Overview
There are ways to configure RPI to be more user friendly to support simplifying and making more consistent Realtime Decision Rules in RPI. Defining a Web Events Adapter with a list of custom events makes it easier to create Realtime selection rules, but it also ensures that the Event Names accurately match the Event Names that are being provided as a part of the event submission. In addition, you can do some configuration to support event metadata fields and values. In this document, we will cover the basics of setting up those features.
Create a web events adapter
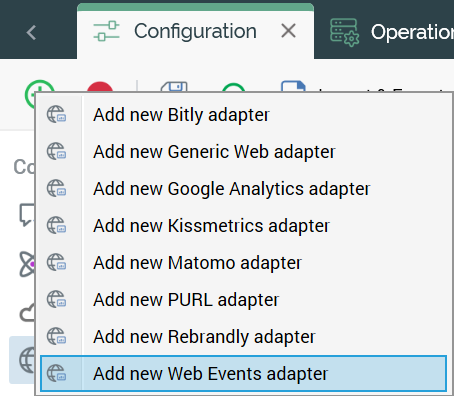
The first step in making custom events available in the Web Realtime Decision rule is to create a Web Events Adapter that has the custom events defined in them. A logical name for it is Realtime Events.
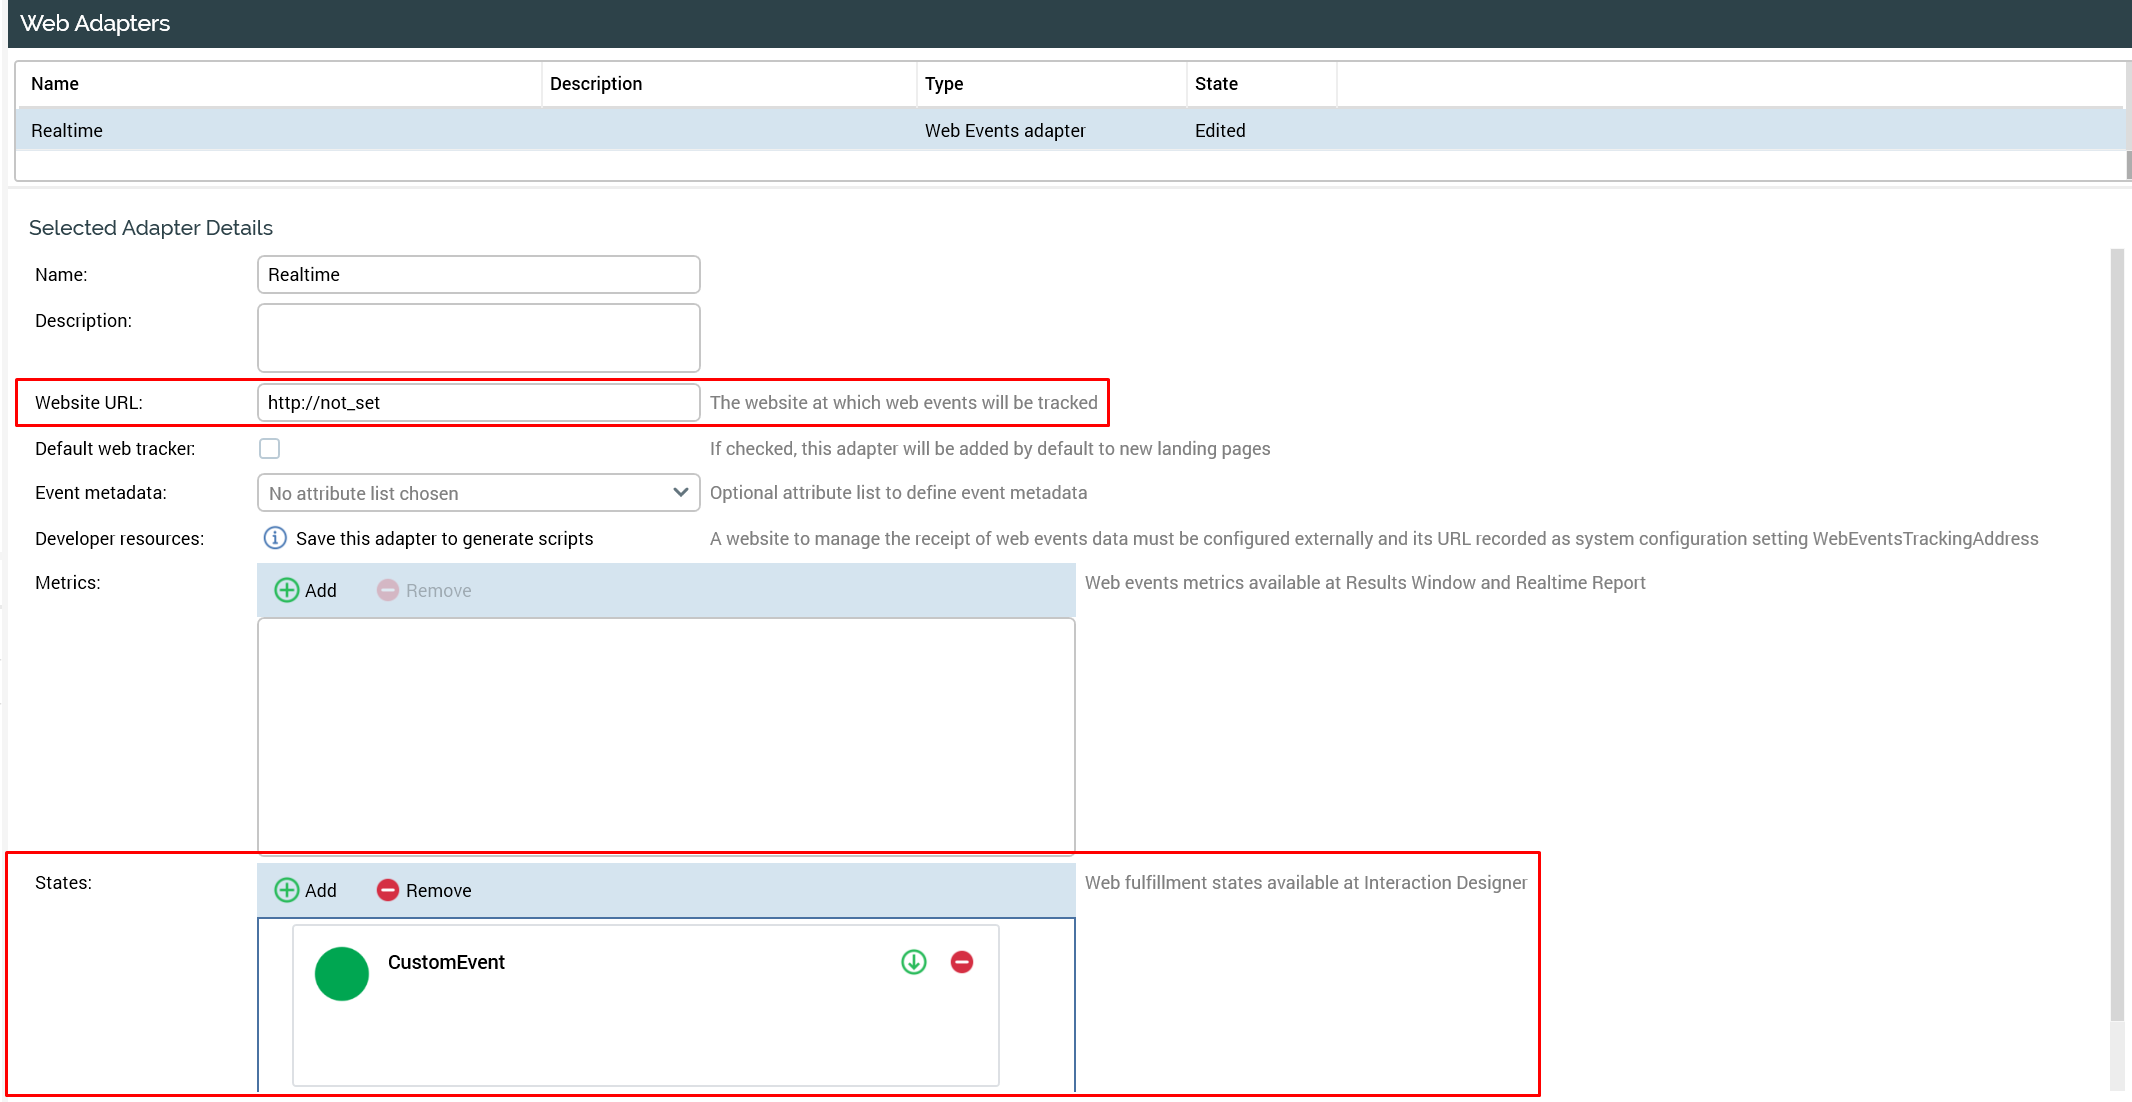
The Website URL needs to be set to a value, but it is not used in the case of Realtime Decision Rules, so it can be set to http://not_set.
From there you can configure the States portion of the web events adapter and add states that will match the potential Event Names that may be provided as events.
Configure Realtime web event decision using custom event state
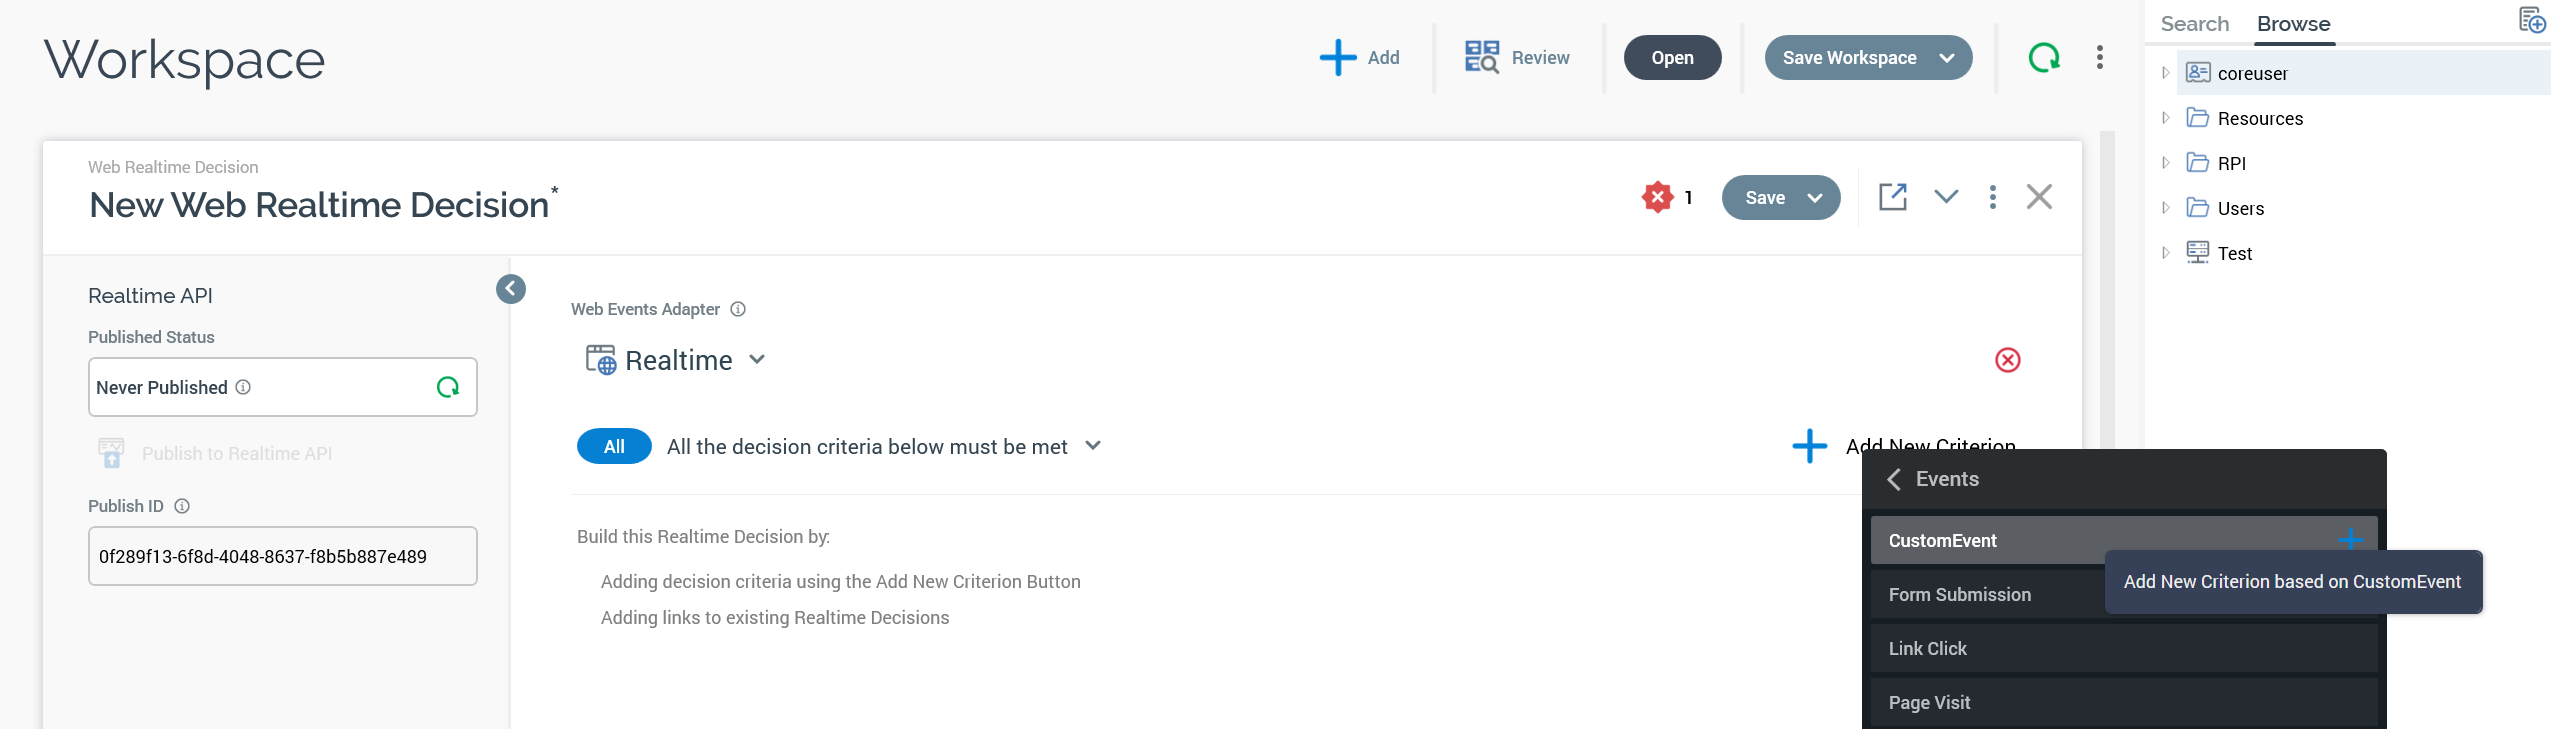
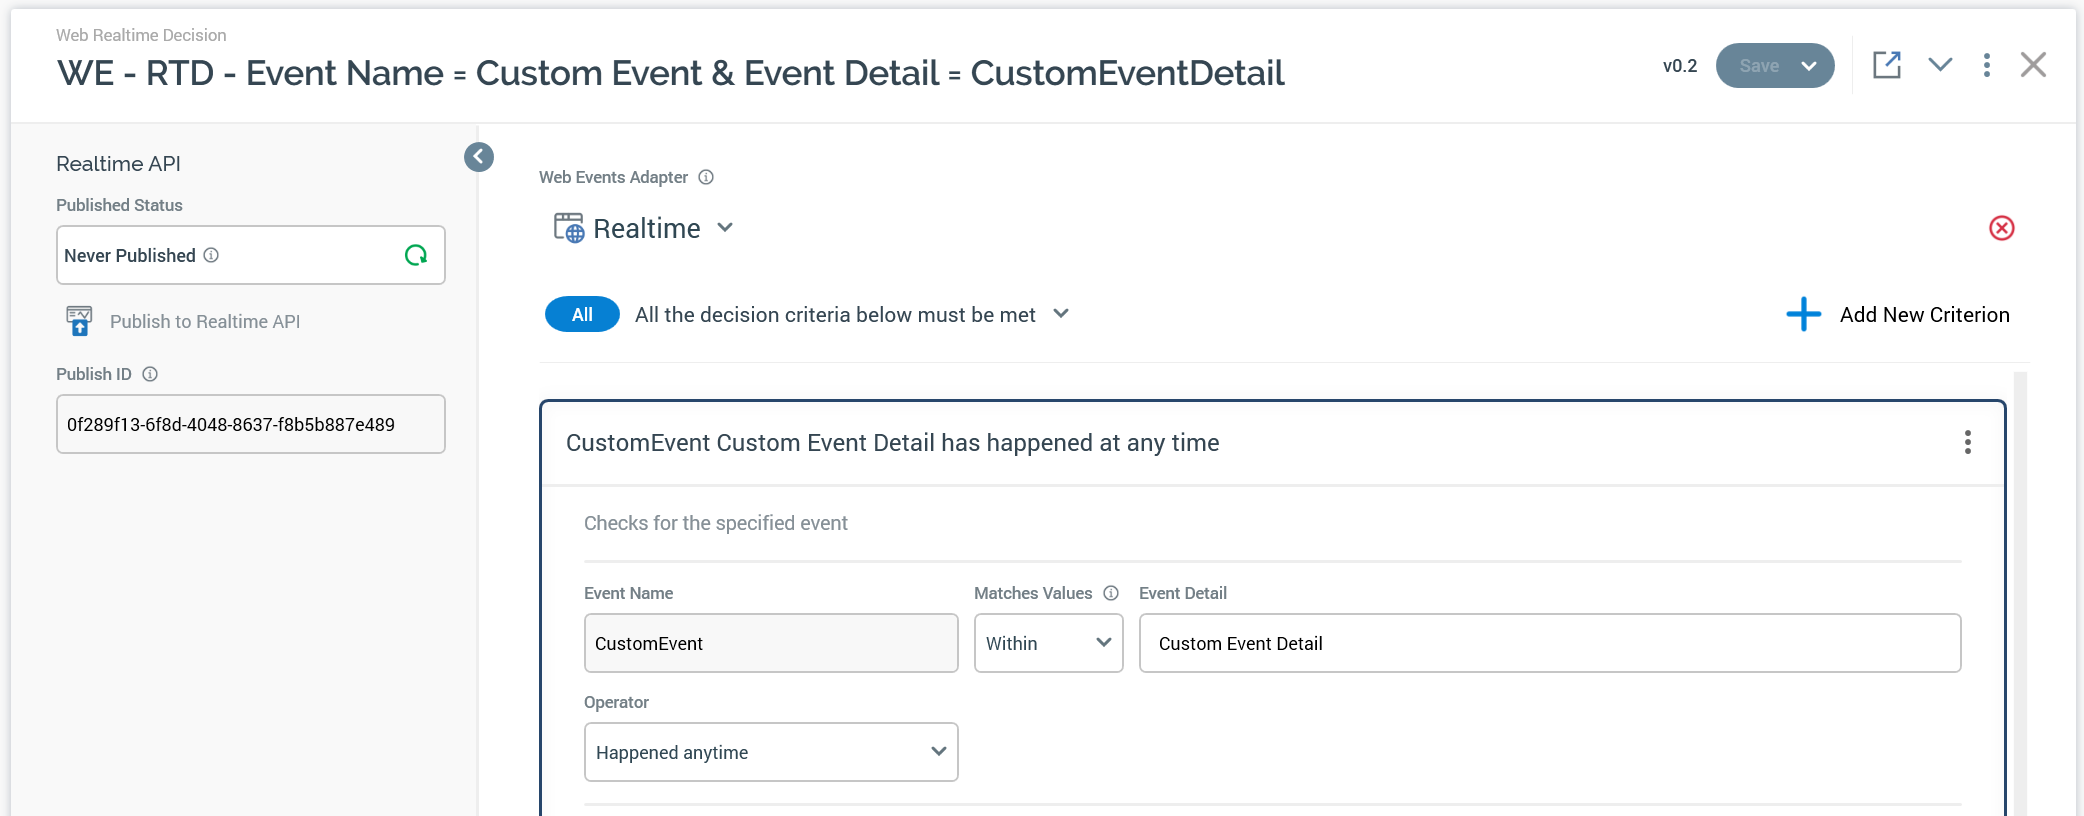
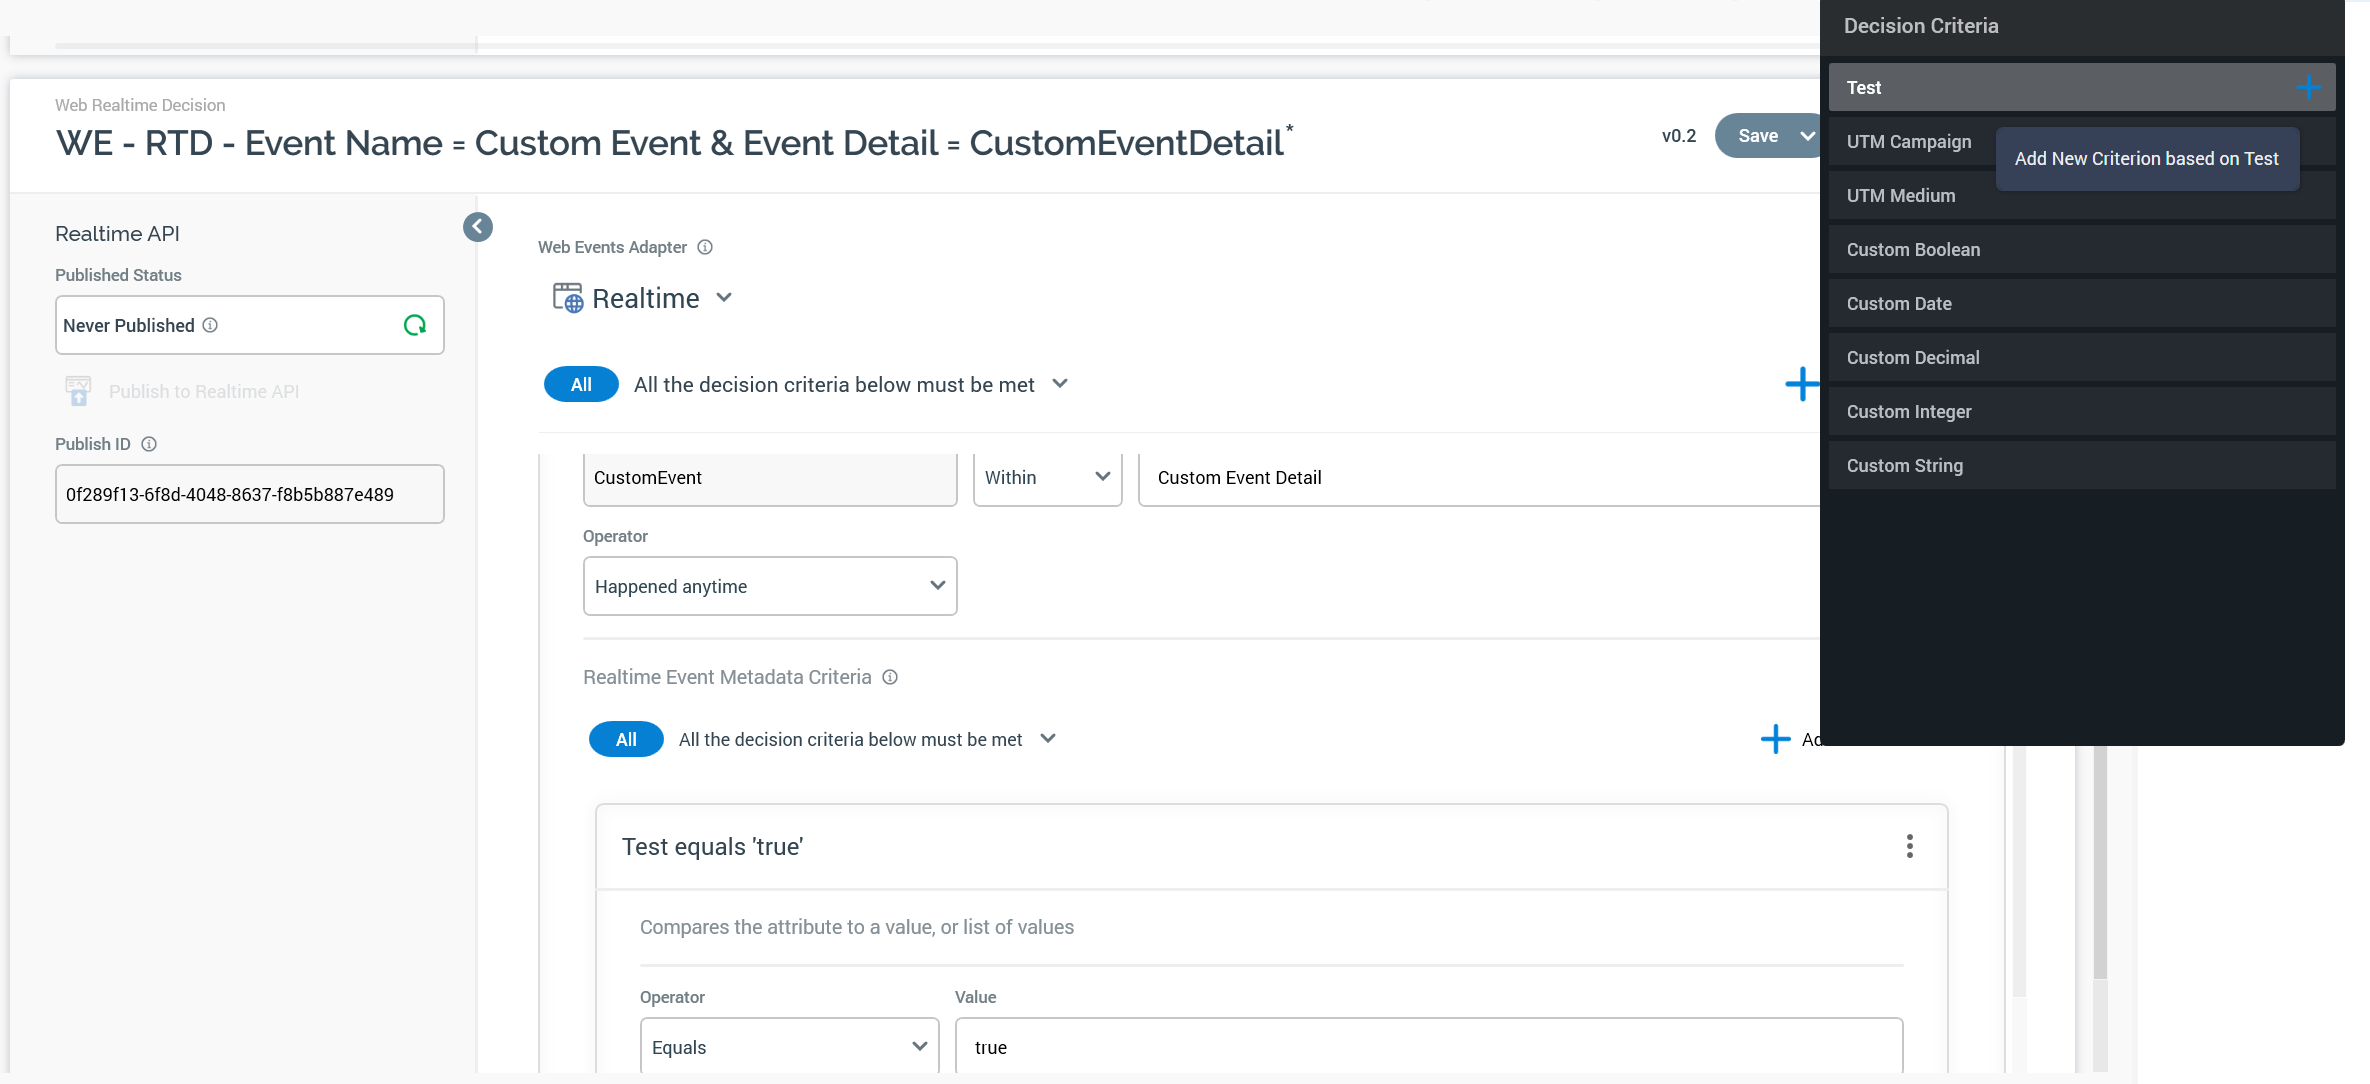
After you have created the web events adapter you can create a Web Realtime Decision Rule. You select the new adapter previously created as the Web Events Adapter, Realtime. You will then add a criterion and select Events and then you will find an Event Name that matched the State that was added, in this example CustomEvent.
Add the Event and configure the Event Detail, if applicable. Events do not require Event Details. In this example, the value of the Event Detail is Custom Event Detail. The Event Detail value must match the value that is passed in the event exactly.
Configure custom event metadata
In addition to Event Names and Event Details, Event Metadata can be provided as a part of a custom event. This additional metadata can be used to customize the Realtime Decision Rule. Before you can use the metadata to configure the Realtime Decision Rule, you must first configure the Web Events Adapter with an Attribute List which will be used to identify the set of metadata and values.
Before creating an Attribute List, it makes sense to create a set of Value Lists that contain the various values for a given Value List.
Create value lists for use in attribute lists
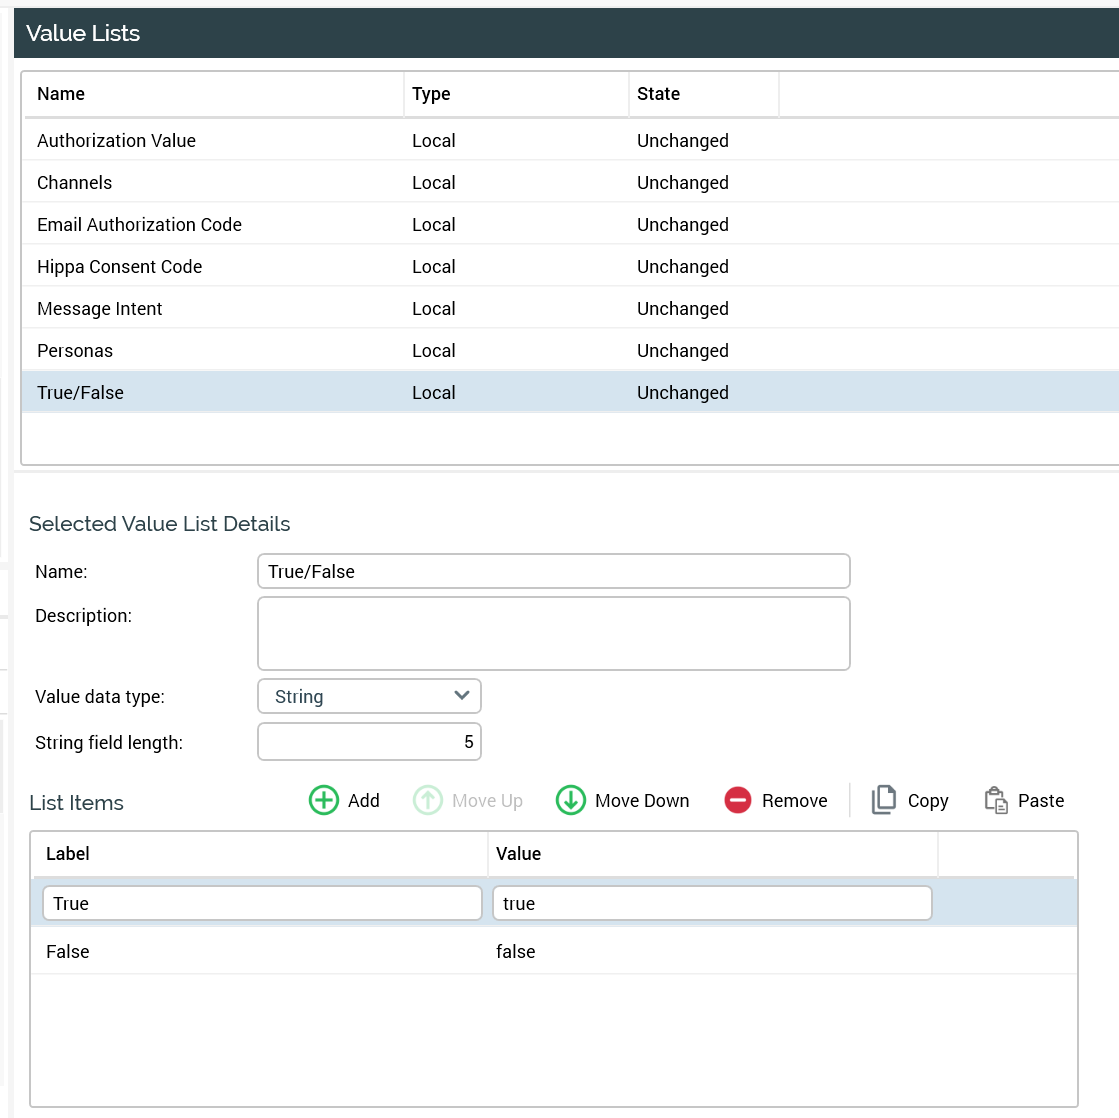
Value Lists can support multiple features in RPI including Audience Definition Metadata and Web Event Adapter Metadata to name a couple. In this case, we will focus on creating a couple Value Lists to be used as the Metadata for a Web Event Adapter.
Below is an example of various Value Lists and using True/False as an example here. This Value List has two values true and false and respective labels of True and False. The labels have a capital first letter and is what is shown to the user in RPI. The value is what is used as the actual value to set as metadata in an Audience Definition and the actual value that is compared to the metadata value of an event in the case of Web Realtime Decisions.
Create attribute list to support metadata for web events adapter
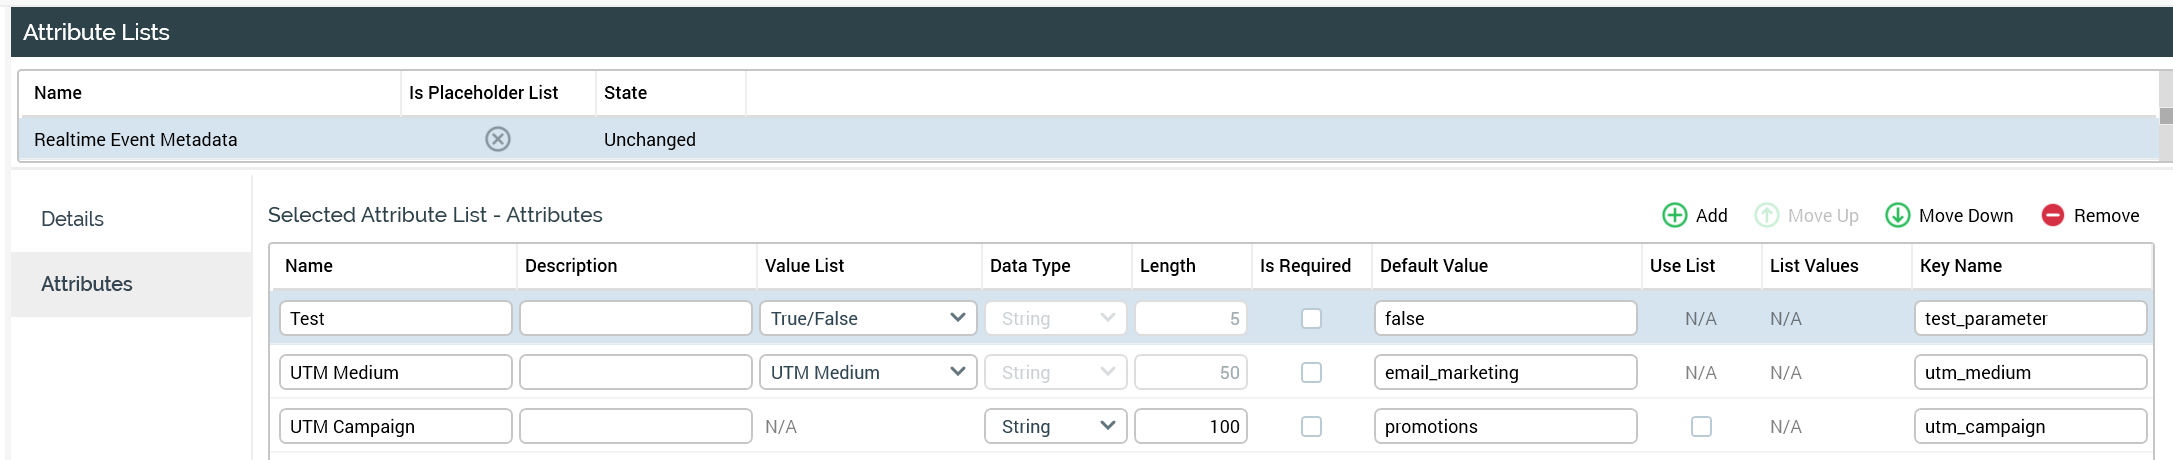
Create a new Attribute List to use to enhance the configuration of the Web Events Adapter created earlier in this document. You can create an Attribute List regardless of whether you create Value Lists or not to support. Value Lists are recommended though as they can be used in multiple places within RPI configurations and will support greater consistency across these components in RPI. In the Attribute List example below there are two attributes, Test and UTM Medium, that have associated Value Lists where the other, UTM Campaign, is just free form text and allows you to enter a value manually. The name of the Attribute list in this example is "Realtime Event Metadata".
Update the web events adapter with event metadata: attribute list
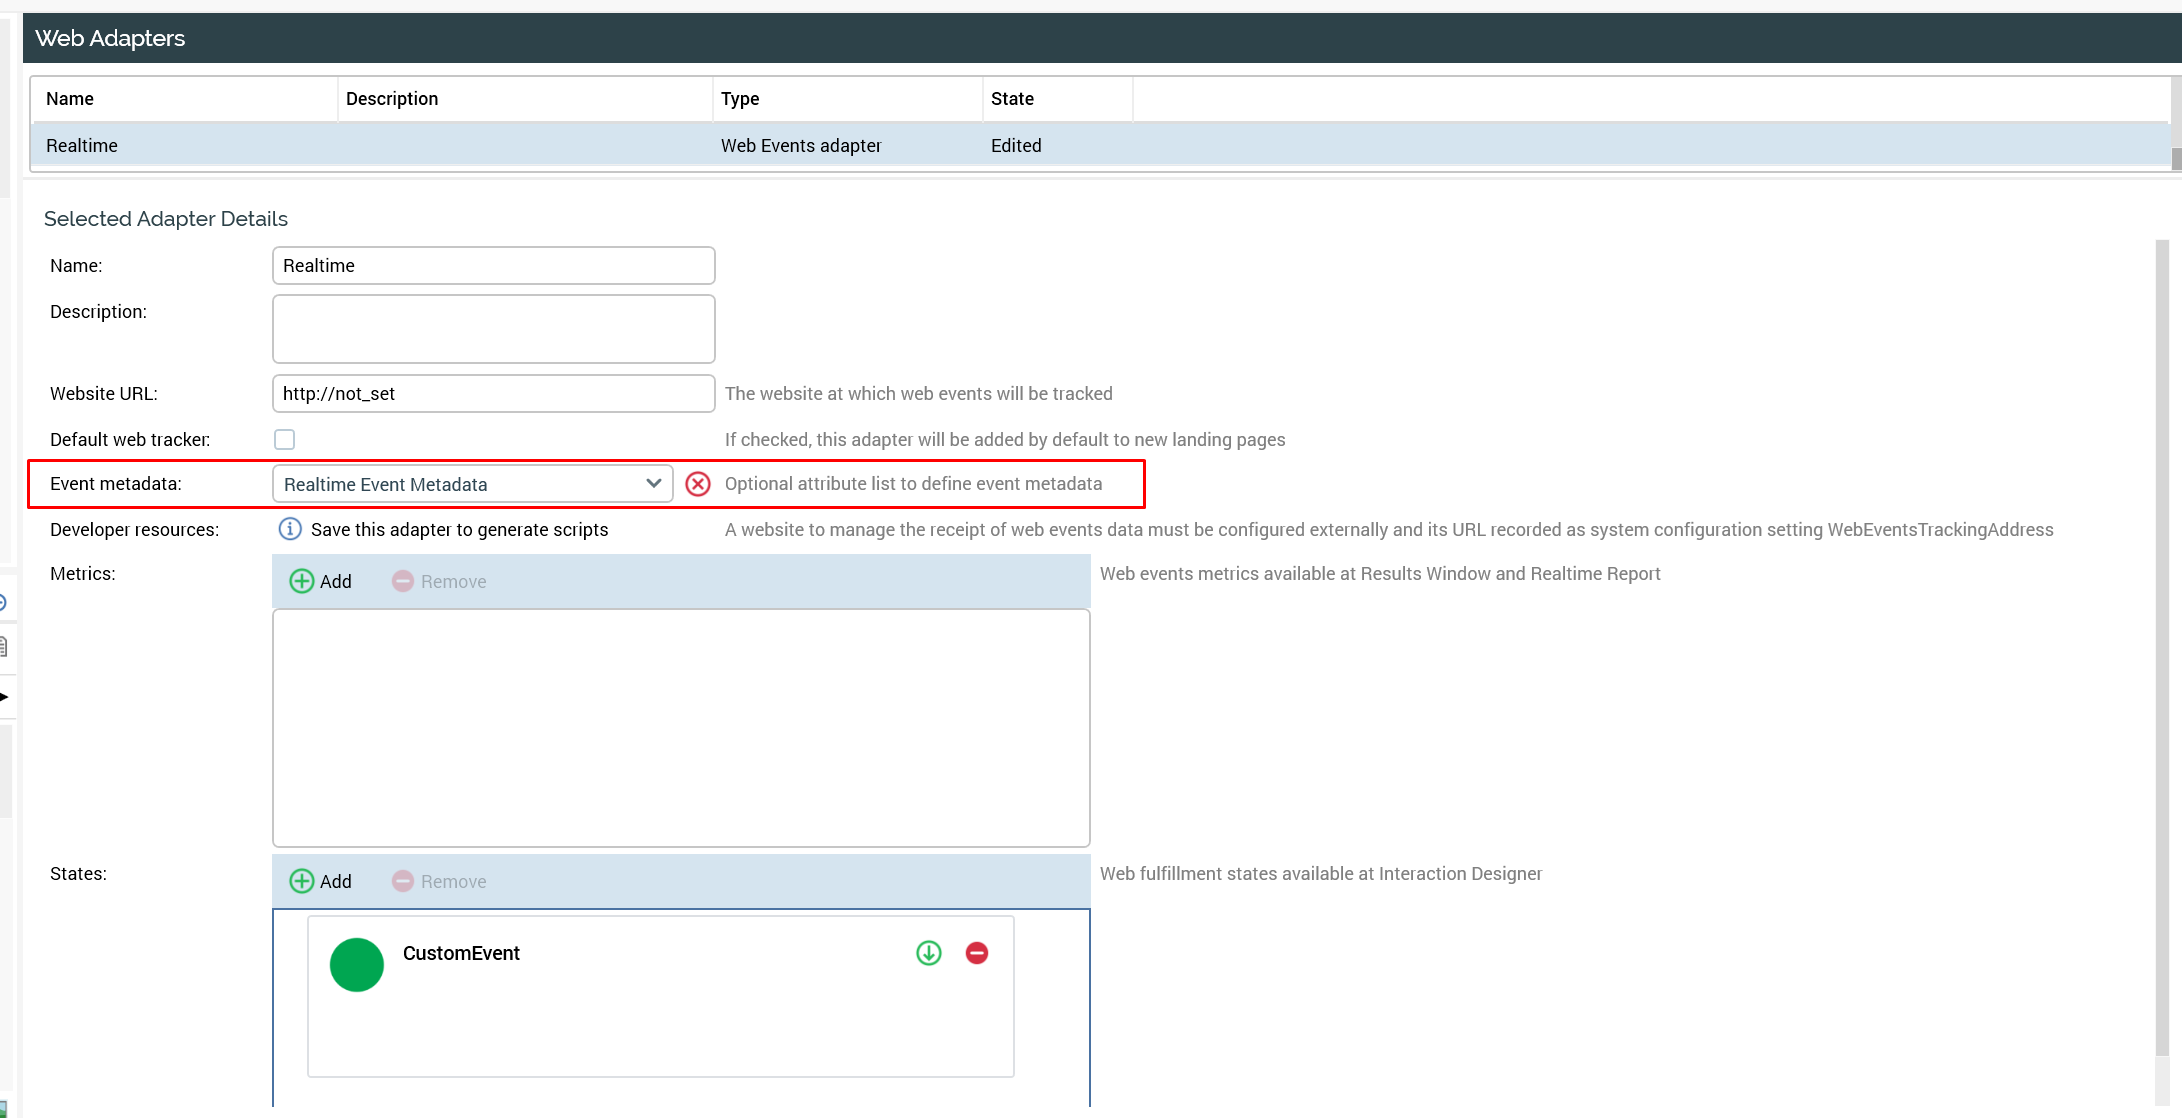
Now that you have created the Attribute List, you can update the Web Events Adapter and associate it with the Event Metadata. Using the drop-down menu for the "Event metadata", select the Attribute List created in the previous step.
Configure Realtime web event decision using event metadata
Now that we have configured "Event metadata" for a Web Event Adapter, we can use the attributes configured as metadata within a Web Realtime Decision. This metadata can be used with standard preconfigured events as well as custom web events.
Example with a custom event
This example expands on the custom event and adds "Realtime Event Metadata Criteria" to the rule. In the "Realtime Event Metadata Criteria" section select "Add criterion" and in this example, we have selected Test as the metadata key we want to include. We further configured the event to qualify that the metadata key of Test is equal to true.
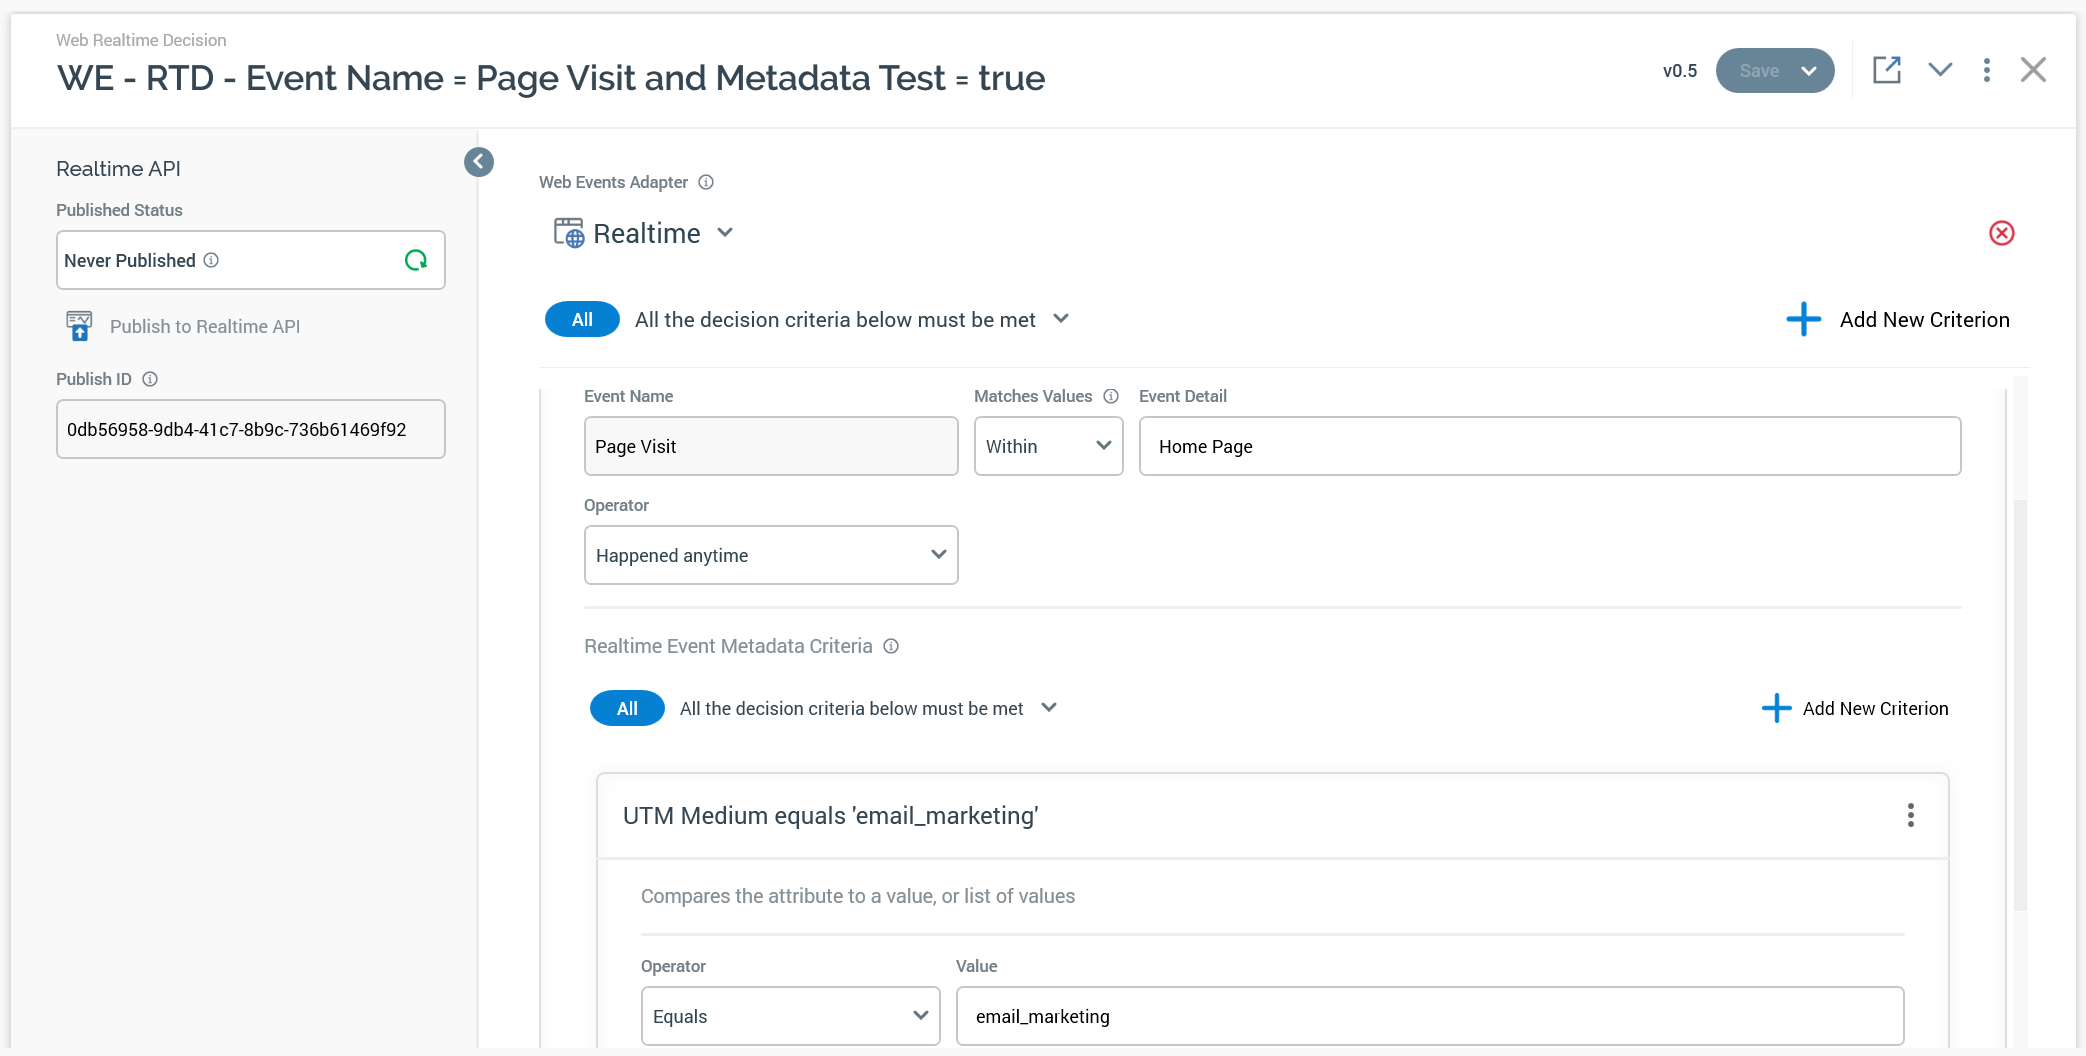
Example with a standard event (page visit)
In this example, the Event is a Page Visit and the Event Detail is set to Home Page. The event metadata being used is UTM Medium and the value is email_marketing.