

This process is for RPI v6 and lower. For RPI v7 and higher, please refer to Data Import.
To create a Data Project:
-
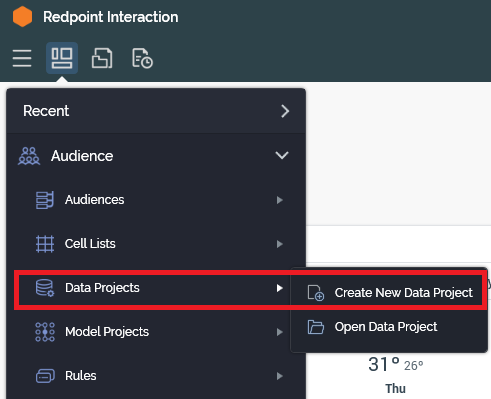
In the Quick Access menu, create and save a new data project.
-
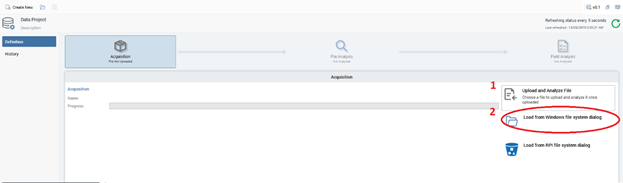
In the Definition tab’s Acquisition panel, select Upload and Analyze File to identify a delimited or fixed-width file to base the new data project on.
-
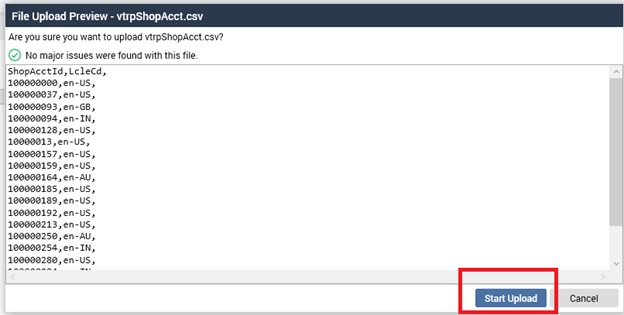
View a sample of the file’s contents and verify that it matches the File Upload Preview dialog.
-
In
Definition.Acquisition, watch as RPI uploads the file to the Redpoint Interaction server and then analyzes its contents. -
If the file is delimited:
-
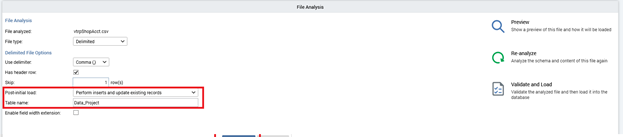
In the Definition tab’s File Analysis panel, specify the data project’s high-level properties.
-
In the Definition tab’s Field Analysis panel, verify Redpoint Interaction’s analysis of the file’s field structure, making any changes as necessary, and specify any required field-level properties.
-
-
If the file is fixed-width:
-
In the Definition tab’s File Analysis panel, specify the data project’s high-level properties.
-
Invoke Preview to view a preview of Redpoint Interaction’s automatic determination of the file’s field boundaries in the Preview dialog, and make manual adjustments as required.
-
Invoke Re-analyze to allow RPI to reflect the defined field boundaries by populating the Definition tab’s Field Analysis panel’s Fields grid.
-
In
Definition.FieldAnalysis, specify any required field-level properties.
-
You need to manually specify the primary key for your table.

-
Select
Validate and Loadto ensure that all rows within the file are accordant with its defined structure, and to initiate loading of the data project’s initial file into the database.