RPI client folder structure and examples
Overview
The RPI file system operates very similarly to the Windows file system, using the metaphors of files and folders to allow you to save and retrieve the assets you create. Also like the Windows file system, the RPI file system supports limiting access to folders by users based upon their assigned permissions.
“Client” folder information
Within RPI there is a “Client” folder, which is able to be renamed to the respective client that will be using RPI. This folder tree is fully configurable to however the client would like to navigate through the artifacts they have created within RPI. This topic provides a few examples of how to set up the folder tree.
All of the sections of the folder tree are able to be changed at any point. There are IDs assigned to each of the sections, so RPI is able to recognize them even if names or locations are later changed.
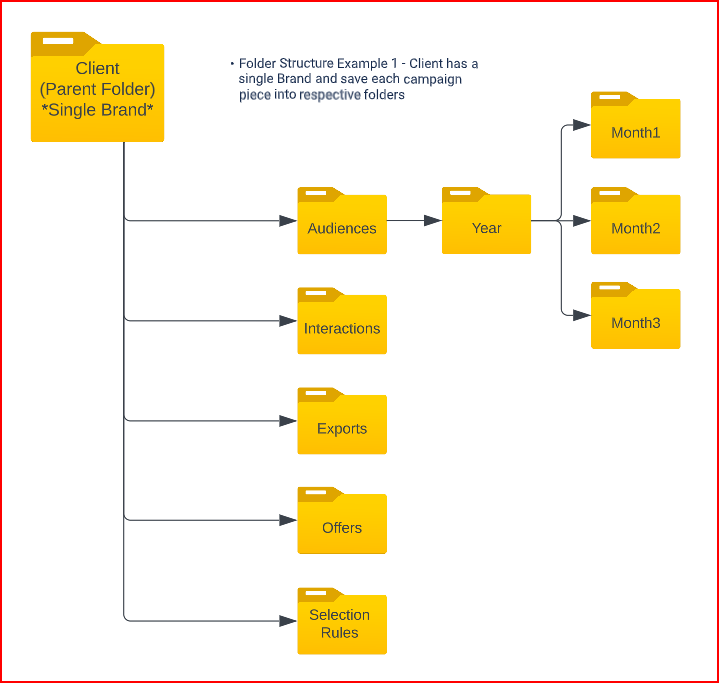
Single brand client example
This example shows a client who has only a single brand, and all of the artifacts created are associated with that brand. This enables a less complex folder structure and allow users to break the different levels of RPI into more granular levels.
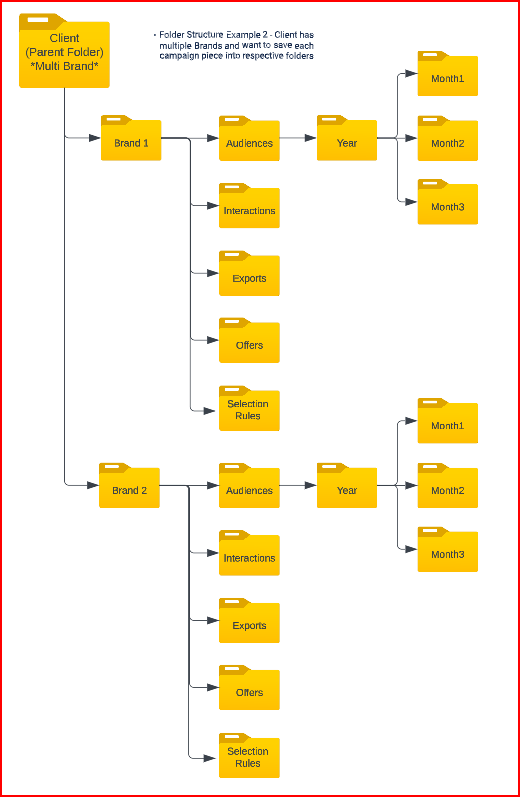
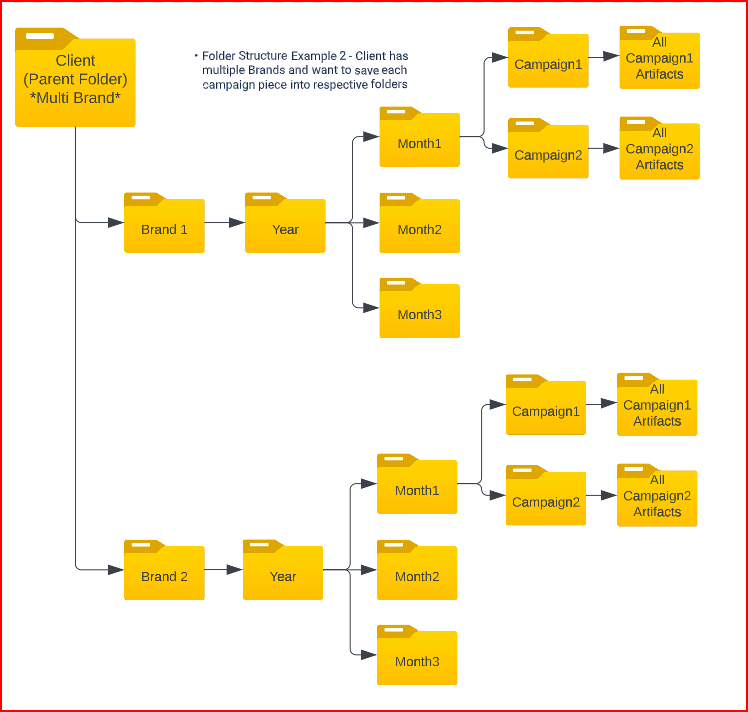
Multi-brand client example
This example shows a client who has multiple brands that are associated to their RPI instance and would prefer to separate them from one another in the folder tree. In the example, there are two separate brand folders followed by the underlying artifacts for the given brand. Clients may choose to move this layout around to account for a given year first and then focus on the brand or potentially roll all of the pieces up to a campaign folder and then the artifacts for that given campaign. See examples below.