

After you define one or more segments and define one or more audiences, you can activate your audience. Activating your audience sends your audience data to a downstream provider. Check out this short video, which walks through an example activation.
Activate your audience
-
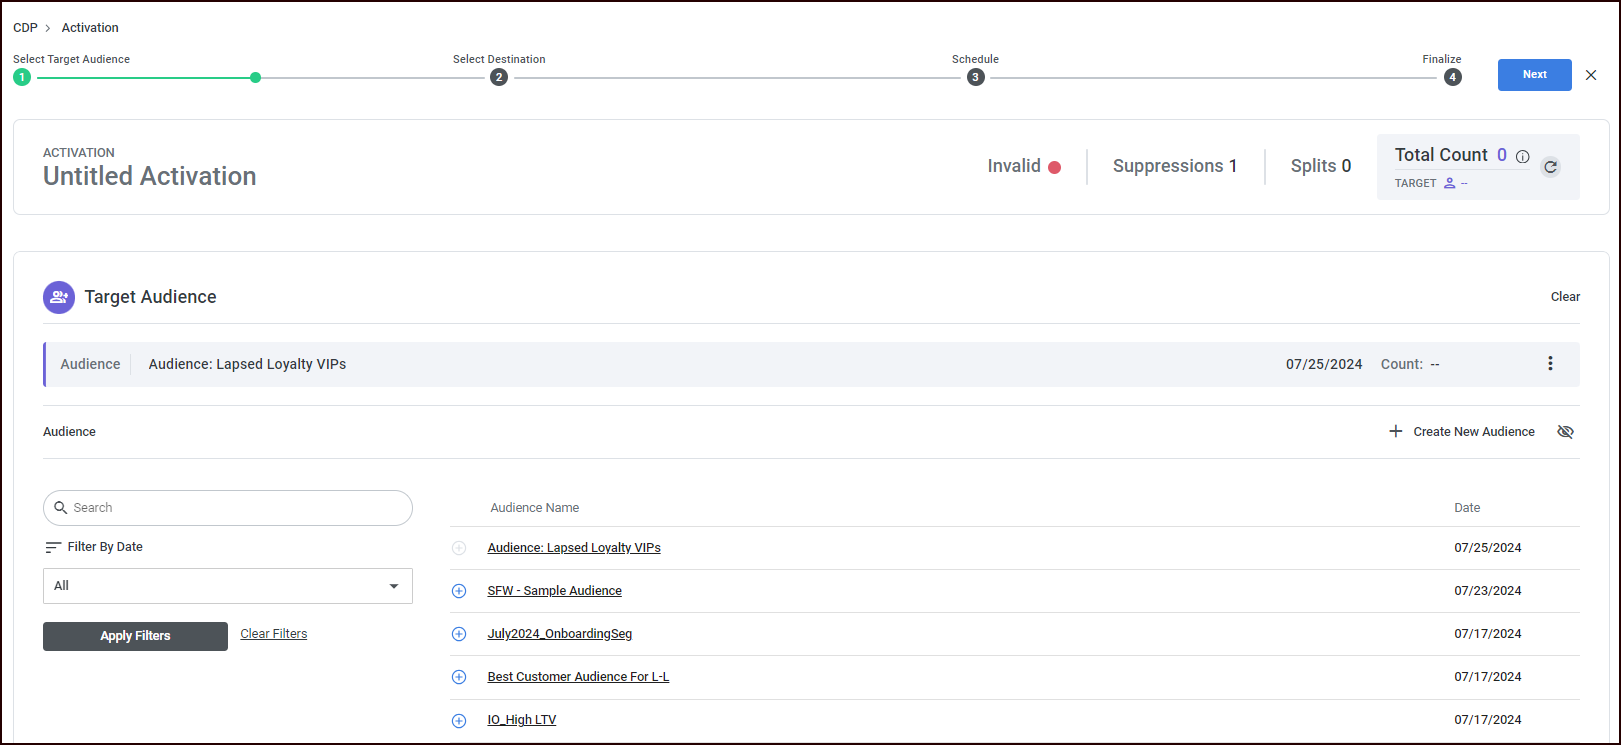
On the Activation page, select Activate Your Audience.
-
Hover over the default name “Untitled Activation” and select the pencil icon to name the activation and add a description (optional). You can name the activation now, or at any point in the workflow before you finalize it.
The activation will indicate that it’s Invalid until you name it.
-
Choose a predefined audience by selecting the plus icon

-
Select the refresh button

-
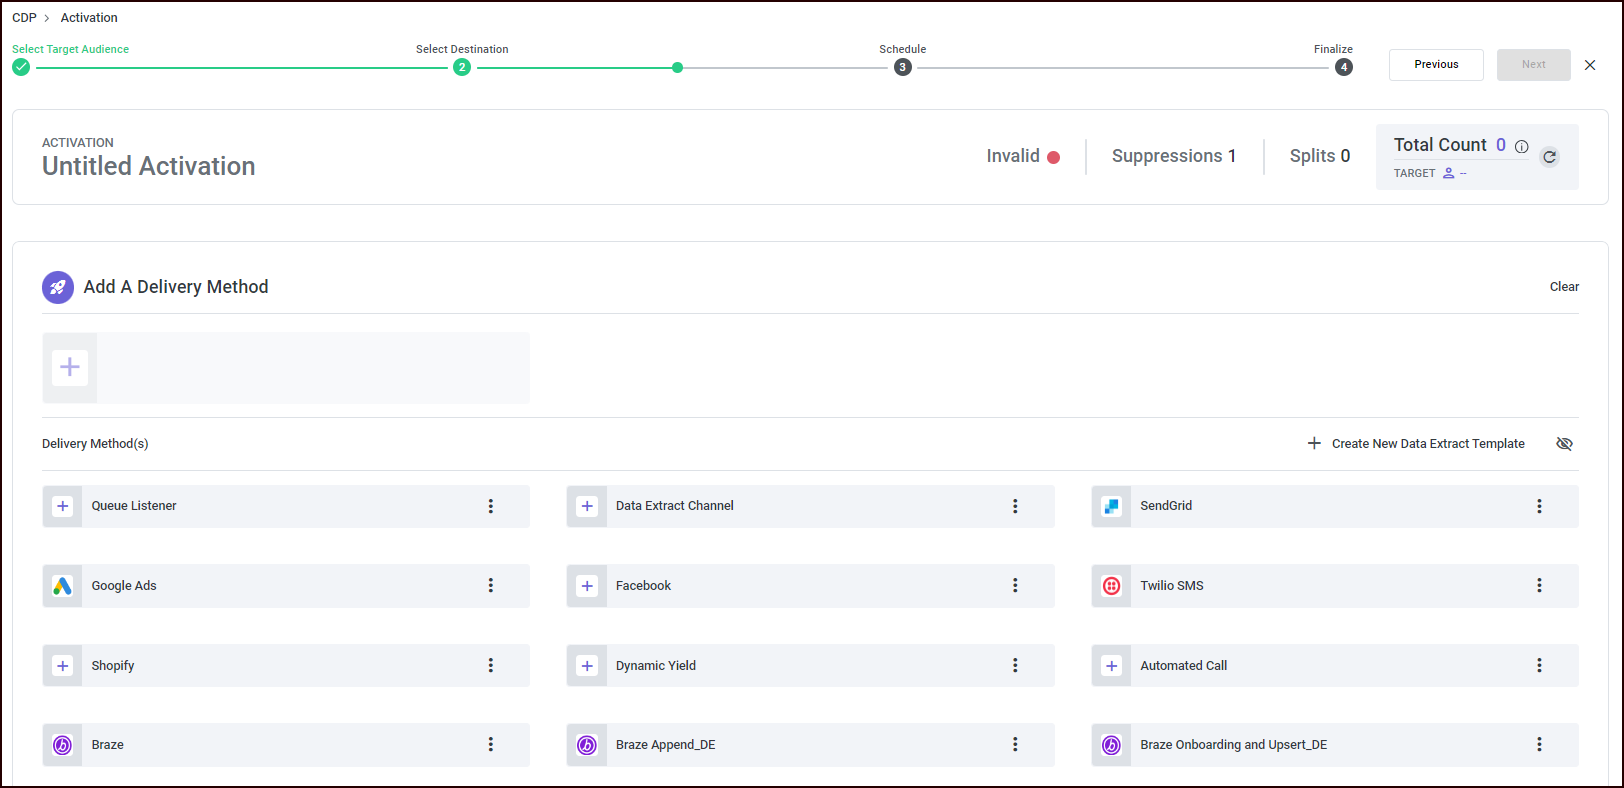
When you’re done adding your audience, select Next. The Add a Delivery Method page is displayed.
Select delivery method(s)
You can use delivery methods that are…
-
Viewable and editable (indicated by the presence of the vertical ellipsis menu on the right side of the method).
-
Read-only (indicated by the lack of the vertical ellipsis menu and a dotted underline). The tooltip indicates that the Delivery Method cannot be viewed or edited, as it contains elements that are only available in the desktop application. If you need to edit the delivery method, please reach out to Redpoint Support for assistance.
To select delivery one or more methods:
-
Choose one or more predefined delivery methods by selecting the delivery method.
-
If you have splits defined in your audience, a popup is displayed that allows you to select splits for this delivery method. You may select all splits, none, or any combination of predefined splits.
-
After selecting Save on the Splits popup, the added delivery method is displayed in the Delivery method list.
-
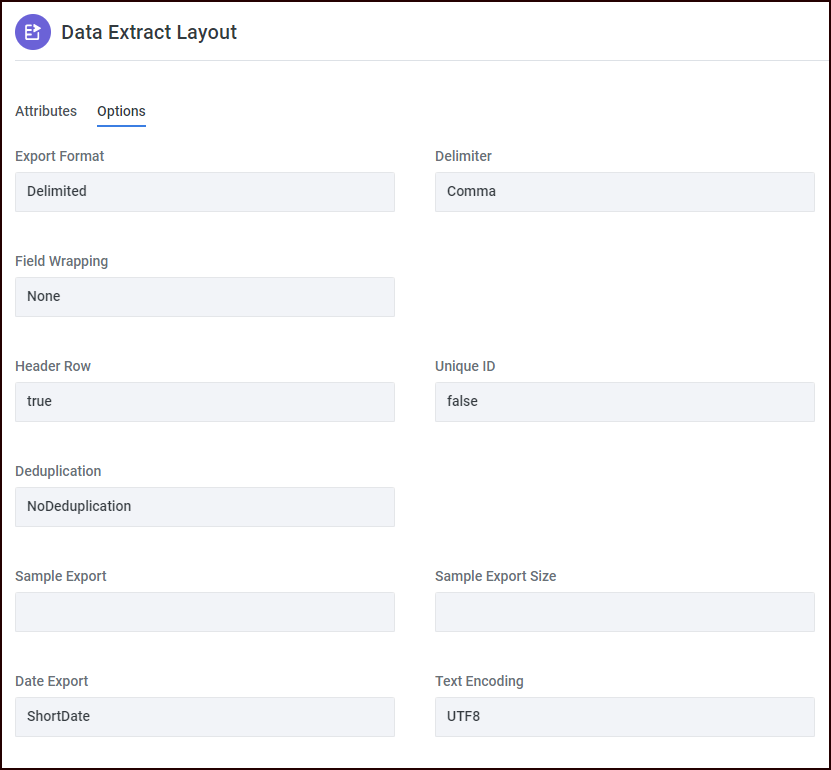
[Not applicable to read-only delivery methods] To view the Data Extract Layout (the attributes from the CDP that will be passed to the defined destination) for a particular delivery method, select the vertical ellipsis menu to the right of the delivery method, and choose View from the context menu. The Data Extract Layout window opens and displays the Attributes:

-
Select Options to view the Options tab.
-
Select the X at the top-right of the window to dismiss it.
-
[Not applicable to read-only delivery methods] You can optionally Edit an existing Data Extract Template (saving it as a new template) by selecting the vertical ellipsis menu to the right of the delivery method, or choose Create New Data Extract Template.
-
When you've added all of the delivery methods, select Next. The Schedule page is displayed.
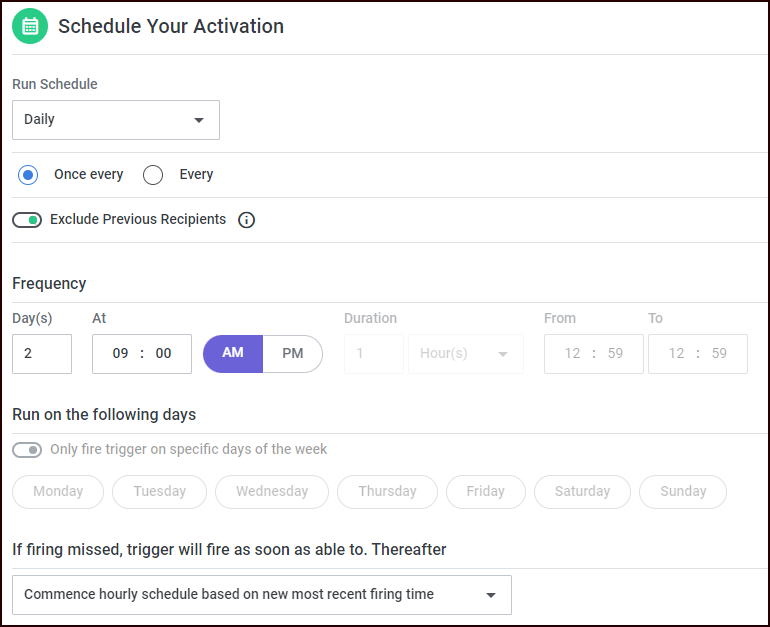
Schedule your activation
Select a date and time to run the activation by selecting an option from the Run Schedule pulldown menu. You can choose to run the activation once or to set up a recurring schedule.
Run once
The following two options will run the activation one time:
-
Run Immediately: the activation will start executing immediately.
-
One Time: select a single date and time from displayed date and time pickers. The activation will begin running at the chosen date and time.
Run on recurring schedule
The following options will run the activation on the schedule that you designate: select the frequency and times that you want to run the activation and then select Next.
Daily
If you choose to run your activation daily, there are some additional options for you to configure. The Once every and Every radio buttons will determine some of the other options you have available to configure.
-
If you choose Once every, you can designate the Frequency as the number of days and time. For example, run the activation every 2 days at 9:00 AM.
-
If you choose Every, the activation will run every day, or on the days you designate by toggling the Only fire trigger on specific days of the week and choosing which days to run it. Also choose how frequently to run the activation and the duration of time to run it. For example, run every 1 hour between the hours of 9:00 AM and 5:00 PM (17:00) on weekdays.
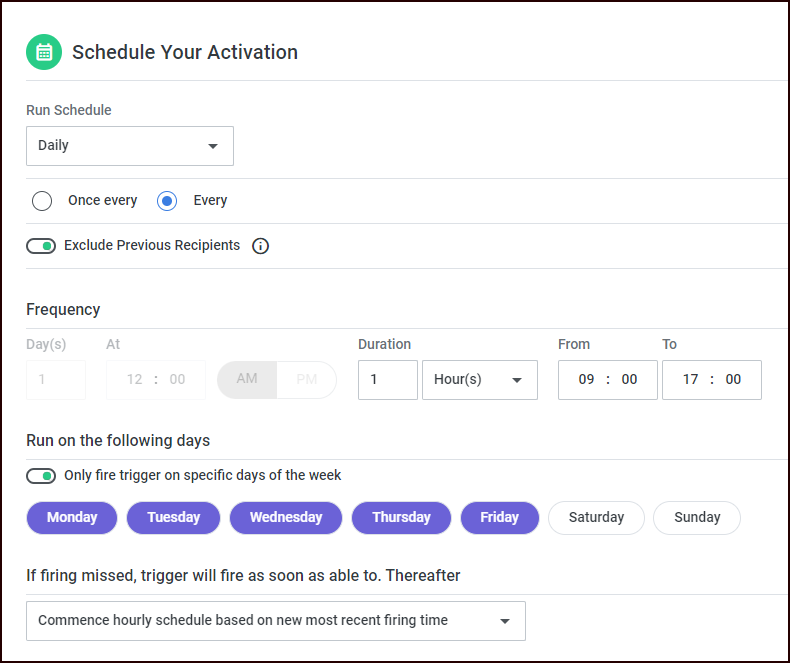
In addition, you can configure the following:
-
Choose whether or not to Exclude Previous Recipients. When toggled on, this will prevent any record from being included in this activation more than once.
-
Choose what happens to subsequent runs in the event that firing is missed:
-
Commence hourly schedule based on new most recent firing time: this means that subsequent runs of this activation will run when the last successful run occurred.
-
Continue original hourly schedule based on Start at time: this means that subsequent runs will be attempted at the originally scheduled time(s).
-
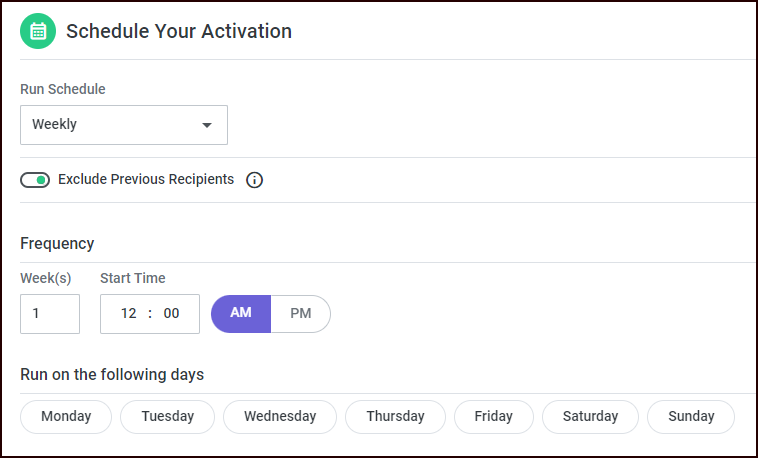
Weekly
If you choose to run your activation weekly, there are some additional options for you to configure.
-
Choose whether or not to Exclude Previous Recipients. When toggled on, this will prevent any record from being included in this activation more than once.
-
Choose whether to have it run every week (1), or every number of weeks (e.g., 2 would mean that it would run once every other week), and the start time.
-
Choose which day(s) to run the activation.
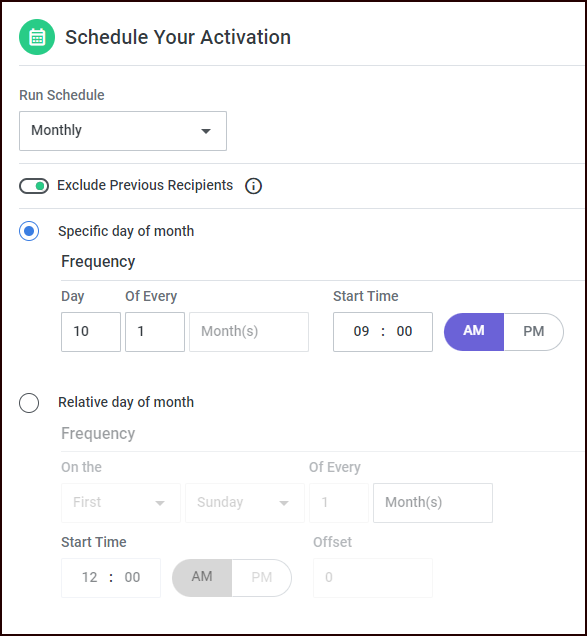
Monthly
If you choose to run your activation monthly, there are some additional options for you to configure.
-
Choose whether or not to Exclude Previous Recipients. When toggled on, this will prevent any record from being included in this activation more than once.
-
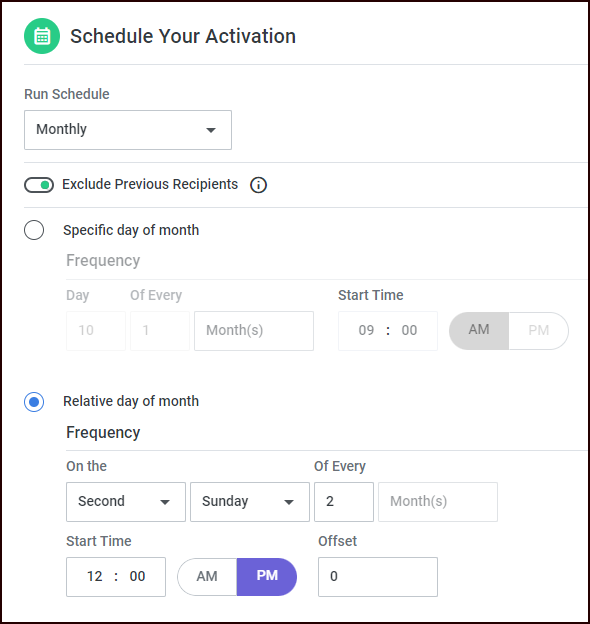
The Specific day of month and Relative day of month radio buttons will determine some of the other options you have available to configure.
-
If you choose Specific day of month, you can choose the calendar day of the month, and whether to run it every month (Of Every set to 1), or every 2 months, etc. and the Start Time.
-
If you choose Relative day of month, you’ll choose the frequency based on the day of the week and where it occurs in the month (e.g., Second Sunday of the month) and whether to run the activation every 1 month, or every 2 months, etc., as well as the Start Time.
-
Finalize your activation
-
Check the information to make sure you have defined your activation correctly. You can select Previous to go back in the workflow to make changes, if needed.
-
When you're certain your activation is correctly defined, select a going-forward workflow from the Next pulldown menu.