

Overview
The Operational Interface (OAPI) is a web service which provides an HTTP REST-like interface to Data Management. OAPI is deployed as a web application in the Apache Tomcat web server. This section describes how to install, configure, and deploy the OAPI.
Requirements
-
Windows or Linux
-
Java 17 (e.g., OpenJDK or Oracle Java)
-
Apache Tomcat 11.x.x
Download Tomcat
Download the latest available 11.x.x version of Tomcat’s “core” binary distribution.
-
For Windows, download the Windows Service Installer
-
For Linux, download the GZIP’d tarball
Comprehensive instructions for installing and configuring Tomcat are available on the Tomcat site; this document will highlight essential details.
Install Tomcat
Windows
On Windows, Tomcat will be installed as a service, so the installation program must be run as an
Administrator. The installation program presents a sequence of straight-forward steps; the default options are generally acceptable.
-
Start the Tomcat installation program.
-
On the Choose Components step, accept the defaults.
-
On the Configuration step, provide details for configuring access to the Tomcat Manager.
-
Specify a username and password, and select the
manager-guirole. Please note the username and password are unrelated to OS usernames and passwords. Note the username and password; you’ll use them when viewing the Tomcat Manager page. -
For the JVM step, browse to your Java 17+ installation.
-
For the Install Location step, accept the default.
-
In the final step, select the option to "Run Apache Tomcat".
Linux
On Linux, it is easiest to install Tomcat in your home directory, but you may install it in any directory you choose. Once Tomcat is started, it will be accessible by all users on the Linux machine or by any external user.
A startup command runs Tomcat in the background in nohup mode, so it will continue to run once you logout and it will not stop until the stop command is run.
Start with the downloaded Tomcat binary distribution file for Linux. (Refer to Tomcat docs for details.)
-
Make your current working directory the location where you will install Tomcat.
-
Expand the Tomcat distribution file and install Tomcat in a new directory.
-
Define the
CATALINA_HOMEenvironment variable, and assign it to the Tomcat installation directory.
Configure the Tomcat Manager
The Tomcat Manager enables you to deploy web applications. Tomcat no longer provides a default Manager username and password so you must configure these yourself.
Windows
This was done during Step 3 of the installation, Install Tomcat > Windows.
Linux
On Linux, you must add a user to the $CATALINA_HOME/conf/tomcat-users.xml configuration file. The username is used exclusively for accessing the Tomcat Manager; it needn’t match any existing Linux username.
In a text editor, open tomcat-users.xml and add the following line with an appropriate username and password:
<user username="..." password="..." roles="manager-gui" />
Start Tomcat
Windows
Check the Windows Service Manager. Tomcat should be running; if not start it.
Linux
Start Tomcat by running command:
$CATALINA_HOME/bin/startup.sh
You can stop Tomcat by running command:
$CATALINA_HOME/bin/shutdown.sh
Verify Tomcat is operational
Open a browser and browse to http://localhost:8080. This should display the Tomcat home page.
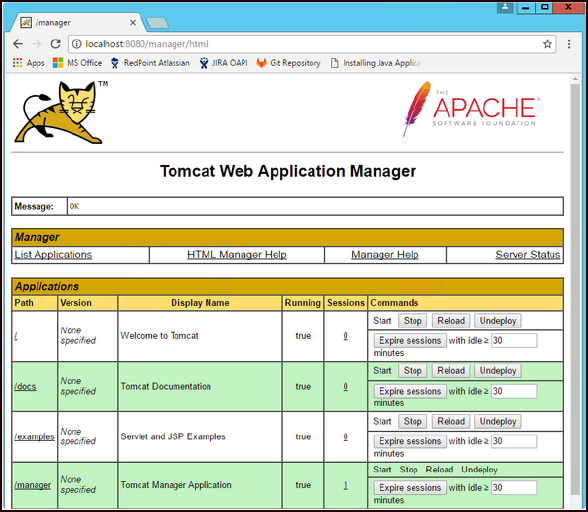
Next, verify access to the Tomcat Manager:
-
Select the Manager App button.
-
When prompted for credentials, enter the username and password you configured earlier.
-
You should see a page that looks similar to the following:
Optionally configure Tomcat for HTTPS
The OAPI works via HTTP or HTTPS. To communicate with the OAPI using HTTPS:
-
Create a keystore with a self-signed security certificate.
-
Copy the keystore into the Tomcat configuration directory.
-
Stop Tomcat.
-
Edit the Tomcat configuration file
server.xmlto turn on HTTPS and use the installed keystore. -
Start Tomcat
Windows Note:
You will create a keystore using the Java keytool command. In Windows, the keytool command is not normally in the command path, however, it is in the bin directory of the Java installation directory. For example, C:\ProgramFiles\Java\jre17\bin\keytool.exe. In the example below, only the name keytool is used; you may need to enter the complete pathname to run it.
Create a keystore
-
Using the Java
keytoolcommand, create a keystore with a self-signed certificate with the following owner information:
Common Name: CN="OAPI"
Organization: O="RedPoint Global, Inc."
Country: C="US"
-
Start a command window and go to your home directory.
-
Run the following command with the given responses.
prompt: keytool -genkey -alias tomcat -keyalg RSA
Enter keystore password: changeit
Re-enter new password: changeit
What is your first and last name? OAPI
What is the name of your organizational unit? <RETURN>
What is the name of your organization? RedPoint Global, Inc.
What is the name of your City or Location? <RETURN>
What is the name of your State or Province? <RETURN>
What is the two-letter country code for this unit? US
Is CN=OAPI, ... C=US correct? yes
Enter key password for <tomcat>
(RETURN if same as keystore password): <RETURN>
This will create file .keystore in your home directory, for example:
-
Windows:
C:\Users\myusername\.keystore -
Linux:
/home/myusernanme/.keystore
-
Verify the keystore file and certificate with the following command:
prompt: keytool -list -v
-
Next, you must install the keystore file by copying it into the Tomcat installation’s
confdirectory. Copy the keystore to:-
Windows:
C:\'Program Files'\'Apache Software Foundation'\'Tomcat 11.0'\conf\keystore -
Linux:
$CATALINA_HOME/conf/keystore
-
Edit Tomcat configuration
To enable Tomcat to use HTTPS with the created keystore, you must add a new XML element to configuration file server.xml. It is located at:
-
Windows:
C:\'Program Files'\'Apache Software Foundation'\'Tomcat 11.0'\conf\server.xml -
Linux:
$CATALINA_HOME/conf/server.xml
-
Open
server.xmlwith a text editor. Inside are several<Connector>elements. -
Add the following element as a sibling of the other
<Connector>elements:
<!-- Define a SSL Coyote HTTP/1.1 Connector on port 8443 →
<Connector
protocol="org.apache.coyote.http11.Http11NioProtocol"
port="8443" maxThreads="200"
scheme="https" secure="true" SSLEnabled="true"
keystoreFile="conf/keystore" keystorePass="changeit"
clientAuth="false" sslProtocol="TLS"/>
-
Save the file and exit.
Verify HTTPS is operational
-
Start Tomcat. Open a web browser and browse to
https://localhost:8080. -
The browser will most likely issue a warning that Tomcat has presented a self-signed certificate, state that the server is not secure, and ask if you wish to proceed.
-
Once you dismiss the warning, you will see the Tomcat home page.
Creating a certificate signed by a certificate authority is beyond the scope of this document.
Deploy the OAPI web application
-
Download oapi-implementation-3.0.6.6.war and rename the file to
oapi.war. -
In a web browser, browse to the Tomcat Manager.
-
Under the WAR file to deploy section, select Choose File.
-
Navigate to the directory containing
oapi.warand select it. -
Select Deploy.
After a moment, Tomcat will deploy the OAPI web application and list it as /oapi in the Applications table.
Verify the OAPI is operational
In a web browser, browse to http://localhost:8080/oapi/v1/ping. The response should be simply PONG.
View the Swagger API documentation with URL: http://localhost:8080/oapi/swagger-ui/index.html or go to http://localhost:8080/oapi/ and select the API Documentation link.
Define system configuration parameters
Make sure to set the appropriate system configuration parameters in Redpoint Interaction (RPI):
-
RPI v7.x: refer to RPI to RPDM Integration.
-
RPI v6.x: in addition to the parameters described in RPI to RPDM Integration, you also need to set
DataManagementIntegrationTypeto1.
DataManagementOAPIWebServiceAddress URI should be formatted as follows:
-
RPI v7.x:
http://localhost:8080/oapi/ -
RPI v6.x:
http://localhost:8080