

Overview
In the context of Server Workbench, a client represents an organization using RPI within a cluster. Note that the term “client” is not to be confused with the RPI client application, which end users use to manage their customer or prospect communications.
To be used, an RPI cluster must contain one client. Optionally, multiple clients can be created. Each client’s RPI installation is entirely separate and wholly isolated from any others within the cluster.
Clients can be associated with many users. A given user may also have access to multiple clients.
Clients are managed within the Server Workbench Clients tab.
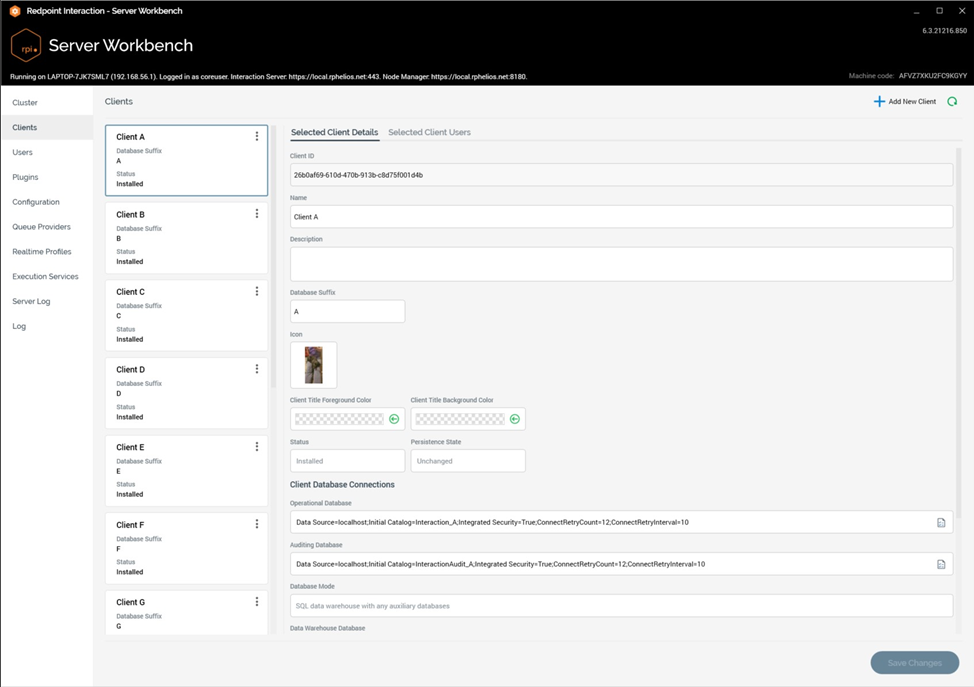
The tab consists of the following:
Toolbar
The Client tab toolbar exposes the following options:
-
Add New Client: clicking this button adds a new client to the bottom of the Clients list, and shows its details in the right-hand tabset. Its name is ‘New Client’, and Description is ‘This is a new client’.’
-
Refresh: clicking this button loads the latest client information from the core operational database. Note that an “Are You Sure?” dialog is shown if unsaved client or user changes are present.
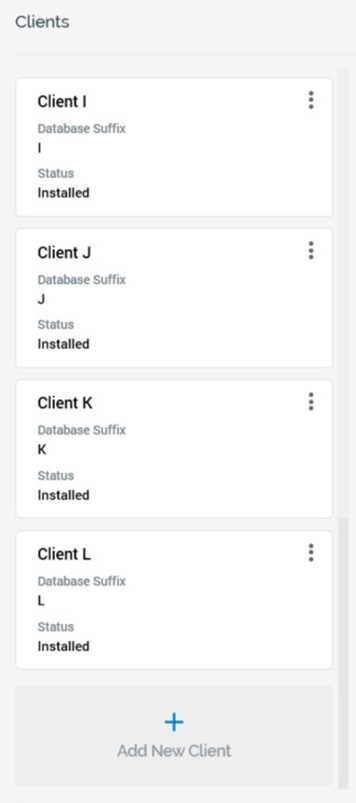
Clients List
A list of existing clients is displayed to the left, at the bottom of which is provided an Add New Client button (behavior of which is as the Add New Client toolbar button (see above):
When no clients have yet been set up in the cluster, the list displays an advisory message (“Add, save and install a new client, then choose the users to associate with it”).
The following appears at a client within the list:
-
Database Suffix
-
Status: one of ‘Installed’ or ‘Not Installed’.
-
Actions menu: exposing the following:
-
Remove: selecting this option sets the selected client’s status to Removed (unless its status was Added, in which case it is removed). You can no longer select a Removed client. Any Removed clients are deleted permanently on invocation of Save, when an ‘Are You Sure?’ dialog is shown. Note that deletion of an Installed client does not remove any of its operational databases.
-
-
Install Client: this button is available when the currently-selected client’s Status is Not Installed, and Persistence state is Unchanged. Clicking the button displays the Install Client overlay (documented separately).
Clients are ordered alphabetically by name.
Selected Client Tabset
Two tabs are shown:
-
Selected Client Details
-
Selected Client Users
Each is covered separately.
Selected Client Details Tab
This tab is used to manage the main details of the client. When no client is selected in the lefthand Clients list, a message is displayed (“Please select a client from the list to view details here”). The following is shown when a client is selected:
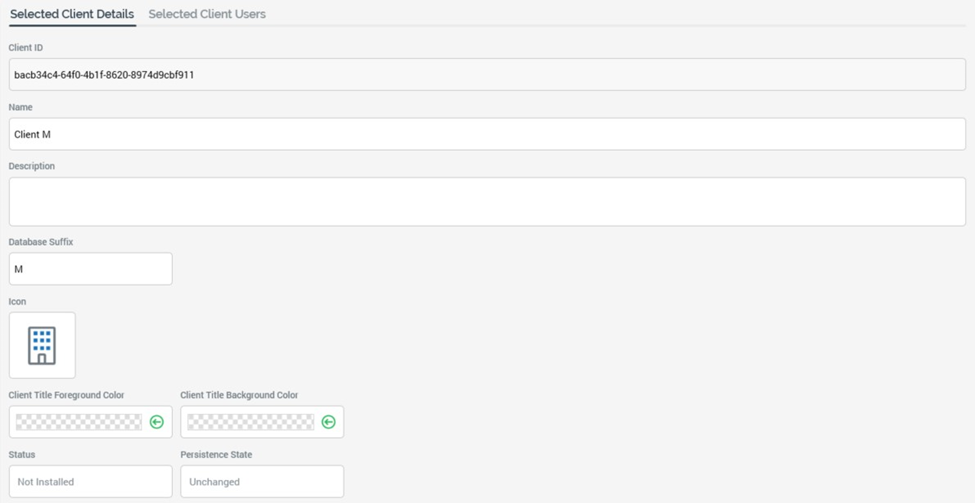
The tab contains the following:
-
Client ID: a read-only GUID. Client ID is displayed following the saving of a new client. You can select the value and copy it to the clipboard if required.
-
Name: provision of a Name for the client is mandatory. The value provided can be a maximum length of 100 characters and must be unique amongst the clients in the cluster.
-
Description: provision of a Description for the client is optional. The value provided can be a maximum length of 1000 characters.
-
Database Suffix: provision of a Database suffix is mandatory. The value provided can be a maximum length of 30 characters. Only database-suitable characters are allowed, and the value must be unique within the cluster.
-
Icon: a default icon is provided. You can click the accompanying Change button to display a Windows file system dialog, in which you can select an image to serve as the client’s new icon.
-
Client colors: it is possible to customize the colors used to display the client’s name at the top of the RPI client application. Foreground and Background colors can be defined. You can set colors using the Choose Color dialog:
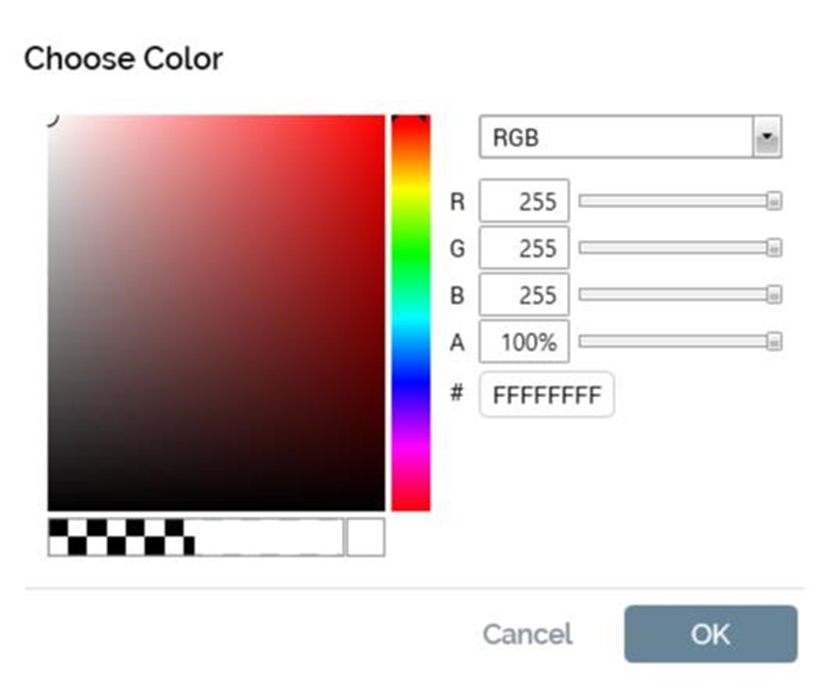
Clicking OK changes the color; clicking Cancel removes the dialog from display without changing the color.
-
Revert: this button allows you to revert the client colors back to their defaults.
-
Status: one of:
-
Not Installed
-
Installed
-
-
Persistence State: one of:
-
Unchanged
-
Added
-
Edited
-
Deleted
-
Client Database Connections Section
This section contains the following:
-
Connection strings: these are only displayed following a client’s installation (wherein its operational databases are created). The following properties are shown:
-
Operational Database connection string
-
Auditing Database connection string
-
Database Mode: read-only; one of:
-
SQL data warehouse with any auxiliary databases
-
NoSQL databases only
-
NoSQL databases with SQL auxiliary databases
-
-
Data Warehouse Database connection string
-
Read-only Data Warehouse Database: to improve performance, you can optionally provide an alternative data warehouse string that will be used to perform read-only queries in the following contexts:
-
Selection rule count
-
Analysis Panel refresh
-
Refresh attribute values task
-
Attribute value catalog task
-
Count Results widget
-
Chart widget
-
Data Viewer
-
-
Data Warehouse Platform (displayed as a read-only string).
-
The database connection string fields are writeable (allowing you to manually adjust the connection strings) and are all mandatory.
If you wish to take advantage of .NET’s automatic connection retries feature when configuring a SQL Server Operational Database connection string, please see the following article:
Note that all SQL Server connection strings automatically include the ConnectRetryCount and ConnectRetryInterval parameters, e.g.:
Data Source=localhost;Initial Catalog=Interaction_D;Integrated
Security=True;ConnectRetryCount=12;ConnectRetryInterval=10
Operational and Auditing Database connection strings are accompanied by a single Test the Operational and Auditing database connections button. Clicking the button checks that the supplied credentials are valid. Results are displayed at the top of the Server Workbench interface.
Data warehouse connection string is accompanied by the following buttons:
-
Change the Data Warehouse Connection: clicking this button displays the Change Data Warehouse Connection dialog, in which you can specify a new data warehouse’s details:
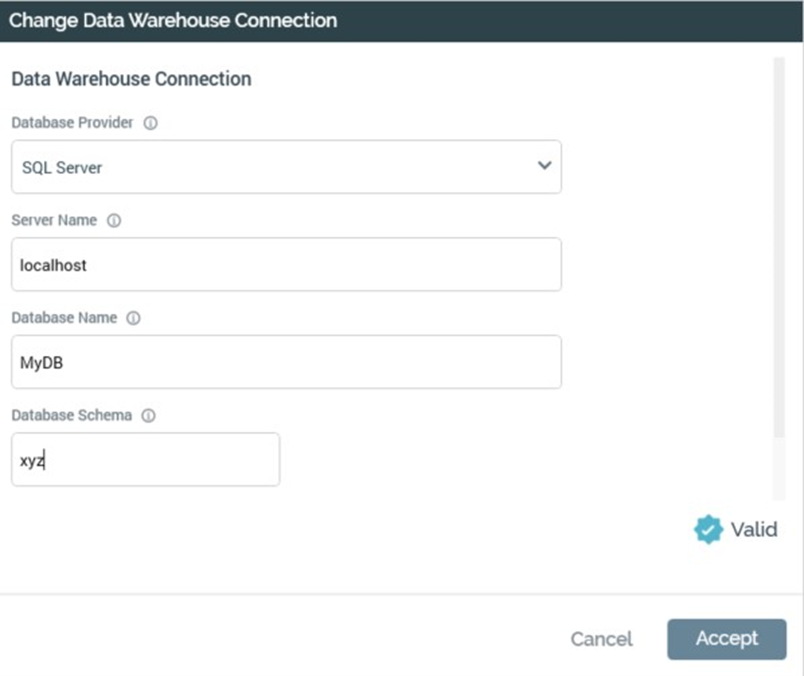
The properties required are contingent on the selection of Database provider. You can click Accept to update the data warehouse connection string. You can also click Cancel to remove the dialog from display without making changes.
-
Manage additional connections to the data warehouse: clicking this button displays the Manage Additional Connections to the Data Warehouse dialog, which allows you to define multiple data warehouse connection strings for the current client. When executing database queries during RPI operational usage, if multiple connection strings have been provided, they are picked up for use in a round robin capacity.
The dialog contains the following: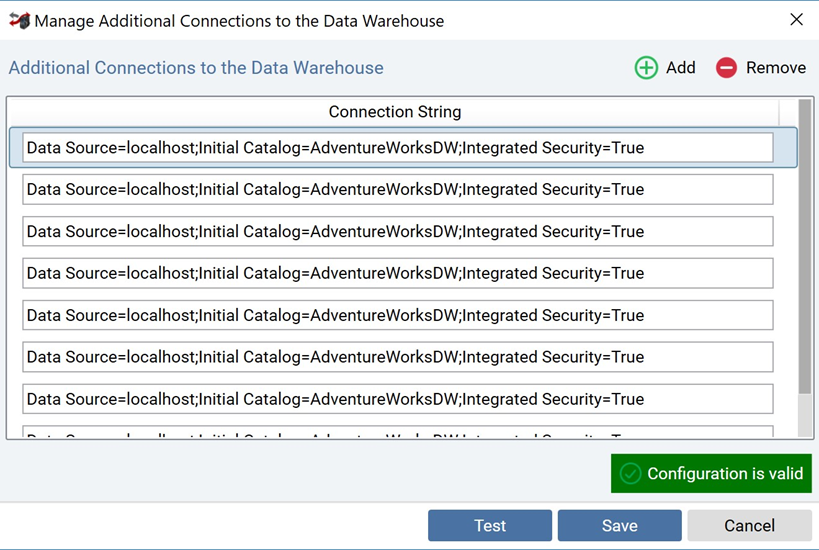
-
Toolbar: exposing the following:
-
Add new Connection: clicking this button adds a new row to the list. Its default text is 'New connection string' (an integer is appended if required to ensure uniqueness).
-
Remove selected Connection: clicking this button removes the currently selected connection string, without displaying an 'Are You Sure?' dialog.
-
-
List: no additional data warehouse connection strings are provided by default. Provision of additional connection strings is optional. For each row in the list, a Connection String property must be provided.
-
Validation status indicator
-
Footer: exposing the following buttons:
-
Test: this button is enabled when one or more connections are present in the list. At invocation, the Last Test Result is displayed below the list. If all connection strings are OK, 'All connections are valid' is shown. If one or more connection strings are not OK, the message 'One or more connections are invalid. Hover for further information' is displayed. On hovering over the message, failure details are displayed in a tooltip.
-
Save: clicking this button persists any changes made within the dialog and closes it. An advisory message is displayed at the top of the Client tab. Note that you can save irrespective of as to whether all provided connection strings have been configured correctly.
-
Cancel: clicking this button abandons any changes made in the dialog and closes it.
-
Encrypt: clicking this button encrypts the supplied connection string value.
-
Test the data warehouse connection: clicking this button checks that the supplied data warehouse credentials are valid. Results are displayed at the top of the Server Workbench interface.
-
-
-
Auxiliary databases: you can optionally define one or more auxiliary databases to augment the data warehouse, and to serve as an additional source of segmentation data.
The property is accompanied by a Manage Auxiliary Databases button, which, when clicked, displays the Manage Auxiliary Databases overlay:
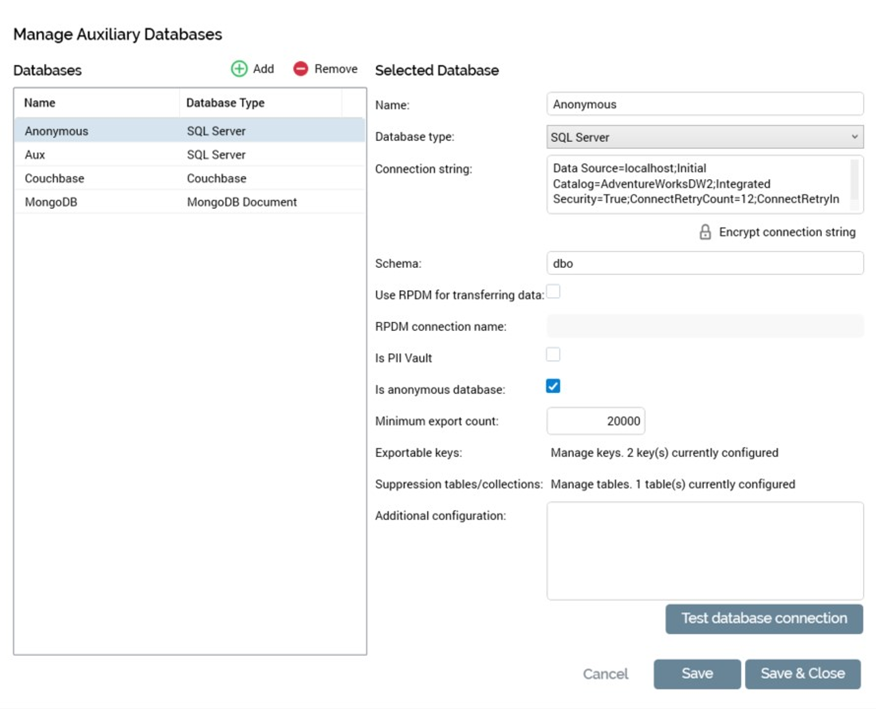
The overlay contains the following:
-
Databases section: displayed to the left, this consists of a toolbar and a grid.
-
Toolbar: exposing the following options:
-
Add: invocation of this option adds a new auxiliary database to the grid. Its name is ‘New database’ (an incrementable integer can be added to ensure uniqueness).
-
Remove: invocation of this option removes the selected auxiliary database from the grid without display of an ‘Are You Sure?’ dialog.
-
-
Grid: containing the following read-only columns:
-
Name
-
Database Type
-
-
-
Selected Database section: displayed to the right, and containing the following:
-
Name: a mandatory property that can be a maximum of 100 characters in length. Name must be unique.
-
Database Type: a dropdown that exposes the following values:
-
Actian VectorH
-
Amazon Athena
-
Amazon Aurora
-
Amazon Redshift Spectrum
-
Apache Cassandra
-
Apache Drill (also use for MapR)
-
AWS Redshift
-
Azure Cosmos SQL
-
Azure MySQL
-
Azure PostgreSQL
-
Azure SQL Server
-
Azure Synapse Analytics
-
Couchbase
-
DB2
-
Dynamo DB
-
Google Big Query
-
Google Big Table
-
Google Datastore
-
Greenplum
-
Apache Hive
-
MariaDB
-
MarkLogic
-
MongoDB SQL
-
MongoDB Document (also used for CosmosDB, Amazon DocumentDB)
-
MySQL
-
Netezza
-
Oracle
-
PostgreSQL
-
Presto
-
SalesforceDB
-
SAP HANA
-
Snowflake
-
SparkSQL
-
SpliceMachine
-
SQL Server (the default)
-
SQL Server PDW
-
Sybase IQ
-
Teradata v15
-
Teradata v16
-
Vertica
-
-
Connection String: this mandatory property can be a maximum of 1000 characters in length.
-
Encrypt connection string: clicking this button encrypts the current connection string.
-
Schema: this mandatory property can be a maximum of 100 characters in length.
-
Use RPDM for transferring data: this property is shown for SQL auxiliary databases only. A checkbox, it is unchecked by default. When checked, the RPDM connection name property is enabled. The property allows you to make use of RPDM when transferring keys between databases, which may realize performance improvements in this context.
Note that, to use RPDM to transfer keys between databases, the relevant client system configuration settings must be configured correctly. These include:-
DataManagementCredentials
-
DataManagementDataConnection
-
DataManagementServerName
-
DataManagementVersionMajor
-
-
RPDM connection name: this property is enabled when Use RPDM... is checked. It is used to specify the name of the RPDM connection to be used when transferring keys between databases. It is mandatory when enabled.
-
IS PII Vault: this checkbox is unchecked by default. When checked, the auxiliary database will be used to host personally identifiable information (PII) only. When using data from the database as RPI attributes, all of the same will be marked as PII, and will be subject to restrictions as documented in the RPI Reference Guide.
-
Is anonymous database: this checkbox is unchecked by default. When checked, the Is attribute export enabled checkbox is not shown, and the Minimum export count, Exportable keys and Suppression tables properties are displayed. Anonymous auxiliary databases are primarily intended for user when integrating with the LiveRamp data management platform as part of Redpoint’s Digital Acquisition Platform.
-
Minimum export count: this property is displayed when Is anonymous database is checked. It is used to define the minimum number of records that can be exported in a single file from an anonymous auxiliary database. A mandatory integer property, it defaults to the value 25, and accepts minimum and maximum values of 0 and 9,999,999, respectively.
-
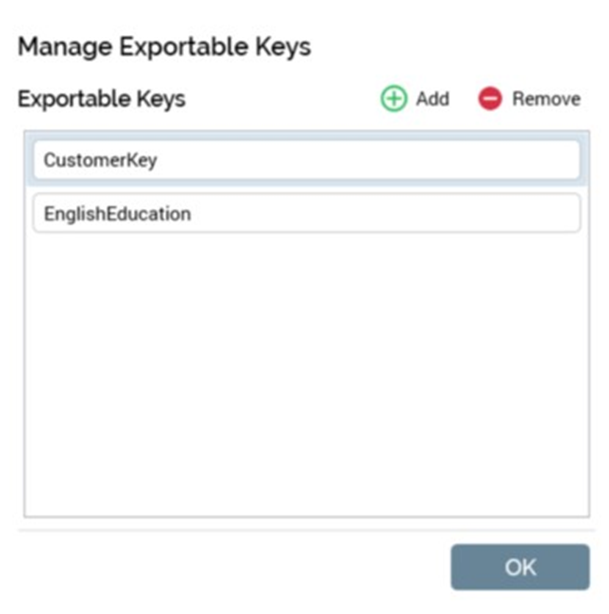
Exportable keys: this button is shown when Is anonymous database is checked. The button's text reads 'Manage keys. [n] key(s) currently configured'. Clicking the button displays the Manage Exportable Keys dialog.
-
Manage Exportable Keys dialog: this dialog is used to manage an anonymous auxiliary database's exportable keys, which define the specific data items that can be exported from an anonymous auxiliary database. The dialog contains a toolbar and an Exportable Keys list.
-
Toolbar: exposing the following:
-
Add new Exportable Key: clicking this button adds a new exportable key to the list. Its default name is 'Key'. Uniqueness is ensured through the appending of an incrementable integer.
-
Remove selected Exportable Key: this button is enabled when an exportable key has been selected. Clicking it removes the exportable key from the list. An 'Are You Sure?' dialog is not shown.
-
-
List: all of the anonymous auxiliary database's exportable keys are listed. A single key ('identitylink') is included by default. Provision of export keys is optional. If a key is provided, it must be supplied with a value, and all keys' values must be unique. The maximum supported value length is 100 characters.
-
-
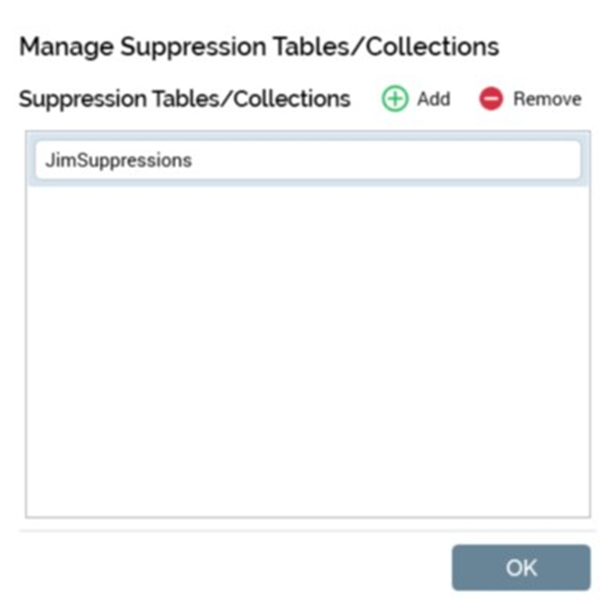
Suppression tables/collections: this button is displayed when Is anonymous database is checked. The button's text reads 'Manage tables. [n] key(s) currently configured'. Clicking the button displays the Manage Suppression Tables/Collections dialog.
-
Manage Suppression Tables/Collections FD: this dialog is used to manage an anonymous auxiliary database's suppression tables (SQL) or collections (NoSQL). Such tables/collections can be used only for the application of suppressions when executing queries against an anonymous auxiliary database. The dialog contains a toolbar and a Suppression Tables/Collections list.
-
Toolbar: exposing the following:
-
Add new Suppression Table/Collection: clicking this button adds a new entry to the list. Its default name is 'Key'. Uniqueness is ensured through the appending of an incrementable integer.
-
Remove selected Suppression Table/Collection: this button is enabled when a list entry has been selected. Clicking it removes the entry from the list. An 'Are You Sure?' dialog is not shown.
-
-
List: all of the anonymous auxiliary database's suppression tables/collections are listed. Provision of the same is optional. If a suppression table/collection is provided, it must be supplied with a value, and all values must be unique. The maximum supported value length is 100 characters.
-
-
Is attribute export enabled: this checkbox is unchecked by default. When unchecked, auxiliary attributes cannot be used at the client in the following contexts:
-
Export Template Designer: Attributes
-
Offer Designer: Data Extract offer
-
-
Additional Export Attributes
-
Configuration.Audience Definitions:
-
Offer history attributes
-
Unable to select auxiliary Transactional resolution level
-
-
-
Additional configuration: this property is currently applicable to Cassandra auxiliary databases only. It is blank by default. You can provide JSON configuration to be used by a Cassandra database as per the following example:
JSON{ "ConsistencyLevel": "One", "LoadBalancingPolicy": "TokenAwarePolicy", "ChildLoadBalancingPolicy": "DCAwareRoundRobinPolicy", "LocalDC": "" }Details of the elements within the JSON follow:
-
ConsistencyLevel: values appropriate to this element are available at https://docs.datastax.com/en/drivers/csharpdse/2.1/html/T_Dse_ConsistencyLevel.htm.
-
LoadBalancingPolicy: the following values are supported:
-
RoundRobinPolicy
-
DCAwareRoundRobinPolicy
-
TokenAwarePolicy
-
-
ChildLoadBalancingPolicy: if LoadBalancingPolicy is set to TokenAwarePolicy, the following ChildLoadBalancingPolicy values are supported:
-
RoundRobinPolicy
-
DCAwareRoundRobinPolicy
-
-
LocalDC: optionally used for DCAwareRoundRobinPolicy
-
-
Test database connection: on clicking this button, a message advises that the connection tested OK or not OK, as appropriate. The following buttons are displayed at the overlay's footer:
-
Cancel: if changes have been made to auxiliary databases, invocation of this option is protected by an Are You Sure? dialog. Invocation removes the overlay from display without saving any changes.
-
Save: saves changes to auxiliary databases; does not remove the overlay from display. Following a successful save, an advisory message is shown. o Save & Close: saves changes to auxiliary databases and closes the overlay. Following a successful save, an advisory message is shown.
-
-
Note that you cannot configure two Cassandra databases, which point to two different Cassandra key spaces, at the same RPI client.
Selected Client Users Tab
The users tab is used to manage users associated with the client. It contains a toolbar and a list of users:
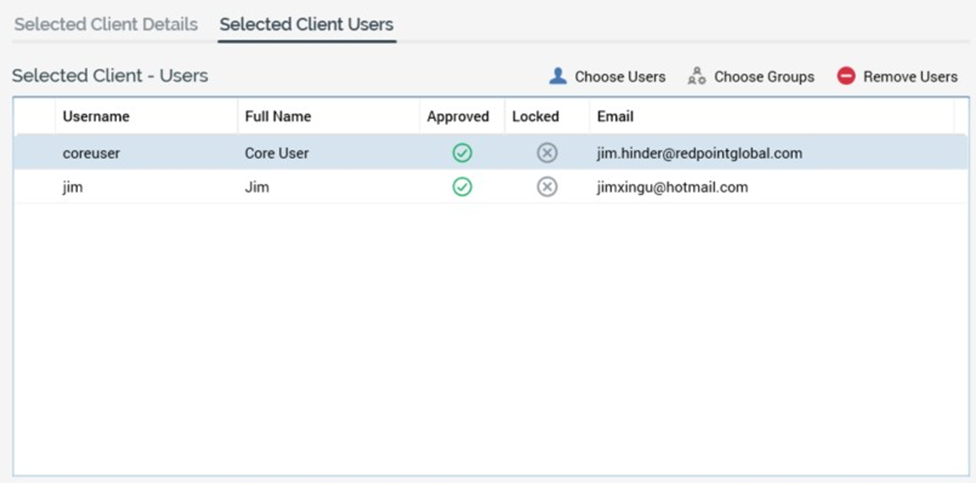
A toolbar is shown above the list, and exposes the following buttons:
-
Choose Users: clicking this button displays the “Assign Users to [Client]” dialog (documented separately). The dialog allows you to manage the assignment of users to the currently-selected client.
-
Choose Groups: clicking this button displays the “Assign Groups to [User] in [Client]” dialog (documented separately). The dialog allows you to manage the assignment of user groups to the currently-selected user in the context of the currently-selected client. The button is available when a user is selected, and the current client’s Persistence state is Unchanged.
-
Remove Users: this button is available when one or more user(s) is/are selected. Clicking it removes the selected user(s) from the Users list.
The Users list itself displays a read-only list of those users associated with the currentlyselected client. Users are displayed in alphabetical order by username. The following user properties are shown:
-
Status icon
-
Username
-
Full name
-
Approved
-
Locked
-
Email Address
Clicking on a user in the list displays the Assign Groups dialog (documented separately).
Footer
A single button is displayed below the Selected Client section:
-
Save Changes: The button is available when outstanding changes exist in the Clients or Users tabs. Clicking Save persists any client and user changes to the core operational database. Any displayed status icons are removed.