

Single Stack
Validating the Core
You may wish to check that everything is installed and running correctly in a given RPI core. You can do so by clicking the Validate Core button, shown within the toolbar to the top right of the Cluster tab. Doing so displays the Validate Core overlay:
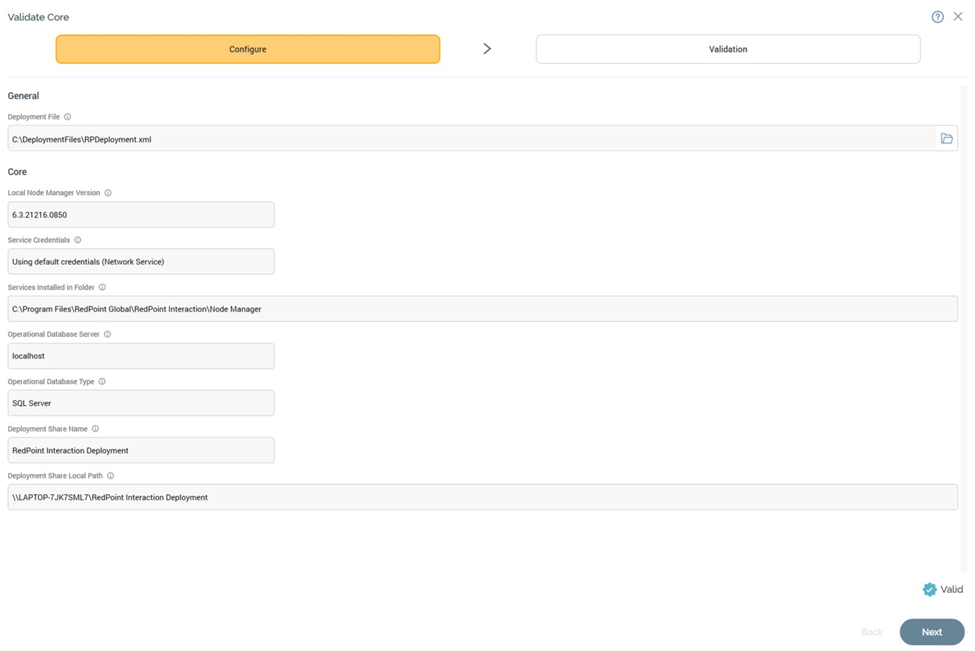
Validate Core
Validation of the core is carried out in a wizard style, using two sub-interfaces as follows:
-
Configure
-
Validation
A graphical representation of current progress through the wizard is displayed within the top section:
Configure Sub-interface
The Configure sub-interface allows you define a single property required by Server Workbench in advance of upgrading the core.
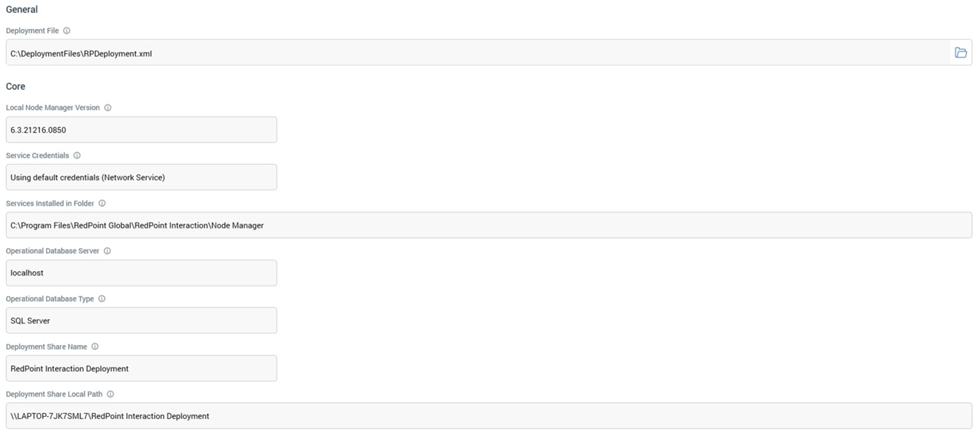
General Section
This section allows you to define a single property:
-
Deployment File: an XML file that defines the validation steps to be performed. It should be set to “RPDeployment.xml”, which can be found within the Source folder.
Core Section
This section displays a series of read-only properties of the current cluster:
-
Local Node Manager version
-
Service Credentials
-
Services Installed in Folder
-
Operational Database Server
-
Operational Database Type
-
Deployment Share Name
-
Deployment Share Local Path
Validation
If you have not correctly completed the mandatory fields within the Configure sub-interface, a validation errors indicator is displayed to the bottom right. Clicking the indicator displays details of the errors in a dialog. You cannot progress to the Validation sub-interface when outstanding validation errors remain.
If the configuration is valid, an indicator advises accordingly. You may now move to the next wizard step.
Navigation
You can move forward through the Validate Core wizard by clicking on the Next button at the bottom right. Doing so displays the Validation sub-interface.
Validation Sub-interface
The purpose of this interface is to display the results of a series of checks performed to ensure that the current RPI cluster is valid.
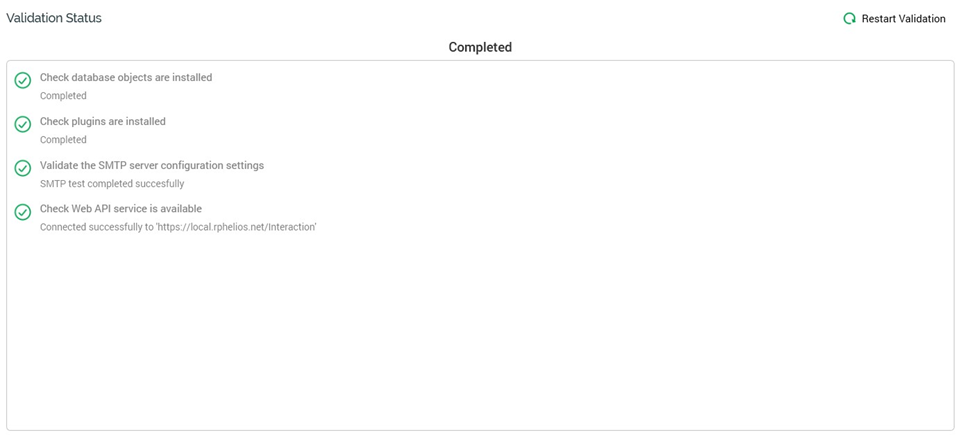
Toolbar
Clicking the Restart Validation button performs the validation checks again.
Validation Status
A series of checks are performed to ensure the current cluster is valid.
Navigation
On completing validation, the Next button displayed at the bottom right is replaced by a Finish button. Clicking Finish closes the Validate Core overlay and displays the Server Workbench tab set, which includes all tabs. The Cluster tab is shown by default.
If you click Finish prior to completion of the checklist, you will be advised to wait until all steps are complete.
You can return to the Configure sub-interface using the Back button.
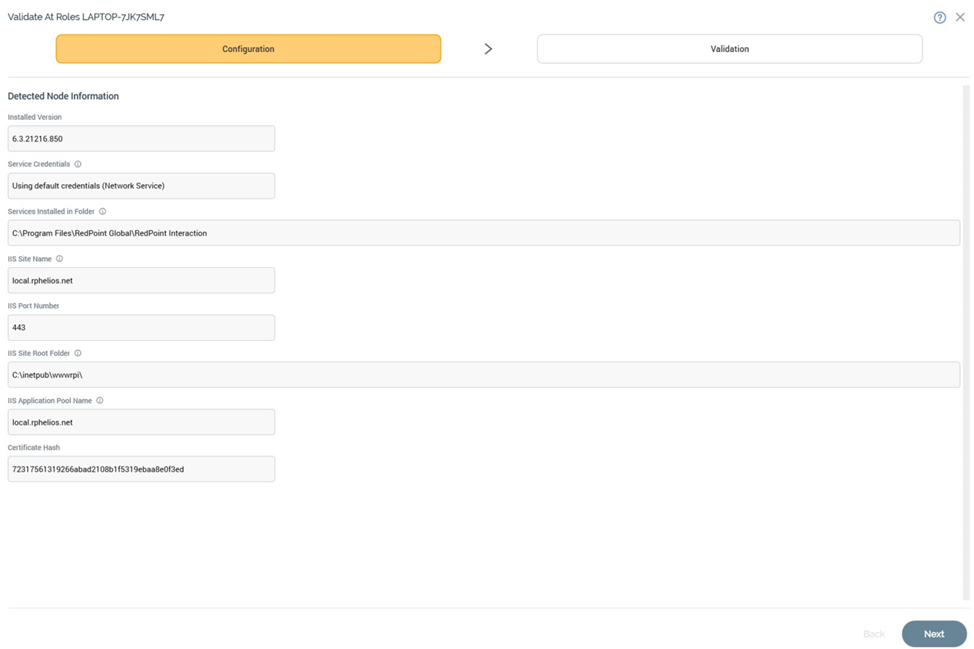
Validating Roles
You may wish to check that everything is installed and running correctly in a given RPI node. You can do so by clicking the Validate Roles context menu button, displayed when hovering over a node. Doing so displays the Validate Roles overlay:
The overlay contains the following:
Header
Validation of node roles is carried out in a wizard style, using two sub-interfaces:
-
Configuration
-
Validation
A graphical representation of current progress through the wizard is displayed within the top section:
Configuration Sub-interface
The Configuration sub-interface allows you to view a read-only summary of details of the roles installed at the current node, prior to performing the validation.
It consists of a single Detected Node Information section.
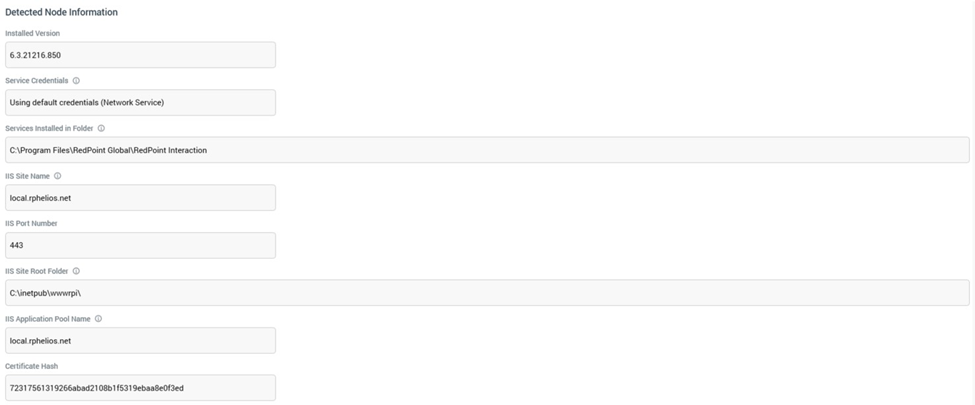
Detected Node Information
The read-only fields within this section are determined automatically by Server Workbench and displayed for informational purposes. The following properties are displayed:
-
Installed Version
-
Service Credentials
This property is only shown if the Windows services role Is installed:
-
Services Installed in Folder
These properties are only displayed if the Web services and/or Help files roles is/are installed. Note that the Network Service account must be a member of the local Administrators group for IIS settings to be discovered.
-
IIS Site Name
-
IIS Port Number
-
IIS Site Root Folder
-
IIS Application Pool Name
-
Certificate Hash
Navigation
You can move forwards through the Validate Roles wizard by clicking on the Next button at the bottom right. Doing so displays the Validation sub-interface.
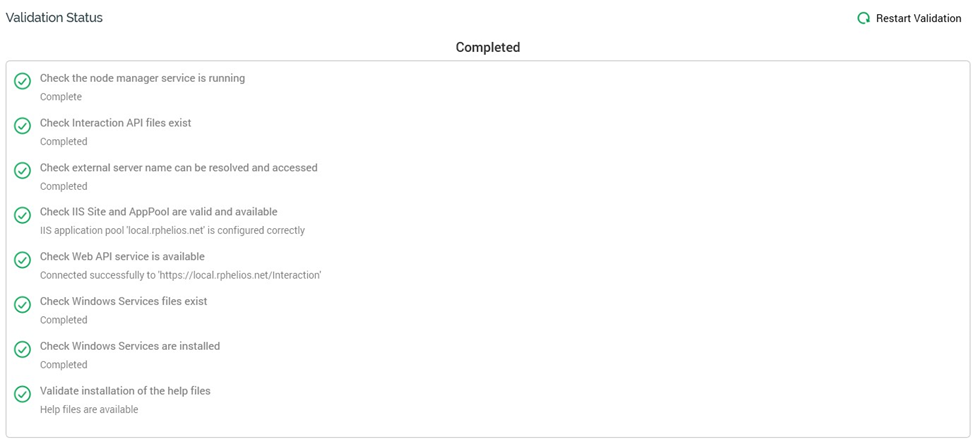
Validation Sub-interface
This interface is used to provide visibility of the checks performed during validation of node roles.
Toolbar
A single button is shown at the toolbar:
-
Restart Validation: clicking this button allows to you repeat the validation checklist.
Validation Status
Details of status information provided at each validation step, and overall progress, are provided in the Core Pre-Install Checklist documentation.
Navigation
On completing validation, the Next button, displayed at the bottom right, is replaced by a Finish button. Clicking Finish closes the Upgrade Roles overlay and displays the Server Workbench tab set, which includes all tabs.
If you click Finish prior to completing validation, you will be advised to wait until all steps are complete.
You can return to the Configure sub-interface using the Back button.
Cluster
To validate the whole cluster, you must perform a Single Stack validation—including validating the core and validating roles—before validating additional cluster nodes. Refer to Validating the Core for instructions on validating the initial cluster node. For each additional node in the cluster, you will validate the local node (while logged into the node) and validate roles (refer to Validating Roles).
You are, of course, at liberty to simply validate only those elements of the cluster that require your attention.