

Overview
This section describes the steps to be taken to use Google Firebase with RPI.
Creating and Configuring a New Google Project
This section describes how to create and configure a new Google project. If you have created one previously, you may skip this section. Otherwise, please follow the steps below:
-
In a web browser, log into the Google API console at https://console.developers.google.com/apis/credentials using a Gmail account.
-
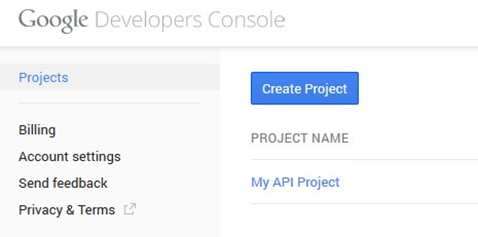
If this is your first time accessing the Google Developer Console, create a new project by clicking on the Create Project button. If not, skip this step.

-
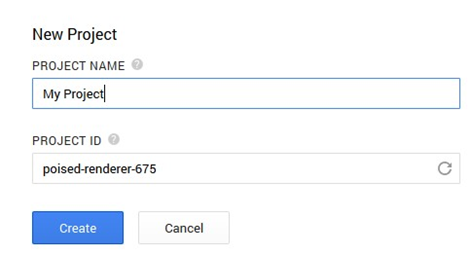
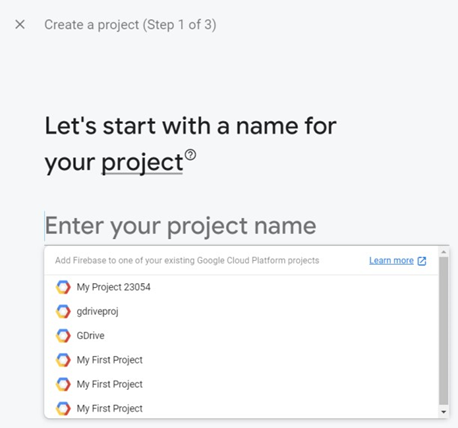
Enter the name of the project and click Create button. Leave the default Project ID value.
-
Having successfully created the project, double-click the project name.
Enabling Google Firebase Cloud Messaging API Key
This section describes how to enable a Google Firebase Cloud Messaging API Key. Please follow the steps below:
-
Go to your Google Project’s dashboard by navigating to API & Services > Credentials.
-
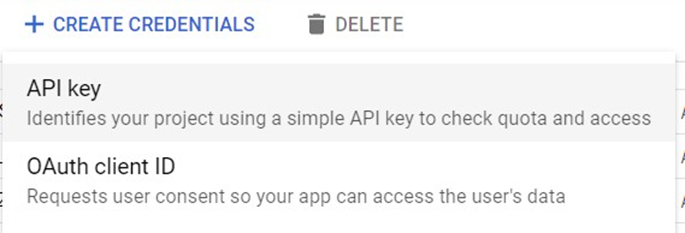
In the Credentials page, click Create Credentials and select API key.

-
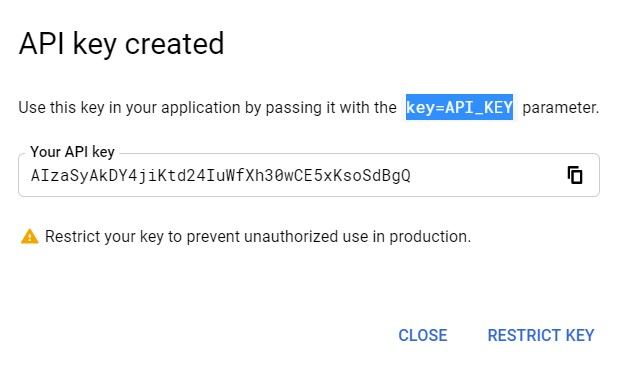
The API key having been created; you are given the option to restrict it.
-
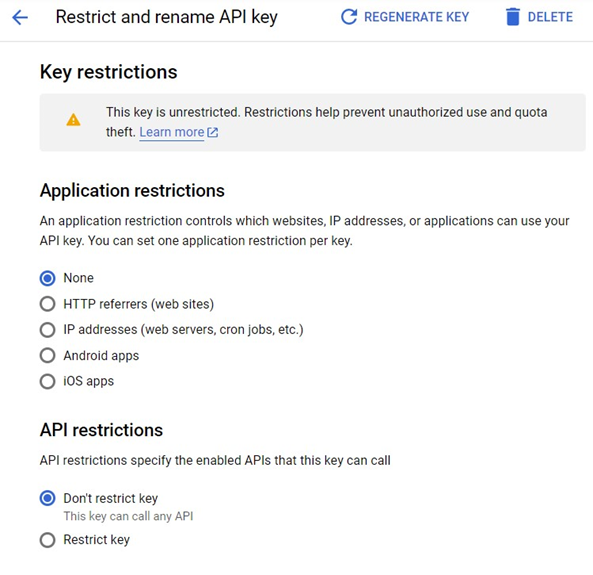
Click Restrict Key. You will be provided with options as to which restrictions are to be applied.
-
Make sure that ‘None’ is selected at Application restrictions.
-
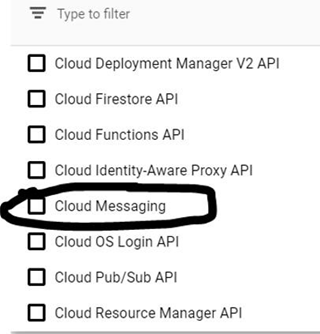
At API restrictions, select ‘Don’t restrict key’, or select ‘Cloud Messaging’ at the Restrict key dropdown.
Provisioning an OAuth Client ID
This section describes how to provision a new Google Firebase OAuth Client ID.
-
At the Credentials page, click Create Credentials and select OAuth client ID.
-
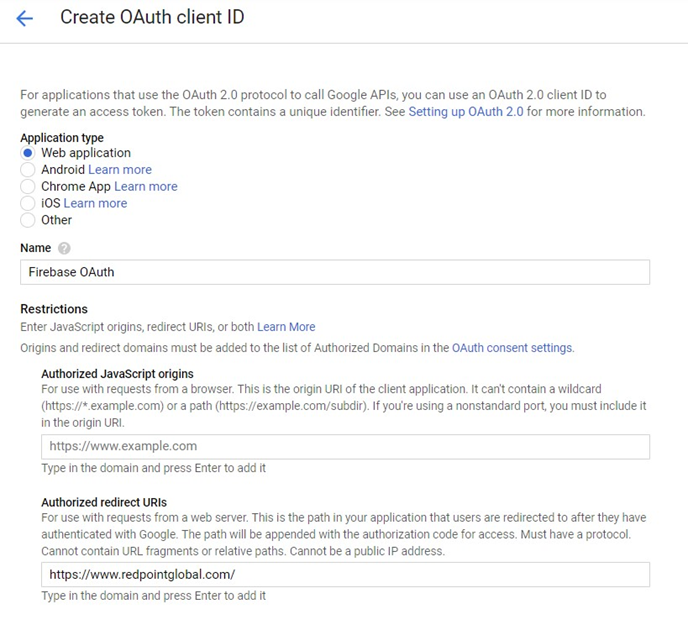
Choose “Web Application” as the application type. Set an authorized redirect URI. This will be used at the Google Firebase channel configuration.
-
Save your Client ID and Client Secret. These will be used when configuring a channel.

Provisioning a Google Firebase Cloud Messaging Project
-
In a web browser, navigate to https://console.firebase.google.com/u/0/ and log into the Google Firebase console page.
-
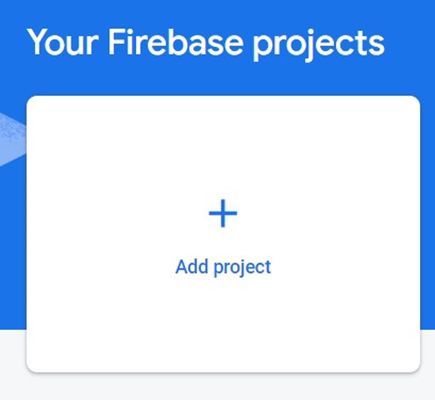
Click Add project.
-
Enter the project’s name.
-
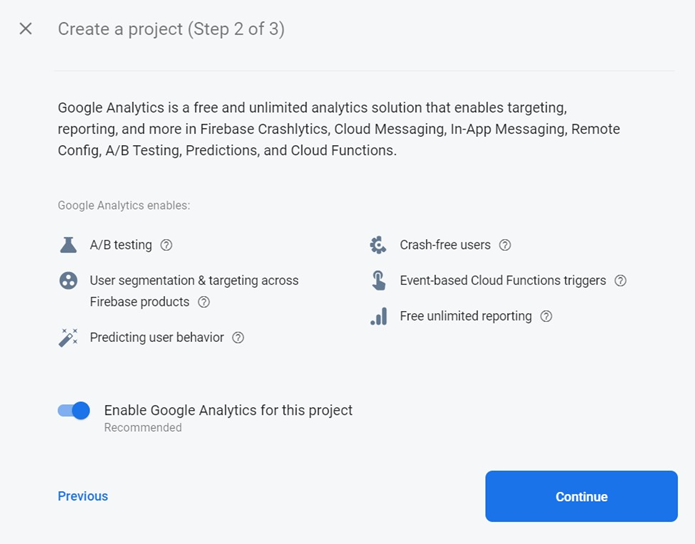
Click Continue at step 2.
-
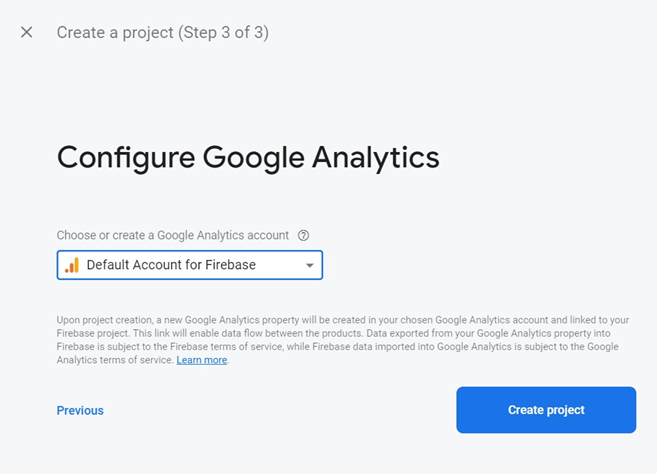
Select an account at step 3.
-
After your Firebase project has been created, you must add your app (e.g., iOS, Android) in it. For detailed and accurate steps, please refer to the following: