

Overview
This section documents the creation of an iOS project and configuration of an Apple Push Notification Service (APNS).
Mac Pre-requisites
-
xCode 4 interface builder
-
Mac OS X
RPI iOS Push Notification Demo App Deployment
-
Ensure the iOS phone is registered on Apple’s developer site.
-
Log on to http://developer.apple.com and go to Member Center > Certificates Identifiers & Profiles.
-
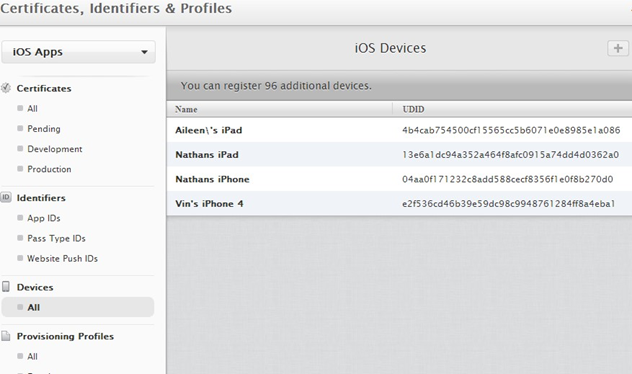
Register the device’s UID:
-
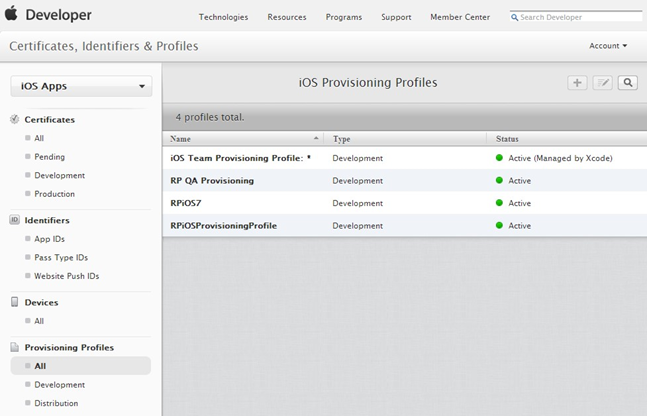
Create a provisioning profile:
-
-
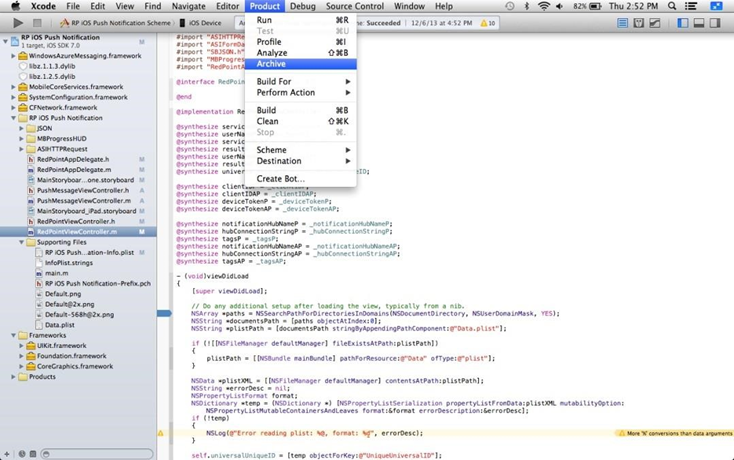
In the xCode interface builder, open your XCode project by clicking Product > Archive menu. The project can be found at $/Resonance/MobileClient/_Master/iOSPushNotification
-
XCode will build and archive your project. Once done, it will open the Archive window. Select your archive from the list and click Distribute.
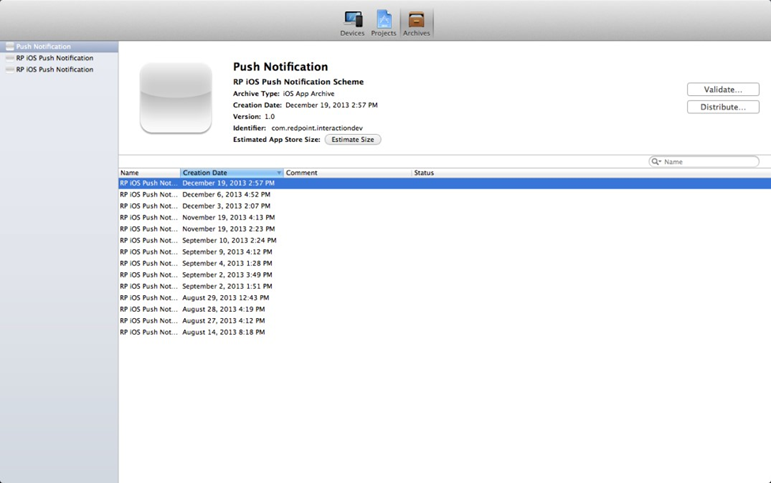
-
Choose “Save for Enterprise or Ad Hoc Deployment” from the methods of distribution.
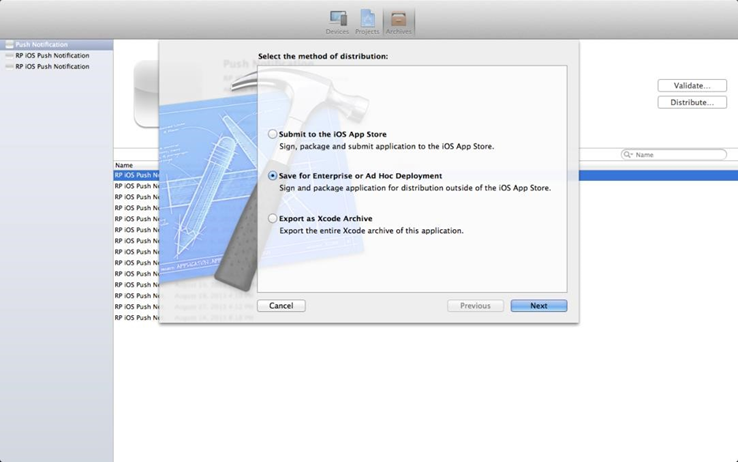
-
Select the appropriate provisioning profile.
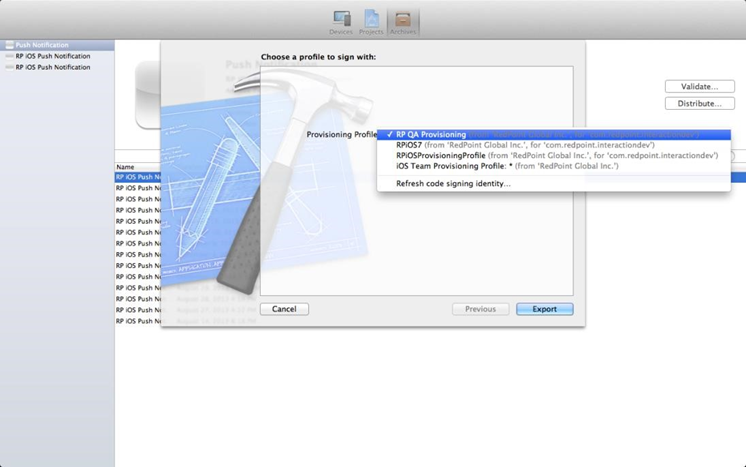
-
Save to the destination folder.
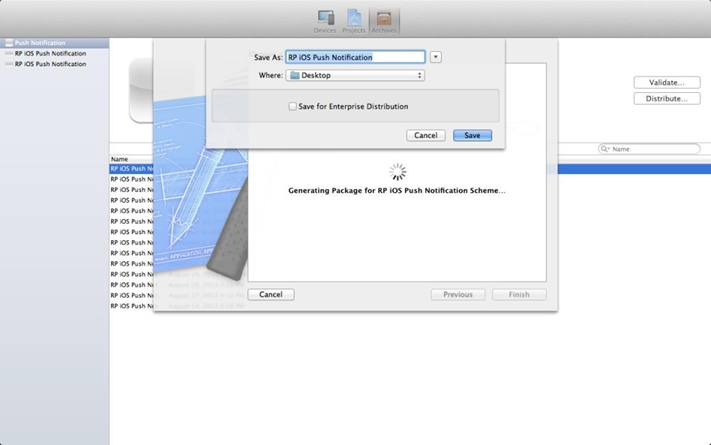
-
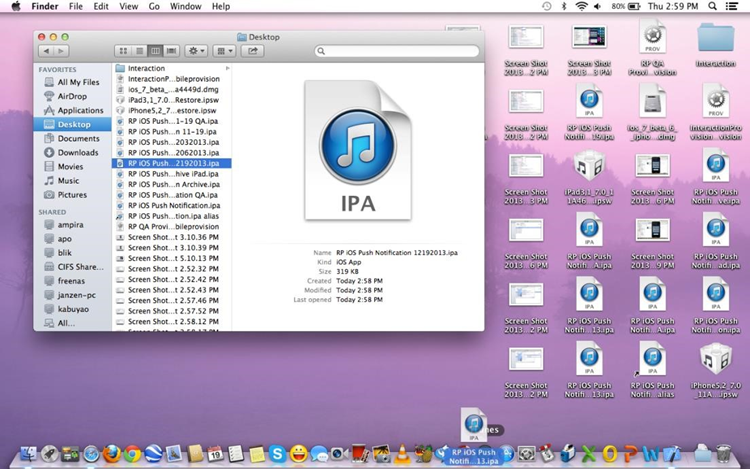
Go to the folder where the ipa file was saved. Click and drag the file to the iTunes application. If the same application has been added to iTunes already, a prompt to replace the app will appear. Choose “Replace”.
-
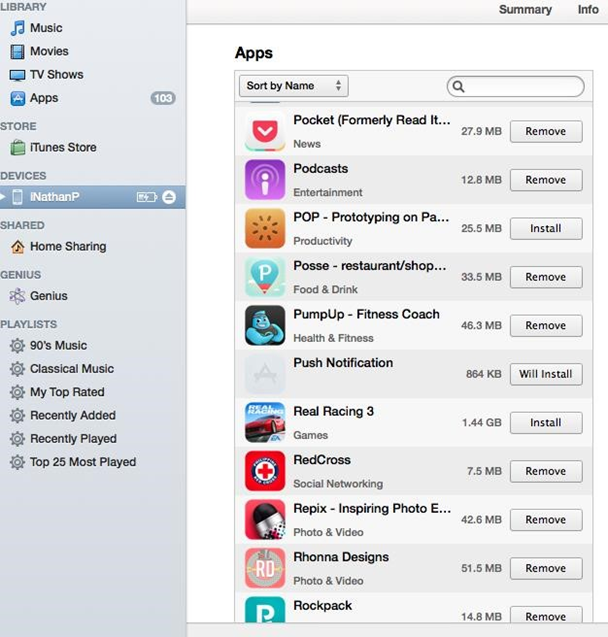
Plug the phone into the Mac and open iTunes. Click the device on the sidebar and go to Apps. Locate the app in the list (Push Notification in the image) and make sure the button says, “Will Install”. If it says “Install”, click the button. Sync the device in iTunes and the app will be installed on the phone.
Creating and Setting Up an iOS project
After completing these steps, you should have a Sender ID and an API key, which you can use later to configure your application and Notification Hub. To create an iOS project please follow the steps below:
-
Login to your account in Apple Developer http://developer.apple.com.
-
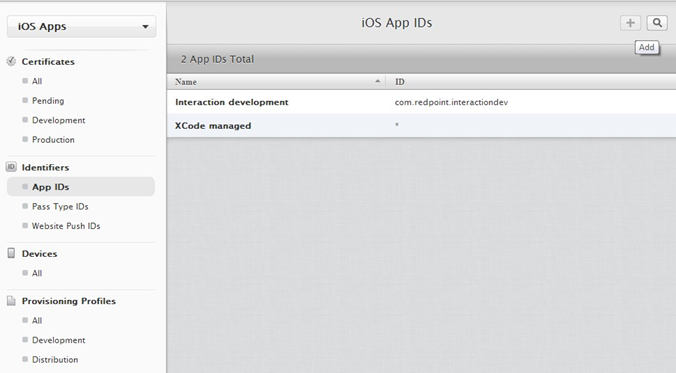
Go to Member Center > Certificates, Identifiers & Profiles. Click on App IDs under Identifiers and click the Add (+) button.
-
Fill in the required information to create a new App ID:
-
Click on Devices and click the Add (+) button. Enter the ID of the phone that will be used to test the RPI iOS Push Notification Demo App.
-
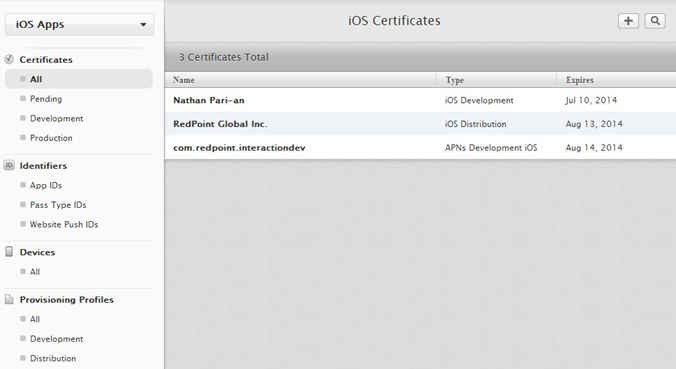
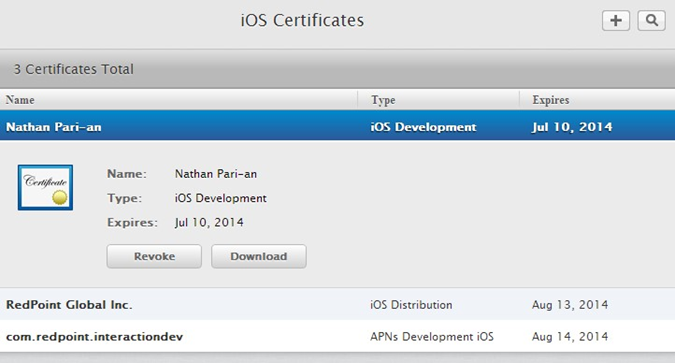
Click All under Certificates. Create a new certificate by clicking the Add (+) button. Choose the type of certificate according to the app’s requirements.
-
Once the certificate is created, download the file.
Utilizing the Certificate on Windows Azure
Using the certificate created in the previous section, configure the Windows Azure Notification Hub:
-
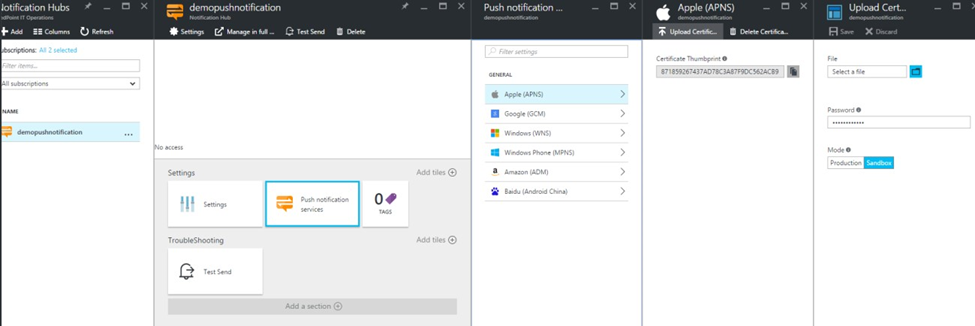
Log in to your Windows Azure account at http://portal.azure.com. Go to Service Bus and navigate to the desired notification hub.
-
Click on More Services then Notification Hubs. Select your notification hub from the list. Click Push Notification then Apple (APNS). Under the Apple (APNS), click on Upload Certificate and locate the certificate downloaded in the previous section.
RPI iOS Push Notification Demo App Configuration
To configure the RPI iOS Push Notification Demo App, please follow these instructions:
-
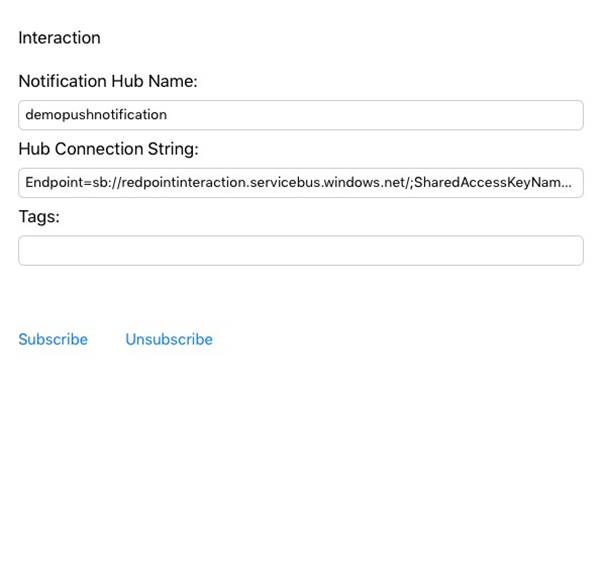
Install and open the RPI iOS Push Notification Demo App.
-
Set the Notification Hub Name to Redpoint-notification-hub.
-
Set the Hub connection string to Endpoint=sb://Redpointinteractionns.servicebus.windows.net/;SharedAccessKeyName=DefaultListenSharedAccessSignature;SharedAccessKey=rdDtlcNxs lufTxGEy2Vg8VQSDAbJ1k0d5Ps2ExxtJ9I=).
-
Set optional Tags to subscribe to specific sets of notifications.
-
Click Subscribe to register the application for push notification.
-
Click Unsubscribe if you do not wish to receive any further messages from the Notification Hub.
-
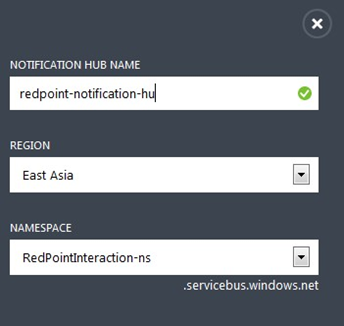
In the Create a Namespace popup dialog box, enter a namespace name and select your appropriate region as depicted below. Click OK.

-
Once the namespace has been successfully created, you will see it appear on the list of namespaces as shown below. Double click the ‘[Name]-ns’ namespace.

-
In the ‘[Name]-ns’ namespace configuration page, select the Notification Hubs tab.

-
Click New > Service Bus > Notification Hub > Quick Create to create a new Notification Hub.
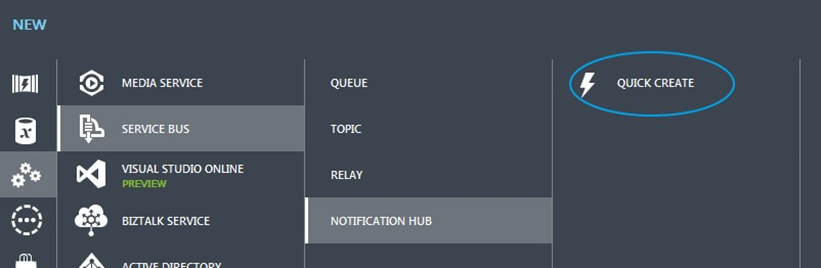
-
In the Quick Create panel, enter the Notification Hub Name, select a Region and the earlier Namespace, and click Create a New Notification Hub.
-
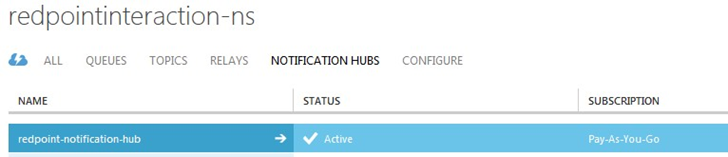
Once the hub has been successfully created, it will appear in the Notification Hubs list.
-
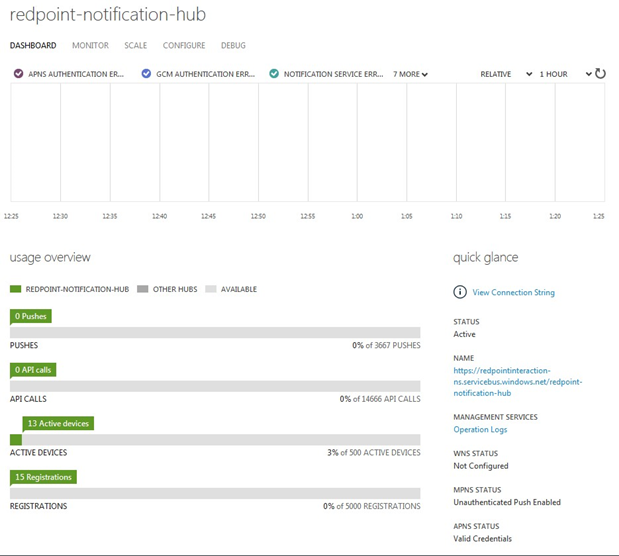
Double click the new hub. The hub’s configuration page is displayed.
-
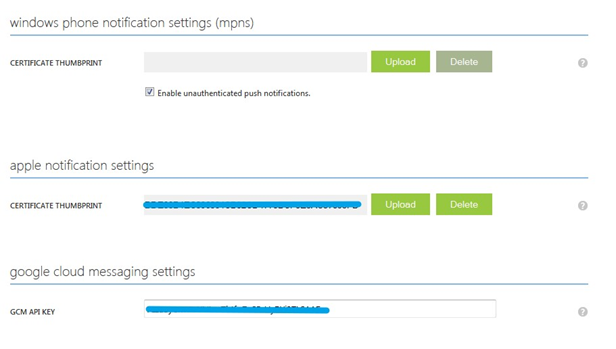
Select the Configure tab, where the following need to be configured:
-
Windows phone notification settings (mpns): ensure the Enable unauthenticated push notifications option is checked.
-
Apple notification settings (apns): ensure the Apple service certificate thumbprint is uploaded.
-
Google Cloud messaging settings (gcm): ensure the Google cloud messaging console GCM API key is provided.
-