Overview
This topic provides a background of the campaign templates that have been created in the Redpoint CDP RPI environment. As more templates are created, they will be added here along with the information about them.
Currently, examples are showing control channel as output option. Users will be able to use any of the other output options that are needed within these templates.
Multi-touch campaign with placeholders - single interaction
Since RPI allows you to create and run multiple flows (audiences) within a single interaction, you are able to set up a single location for a multi-touch campaign.
Using the below campaign template as an example you can follow the provided instructions to create a multi-touch workflow by just updating the initial touch selection rule and then just the placeholders within the following touch points.
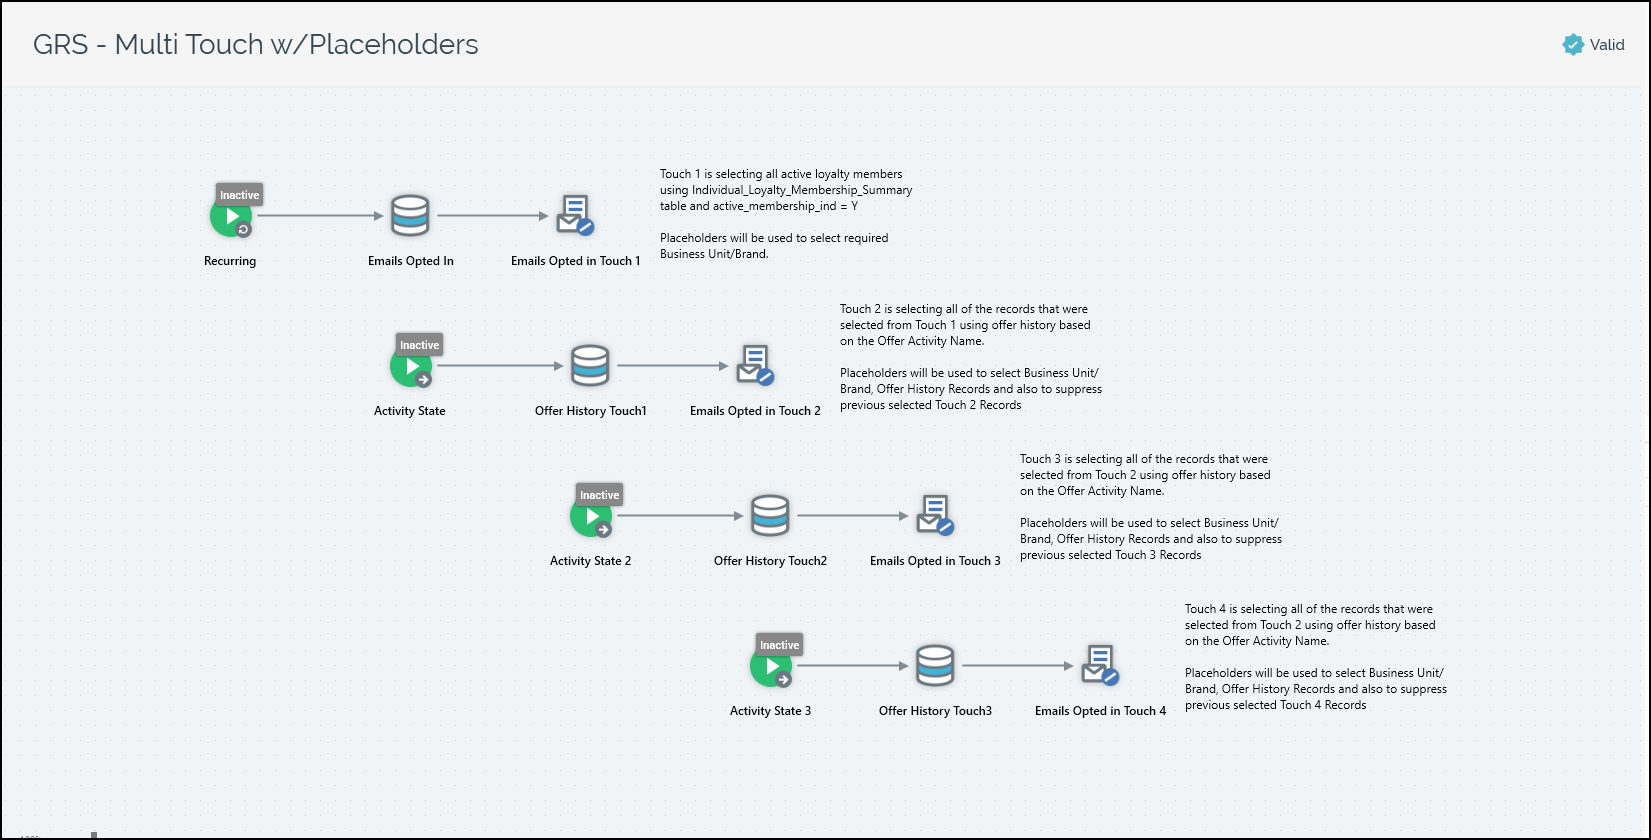
Touch 1
The first workflow in this example is where the initial selection rule takes place that will allow for the following touch points to use the selected data. In this audience we are selecting all of the records that are opted into receiving emails within the database. The following pieces will break down each of the processes in the screenshot.

-
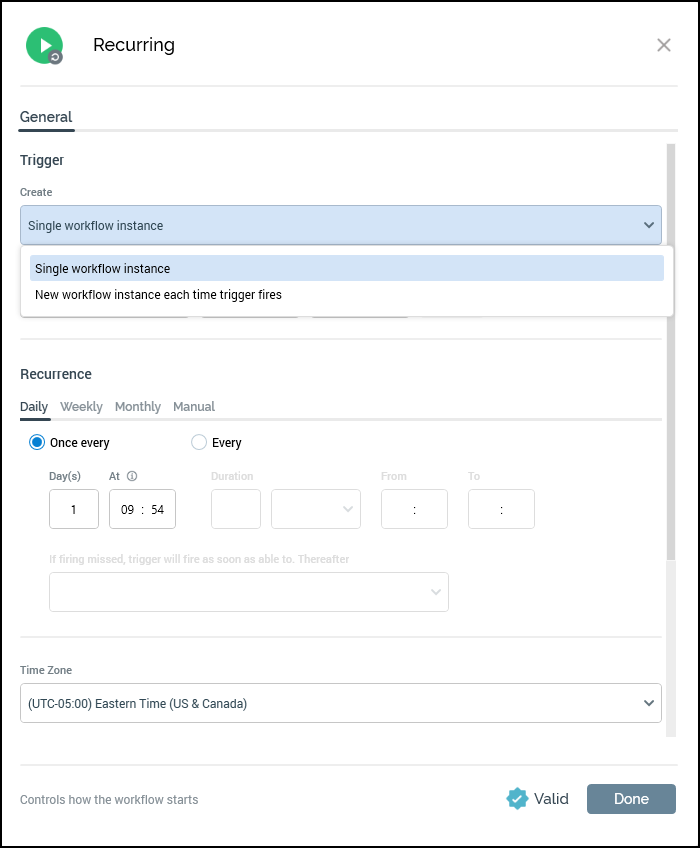
Recurring: Set a recurring schedule to run this initial audience run and select new records. Within this process block there is a set of configurations that give you control of timing and frequency.
-
Trigger: There are two options for how RPI will handle the given workflow at the start time. When picking between these two options, consider whether you want a record to come through this flow one time ever or allow them to requalify each time this flow runs.
-
Single workflow instance: Allows a record to qualify for the initial selection only one time based on the resolution key that is being used within the audience.
-
New workflow instance each time trigger fires: Allows records to requalify for the initial selection each time the campaign runs.
-
-
Recurrence: This section allows you to define how often to run this workflow, whether it is daily, weekly, monthly, or as a manual trigger.
-
-
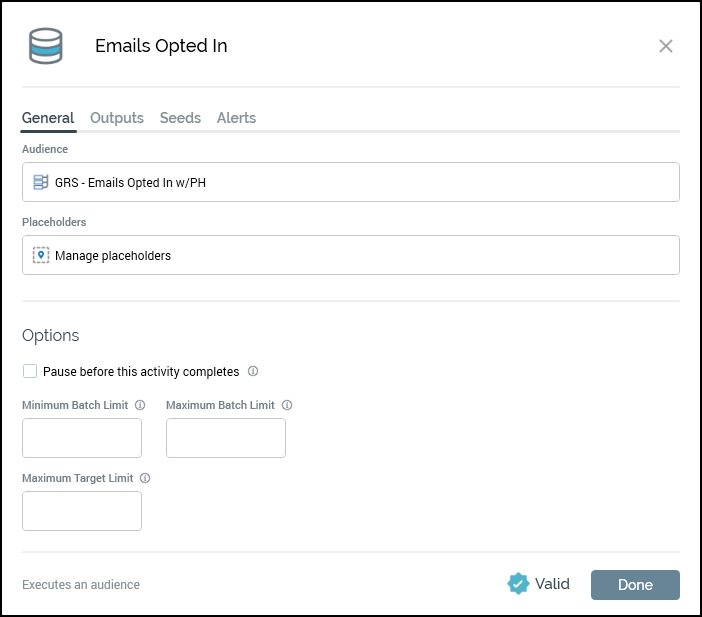
Batch Audience: This process block is where the user-created audience is assigned and run at the processing. We will dig further into the audience set up in the next section, but this is just a look at how this process block would be configured to run an audience.
-
Audience: In this example, an audience has been assigned, which is “IGR - BU Emails Opted in w/PH” (Individual Golden Record - Business Unit Email Opted in with Placeholders). We look deeper into this audience later in this document.
-
Placeholders: These are attributes that have been created to simplify how a user updates criteria within the selection rules within an audience. This configuration lets you make these changes in one place without needing to go into the underlying audience. Click Manage placeholders to access and modify the placeholders any time you use this template. The second screenshot shows that there is only one placeholder for the initial audience, which is looking for Business Unit Code.
-

Audience: GRS - BU Emails Opted in w/PH
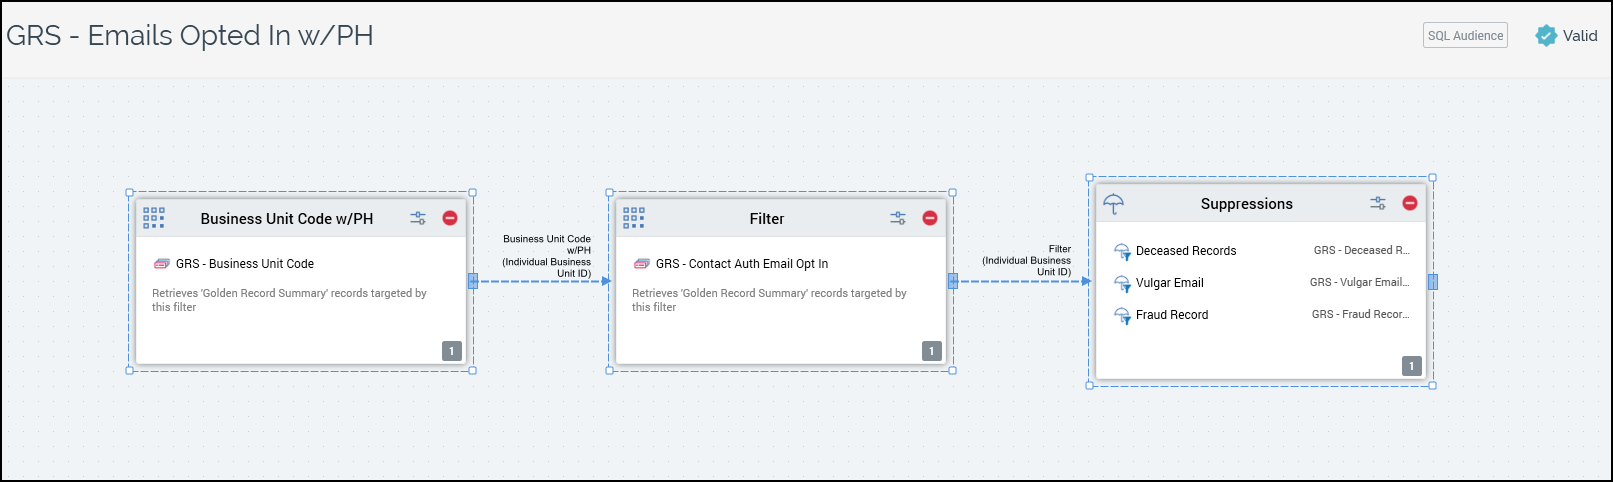
-
The first process block within the audience is a filter block that allows you to assign a selection rule to select certain records based on their information within the database. The configured selection rule in this filter block is looking for records with the selected Business Unit Code, which is being set using a placeholder, as mentioned above.
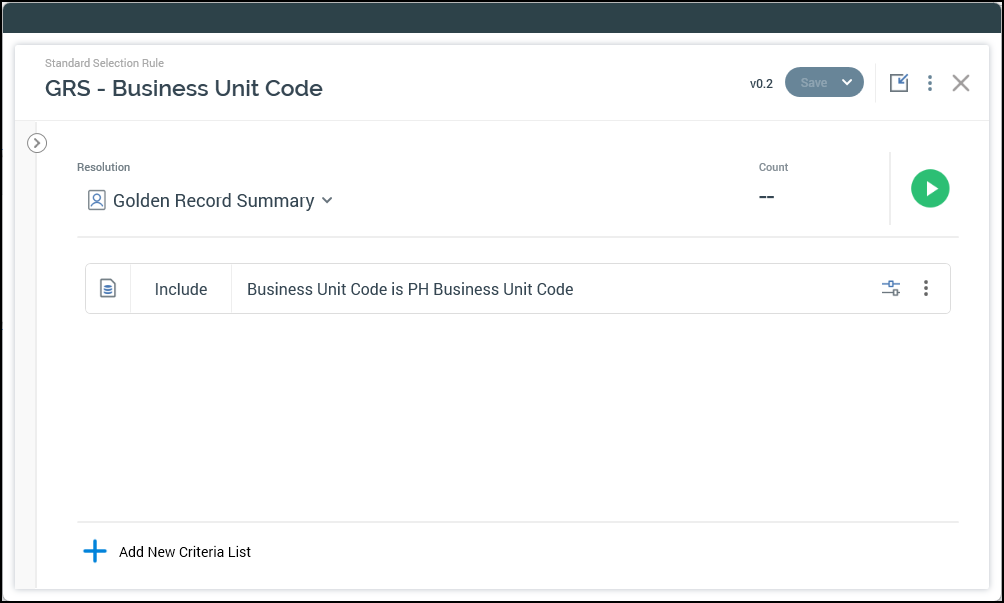
-
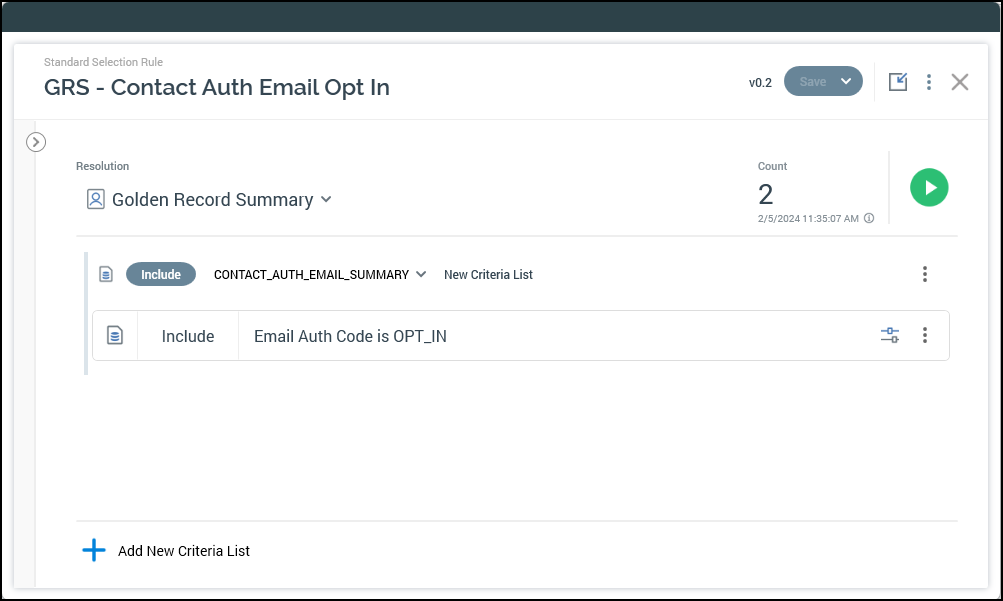
The second process block is another filter block that is using a selection rule to select records based on their
auth_codewithin theContact_Auth_Email_Summary.
When creating this audience, both of the provided rules could be combined into one selection rule, but splitting them out gives you the ability to see the count breakdown at each step.
-
The third process block in the audience is a suppression block, which takes all of the qualified records from the previous selection rules, and removes records based on information about these records in the database. The suppressions that have been applied to this campaign are based on these selection rules.
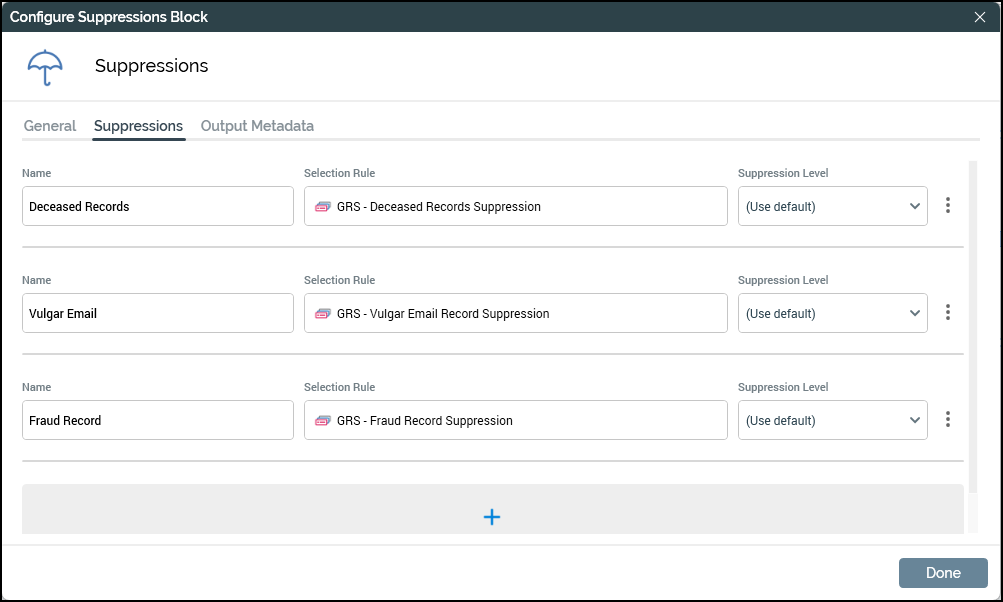
-
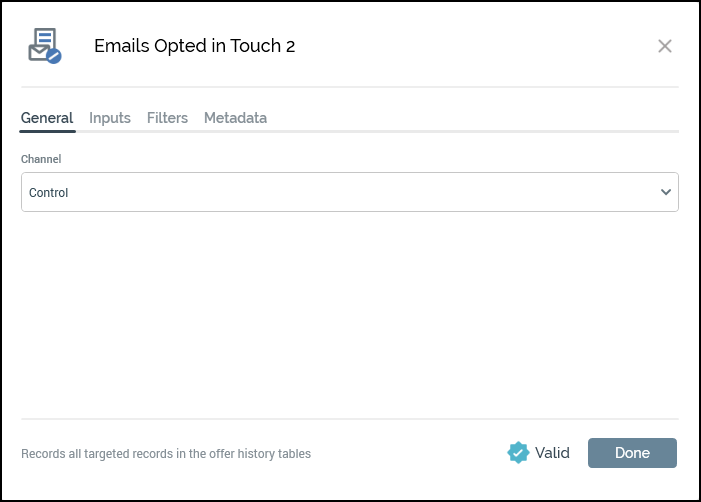
Control: This process block is used to either execute an offer, generate an export file, or in this case write to a control table. This process will work with any of those options but for this example a control group was used.

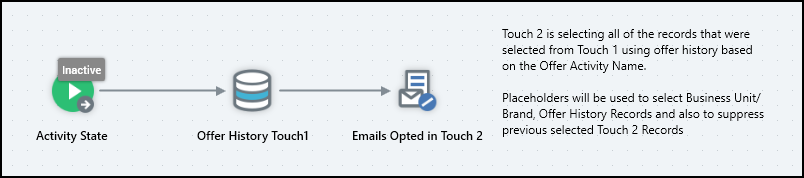
Touch 2+
Based on the initial screenshot showing the overall interaction there are three of the exact same workflows that allow a user to configure them based on how many touch points they want to have within their campaign. The following screenshot shows the 3 parts that make up the subsequent workflows for touch point selections.
-
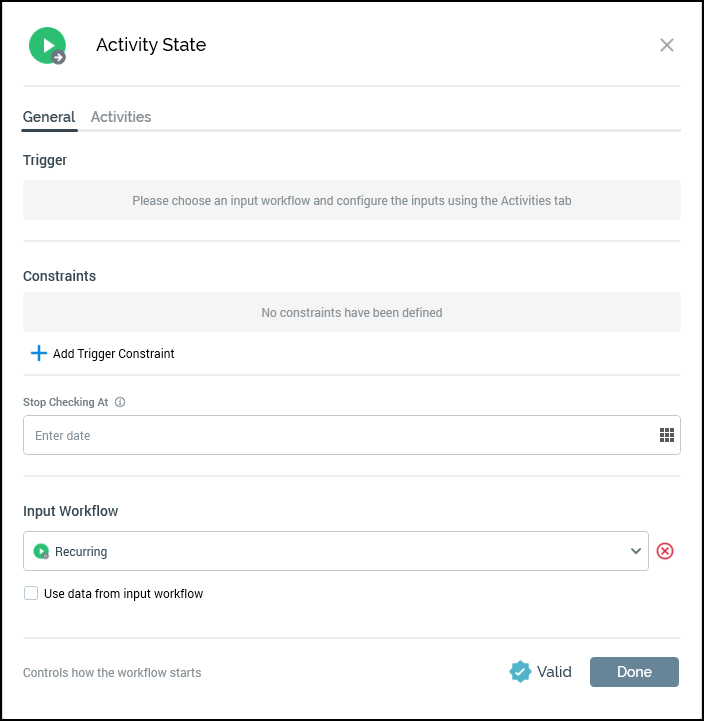
Activity State (General): This process block allows you to trigger a workflow based on a previous workflow's completion. In the screenshot you can see that the Recurring workflow that ties to touch point 1 from the information above is being used as the “Input Workflow”. This allows you to use any of the pieces from that flow to trigger touch point 2 to start.
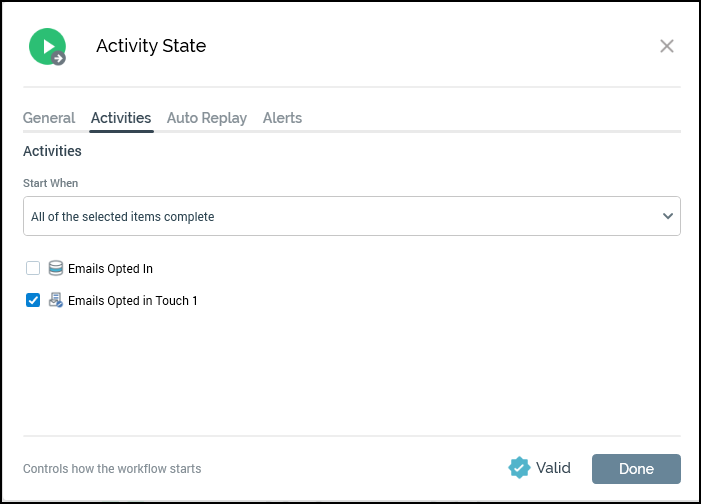
Activity State (Activities): Within this section, once the input workflow has been selected, you can select one or more activities that need to complete in order for the workflow to begin running. In this instance, the control process block has been selected. This means that all records from touch point 1 will have been selected and written to offer history prior to touch point 2 starting.
-
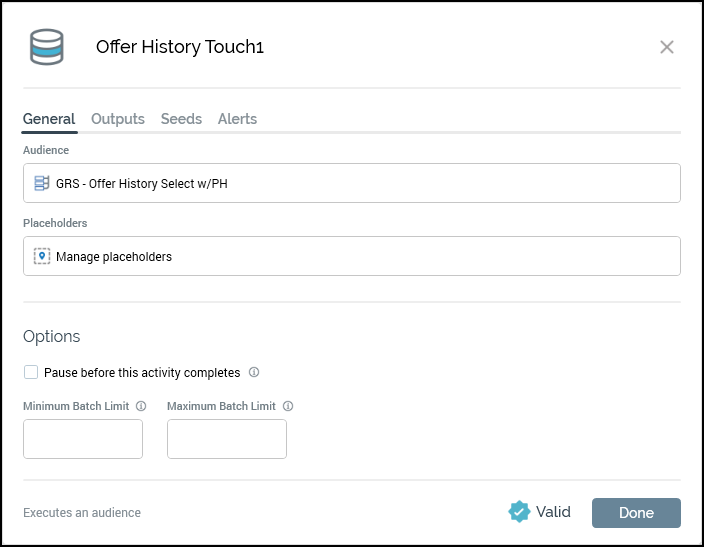
Batch Audience: This process block is where the user-created audience is assigned and run at time of processing. We will dig further into the audience set up in the next section, but this is just a look at how this process block would be configured to run an audience.
-
Audience: In this example, an audience has been assigned, which is “IGR - Offer History Select w/PH”. We look deeper into this audience further into this document.
-
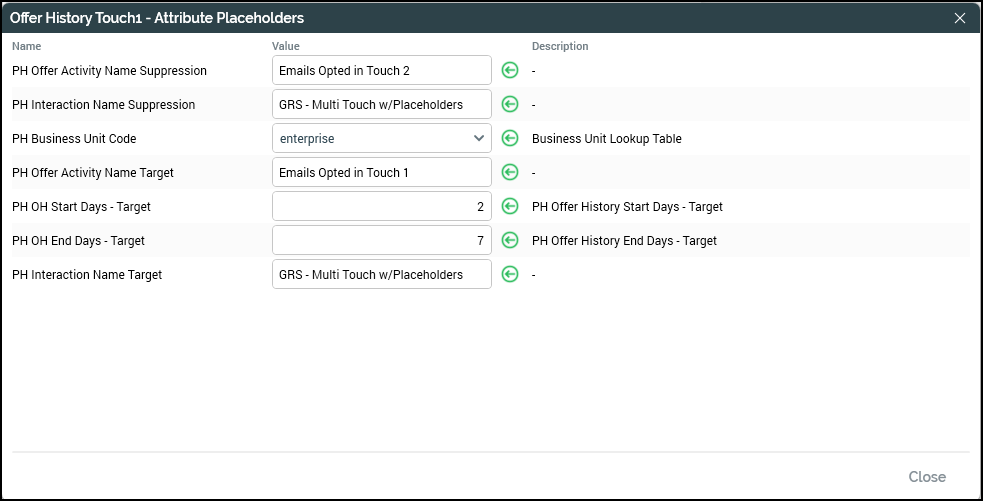
Placeholders: These are attributes that have been created to simplify updating criteria within the selection rules within an audience. This configuration lets you make these changes in one place without needing to go into the underlying audience. In the screenshot below, there are multiple placeholders for the touch point 2 audience, which helps you select records based on data within the offer history table from the initial touch point workflow.
-
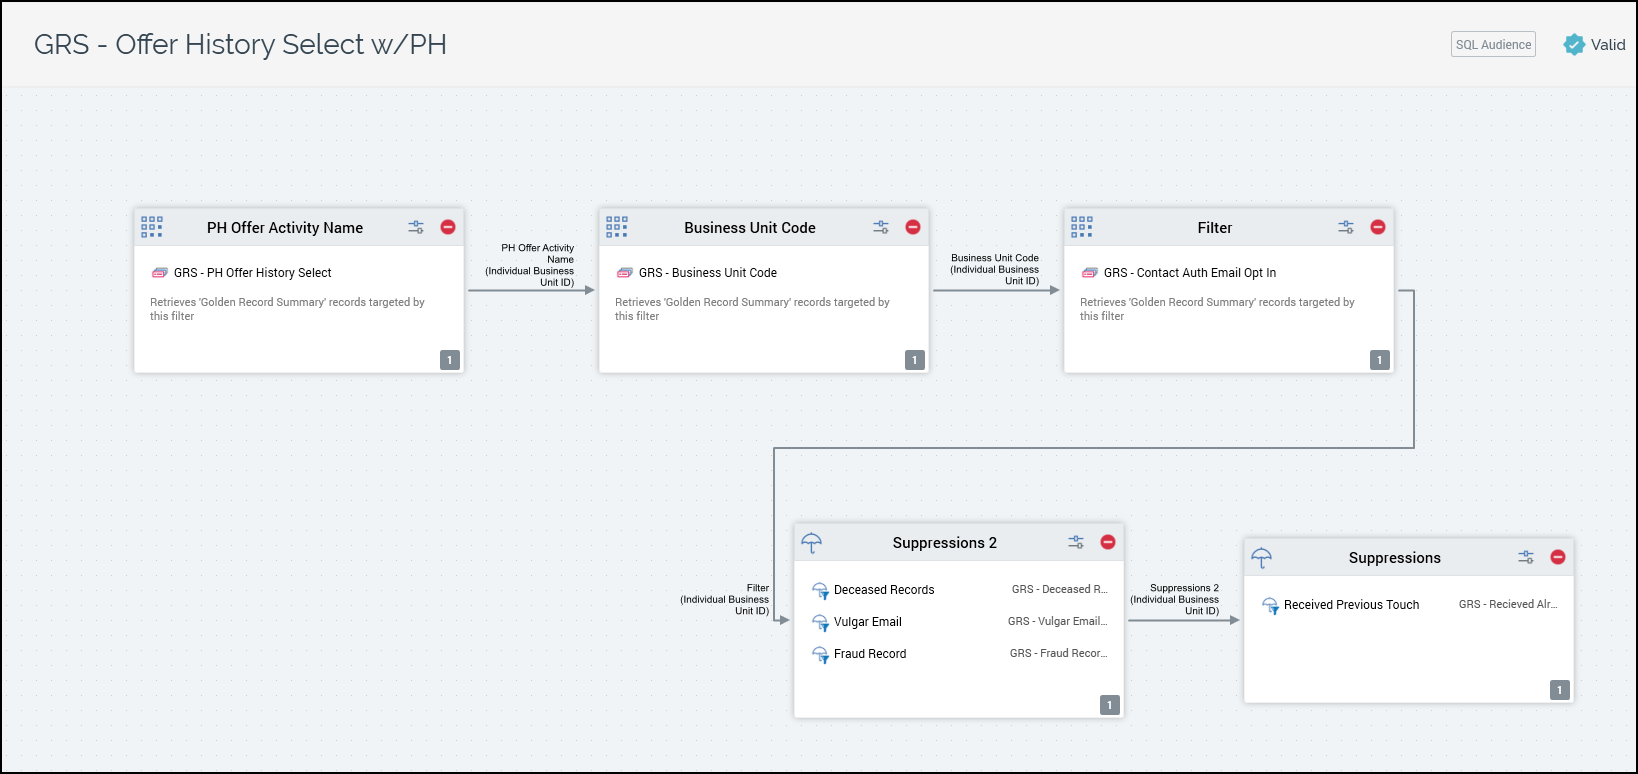
Audience: GRS - Offer History Select w/PH
-
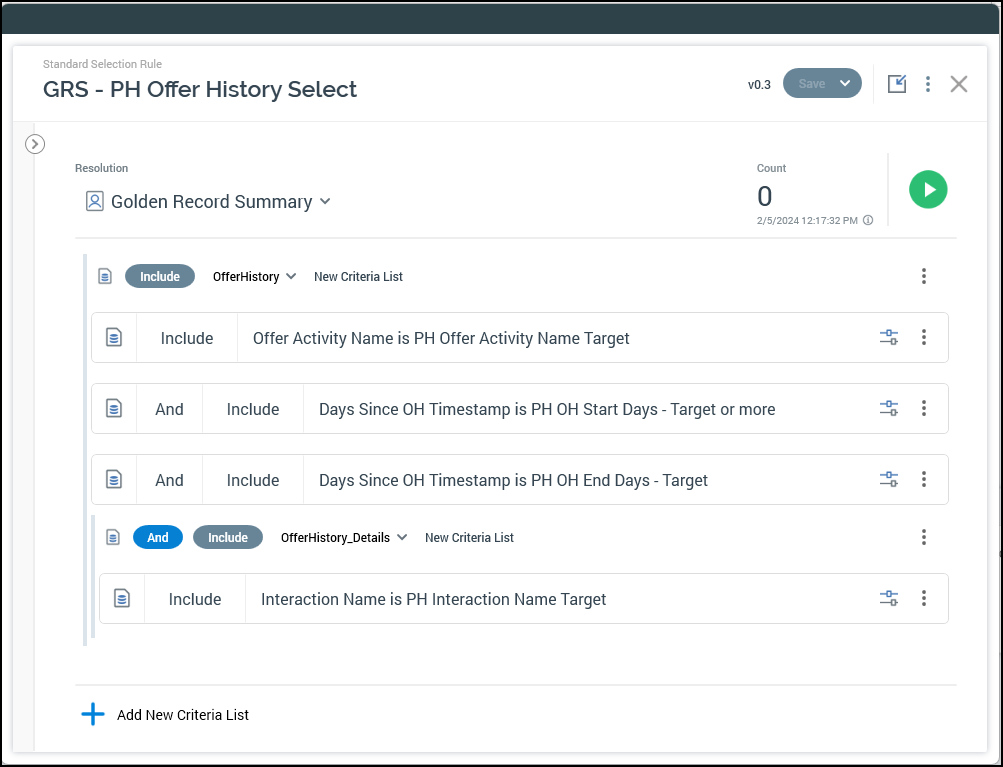
The first process block within the audience is a filter block. The configured selection rule in this filter block is looking for records within Offer History (OH) and Offer History details based on a number of placeholder (PH) attributes. The placeholders that are being used are:
-
PH Offer Activity Name Target
-
PH OH Start Days - Target
-
PH OH End Days - Target
-
PH Interaction Name Target
-
See the Placeholder attribute information page for more information about configured placeholders.
The defined selection rule selects records based on the Offer Activity Name, #of Days to look back for those records (2 days in this example), #of max days to look back (7 days in this example), and then finally the Interaction name that was used within the first touch point. Each of these rules are configurable placeholders mentioned above.
-
The second process block is another filter; it’s the same filter that was used in the touch 1 initial selection workflow. This filter verifies that the records being selected from Offer History are still associated with the originally selected brand from flow one.

-
The third process block takes the qualified records and verifies they are still opted into email since they were originally selected in flow one. This ensures no records are sent a message that no longer want to receive them.
-
The fourth process block is a suppression process that removes records based on the selected rules within it. This block is the same that was used within touch point 1 as well.
-
The fifth process block is another suppression block. Although it could be combined with the previous block, having it separate it allows you to see drop off counts easily between the two different blocks. The rule that is being applied here is selecting records that have already received the current touch point, which in this case would be touch point 2. This prevents duplicate sends to the same user within the 2-day to 7-day window from the first selection in this workflow.
The use of placeholders is similar to those used within the selection rule above. But in this case, the placeholders have “Suppression” in the name.

-
Control: This process block is used to either execute an offer, generate an export file, or in this case write to a control table. This process will work with any of those options but for this example a control group was used.