Overview
Up until this point we have only been concerned with assigning coupon codes to a single resolution, but stated that you could use multiple resolutions, which increases the complexity. In this section, we will cover the changes that you need to make to use more than one resolution.
When we state that that we will support two resolutions for coupon assignment, that implies that we will have two separate audience definitions, each using a different resolution. In this example we will use Person and Prospective Buyer as the two resolutions/audiences that we will work with.
The resolution for Person is PID, and the resolution for Prospective Buyer is ProspectiveBuyerKey. The key to supporting multiple resolutions is that you need to write both resolution keys to the Coupon Assignment table to ensure that the join from OfferHistory to Coupon Assignment will return records. What that means is that both the resolution keys need to be populated for the join to work as expected. What we can’t guarantee is that one resolution will have both keys or even if they do have both keys they may not be populated.
In this example Person doesn’t contain a Prospective Buyer Key at all, and Prospective Buyer has PID, but it is not always populated. This will require us to create custom attributes to facilitate having a value for both fields, regardless of whether the coupon is being applied to a Person or Prospective Buyer.
The generic way that the coupon assignment table is defined allows for multiple keys that are either integer or varchar values. In this case, PID is already assigned to resolution_key_int01 and ProspectiveBuyerKey is also an integer, so we will assign it to resolution_key_int02. In this case we are using two integers, but the same approach will work with varchars as well.
Step 1: Create custom attributes
We will start by creating custom attributes to support the fact that we need a value for each of the resolution keys, regardless of which one we are assigning coupons to. The thing to remember is that the audience will always be unique on the resolution key of the audience definition that is being used in the audience. The fact that we need to load the other key is just to support the join, because you can’t join on a null value. There are various ways that we could do this, but based on fact that we don’t have a ProspectiveBuyerKey for Person, that will require one approach. Although that one approach may be sufficient in both cases, since we do have PID for the Prospective Buyer table, we will show two different approaches to accomplish this solution of using multiple keys. The approach that we are using for Person and assigning a ProspectiveBuyerKey would be suitable for both audiences, but again we are trying to show the options that are available to you and allow you to capture as much detail as is available at the time of assigning coupons.
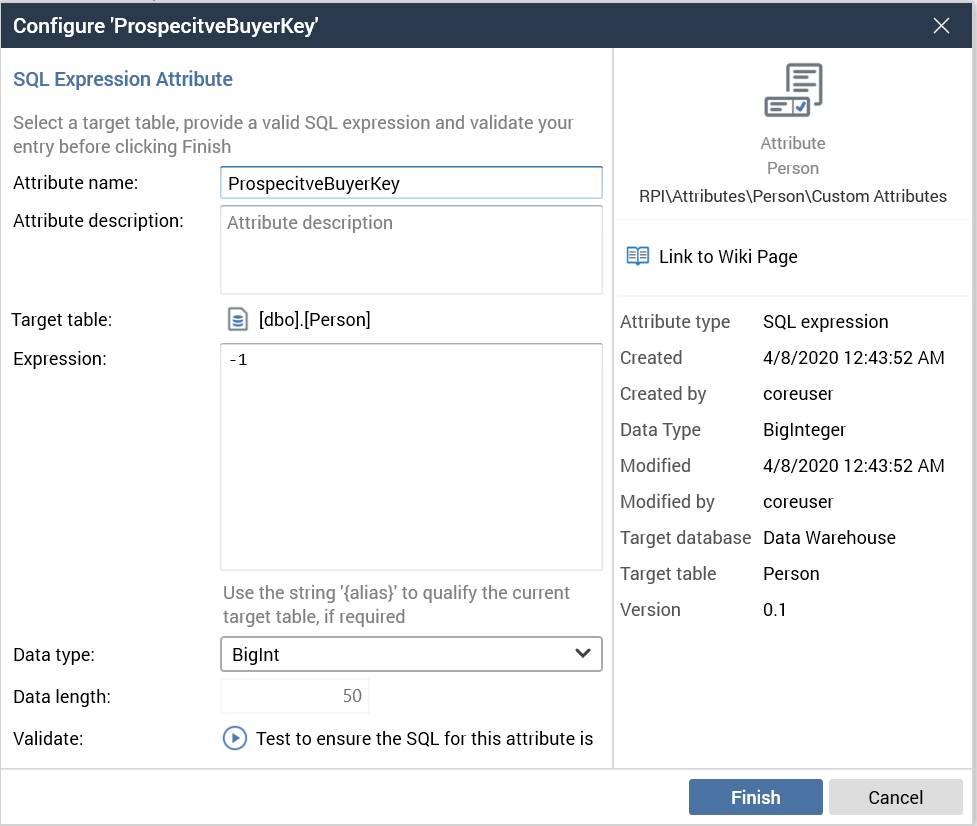
As mentioned, the Person table doesn’t contain a ProspectiveBuyerKey at all. So, we will create a custom attribute and assign it a value of -1 in order to fulfill having a ProspectiveBuyerKey. When creating a custom attribute for this purpose, we always use the base resolution table as the Target table, and the attribute name needs to be spelled exactly how the Resolution Key is spelled.
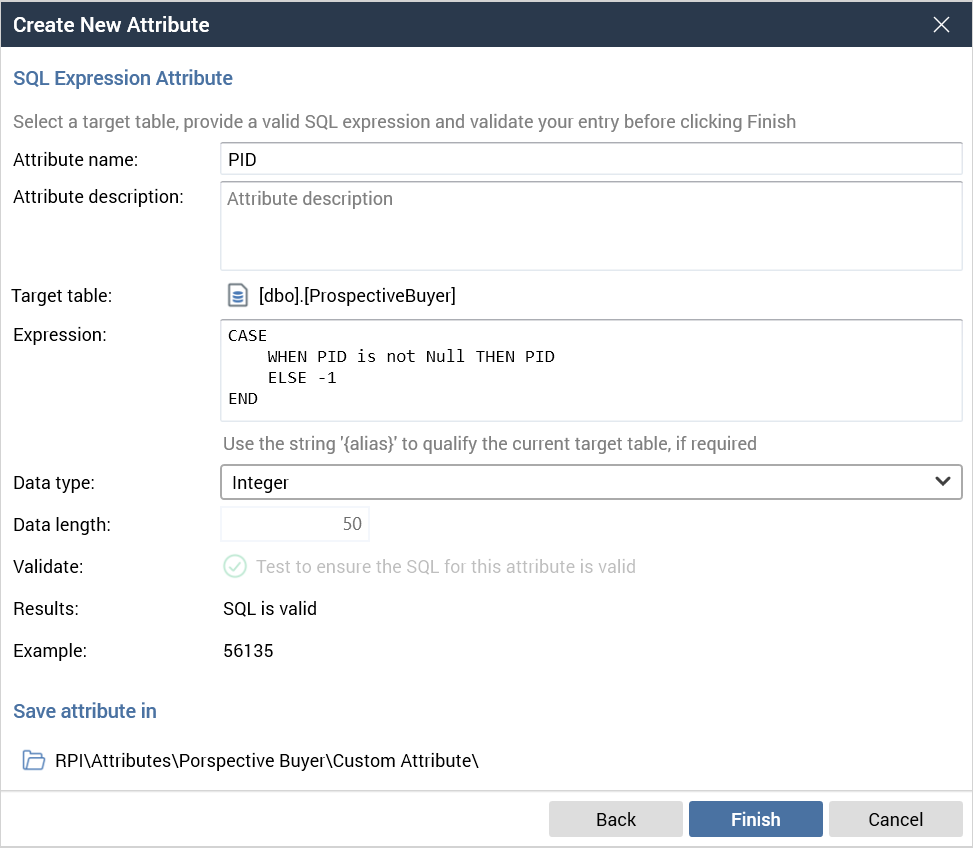
In the case of Prospective Buyer, we have PID, but it is not always populated. So, we will use a case statement to use the PID if it is populated, and to set it to -1 if it is not populated.
Step 2: Assign custom attributes to the audience definitions
-
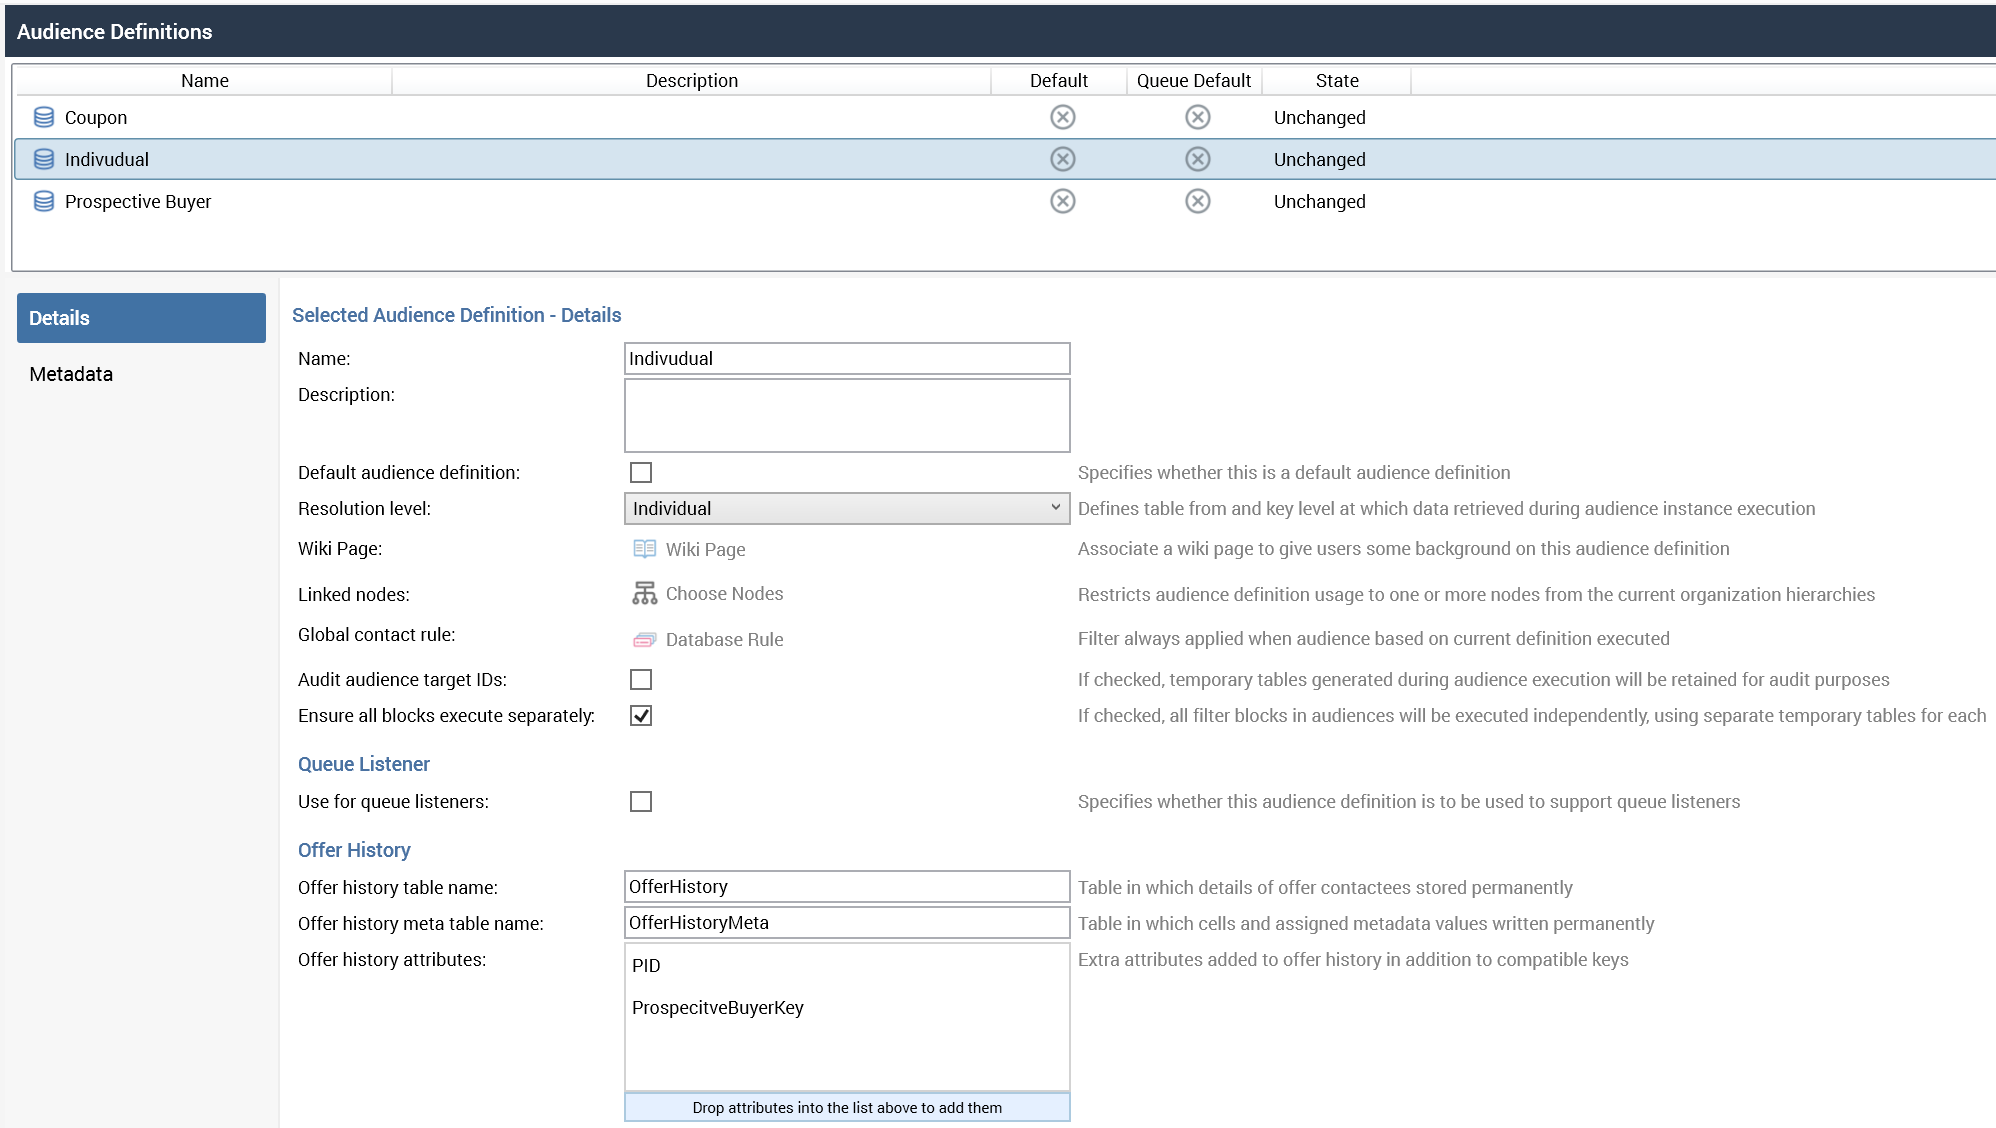
Start by adding the Prospective Buyer Key to the to the Individual resolution.
-
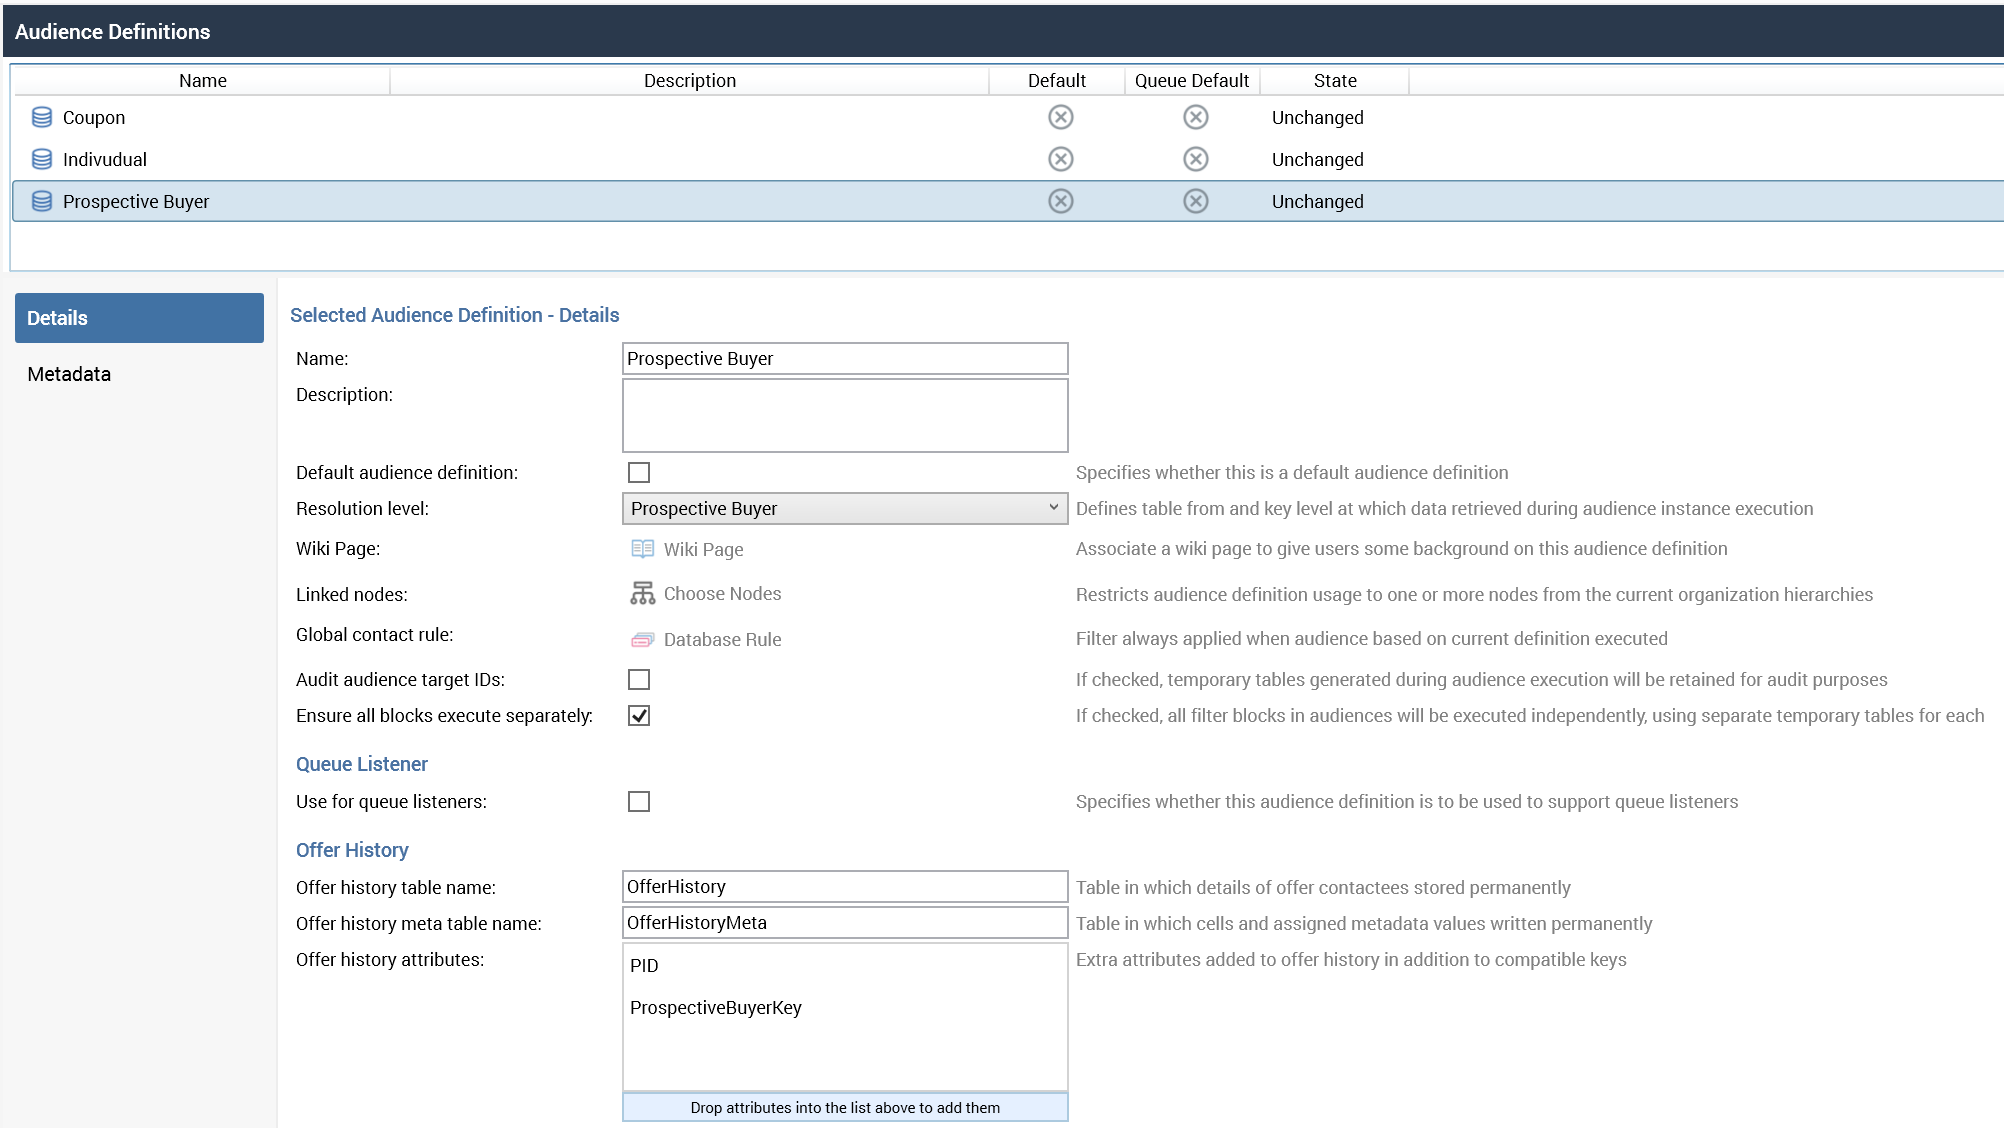
Then the PID to the Prospective Buyer Audience.
Step 3: Make a copy of the RPDM coupon assignment project to support multiple resolutions
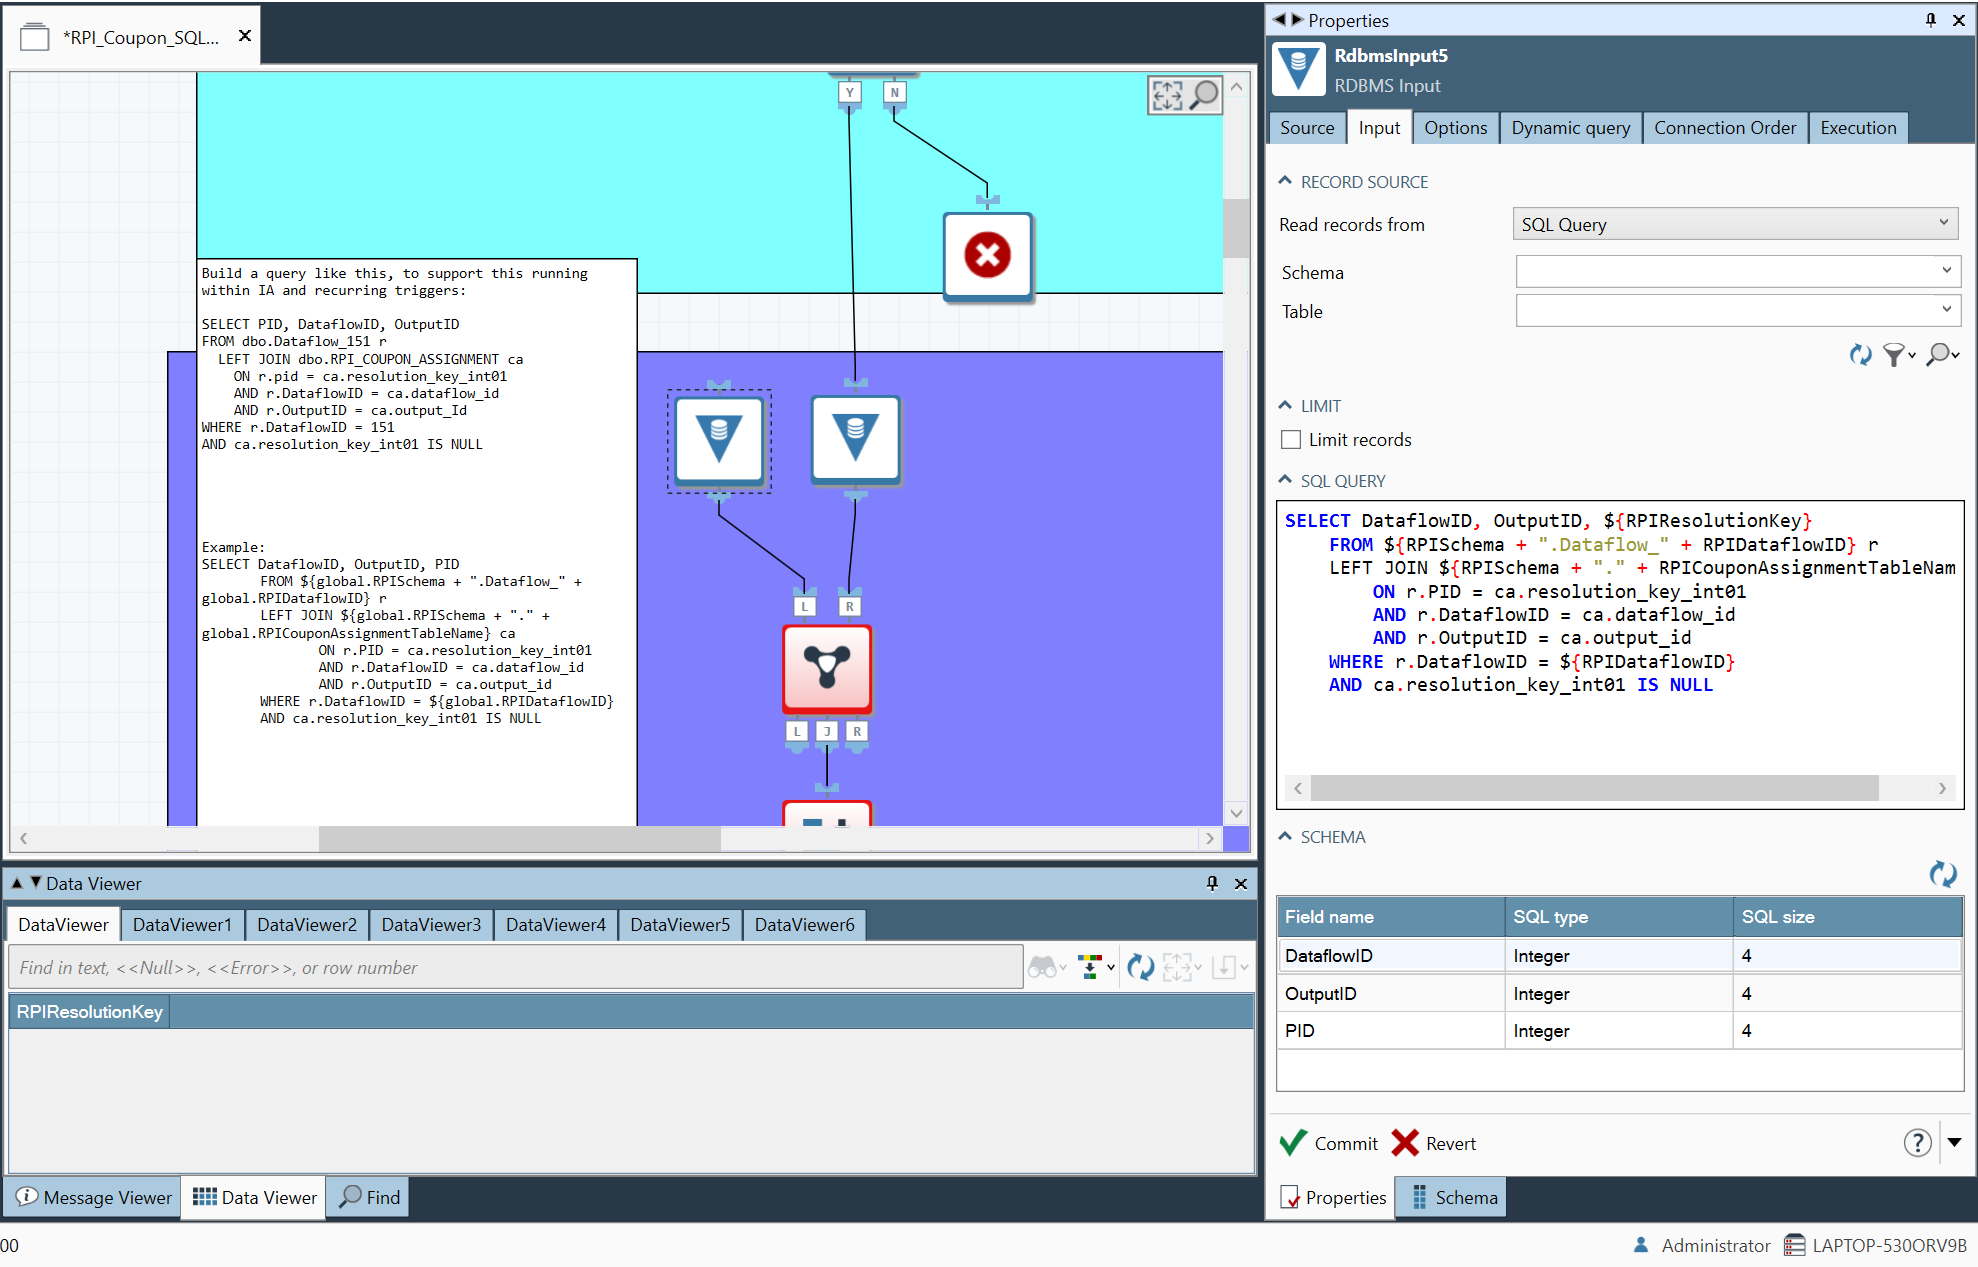
In order to support multiple resolutions, we will need to make a few adjustments to the existing RPDM coupon assignment project. In order to preserve the existing project, we will just make a copy of the existing RPDM coupon project and call it RPI_Coupon_SQLServer_V2. In a future step, we will modify the project to support the additional resolution.
RPI_Coupon_SQLServer_V2:
Step 4: Create a new data process project
Create a new data process project to support connection to the new RPDM project. In a production application, we would just modify the existing RPDM project and RPI data process project, but here we are using an adjusted copy to preserve the original single resolution projects.

Step 5: Test RPI interaction
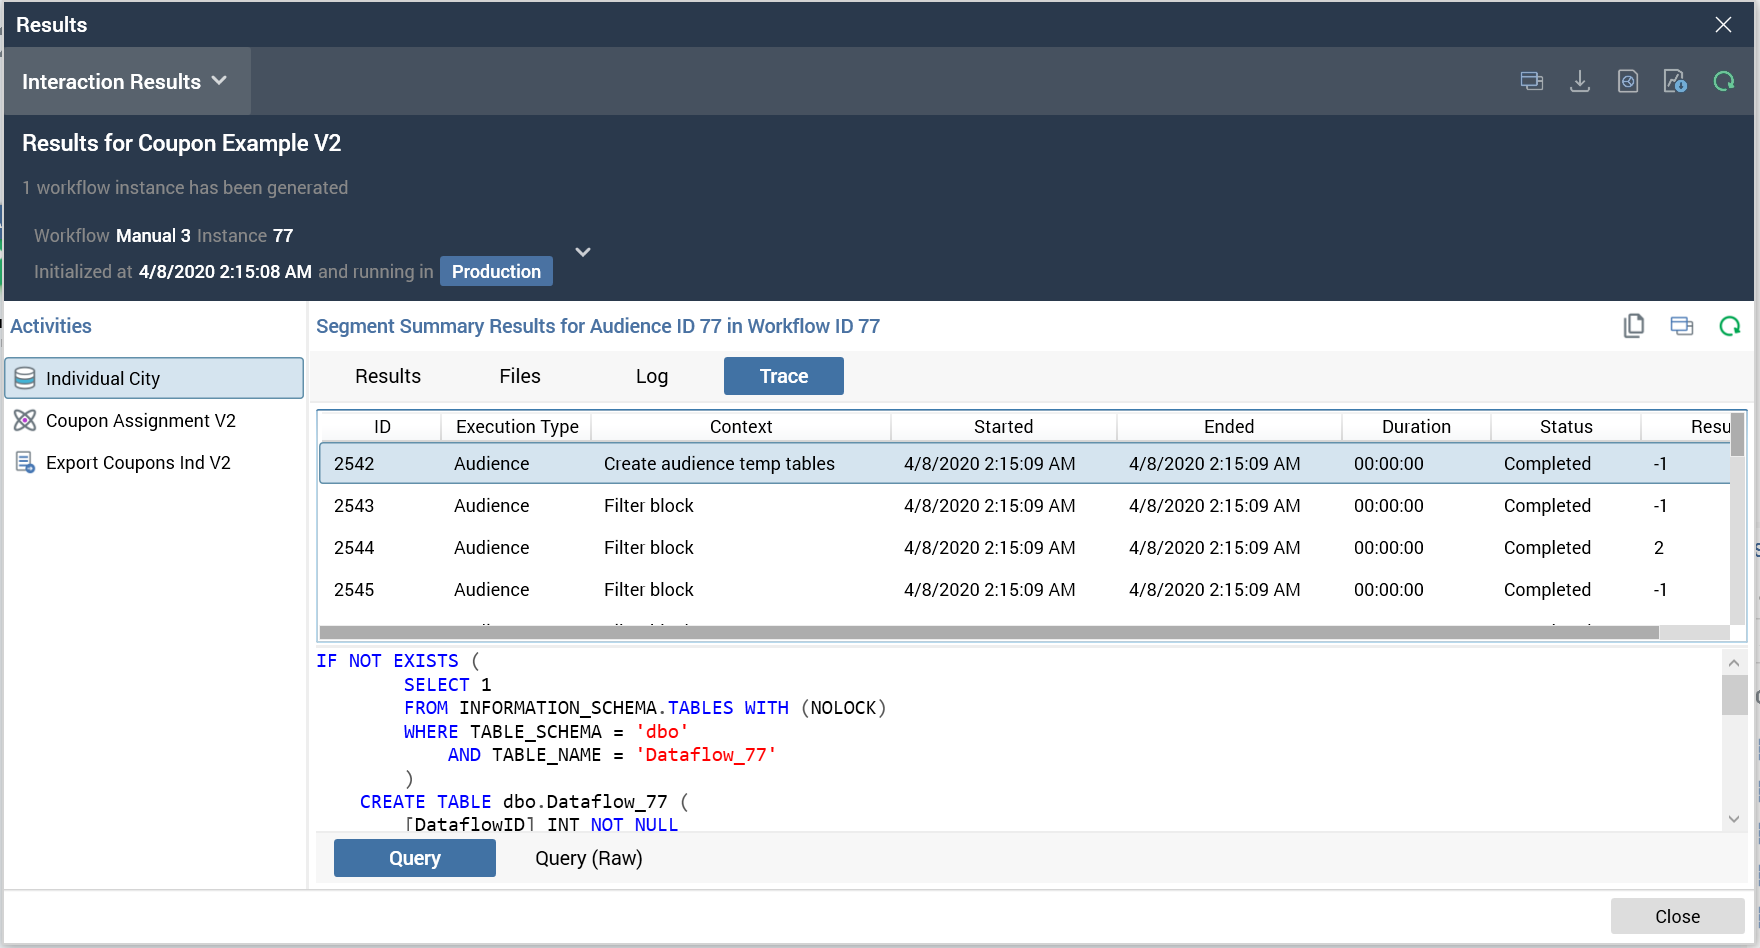
Make a copy of the original coupon example and modify it to call the new coupon process project. Run it up to the wait for event and then take note of the Dataflow table in order to finalize the configuration of version 2 of RPDM coupon assignment.
Starting workflow:

Dataflow reference in the Trace Log:
Step 6: Modify the RPDM coupon project V2
Now that we have a dataflow table that includes the additional resolution key, ProspectiveBuyerKey, we can make the adjustments to the RPDM project.
-
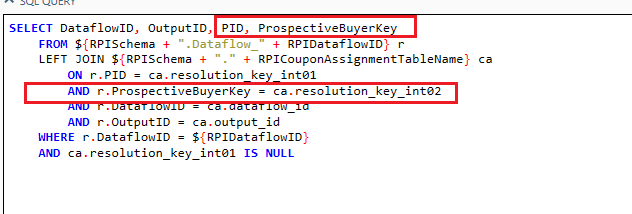
Start by updating the temp table selection. Now that we are using more than one resolution key, you will need to specify the specific field names as opposed to using the variable
RPIResolutionKey. In this example, that will bePIDandProspecitveBuyerKey. -
In addition to this, also modify the join condition to incorporate both keys. You can do this by adding the following line to the join condition:
AND r.ProspectiveBuyerKey = ca.resolution_key_int02
Temp table RDBMS modification example:
-
Continue to the bottom of the project, disable the RBDMS outputs, and execute a test run to ensure that both of the resolutions are being passed through the project as expected.
-
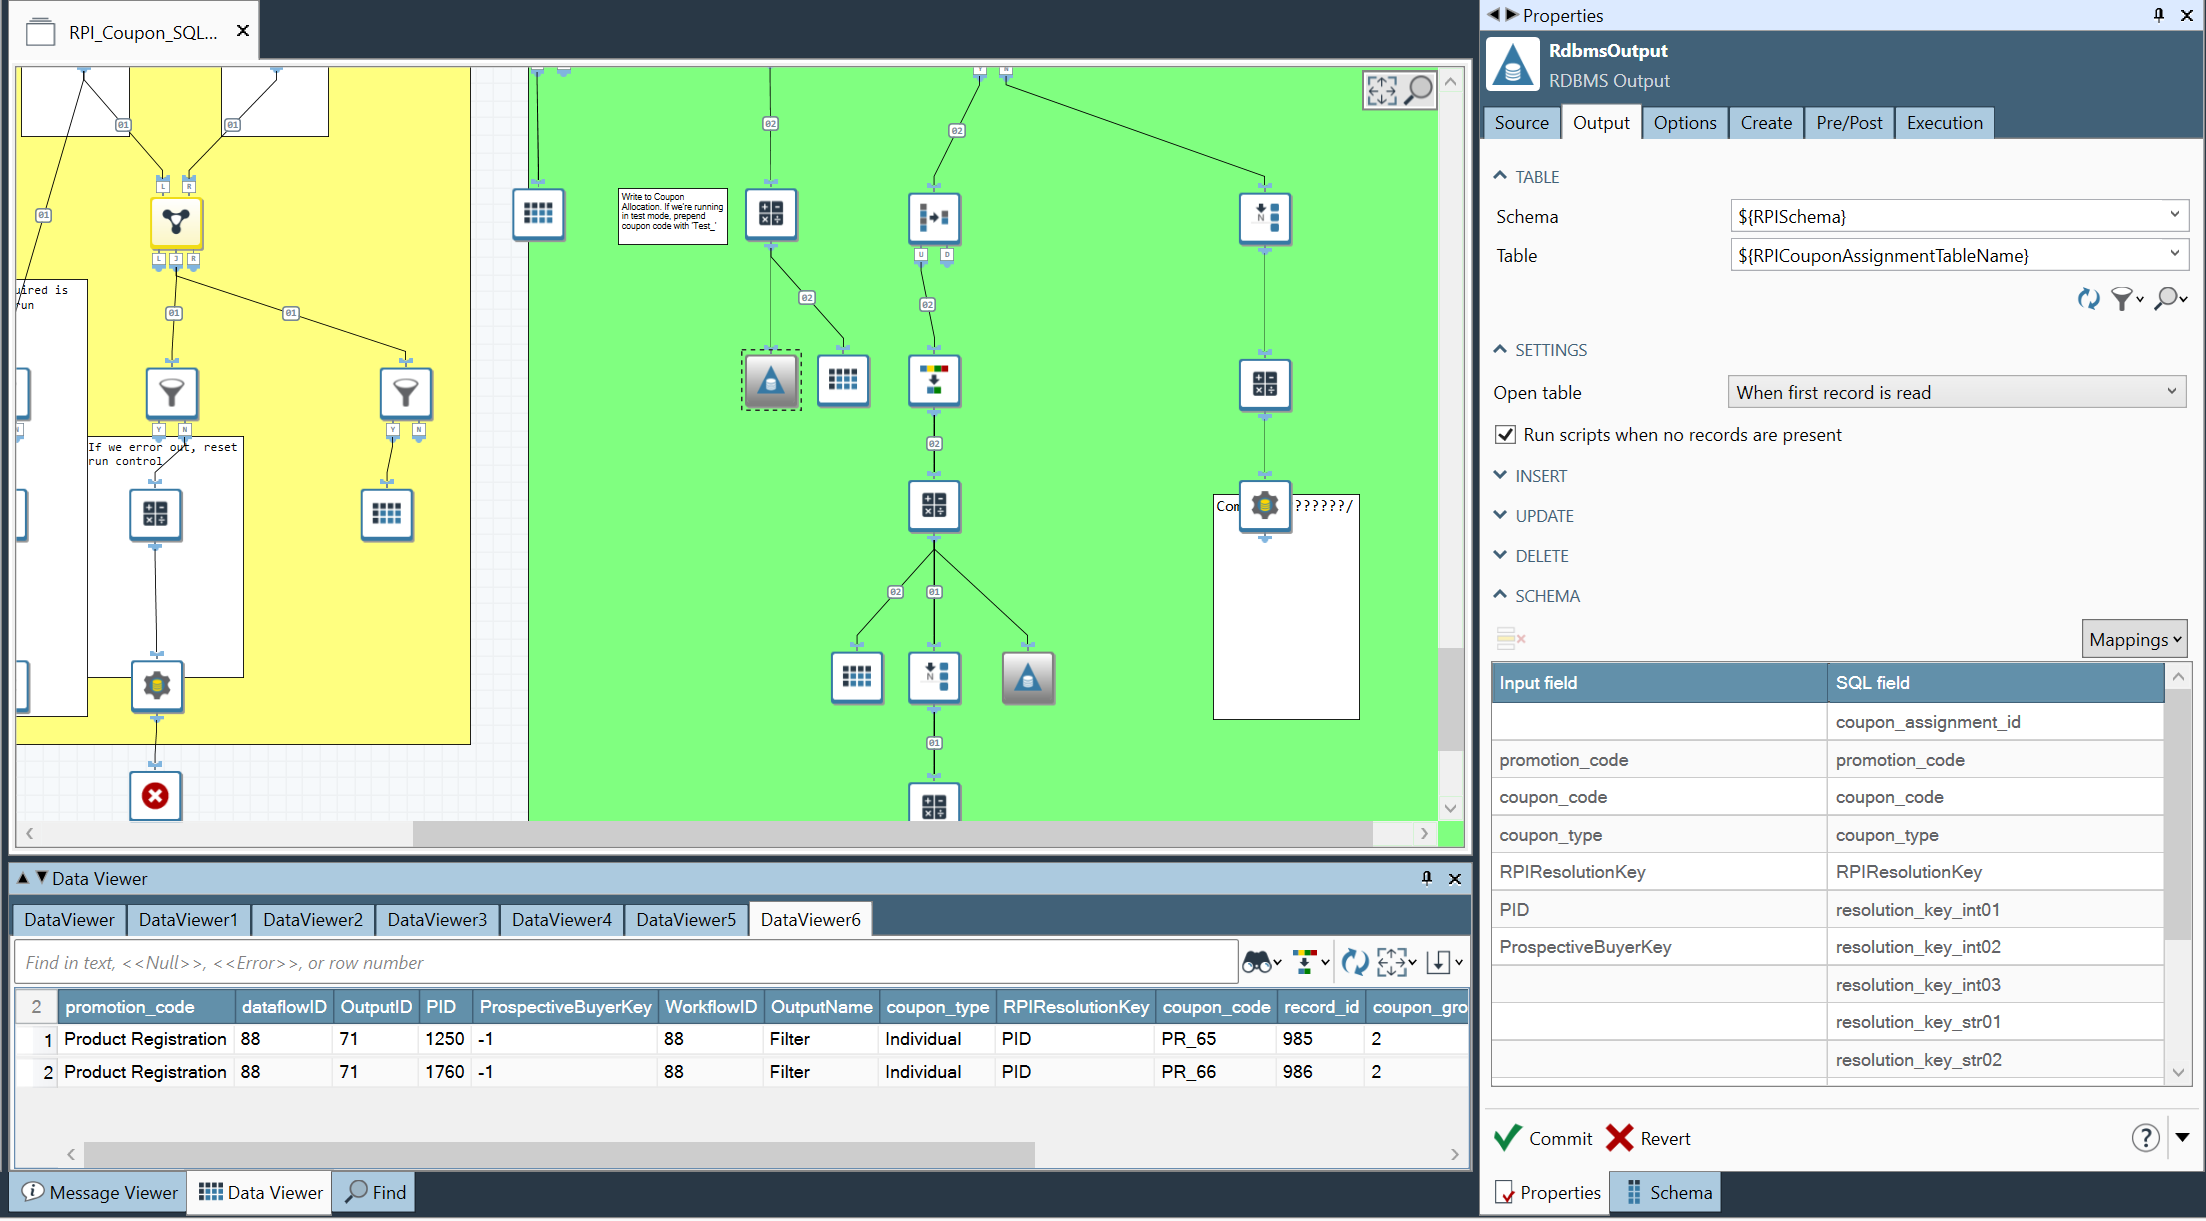
After, update the RDBMS output that inserts into the coupon assignment job and assign the
ProspectiveBuyerKeyto the SQL fieldresolution_key_int02. -
At this point, enable the RDBMS outputs and save the project.
Step 7: Modify coupon assignment join
In order to use multiple resolution keys, you must modify the join from the OfferHistory table to the Coupon Assignment to use both resolution_key_int01 and resolution_key_int02.

Step 8: Add a multi-join for the prospective buyer
Create a multiple join from ProspectiveBuyer to RPI_COUPON_ASSIGNMENT: ProspectiveBuyerto OfferHistory toRPI_COUPON_ASSIGNMENT.

Step 9: Continue workflow execution
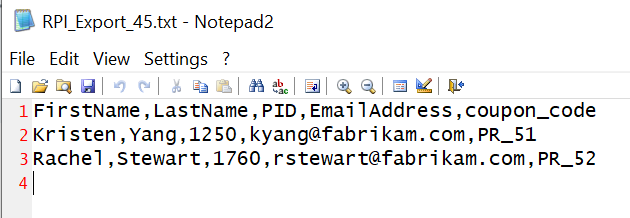
At this point, we can go back to the interaction and complete the execution of the data process project and the extract.

Extract example:
Step 10: Create prospective buyer workflow
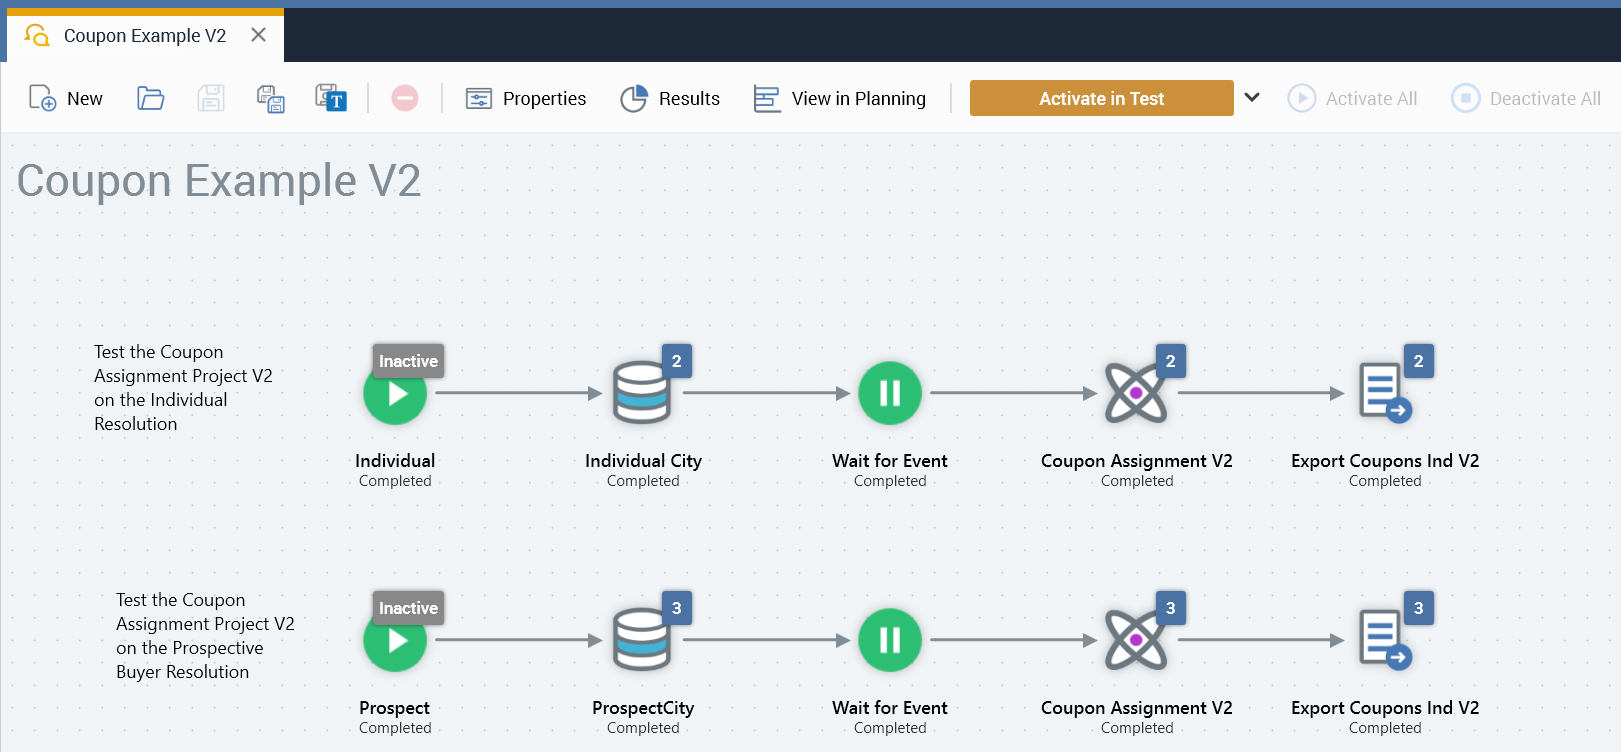
In order to test that the coupon project works for both resolutions, we need to configure a workflow for the prospective buyer
-
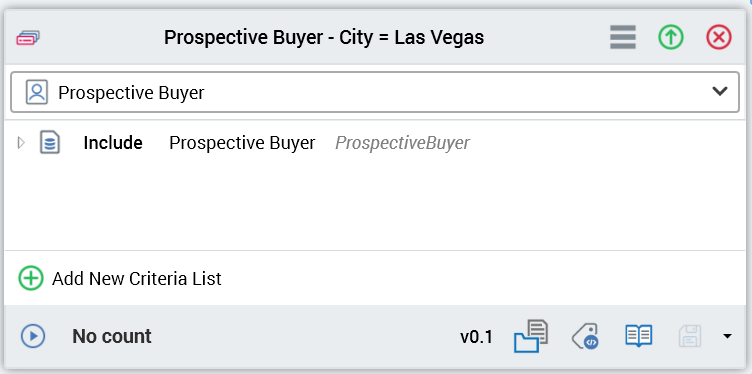
Create a selection rule.
-
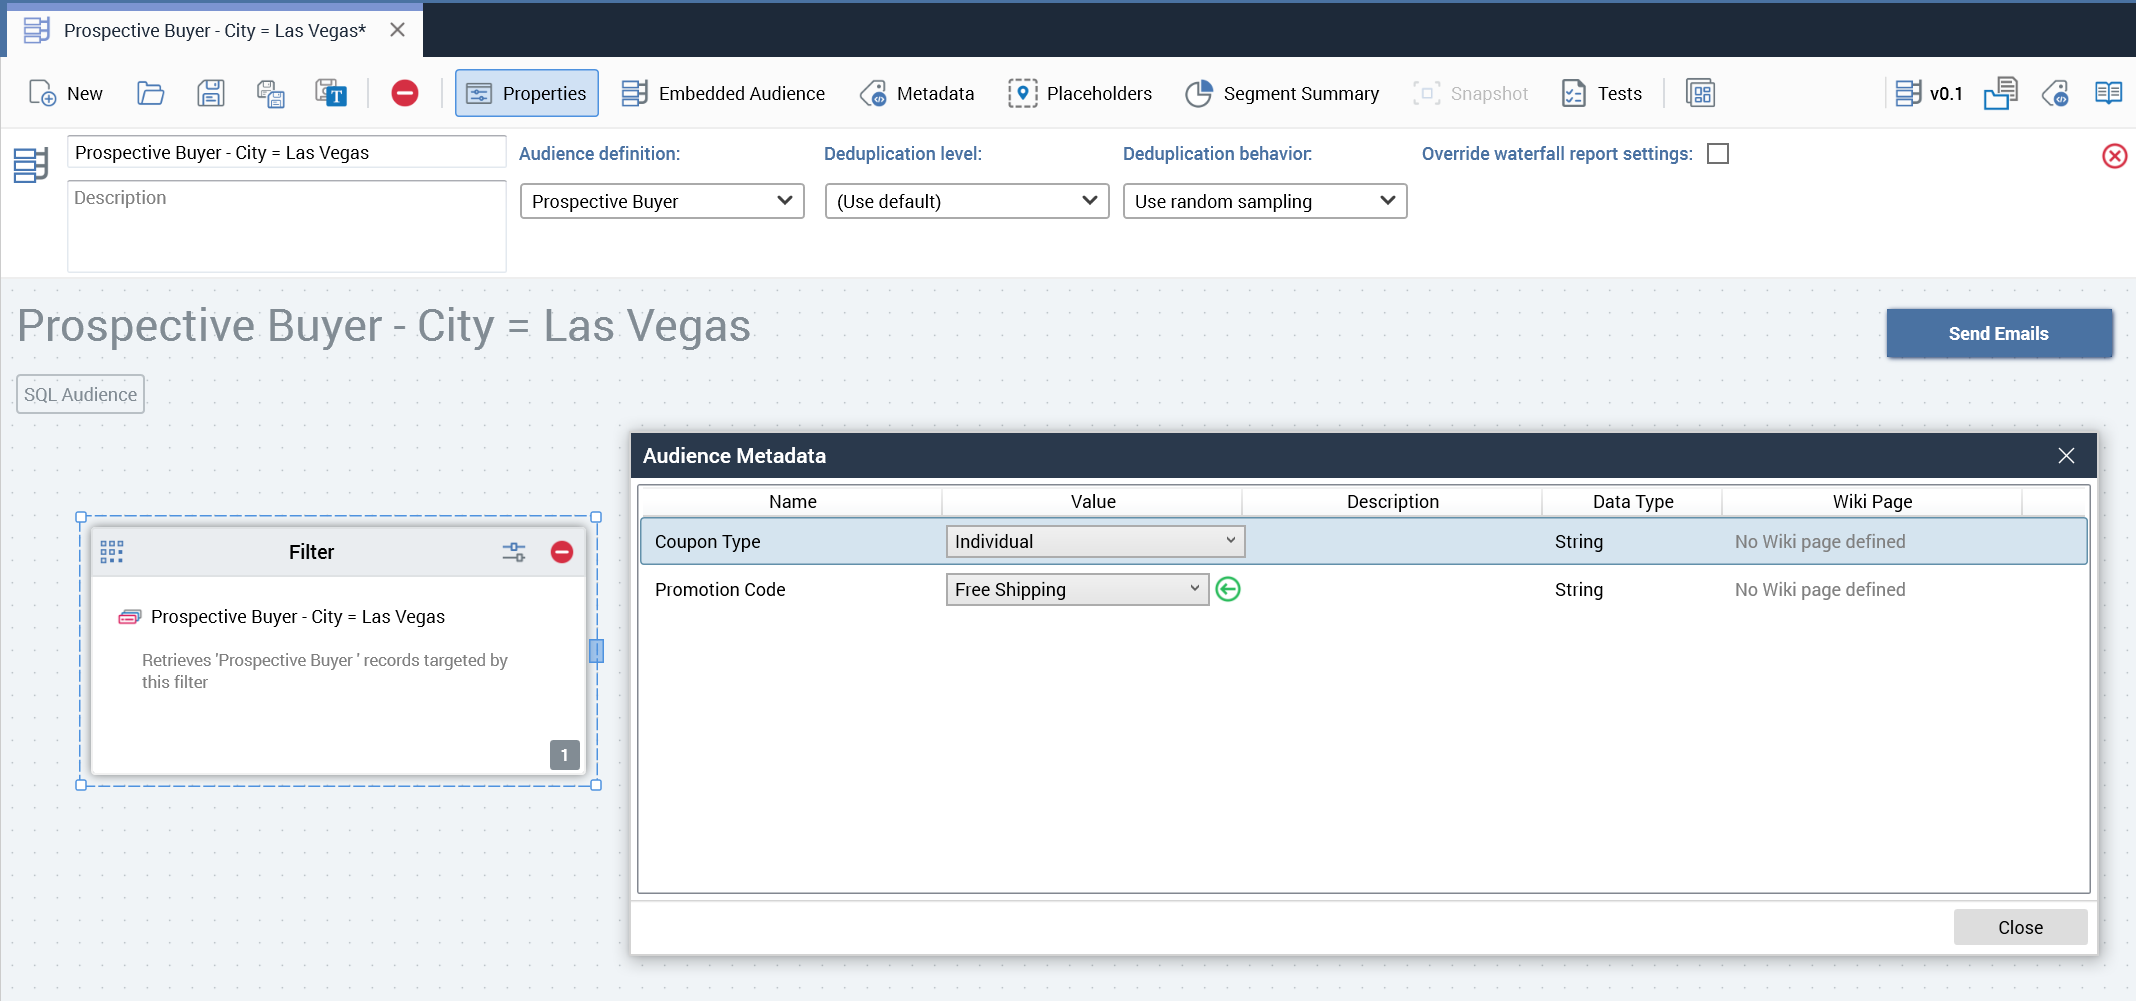
Create an audience.
-
Create a workflow.
Extract example:


