Overview
After you define one or more segments you can combine these prebuilt segments (or use just one) to develop a target audience. You can use the linear builder, as described in this topic, or you can try out our new Audience Builder.
Check out the short video below as we walk through creating an example audience.
Create an audience
-
Select one of the workflow entry points, such as Build an Audience on the Audience page.
-
Hover over the default name “Untitled Audience” and select the pencil icon to name the audience and add a description (optional). You can name the audience now, or at any point in the workflow before you finalize the audience.
The audience will indicate that it’s Invalid until you name it.
-
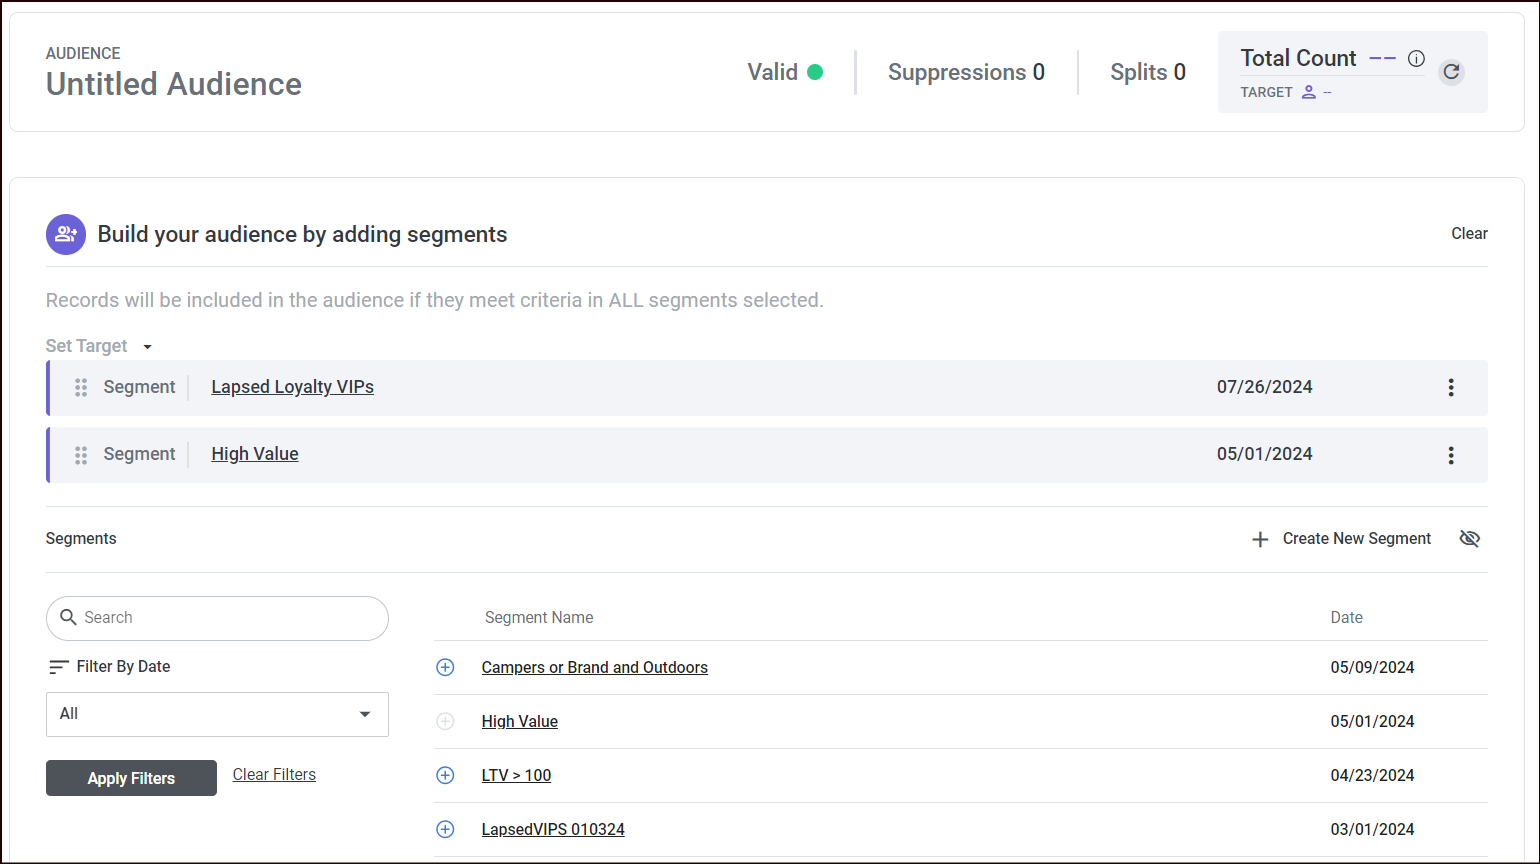
Add segments to the audience.
-
Choose one or more predefined segments by selecting the plus icon

-
Optionally, select an option from the Set Target drop-down menu to refine your target audience.
Target options are based on your organization's defined dedupe settings, with the default generally being an Individual record, but this can be customized at any time if there is a more appropriate default setting (e.g., you could select Household if you wanted to send direct mail to only one member of a household). -
Select the refresh button

-
When you've added all of the segments, select Next or choose your next step in the stepper (at this point, you can skip over the optional steps, if you’re not using suppressions or splits, and go straight to the Add Metadata step):

-
Add suppressions (optional)
-
Add splits (optional)
-
Add suppressions (optional)
A suppression allows you to exclude records that meet certain criteria. This is an optional step; if you don’t want to add suppressions, you can proceed to the next step.
-
If you want to add one or more suppressions to your audience, choose one or more predefined segments by selecting the plus icon
-
Select Create New Segment if you want to define a new segment to use as a suppression.
-
When you've added all of the suppressions, select Next or choose your next step in the stepper:
-
Add splits (optional)
-
Add splits (optional)
A split allows you to further group your audience into smaller groups. This can be useful if you want to conduct A/B testing or if you’re ramping up a new IP address, for example. This is an optional step; if you don’t want to add splits, you can proceed to the next step.
-
If you want to add a split to your audience, select + Add. The added split is displayed in the Splits list.

-
Add as many splits as necessary.
-
On each split added to the list:
-
Select the split name (e.g., Split 1) to display a popup that allows you to customize the split's name.
-
Optionally select Add segment to this split. A popup table of segments is displayed.
-
Select a segment by selecting the plus icon
-
Select a split's Cap Value to display a popup that allows you to change the Cap value (optional) as well as select Percentage or Numeric value. Select Apply.
-
-
When you're finished adding splits, select Next or choose your next step in the stepper:
Add metadata
This step may be optional depending on your configuration of Redpoint CDP.
In this step you can add metadata fields to your audience and each of your splits (if you have added one or more splits). These metadata fields allow you to add description tags to your audience and splits.

-
To add metadata to your audience, select + Add:
-
In the Add Metadata pop-up that appears, select the metadata fields you want to include.
-
If you have splits configured, you can also assign metadata to your splits.
-
Select Add Selected Metadata.
-
Select Set to set the value of the metadata fields.
-
-
When you're finished adding metadata fields, select Next or select Summary in the stepper.
Finalize your audience
-
In the Summary step, check the information to make sure you have defined your audience components correctly. You can select Previous to go back in the audience definition workflow and make changes.
-
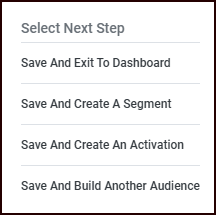
When you're certain your audience is correctly defined, select a going-forward workflow from the down-arrow button and select Save.
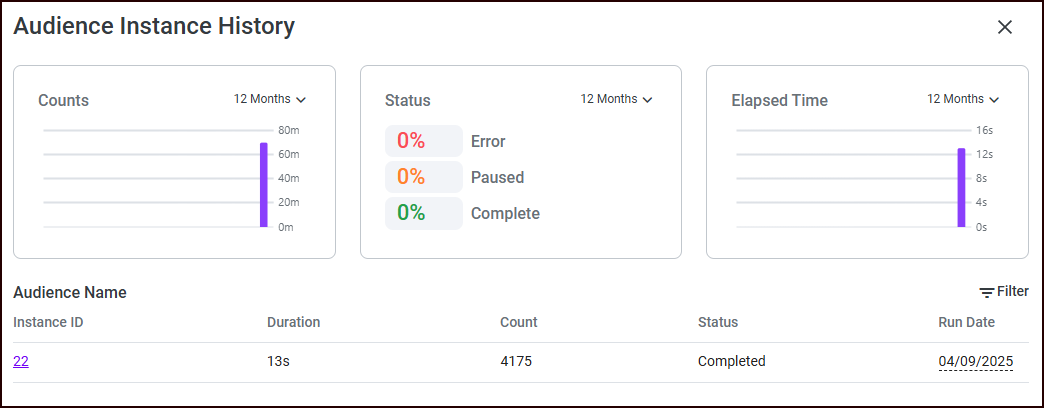
View audience instance history
On the audience Summary page, you can view information about the audience instance and access the instance history by clicking the Audience Instance History link.

When you click Audience Instance History, you can view the following information:
-
Counts
-
Status
-
Elapsed Time
-
Historical Instances