

Temp Spaces and Resource Maps are defined on the Resources tab of the Machine Settings and Site Settings Properties panes. These are typically defined for each Execution Server in a cluster, although you can also define resource maps that apply to the entire site in the Site Server settings.
The Temp spaces grid lists all locations to be used (in parallel) for temporary disk storage for Data Management projects. Each location refers to a folder on a separate physical disk (or separate volume, for SAN- or RAID-based temp storage).
Data Management performs best when there are multiple independent temp spaces, and when the temp spaces are physically separate from the storage of the live data being read or written.
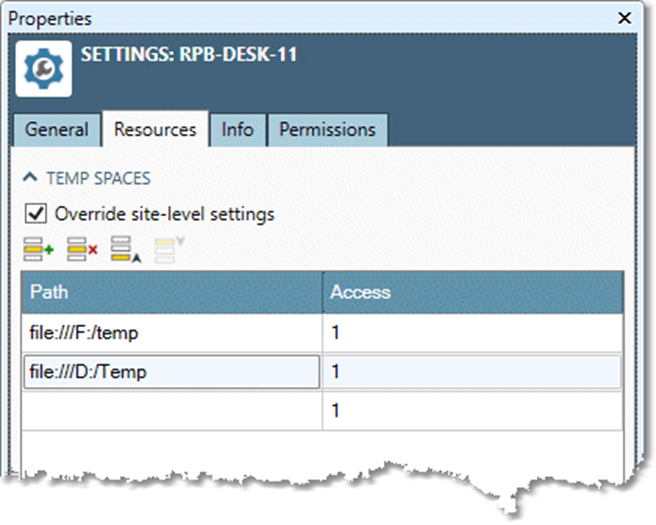
To define temp spaces, select a row in the TEMP SPACES grid and then specify a Path and an Access for each path. Access is a value indicating the usage frequency of this temp space relative to other defined temp spaces. For example, two temp spaces assigned values of 1 and 2 would respectively get about 33% and 67% of the usage. This lets you control the relative distribution of temp space size and bandwidth across multiple temp space locations.
The Resource maps grid lists mappings from the logical names of data resources to their physical paths. Unlike temp spaces, when you define resource maps at the machine level, they do not completely replace the site-level settings. Rather, the site-level resource maps are merged with the machine-level resource maps. This lets you set up defaults that apply to the entire site, but define specific overrides for each Execution Server.
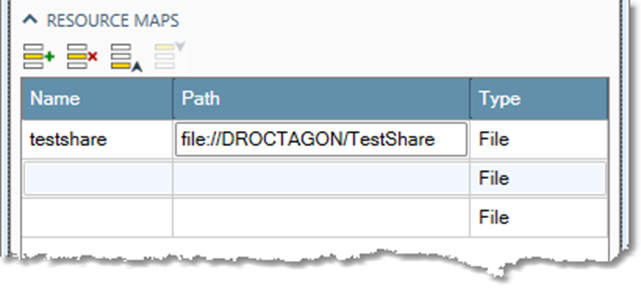
Typically, you define resource maps to isolate your projects from changes in the physical path to data. For example, you might have a file-type resource map named MyData stored at f:\mydata on Server1, but shared on the network as \\Server1\mydata. In this example, the Resource map entry on Server1 would map MyData to file:///F:/mydata. But on every other Execution Server in the cluster, it would be mapped to file://Server1/mydata.
You can also set up resource maps to let you easily change between test and production modes: create a database-type resource map that maps the database name onto different servers depending on whether you are in test or production.
Resource maps can be referenced in variables, using the prefix resource. Use syntax like ${resource.ShareData}/data.csv in applications such as arguments to streaming transforms.
Using resource maps
Once you have defined file resource maps, use them anywhere you can type a file name by substituting the resource map name for the leading part of the file path. For example, if you define the resource map testshare.
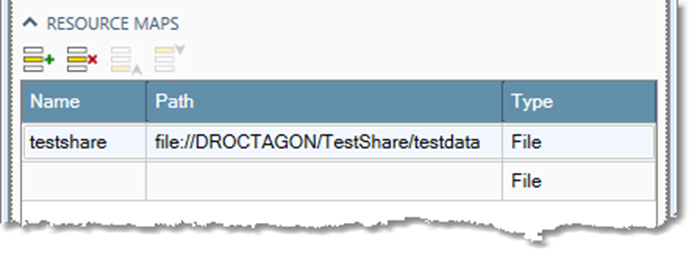
you can use it in any tool that takes a file path, such as CSV Input.
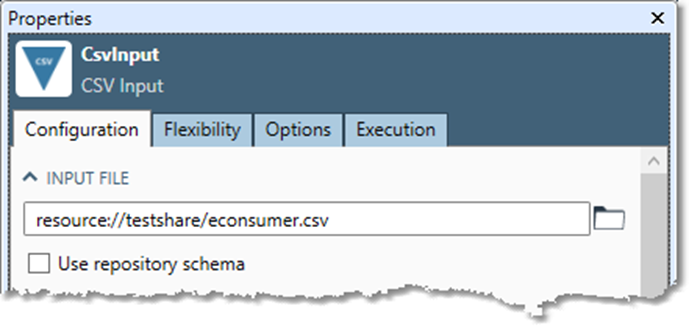
When reading the file, Data Management replaces the testshare with the defined path \\DROCTAGON\TestShare\testdata. This helps isolate Data Management from changes in the physical location of data, and lets you access data found in different locations on different servers using the same logical path.
Once you have defined database resource maps, use them in the RDBMS Input, RDBMS Output, RDBMS Execute tools and Data Connections by using the resource map name instead of a server name. For example, if you define the resource map DB1.
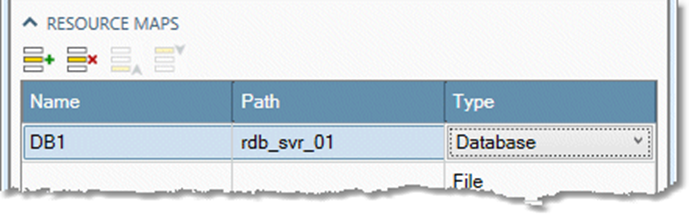
You can use that resource map name when configuring a data connection.