Overview
This page describes how to provision an Amazon SQS. Please follow the steps below.
Create an Amazon AWS Account
You can skip this section if you already have an Amazon AWS account.
-
On your web browser go to AWS.
-
Select the Create an AWS Account button in the upper right corner.
-
Follow the on-screen instructions to enter your email address and an AWS account name, then select Verify email address.
-
Complete the security verification and select Submit.
-
Check your email, provide the verification code, and select Verify.
-
Create a password for your AWS account, then choose Continue.
-
Fill in the required contact information, including your full name and your company/organization name and select Continue.
-
Complete the billing information and choose Verify and Continue.
-
Confirm your identity using your mobile number.
-
Select a plan and select Complete sign up.
You’ve successfully created your Amazon AWS account. Continue to the AWS Management Console.
Create an Amazon SQS Access Key
Select/Create a user
-
On your web browser go to the AWS console.
-
Choose Root user, enter your user email address, then select Next.
-
Enter your password and select Sign in. You’ll be redirected to the Console Dashboard.
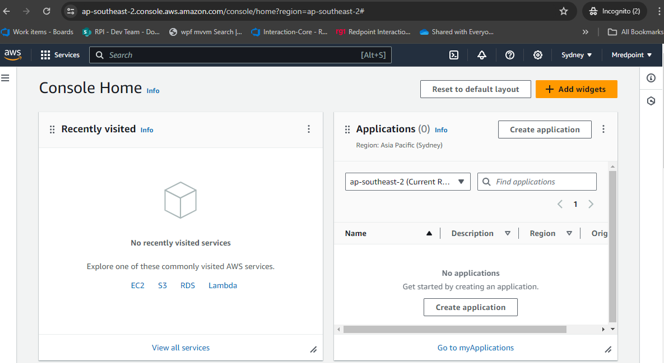
-
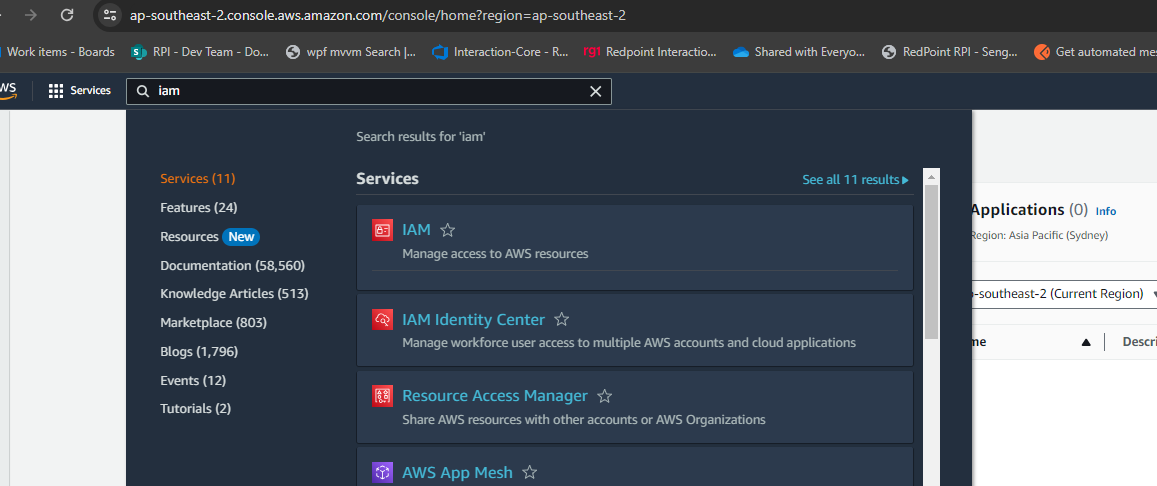
Navigate to the IAM Console, type “IAM” into the search bar at the top of the console. Select IAM from the search results.
-
In the IAM console, select Users in the left navigation pane. This will display a list of IAM users associated with your AWS account. You need to assign the user to the “AmazonSQSFullAccess” permission policy.
-
Choose one of these options:
-
Existing users: select the user you want to give this permission.
-
New users: select Create user to create a new user to give this permission. Once you’ve created the user, select their name from the list.
-
Add permission to user
-
Once you've selected or created a user, navigate to the Permission tab and select Add permission.

-
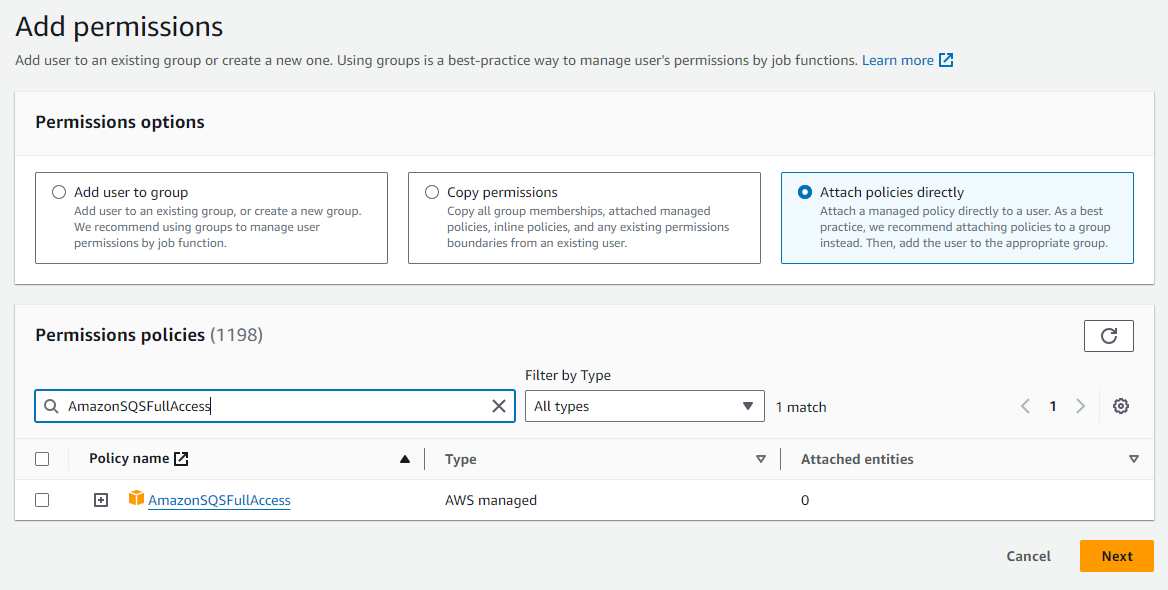
In the "Add permissions" wizard, select Attach existing policies directly.
-
Using the search bar to filter, search for and select "AmazonSQSFullAccess" policy from the dropdown.
-
Choose Next.
-
Select Add permissions.
Generate an access key
Next, you’ll need to generate an access key for the user.
You can skip this section if the user already has an access key.
-
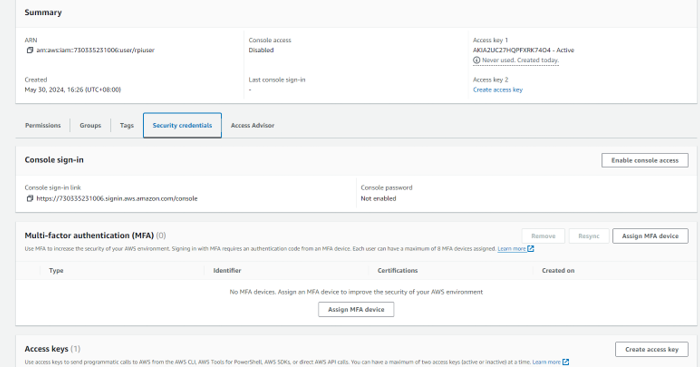
On the selected user, navigate to the Security credentials tab. Here you can manage the user's security credentials, including access keys.
-
Select Create access key. This generates a new access key pair consisting of an Access Key ID and a Secret Access Key.
-
After creating the access key, download the access key details as a CSV file.
Make sure to securely store this file, as you won't be able to access the secret key again through the AWS Management Console.
Create a new queue provider
-
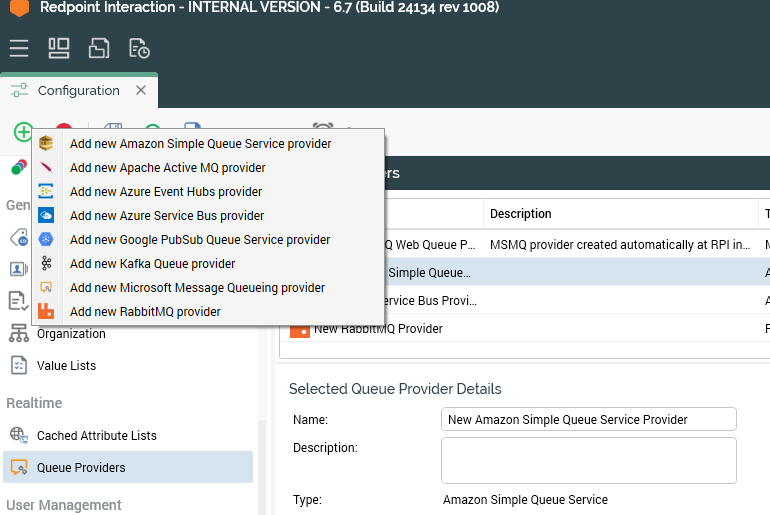
Go to Queue Providers in RPI.
-
Select Create a new Queue Provider.
-
Choose Add new Amazon Simple Queue Service Provider from the dropdown.
-
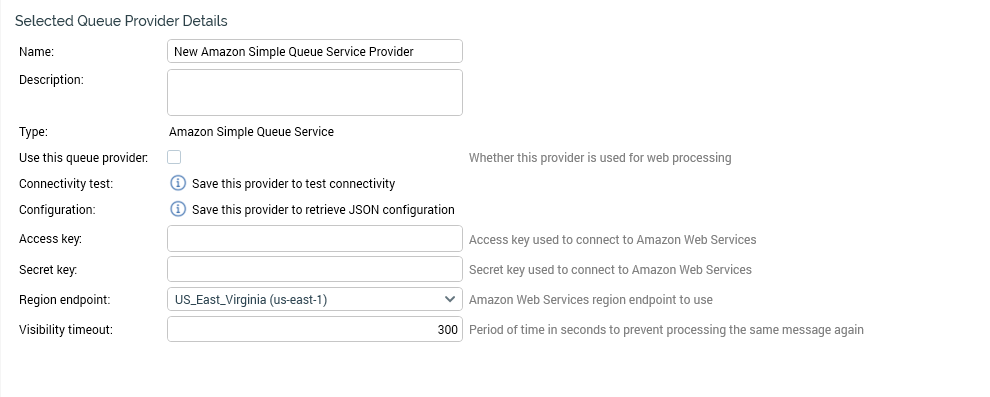
Fill out the Amazon SQS configuration fields and supply the Access Key and Secret Key generated in the previous section.
-
Click Save.
All queues are automatically created as Standard Queue Type.

