

Overview
Azure Event Hubs is not a suitable queue provider for use with Queue Listeners in a multi-node environment.
Provisioning a storage container name and connection string
This section describes how to create and configure Azure Event Hubs in the Windows Azure portal. Please follow the steps below:
-
In a web browser, log in to the Windows Azure portal.
-
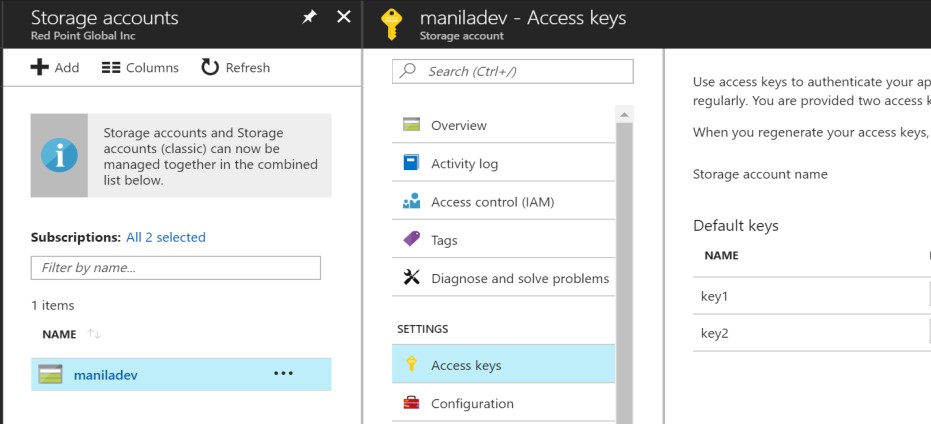
Once you have successfully logged into the portal, search for the “Storage accounts” resource and select Storage accounts.
-
In the list of storage accounts, select and select the appropriate storage account to use.
-
Under Settings, select Access keys.
-
Use the storage account name to configure the storage container name of the RPI Azure Event Hubs queue provider.
-
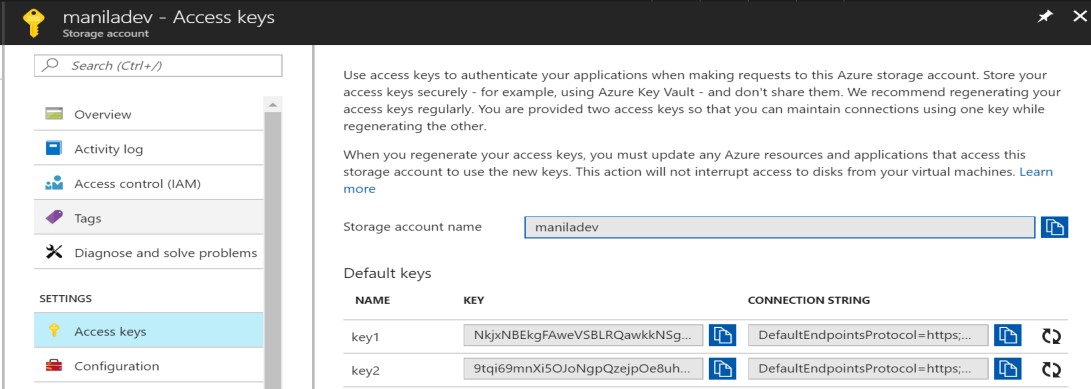
Under Default keys, use the key1 connection string to configure the storage connection string of the RPI Azure Event Hubs queue provider.
Provisioning the event hubs name and connection string
-
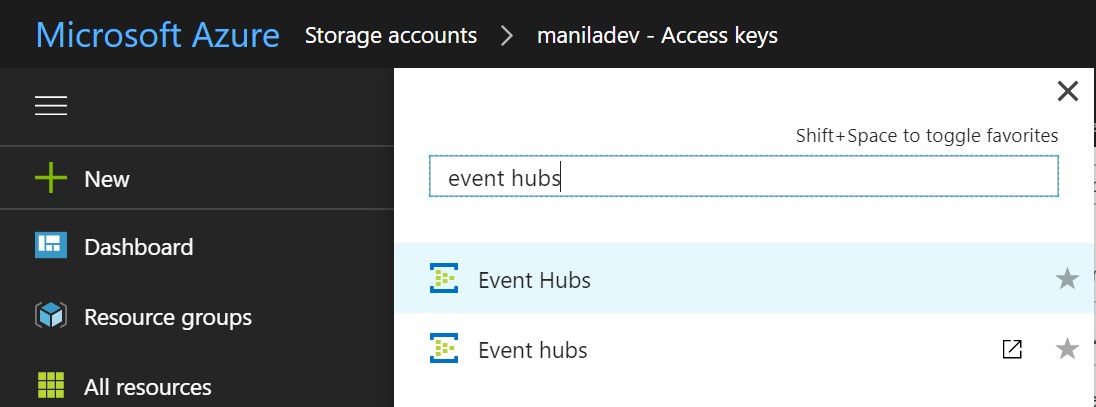
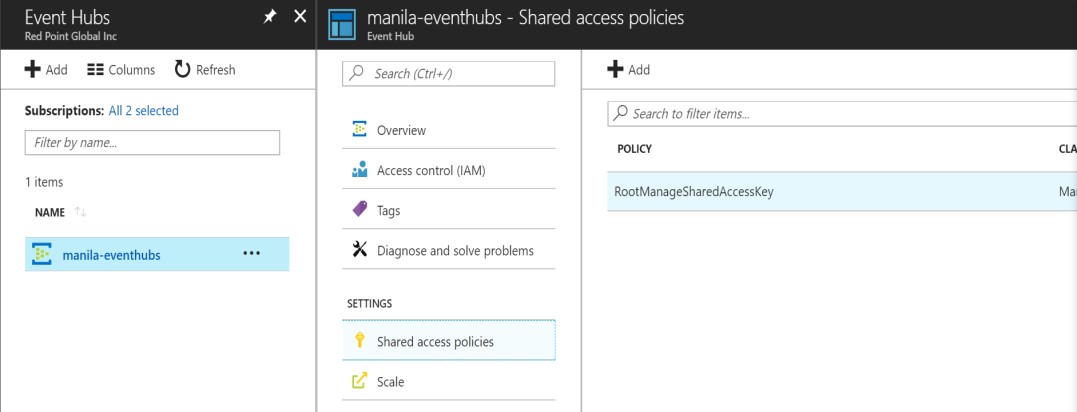
Once you have successfully logged into the portal, search for the “Event Hubs” resource and select Event Hubs.
-
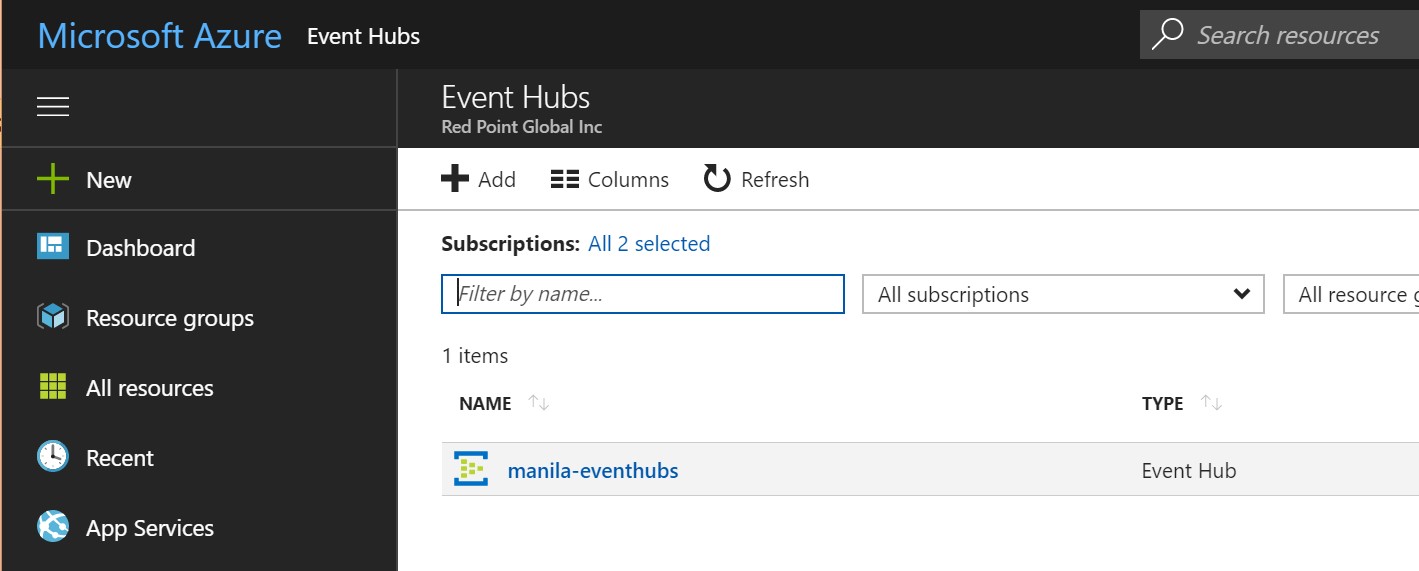
In the list of event hubs, select the appropriate event hub to be used. Take note of the name as you will use this to configure the Event hubs name of the RPI Azure Event Hubs queue provider.
-
Select Shared access policies (located under Settings).
-
Select RootManageShareAccessKey (under Policy).
-
In the “SAS Policy: RootManageSharedAccessKey” panel, make sure Send and Listen are checked. Ask your Azure account admin to enable these options if they are not checked.
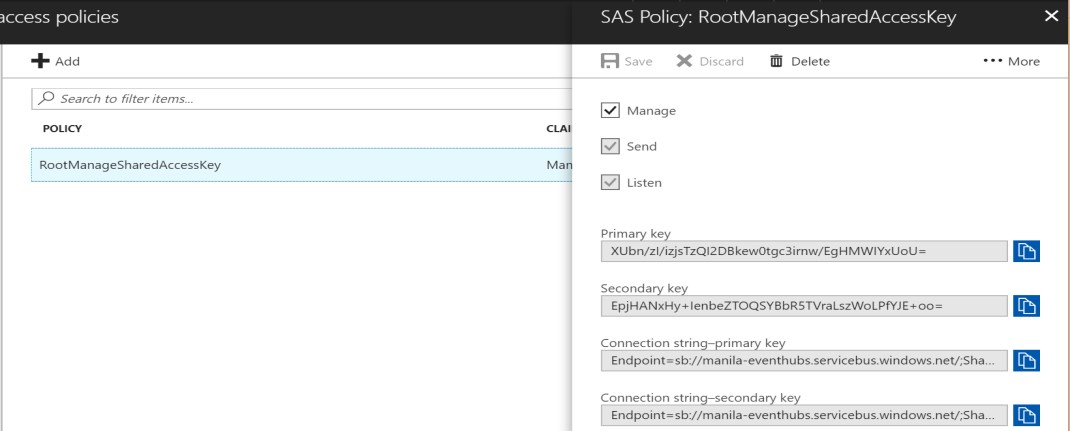
Use the Connection string-primary key to configure the Connection string of the RPI Azure Event Hubs queue provider.
Permissions
For Azure Cloud Identity authentication, the following roles must be added to the user:
-
Azure Event Hubs Data Owner
-
Azure Event Hubs Data Receiver
-
Azure Event Hubs Data Sender