

Overview
This section describes how to configure Azure Service Bus for use with RPI. Please follow the steps below:
-
Set up your service bus namespace in Azure and obtain the connection string.
-
In a web browser, log into the Windows Azure portal.
-
Once you have successfully logged into the portal, search for the “Service Bus” resource and select Create.
-
Provide the Namespace, choose your Subscription, Resource group, location and pricing tier. Once the namespace is created it will appear in the list of Service Bus namespaces
-
Select the record.
-
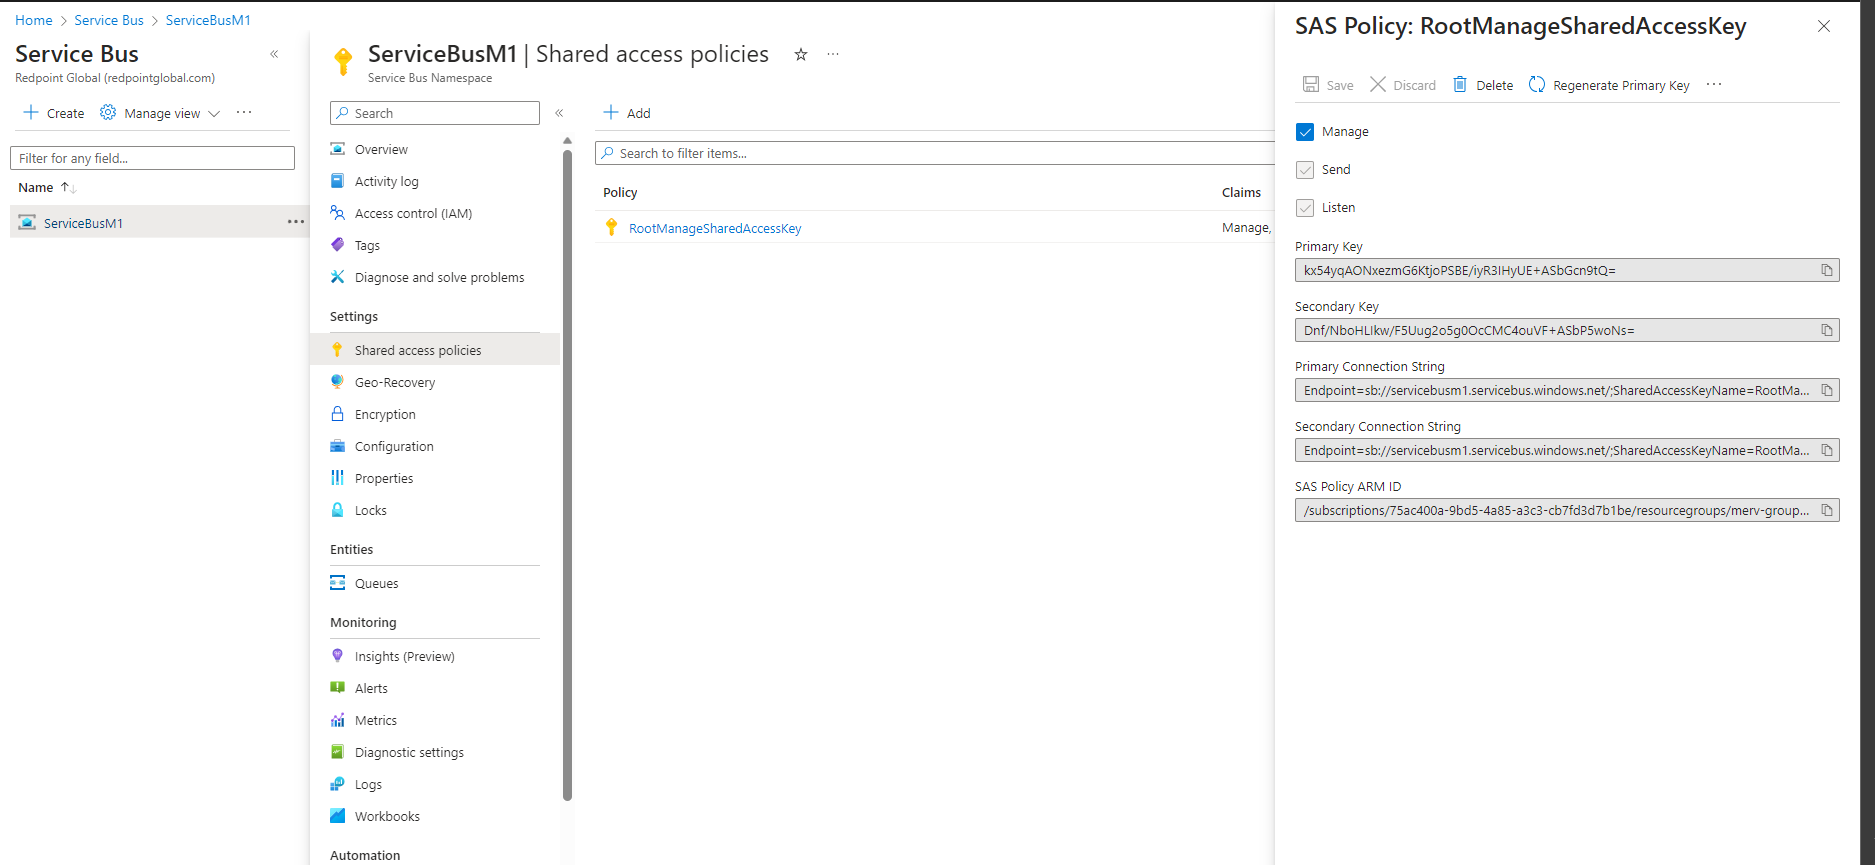
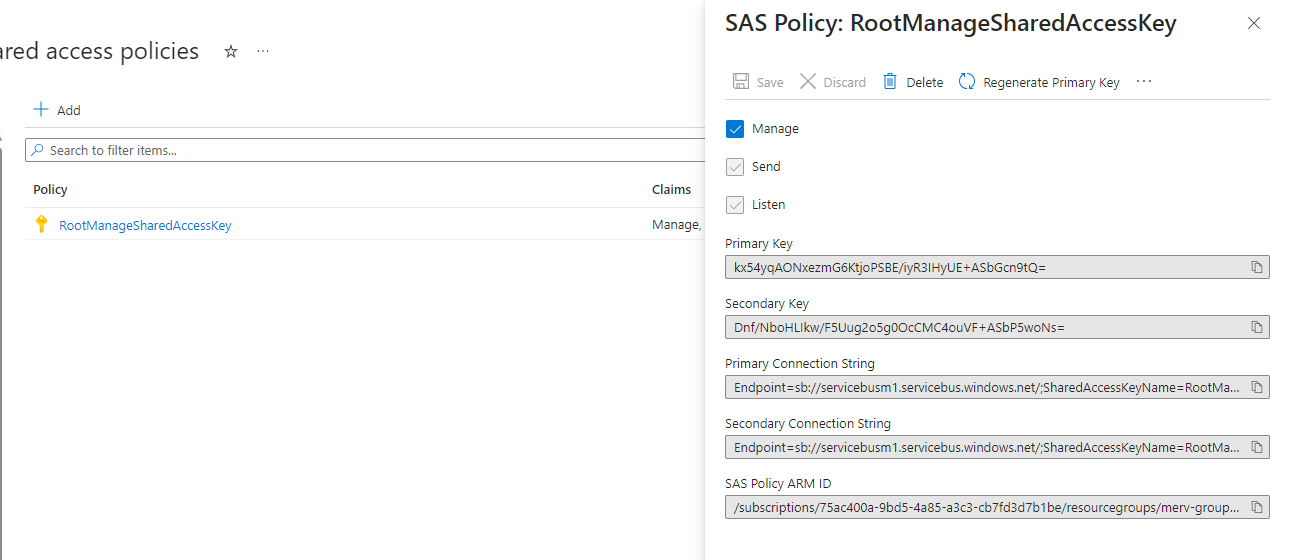
Select Shared access policies (located under Settings):
-
In the “SAS Policy: RootManageSharedAccessKey” panel, make sure Send and Listen are checked. Ask your Azure account admin to enable these options if they are not checked. They will be used when configuring the queue provider in RPI:
-
Use the Primary Connection string to configure the Connection string of the RPI Azure Service bus queue provider.
Set up an RPI Azure Service Bus queue provider
Set up an RPI Azure Service Bus queue provider to use your newly created Azure message bus.
-
Log in to the RPI client as an Admin user.
-
Navigate to Configuration>Queue Providers.
-
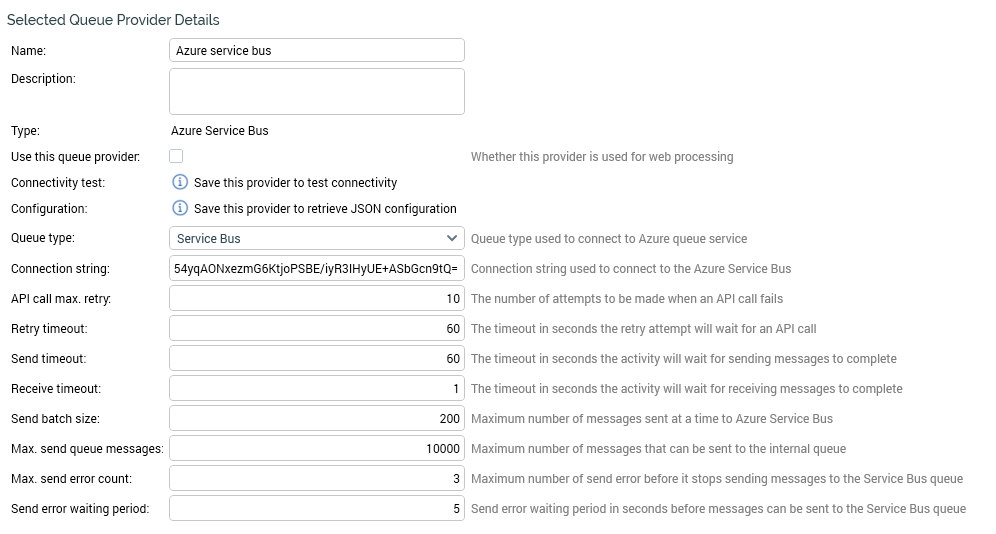
Add a new Azure Service Bus provider. Provide a name, select the “Use this queue provider” option and paste in the Connection String copied above.
-
Save the record and select Connectivity test to verify connectivity to the service bus.
-
Once connectivity has been verified, select Copy JSON configuration to clipboard and record the JSON configuration details. This will be used in the appsettings.json.config file for the RPI Realtime API site.
-
Navigate to Configuration>System Configuration and set the value for the following three queue related parameters. Please note that the queues need not already exist within the Azure service bus namespace as RPI will create the queues automatically if they do not exist. Record the names supplied as they will be needed for the web.config file within the RPI Realtime API site.
-
FormSubmissionQueuePath -
WebCacheQueuePath -
WebEventQueuePath
-
-
Configure the Realtime API appsettings.json.config file to reference the new queue provider and queues created in the sections above. Start by opening the appsettings.json.config file at the root of the RPI Realtime API web site directory in a text editor.
-
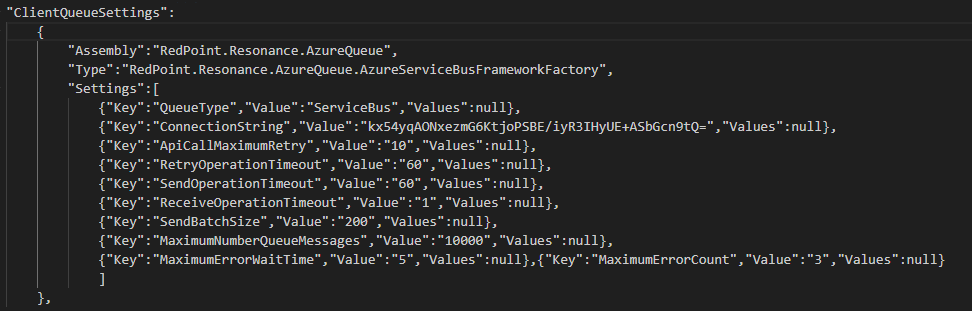
Locate the ClientQueueSettings Node:
-
Paste the contents of the queue JSON configuration details copied earlier between the tags.
-
Locate the following settings within the appsettings.json.config file and set respectively to match exactly the three system configuration values defined above:
-
In this section, enter the value set at system configuration parameter Form
SubmissionQueuePath:"FormQueuePath": "RPIWebFormSubmissionMerv" -
In this section, enter the value set at system configuration parameter WebCacheQueuePath:
"CacheOutputQueuePath": "RPIWebCacheDataMerv" -
In this section, enter the value set at system configuration parameter WebEventQueuePath:
"EventsQueuePath": "RPIWebEventsMerv"
-
This completes the steps necessary to configure RPI to use Azure Service Bus message queues. You can validate that the queues have been created successfully from the Windows Azure portal. They will be listed under QUEUES within the namespace created in the first section above:

Permissions
For Azure Cloud Identity authentication, the following roles must be added to the user:
-
Azure Service Bus Data Owner
-
Azure Service Bus Data Receiver
-
Azure Service Bus Data Sender