Overview
This document walks through how to use the metadata filtering feature in RPI. This feature gives you the ability to link metadata attribute dropdown lists to help simplify the metadata assignment process.
The video below explains how to configure metadata so that it can be filtered by other selections, thus adding to ease of use.
Use Case
When creating a campaign, a user has multiple metadata fields they need to populate. Metadata filtering allows a user to populate the first metadata field, for this example, Campaign Channel. Consequently, this limits the values within the second metadata drop-down, Campaign Codes, to only populate metadata values associated with the Channel chosen in the first metadata value.
Prerequisites
-
Created value lists: refer to Getting started with Value Lists
-
Metadata assigned to Audience Definition: refer to Metadata tab
Considerations
Metadata filtering is only available when using metadata attributes based on value lists.
Where to start
Creating value lists
To create at least two value lists to successfully use the filtering functionality, complete the following steps in RPI:
-
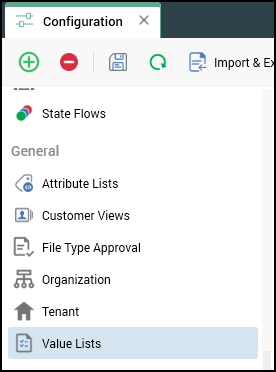
Navigate to Value Lists within RPI Configuration Screen.
-
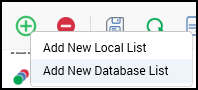
Click the green + button on the top left of the screen and select either Add New Local List or Add New Database List.
Value lists allow you to define lists of values, either provided manually or sourced from a data warehouse table. These lists can then be used to provide constrained sets of values that can be leveraged when building metadata attributes in an audience definition.
The following covers how to configure both types of value lists. Both types will be used within the examples that follow:
-
Local list: This is a list of user-defined values that can be used within a given metadata field which will be presented as a drop-down list. For this example, the local list will consist of two different “Campaign Channels”.
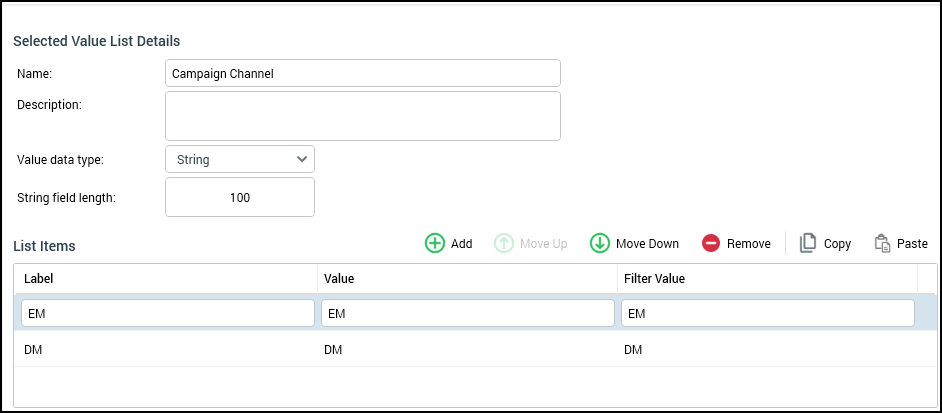
Filter Value needs to match to a value/field within the linked metadata field that will be setup in Metadata Tab. Configuration Reference: Getting started with Value Lists.
-
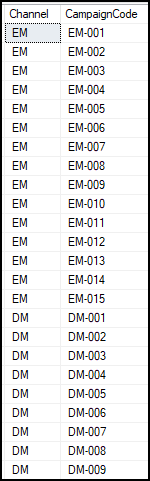
Database list: This value list will be based on a selected database table and selected field within that table. For this example, the value list will be based on a database table that has a list of campaign codes with Channel Codes associated to each one.
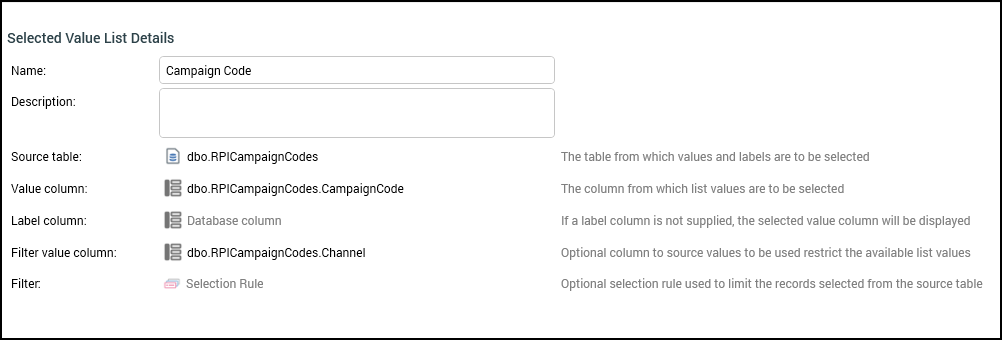
Filter Value column values will need to match the above created filter values to allow the two attributes to link within the metadata filtering feature. Configuration Reference: Getting started with Value Lists.
-
Database Table Example:
Assigning metadata
Once there are value lists created within RPI, you can now move to the next step of assigning metadata to a given audience definition and also assign the dependencies between the different attributes to allow for filtering.
For this example, assume that an audience definition has been created within RPI. Within that audience definition, the you need to assign metadata within the metadata tab.
-
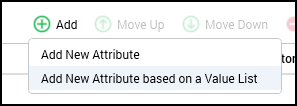
Within Metadata tab click Add on the right side of the window and select Add New Attribute based on a Value List. Repeat this step to create two attributes.

-
Assign the values to the following fields:
-
Name: Campaign Channel & Campaign Code.
-
Description (Optional): Best practice is to give a brief description of what this attribute is being used for or if there are any dependencies for the given attribute.
-
Value List: Select the Value List that was created in the previous section that is tied to the attribute name.
-
Filter Value: Select the attribute that will be the dependency for filtering that given attribute. Filter Values will only show up as available filters if they are also assigned as metadata fields.
-
Offer History Meta Name: Assign a name for the given attribute that will be used to create that given field within the Offer History Meta table.

-
Using metadata filtering within an audience
Now that the value lists and metadata attributes have been created and assigned as needed, you can now use them within the campaign metadata. This section will walk through how to use them and what the expected outcome should look like.
-
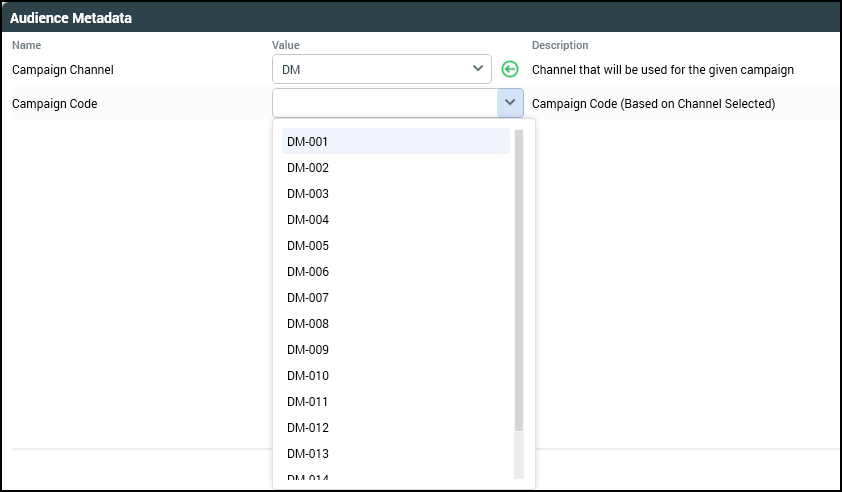
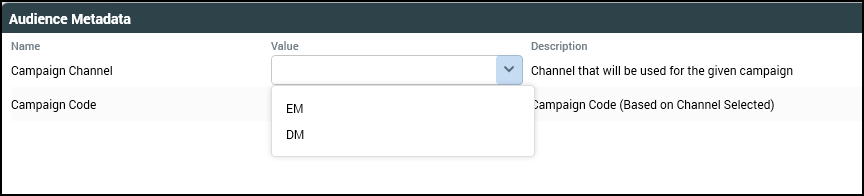
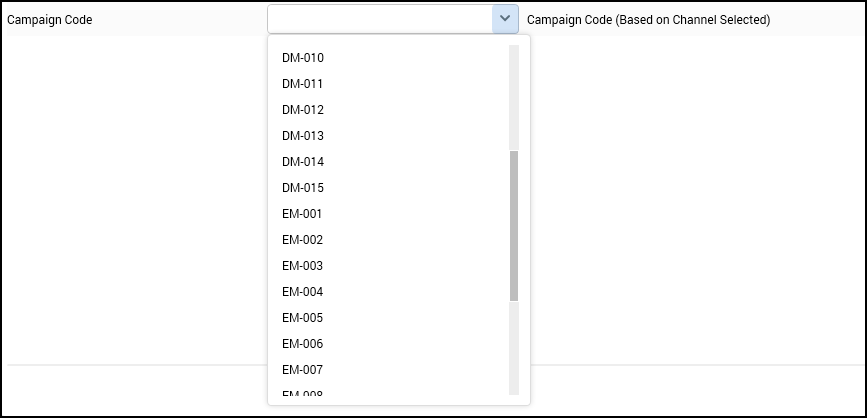
Once you’ve created a new audience within RPI, you can set campaign metadata. There are only two metadata fields that were created for this example, which are Campaign Channel and Campaign Code.

-
Within each drop down list will be the values that currently exist within the value lists that were created. Campaign Channel values are EM & DM; Campaign Code consists of a larger list of codes based on a database table.
-
When creating the metadata filter values, we set Campaign Code to be dependent on Campaign Channel. In the above screenshot, you can see there are both EM and DM Campaign codes that you will need to scroll through. If you’re only looking to assign a DM-NNN value, then you will need to set Campaign Channel to DM to filter out the EM codes.