

Overview
The Home tab is always displayed.

It can contain the following sections:
-
Mode
-
Clipboard
-
Edit
-
Font
-
Paragraph
-
Proofing
-
View
-
Find and Replace
-
HTML Template
-
Text
-
Misc
Mode section
This section is displayed in the following contexts:
-
Email Offer Designer - HTML Email Content - Rich Text mode
-
Email Offer Designer - HTML Email Content - HTML mode
-
Landing Page Designer - Rich Text mode
-
Landing Page Designer - HTML mode
-
Asset Designer - HTML Asset - Rich Text mode
-
Asset Designer - HTML Asset - HTML mode
-
Wiki Page Designer - Rich Text mode
-
Wiki Page Designer - HTML mode
The Home tab’s Mode section exposes the following:
Rich Text
Selecting this button switches the current content editor into rich text mode. Upon invocation, a dialog is displayed:
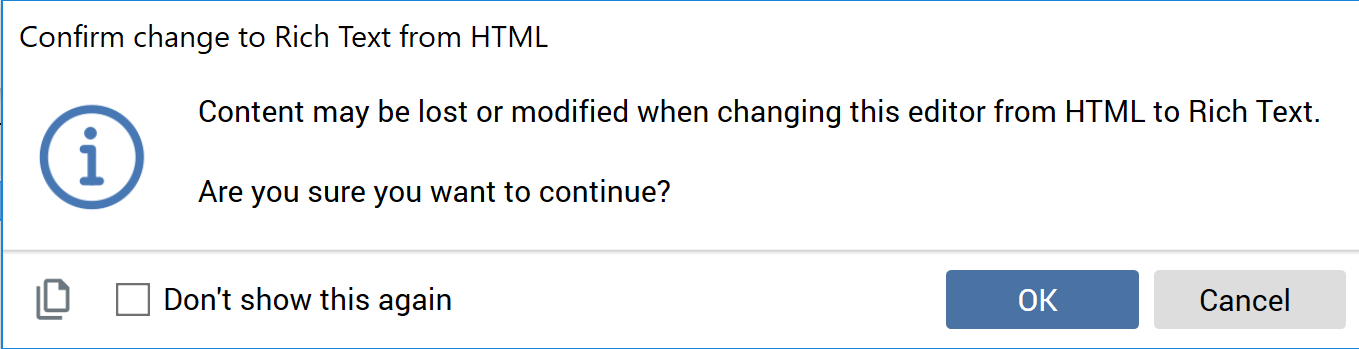
You can select OK to proceed with changing the edit mode or Cancel to remove the dialog from display without changing mode.
If you check the checkbox at the dialog’s footer, the dialog will not be shown again when changing content editor mode.
Note that, if you wish to maintain precise control over the HTML that is ultimately rendered (e.g. in an email offer or HTML asset), it is recommended to use HTML, rather than rich text, mode.
HTML
Selecting this button switches the current content editor into HTML mode. Upon invocation, a dialog is displayed:

You can select OK to proceed with changing the edit mode or Cancel to remove the dialog from display without changing mode.
If you check the checkbox at the dialog’s footer, the dialog will not be shown again when changing content editor mode.
Any unsupported HTML tags that you previously entered in HTML view are removed when you change display from rich text to HTML and are replaced with <SPAN> tag pairs.
Note that your most recent selection within the current designer is applied at its subsequent invocation.
Clipboard section
This section is displayed in the following contexts:
-
Email Offer Designer - HTML Email Content - Rich Text mode
-
Email Offer Designer - HTML Email Content - HTML mode
-
Email Offer Designer – Text Email Content
-
SMS Offer Designer
-
Landing Page Designer - Rich Text mode
-
Landing Page Designer - HTML mode
-
Asset Designer - HTML Asset - Rich Text mode
-
Asset Designer - HTML Asset - HTML mode
-
Asset Designer - Text Asset
-
Wiki Page Designer - Rich Text mode
-
Wiki Page Designer - HTML mode
The Home tab’s Clipboard section exposes the following commands:
-
Cut
-
Copy
-
Note that the copying of table content is not supported.
-
-
Paste
The following additional commands are shown when editing Rich text:
-
Cut special: displayed only when editing rich text content, this button allows you to copy the selection and put it on the clipboard, converting any embedded objects into tags that can be pasted back into content without losing their reference.
-
Copy Special: as per Cut special, but copies, rather than cuts, text.
-
Paste Special: displayed only when editing rich text content, this button allows you to paste the contents of the clipboard, converting any embedded object tags back into standard RPI tags and adding any references to embedded objects.
Edit section
This section is displayed in the following contexts:
-
Email Offer Designer - HTML Email Content - Rich Text mode
-
Email Offer Designer - HTML Email Content - HTML mode
-
Email Offer Designer – Text Email Content
-
SMS Offer Designer
-
Landing Page Designer - Rich Text mode
-
Landing Page Designer - HTML mode
-
Asset Designer - HTML Asset - Rich Text mode
-
Asset Designer - HTML Asset - HTML mode
-
Asset Designer - Text Asset
-
Wiki Page Designer - Rich Text mode
-
Wiki Page Designer - HTML mode
The Home Tab’s Edit section exposes the following commands:
-
Undo
-
Redo
Font section
This section is displayed in the following contexts:
-
Email Offer Designer - HTML Email Content - Rich Text mode
-
Landing Page Designer - Rich Text mode
-
Asset Designer - HTML Asset - Rich Text mode
-
Wiki Page Designer - Rich Text mode
The Home tab’s Font section exposes the following commands:
-
Font
-
Note that not all available fonts are supported in the Preview’s embedded browser control. Where a specific font is not supported, a “best fit” equivalent is applied at Preview.
-
Note that this may also extend to the rendering of content authored in the rich text editor in an email offer recipient’s inbox.
-
-
Font Size
-
Grow Font
-
Shrink Font
-
Bold
-
Italic
-
Underline
-
Strikethrough
-
Subscript
-
Superscript
-
Text Highlight Color: this field facilitates direct application of the most-recently selected color. Selecting the accompanying dropdown displays a dialog. The dialog gives access to the following types of color:
-
No color
-
Theme colors
-
Standard colors
-
Recent colors
-
Create Custom Color...: invocation of this option displays the Create Custom Color dialog, which is documented separately.
-
-
Font Color: as per Text Highlight Color, above. Note that Automatic replaces No Color in the dialog.
-
Show the font dialog box: this button, displayed in the bottom right-hand corner of the Font section, allows you to display the Font dialog box, which is documented separately.
Paragraph section
This section is displayed in the following contexts:
-
Email Offer Designer - HTML Email Content - Rich Text mode
-
Landing Page Designer - Rich Text mode
-
Asset Designer - HTML Asset - Rich Text mode
-
Wiki Page Designer - Rich Text mode
The Home tab’s Paragraph section exposes the following commands:
-
Bullets
-
Numbering
-
Decrease Indent
-
Increase Indent
-
Align Text Left
-
Note: selected by default.
-
-
Center
-
Align Text Right
-
Justify
-
Show the Paragraph dialog box
-
Note: selecting this button, which is shown at the bottom right of the Paragraph section, displays the Paragraph Properties dialog box, which is documented separately.
-
Proofing section
This section is displayed in the following contexts:
-
Email Offer Designer - HTML Email Content - Rich Text mode
-
Landing Page Designer - Rich Text mode
-
Asset Designer - HTML Asset - Rich Text mode
-
Wiki Page Designer – Rich Text mode
The Home tab’s Proofing section exposes the following options:
-
Enable Spell Check: this toggle button allows you to toggle on or off spell checking within the current content editor. The toggle on/off setting is persisted across all designer types.
-
Find Next Error: this button is available when spell check is toggled on. Selecting the button selects the next spelling error in the current content. An informational message is shown when no further spelling errors are present.
For more information on the handling of spelling errors when spell check is toggled on, please see the separate Spell Check section.
View section
This section is displayed in the following contexts:
-
Email Offer Designer - HTML Email Content - Rich Text mode
-
Email Offer Designer - HTML Email Content - HTML mode
-
Email Offer Designer – Text Email Content
-
Email Offer Designer - Asset Assigned to cell
-
SMS Offer Designer
-
Landing Page Designer - Rich Text mode
-
Landing Page Designer - HTML mode
-
Landing Page Designer - Asset Assigned to cell
-
Asset Designer - HTML Asset - Rich Text mode
-
Asset Designer - HTML Asset - HTML mode
-
Asset Designer - Text Asset
-
Wiki Page Designer – HTML mode
-
Wiki Page Designer – Text mode
The Home tab’s View section exposes the following options:
Embedded Items
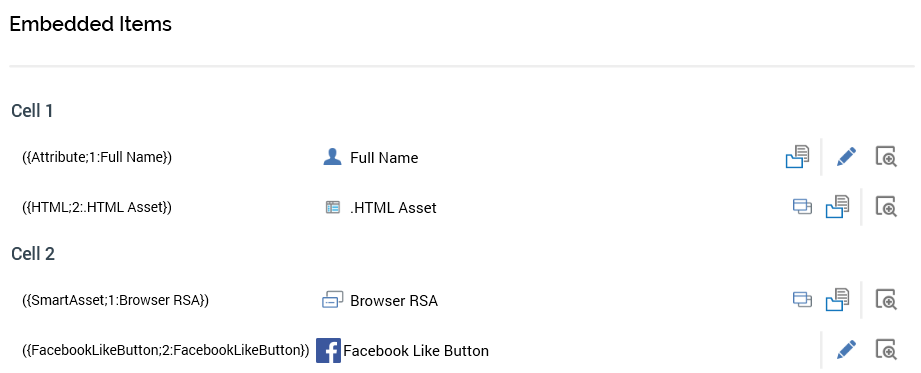
This button is available at all of the contexts listed above. It allows you to view a list of the items (files, links, buttons and advanced smart asset variants) embedded in the current content (or, if an email offer, used in the email’s Subject property). Items are listed in the Embedded Items dialog.
If no items are embedded in the content, the dialog is not shown and an informational message is displayed.
If shown for HTML email offer or landing page content, embedded items are grouped by cell. If a cell is shared, its share name is displayed; if not, its ordinal cell number is shown. Cells are ordered as per their appearance within the Page Layout section. Any items included in a cell more than once are displayed once only in that cell.
When shown in other contexts, embedded items are not grouped. Any items included in content more than once are displayed once only.
For each embedded item, the following are shown:
-
Tag
-
Icon
-
Name: the verbiage displayed is dependent on the embedded item’s type:
-
If a file, the filename is shown.
-
If a button, the name of the button type is shown.
-
If a link:
-
If linking to an address, the link address is shown.
-
If linking to a landing page, the landing page name is shown.
-
-
If a web form element, “[web form name] ([element name])” is shown.
-
-
Open latest version: this button is only shown for assets, advanced smart asset variants and web form elements. Invocation in respect of an asset displays the latest version of the file in the Asset Designer. If the asset is already open, it receives the focus. Invocation at an advanced smart asset variant displays the smart asset in the Smart Asset Designer. Selecting Open latest version at a web form element displays the element’s parent web form in the Asset Designer.
-
Open file location: this button is only shown for non-external files. When selected, the file’s folder is displayed in the File System Dialog, and the file itself is selected.
-
Edit: this button is available at links, buttons, web form elements and advanced smart asset variants displayed within the Embedded Item dialog. Selecting it shows the item’s settings in an appropriate dialog, allowing them to be edited as required. In the case of an advanced smart asset variant, the Edit Advanced Smart Asset Variant dialog allows for another variant from the same smart asset to be selected.
-
Refresh: only available at external content.
-
Select in content: selecting this button highlights the first instance of the embedded item in the current context. If invoked in respect of a file that is embedded more than once in a given context, it is only selected once therein.
The following context menu items area available when right-clicking a local file in the Embedded Items dialog:
-
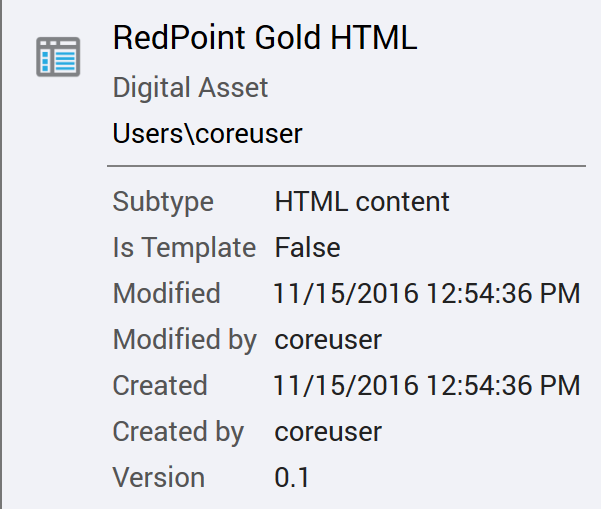
View File Information...: displays the file's details in the File Information Dialog.
-
Open Latest Version: only available at an asset or smart asset variant. Selecting it displays the latest version of the file in the Asset Designer. If the asset is already open, it receives the focus.
-
Open This Version: only available at an asset or smart asset variant. If the current context contains a previous version of another asset, invocation of this options displays that version in another instance of the Asset Designer.
-
Open File Location: displays the File System Dialog, with the file in question selected therein.
The following option is available when right-clicking an external file in the Embedded Items dialog:
-
View File Information…
-
An informational tooltip is displayed on hovering over a file in the Embedded Items dialog, containing:
-
Editor
this button allows you to show or hide the editor used to edit cells or raw HTML. It is available in the email Offer Designer (when editing HTML at a cell, or raw HTML content), and also in the Landing Page Designer. When selected, the Cell/Raw HTML Editor is displayed. When not selected, only the Preview is shown.
Find and Replace section
This section is displayed in the following contexts:
-
Email Offer Designer - HTML Email Content - Rich Text mode
-
Email Offer Designer - HTML Email Content - HTML mode
-
Email Offer Designer - Text Email Content
-
SMS Offer Designer
-
Landing Page Designer - Rich Text mode
-
Landing Page Designer - HTML mode
-
Asset Designer - HTML Asset - Rich Text mode
-
Asset Designer - HTML Asset - HTML mode
-
Asset Designer - Text Asset
-
Wiki Page Designer - Rich Text mode
-
Wiki Page Designer - HTML mode
The Home tab’s Find section exposes the following options:
-
Find: this field and its accompanying buttons allow you to search the current content editor for occurrences of a supplied text string. The Find field allows you to enter the string for which you wish to search. Entering text enables the Find next and Find previous buttons, and removing the text disables the same.
-
Find next: this button is available when a string is present in the Find field. Invocation finds the next instance of the specified string. If an occurrence of the string is located in the content, it is selected.
-
If the cursor is within the text when the button is pressed, the string must be to the right of and below the cursor to be found. If no matching instances are located, the existing cursor position and highlighting are maintained.
-
If the cursor is not within the text, the string to be found may be anywhere within the content editor.
-
If no matching instances are located, an advisory message is displayed.
-
-
Find previous: invocation of this option behaves as Find next, except that text is searched in the opposite direction.
-
Replace: this field and its accompanying buttons allow you to search the current content editor for occurrences of a Find text string, and then replace them with a supplied Replace test string. The Replace field allows you to enter the string to replace instances of the Find string. Entering text enables the Replace next and Replace previous buttons, and removing the text disables the same.
-
Replace next: this button is available when strings are present in the Find and Replace fields. Invocation finds the next instance of the specified Find string, and replaces it with the Replace string.
-
If the cursor is within the text when the button is pressed, the Find string must be to the right of and below the cursor to be found and replaced. If no matching instances are located, the existing cursor position and highlighting are maintained.
-
If the cursor is not within the text, the string to be found may be anywhere within the content editor.
-
If no matching instances are located, an advisory message is displayed.
-
-
Replace previous: invocation of this option behaves as Replace next, except that text is searched in the opposite direction.
Format section
This section is displayed in the following context:
-
Asset Designer - Text Asset
It exposes the following options:
Three toggle buttons allow you to choose the type of text to be entered in the editor. You can choose from Text (the default)…

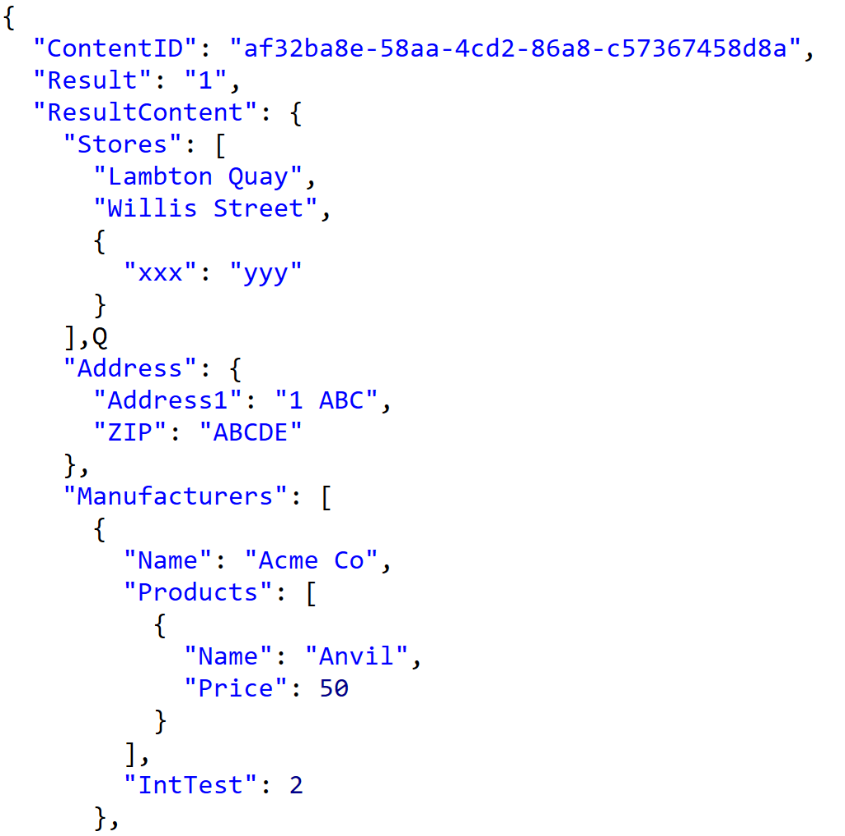
…JSON…
…or XML:
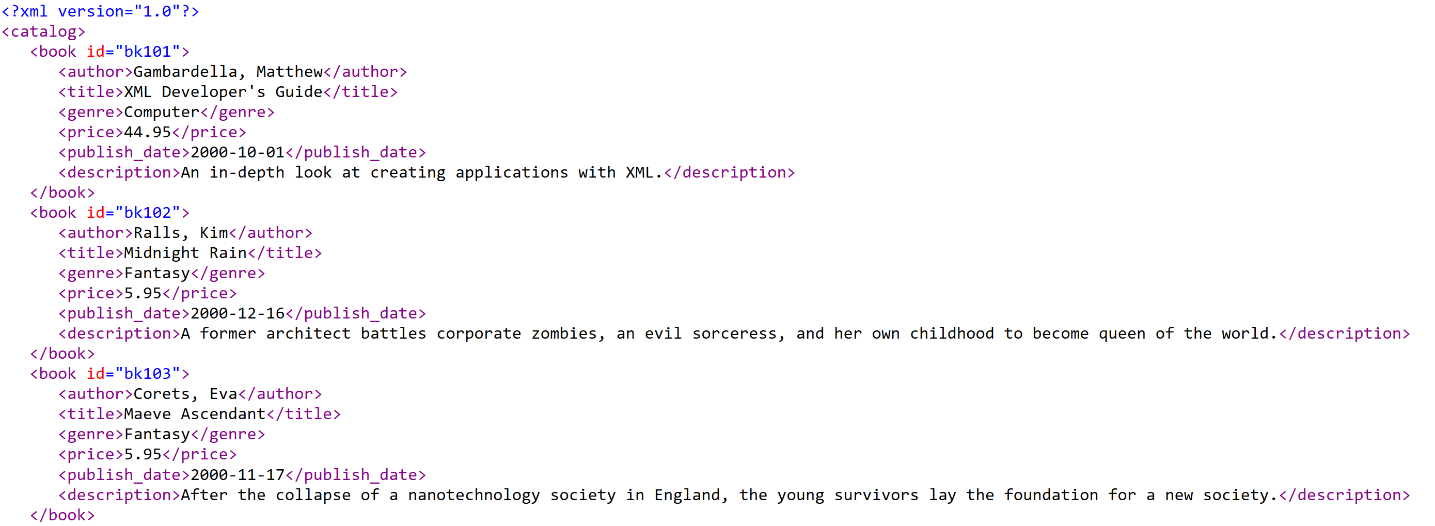
The Format setting is used to correctly format the results returned from a call to the RPI Realtime Decisions API endpoint.
Wiki Links section
This section is displayed in the following contexts:
-
Wiki Page Designer - Rich Text mode
-
Wiki Page Designer - HTML mode
It exposes the following options:
-
Insert Wiki Page Link: available at the Wiki Page Designer only. Displays the File System Dialog, allow selection of a previously-saved Wiki page to which to create a link. Only Wiki page files are shown. The link is created at the point in the Wiki content where the cursor is currently placed. A link’s syntax is accordant with the following example:
<a href=‘‘RPI://Wikipage?id=3ca1a3c4-24c0-4967-a208-cb7e89faa948’’>Home</a>
Note that you cannot traverse a link created in this way in the Wiki Page Designer.
-
Create Page and Insert Link: available at the Wiki Page Designer only. Presents the File System Dialog, within which you may specify the filename and location of a new Wiki page. When you invoke OK, the new page is created and a link to it embedded within the current Wiki page at the current cursor position.
Note that you cannot traverse a link created in this way in the Wiki Page Designer.
HTML Template section
This section is displayed in the following contexts:
Asset Designer - HTML Asset - HTML mode
It exposes the following options:
-
Allow use as HTML Template: this toggle button controls whether the Insert Template Element button.
-
Insert Template Element: this button is only displayed if Allow use as HTML Template is selected, and the cursor has been placed within the asset’s content. It allows you to insert a special DIV or SPAN HTML element into your HTML content. When such an element is present, on selecting the template in the email Offer or Landing Page Designer, the element will be treated as a cell or content slot, to which appropriate collateral can be added.
Note that the DIV or SPAN opening and closing tags must not be separated by a carriage return.
Insert HTML Template Element dialog
Selecting the button displays the Insert HTML Template Element dialog.
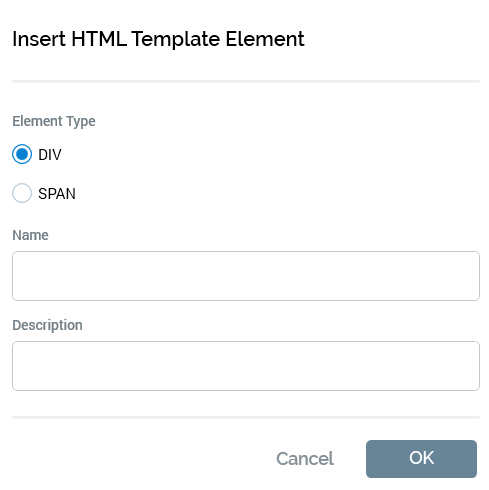
The dialog contains the following:
-
Radio buttons: two radio buttons allow you to define the type of element to be added:
-
DIV
-
Note: selected by default
-
-
SPAN
-
-
Name: provision of a name for the element is mandatory, and the value entered can be a maximum of 100 characters in length. The element's name must be unique within the current asset.
-
Description: provision of a description is optional, and the value entered can be a maximum of 1000 characters in length
-
OK: selecting OK adds an HTML element of the selected type at the current cursor position.
If a DIV, the element is as per the following example:
‘<div id="rpicell_top"><!--description="Top div" --></div>’
If a SPAN, as per this example:
‘<span id="rpicell_middle"><!--description="Middle span" --></span>'’
Note that, in both cases, the element's name structure is as follows:
'rpicell_[name, less spaces]'
-
Cancel: selecting this button removes the dialog from display without adding an element. Selecting off the dialog has the same effect.
Note that you can also add cells to an HTML template manually. If you edit a cell’s name, any content in contexts where the template is used will be lost.
Text section
This section is displayed in the following contexts:
-
Email Offer Designer - HTML Email Content - HTML mode
-
Email Offer Designer – Text Email Content
-
SMS Offer Designer
-
Landing Page Designer - HTML mode
-
Asset Designer - HTML Asset - HTML mode
-
Asset Designer - Text Asset
-
Wiki Page Designer - HTML mode
The Home tab’s Text section exposes the following options:
-
Load From File: you can use this option to load content from an external file into the content editor. If content is already displayed, a dialog is shown that says “Note that all existing will be replaced with the content taken from the selected file. Click OK if you want to continue.”
You can select OK to proceed with loading the new, or Cancel to retain the existing, content. Proceeding displays the Load Content Windows file system dialog.
By default, the Windows file system dialog is filtered to display HTML and text files only; if you wish, you can choose to view All files instead. Having chosen a file, you can Open it. The contents of the file are displayed, replacing any previously-displayed content. An information message ('The contents of the chosen file have been loaded') is also displayed.
You can also Cancel the Windows file system dialog, which retains any previously-displayed content.
-
Wrap Text: this toggle button allows you to wrap the content displayed in the editor. The button’s setting is persisted, so its most recently selected state is applied when you next open a content editor.
-
Show Line Numbers: when this toggle button is selected, line numbers are shown at the content editor. The button’s setting is persisted, so its most recently selected state is applied when you next open a content editor.
Misc section
This section is displayed in the following contexts:
-
Email Offer Designer –Text Email Content
It exposes a single option to Generate Text from HTML. Invocation of this option takes all of an email offer’s current HTML email content, converts it to text and assigns the results to the offer’s text content, displaying the Text content tab when doing so. If existing text content already exists, an “Are you Sure?” dialog is displayed.
ChatGPT/Writer sections
These sections can be displayed displayed in the following contexts:
-
Email Offer Designer - HTML Email Content
-
Email Offer Designer – Text Email Content
-
Landing Page Designer
-
Asset Designer - HTML Asset
-
Asset Designer - Text Asset
One or both of these sections are displayed when the ChatGPT and/or the Writer external content generation tools have been enabled within the current RPI installation. The sections contain the following:
-
Prompt: you can enter a prompt, which, when sent to the content generation tool, will be used as the basis for the generation of text content using AI. On hovering over the prompt, an Edit button is displayed. Selecting it displays the [Tool Name] Content Prompt modeless dialog. You can enter prompt text in the same and press Done when complete. The entered text is reflected in the Prompt field, and the full prompt text is displayed in the tooltip on hover.
-
Generate this button: is turned on when a prompt has been provided. Selecting it displays a context menu:
-
Replace Text: selecting this button displays a “Generating content using [Tool]” overlay, and then replaces all text in the current context with text generated by the tool.
-
Insert at Cursor Position: selecting this button displays a “Generating content using [Tool]” overlay, and then inserts text generated by the tool at the current cursor position.
-
-
Tool name