

Signing into the Eloqua portal
This section describes how to sign-in into Eloqua portal. Please follow the steps below:
-
On your web browser, log in to Eloqua.
-
Sign in by providing your Eloqua credentials (Company Name, Username, and Password) and select Sign In.
Once you have successfully logged in, you will be redirected to the Eloqua dashboard.
Provisioning new OAuth credentials
-
In the Eloqua portal, navigate to Settings.
-
In the Platform Extensions section, select AppCloud Developer.
-
Choose Create App to create new OAuth credentials.
-
Provide all mandatory fields to create the new OAuth credentials.
-
Select Save.
-
Copy the generated Client Id, Client Secret, and OAuth Callback URL (found in the Authentication to Eloqua) section.
The value of these parameters will be used in Redpoint Interaction when authenticating a new Eloqua email channel.
The Redirect URL Eloqua channel setting must be sourced from the OAuth Callback URL.
Creating an email group
-
To create a new Email Group, navigate to Email > Email Setup > Email Groups.
-
Select Add.
-
Provide all mandatory fields.
-
Select Save.
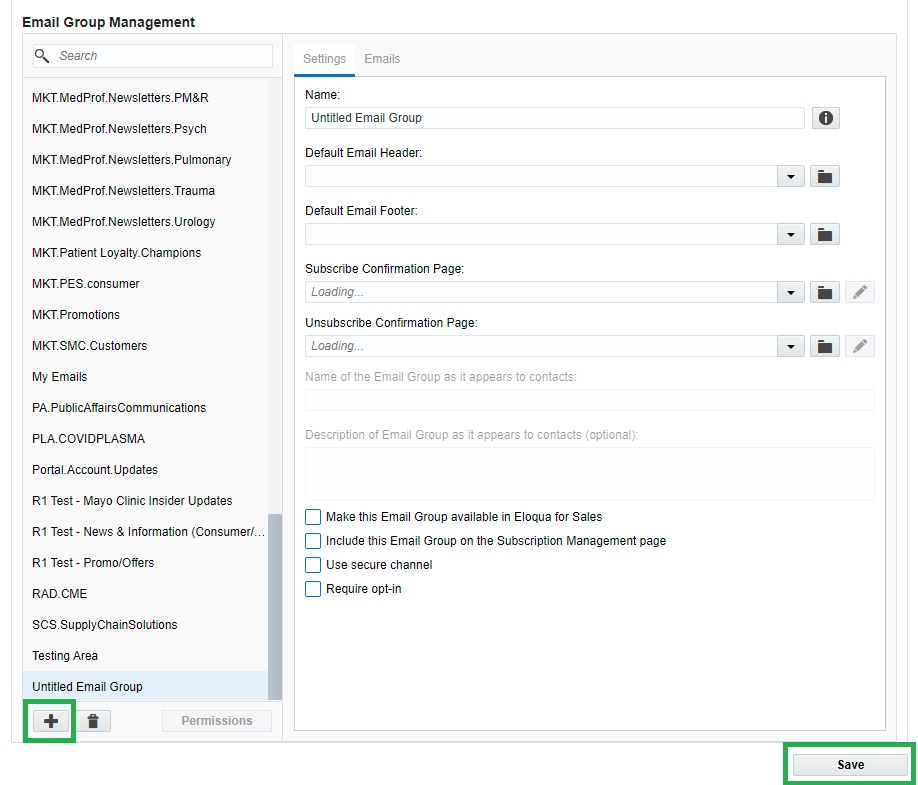
The check box options are not mandatory, and can be set depending on the client’s requirements.