

Overview
This page walks you through configuring Marigold to work with Redpoint Interaction (RPI).
Signing in to the Marigold portal
This section describes how to sign in to Marigold portal. Follow the steps below:
-
In your web browser, go to the Marigold portal and sign in by providing your Marigold credentials such as Company, Username, and Password.
-
Select Next.
-
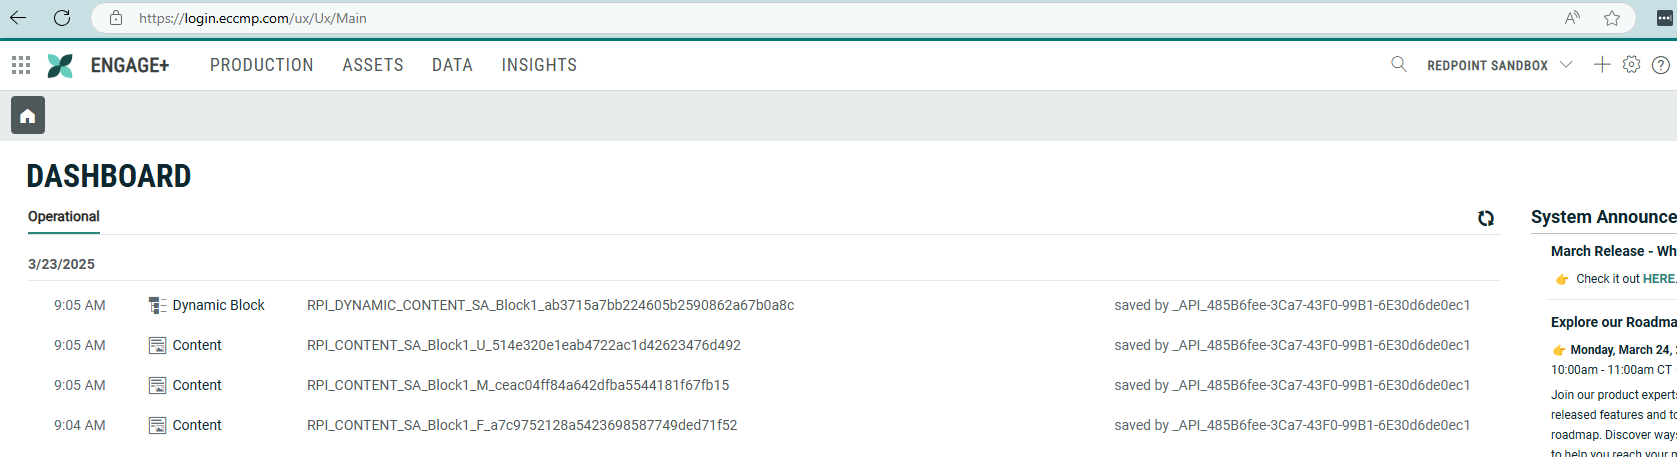
If your account is successfully authenticated, you'll be redirected to Marigold’s main dashboard.
Provisioning new API keys
-
On the main dashboard, hover over the Data menu and select API Keys under the Management group section.
-
Once you're redirected to the API ACCESS section, select Create New.
-
Supply all mandatory fields as required by Marigold in creating a new OAuth 2.0 API key.
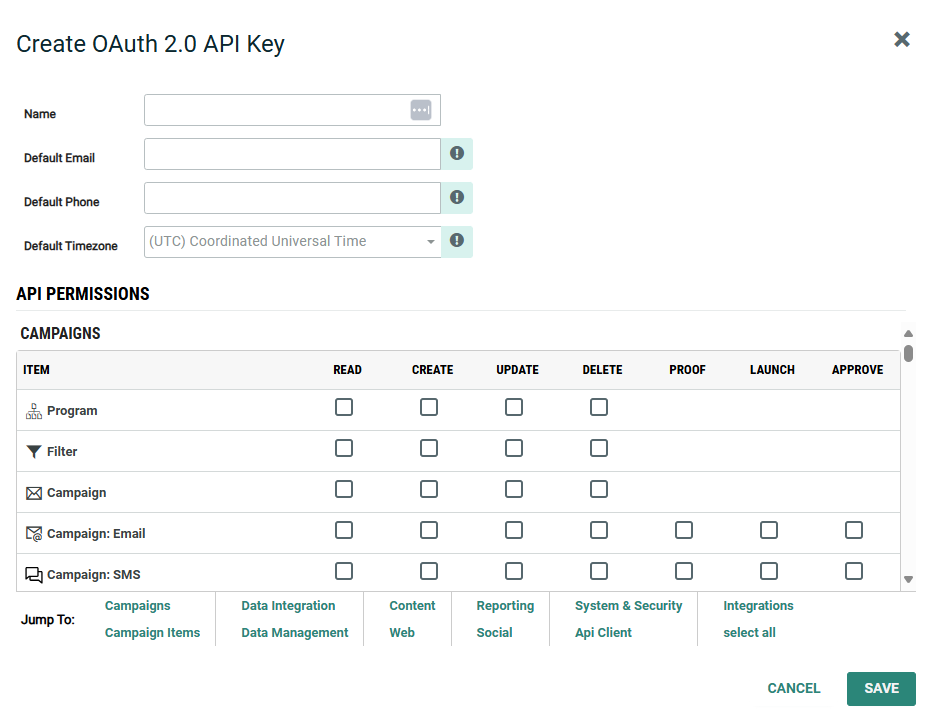
RPI requires all permissions to be granted for specific API key.
-
Select Save to create the new API key.
-
The generated Consumer Key is used as the Username, and the Consumer Secret is used as the password when provisioning a new Marigold channel connector in RPI.

The Client ID is based on Legacy API keys. If you are still using Legacy API keys, this parameter is mandatory. Since the parameter is optional in the Marigold channel connector, authentication is likely going to fail if you leave this parameter empty.
Provisioning a new Database Entity
-
On the main dashboard, hover over the Data menu and select Tables under the Management group section.
-
Select New.
-
Enter the Display Name and Table Name.
-
Select Save.
-
Once the Database Entity is created, select Add New>New Field.
-
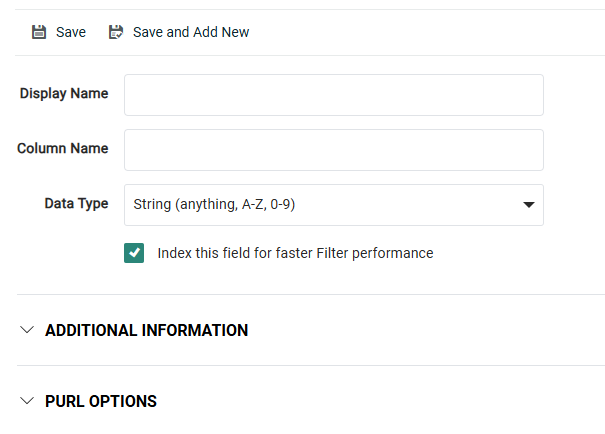
Enter the Display Name, Column Name, and set the desired Data Type.
-
Select Save to create the field or Save and Add New to add another new field.
You must configure the following standard fields below for RPI. You can add any additional fields to your database entity as necessary.
|
Display name |
Column name |
Data type |
|---|---|---|
|
|
|
String |
|
|
|
Integer |
Provisioning a new Lookup table
-
On the main dashboard, hover over the Data menu and select Tables under the Management group section.
-
Select New.
-
Enter the Display Name and Table Name.
-
Select Save.
-
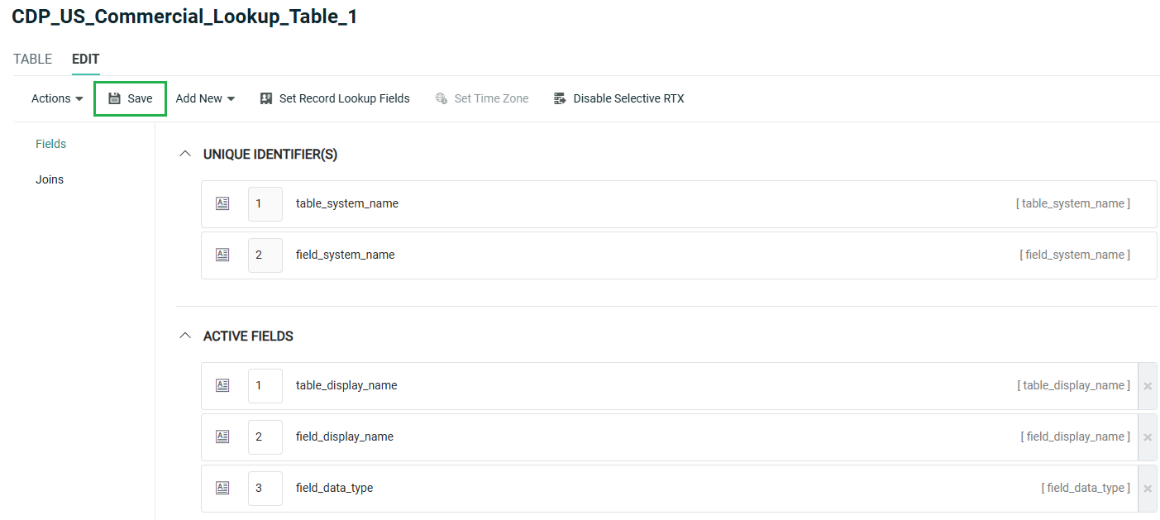
On the Edit tab, select Set Record Lookup Fields.
-
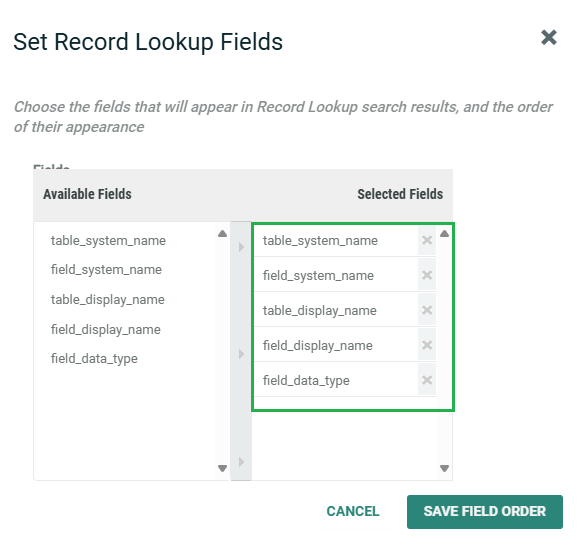
Select the Record Lookup Fields as shown below.
-
Select Save Field Order.
-
Select Save to commit changes.
You can use the Lookup Table when provisioning the new Marigold channel connector in RPI.

Provisioning a new Data Map
-
On the main dashboard, hover over the Data menu and select Data Maps under the Integration group section.
-
Select New.
-
Provide the Name and Data Source. The data source must be the corresponding database entity.
-
Select Create.
-
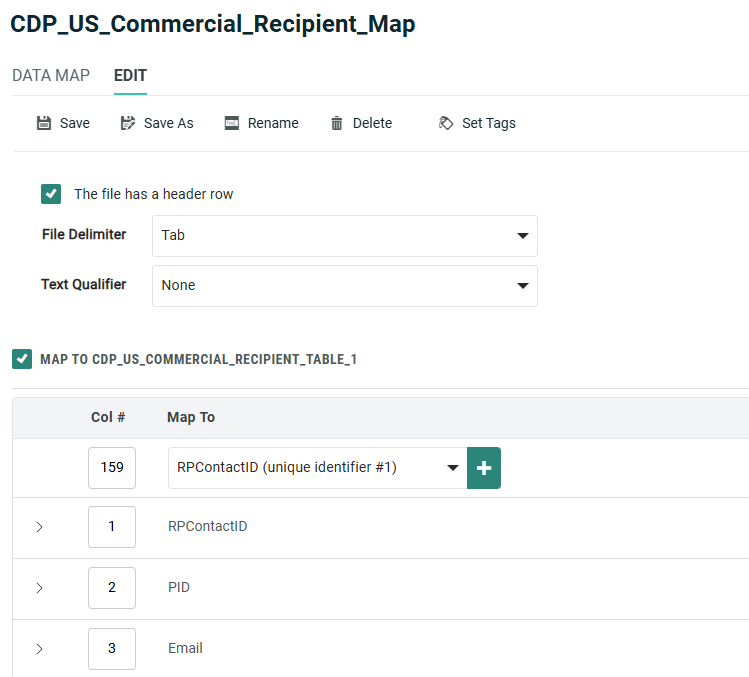
Make sure that the File Delimiter option is set to Tab delimiter in the “The file has a header row” option. The Text Qualifier must be set to None by default.
The Data Map should be configured as Property Map when provisioning a new Marigold channel connector in RPI.

Learn more about Marigold Data Maps.
Provisioning a new Opt-Out Message
-
On the main dashboard, hover over the Assets menu and select Opt-Out Message under the Blocks group section.
-
Select New.
-
Provide the Name and Data Source. The data source must be the corresponding database entity.
-
Select Create.
-
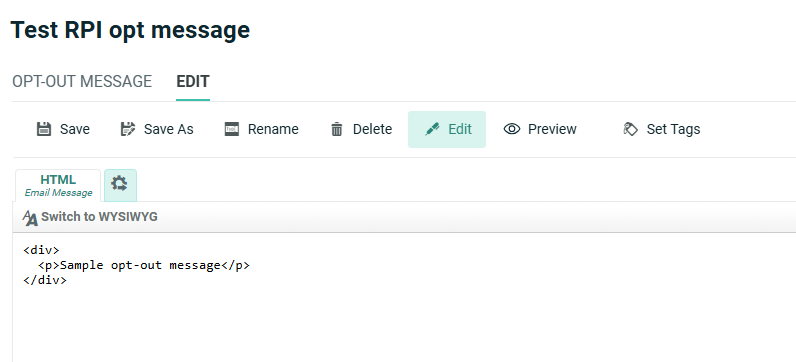
Provide the Opt-Out Message content per your design in the Edit tab section.
-
Select Save to commit any changes made.
-
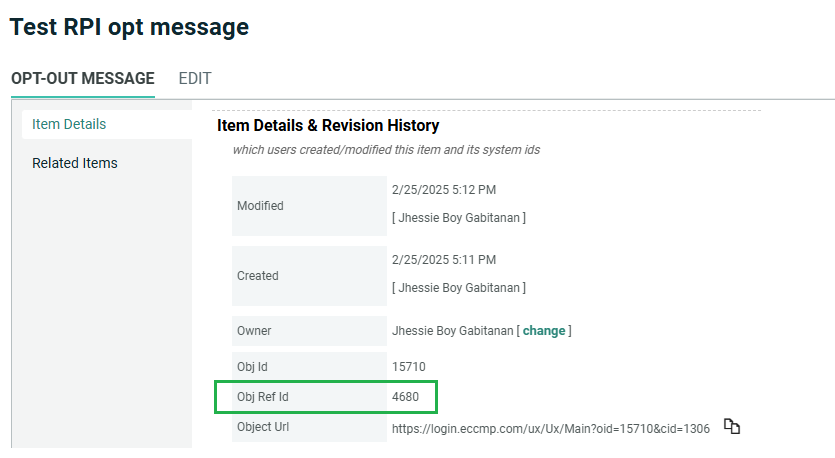
To retrieve the Opt-Out Message ID, go to the Opt-Out Message tab and look for the Obj Ref Id field. Use the corresponding value of the field when provisioning the Marigold channel connector in RPI.
Learn more about the Marigold Opt-Out Message.
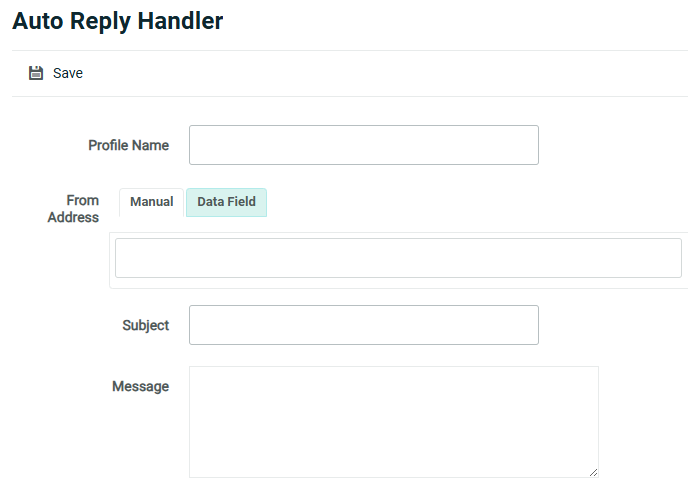
Provisioning a new Auto-Reply Handler
-
On the main dashboard, hover over the Settings menu and select Auto-Reply Handler under the Campaign Settings group section.
-
Select New.
-
Provide the Profile Name, From Address, Subject, and Message.
-
For the From Address option, you can either configure a valid static email address from the Manual tab, or select a field from the Data Field tab using the drop-down menu populated with every field in your system that is formatted with a Data Type of Email.
-
-
Select Save to commit the changes.
You should be able to select and configure the Auto-Reply handler when provisioning a new Marigold channel connector in RPI.

Learn more about the Marigold Auto-Reply handler profile.
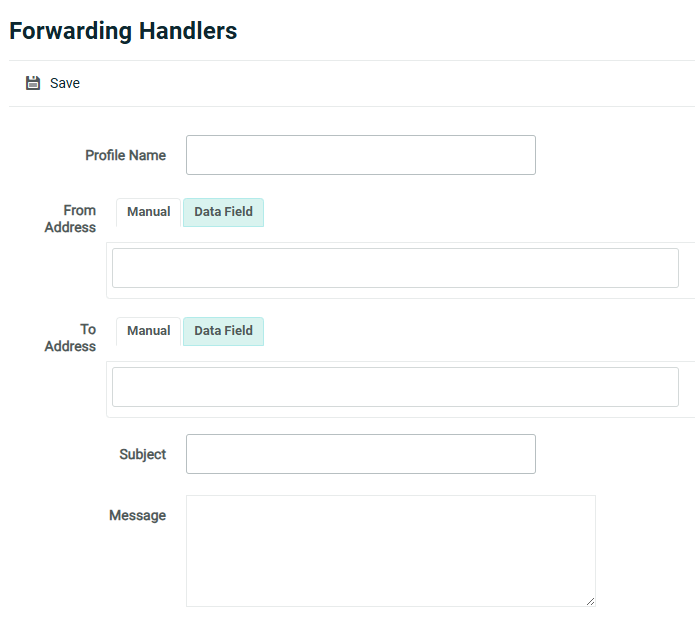
Provisioning a new Forwarding Handler
-
On the main dashboard, hover over the Settings menu and select Forwarding Handler under the Campaign Settings group section.
-
Create New.
-
Provide the Profile Name, From Address, To Address, Subject, and Message.
-
For the From Address option, you can either configure a valid static email address from the Manual tab, or select a field from the Data Field tab using the drop-down menu populated with every field in your system that is formatted with a Data Type of Email.
-
For the To Address option, you can either configure a valid static email address from the Manual tab, or select a field from the Data Field tab using the drop-down menu populated with every field in your system that is formatted with a Data Type of Email.
-
-
Select Save to commit the changes.
You should be able to select and configure the Forwarding handler when provisioning a new Marigold channel connector in RPI.

Learn more about the Marigold Forwarding handler profile.
Provisioning a new Data Export
When provisioning an email activity Data Export to be utilized in RPI during inbound execution, please reach out to the Marigold Client Services Team for proper guidance.
The Data Export field names required by RPI are as follows.
|
Display name |
System name |
Data type |
|---|---|---|
|
|
|
String |
|
|
|
Integer |
The standard file names for email activities required by RPI are as follows.
|
File name |
Data export activity type |
Source |
|---|
|
File name |
Data export activity type |
Source |
|---|---|---|
|
|
Open |
SFTP |
|
|
Click |
SFTP |
|
|
Send |
SFTP |
|
|
Unsubscribe |
SFTP |
|
|
Bounce |
SFTP |
Learn more about the Marigold Data Export.