

Overview
Follow the steps below to enable KMS encryption at an S3 bucket.
Enable default encryption for an S3 bucket
This section describes how to enable encryption for AWS S3-KMS. Please follow the steps below:
-
Sign into the AWS Management Console and open the Amazon S3 console.
-
In the Bucket name list, choose the name of the bucket to use.
-
Select the Properties tab.
-
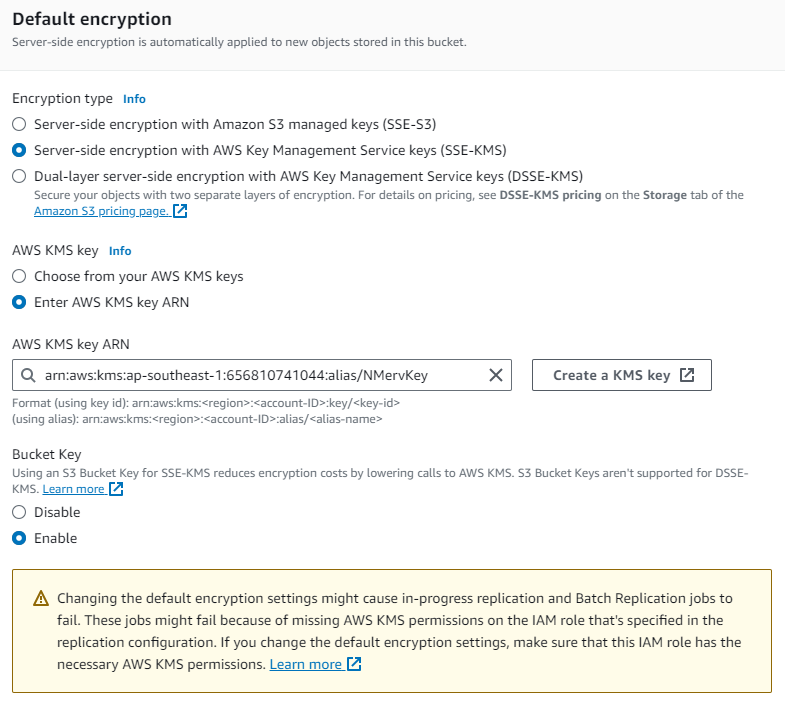
Choose Default encryption.
-
Choose Server-side encryption with AWS Key Management Service keys (SSE-KMS).
-
Select a master key from the list of the AWS KMS master keys that you have created. Note that AES-256 is not supported in this context.
-
Type the Amazon Resource Name (ARN) of the AWS KMS key to use. You can find the ARN for your AWS KMS key in the IAM console, under Encryption keys, or you can choose a key name from the dropdown list.
-
Select Save.
Create master key for AWS-KMS
This section describes how to create an AWS-KMS master key. Please follow the steps below:
-
Navigate to Services>Security, Identity & Compliance>Key Management Service.
-
Select Create Key.
-
Select Symmetric.
-
Choose Encrypt and decrypt.
-
Select Next step.
-
add an alias
-
Select Next.
-
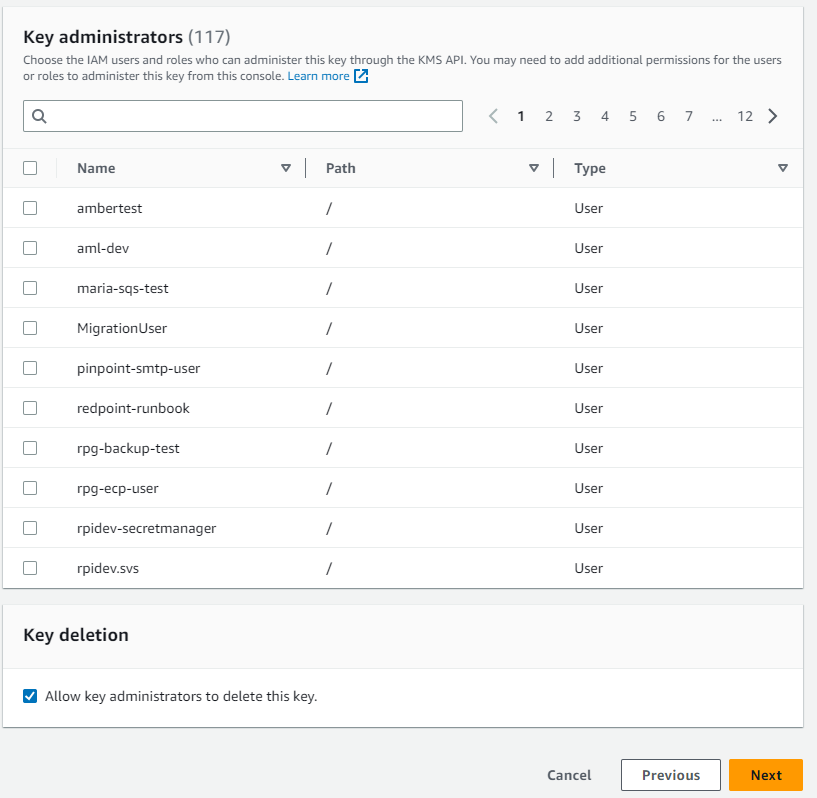
Check the boxes of the users and roles who can administer the master key.
-
Select Next.
-
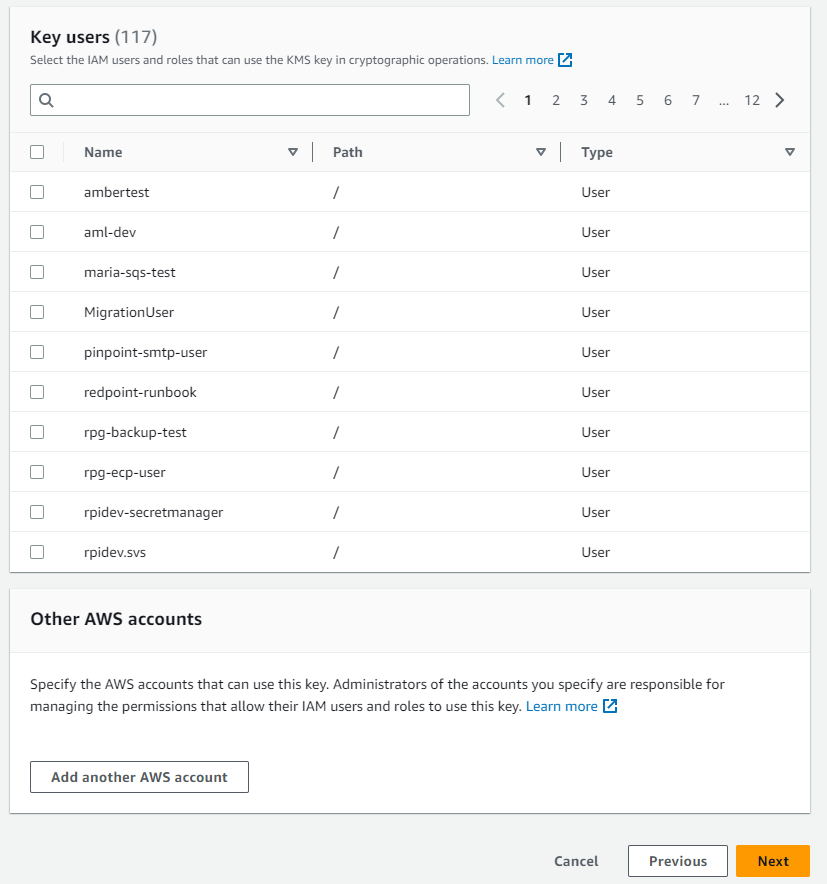
Select the boxes of users and roles who can encrypt and decrypt data when using AWS services.
-
Select Finish to save the encryption key.
AWS S3 bucket and CloudFront configuration
This section describes how to enable an S3 bucket with CloudFront. Please follow the steps below:
-
Bucket policy configuration—see the following example:
{
  "Version":"2012-10-17",
  "Statement":[
    {
      "Sid": "PublicRead",
      "Effect": "Allow",
      "Principal": "*",
      "Action": "s3:GetObject",
      "Resource": "arn:aws:s3:::zendesk104573/*"
    }
  ]
}
-
Create a CloudFront Distribution. See the following example:
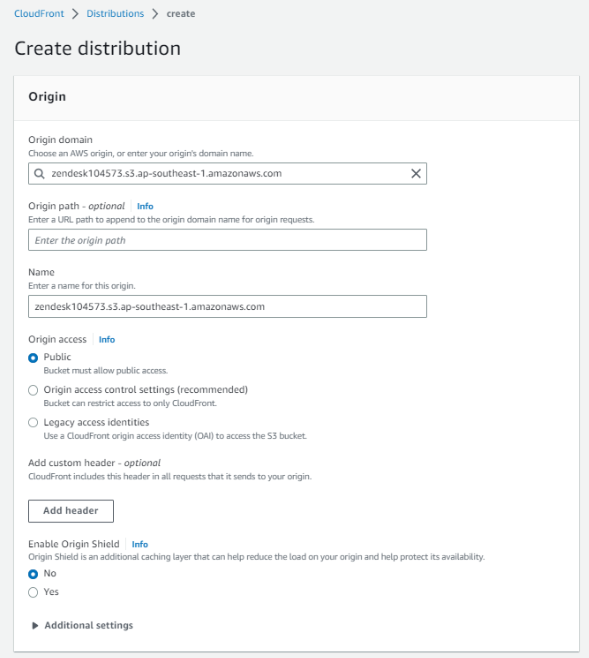
-
Set CloudFront Cache behavior settings. See the following example:

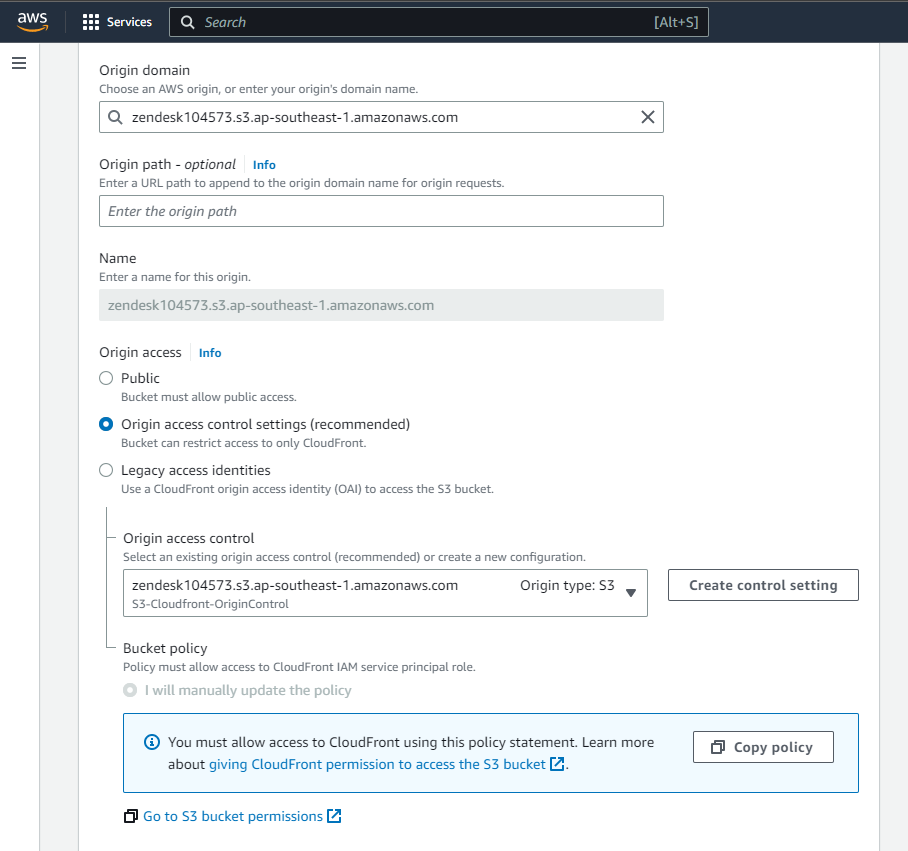
Private AWS S3 bucket and CloudFront configuration
-
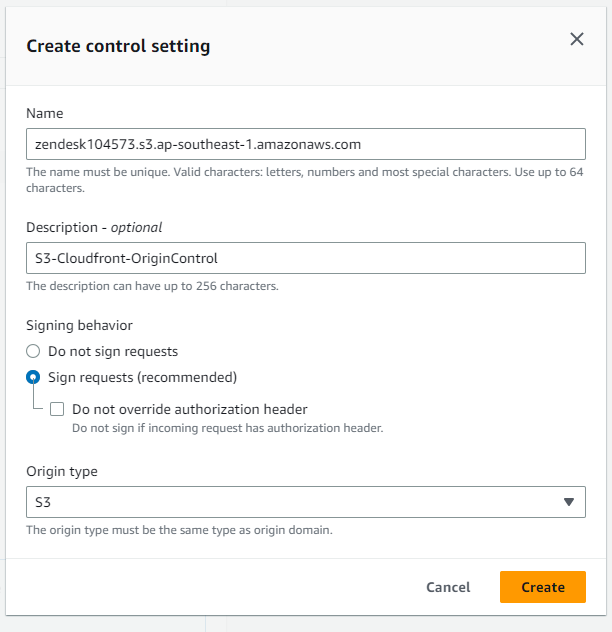
In your CloudFront configuration settings, select Create control setting.
-
Configure the following settings and select Create.
-
Copy the generated CloudFront Origin Access Control (OAC) policy as per the example below:
{
        "Version": "2008-10-17",
        "Id": "PolicyForCloudFrontPrivateContent",
        "Statement": [
            {
                "Sid": "AllowCloudFrontServicePrincipal",
                "Effect": "Allow",
                "Principal": {
                    "Service": "cloudfront.amazonaws.com"
                },
                "Action": "s3:GetObject",
                "Resource": "arn:aws:s3:::zendesk104573/*",
                "Condition": {
                    "StringEquals": {
                      "AWS:SourceArn": "arn:aws:cloudfront::656810741044:distribution/E1RU3E9R98UUL3"
                    }
                }
            }
        ]
      }
Permissions
The following bucket permissions need to be added:
-
s3:ListBucketMultipartUploads
-
s3:DeleteObjectVersion
-
s3:ListBucketVersions
-
s3:GetBucketLogging
-
s3:ListBucket
-
s3:ListAllMyBuckets
-
s3:PutObjectLegalHold
-
s3:GetBucketAcl
-
s3:GetBucketNotification
-
s3:GetBucketPolicy
-
s3:ListMultipartUploadParts
-
s3:PutObject
-
s3:GetObjectAcl
-
s3:GetObject
-
s3:DeleteBucketWebsite
-
s3:PutObjectRetention
-
s3:GetObjectVersionAcl
-
s3:DeleteObject
-
s3:GetBucketLocation