

Overview
The Folder Search component provides access to files within the RPI file system.
It forms part of many designers’ toolboxes, in which context it is used as a source of files required when building RPI entities such as selection rules, audiences, and interactions. Its use in such contexts is described in the documentation for each designer.
A File Summary is displayed as a tooltip when you hover over a file in a Folder Search component.
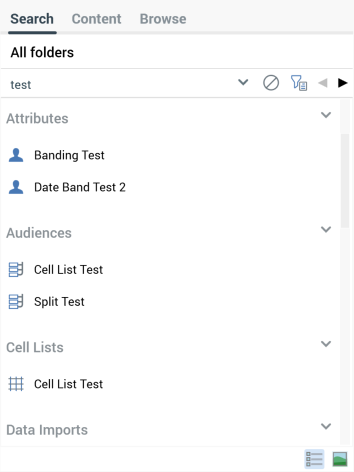
Search tab
One of up to three tabs displayed within folder search, the others being Content and Browse, the Search tab contains the following:
-
Search context
-
Search toolbar
-
Search results
Search context
The text displayed at the top of the search tab identifies the current search context–either a specific folder within the RPI file system, or All folders.
By default, the search context is set to your user folder, and the tab automatically displays any files persisted therein that are relevant to the current context–for example, having invoked the Rule Designer, the toolbox folder search lists only files relevant to that designer within your user folder.
You can click the folder name displayed in the Search tab header to change the search context. When you do so, the Choose Folder dialog is displayed.
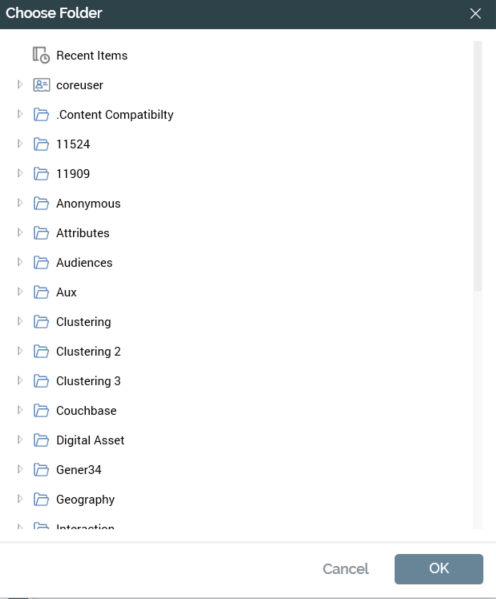
This dialog lists the folders in the RPI file system to which you have access (if required, you can also choose the Recent Items folder).
A context menu is displayed when right-clicking a folder in the Choose Folder dialog, exposing the following options:
-
New folder: not available at external content providers.
-
Refresh
-
Rename: not available at your user folder, or at external content providers.
You can highlight a folder and invoke Choose the selected folder; this updates the Search tab header with the name of the selected folder, and also automatically executes a search to populate the Search tab with files matching the specified search criteria within the selected folder. You can also Cancel the Choose Folder dialog.
When a Search folder context is established, when you hover over the Search tab header a button (“Click here to search within all folders”) is displayed to the right. Clicking the button changes the tab header text to “Search all folders”, and automatically executes a search to populate the Search tab with files matching the selected Type (if specified) within all folders.
On initial designer invocation, the Search tab's search context is set to your user folder. When you reset the folder manually, upon subsequent invocation, the Search tab's default folder defaults to the folder to which it was most recently set. This applies equally across multiple RPI sessions. You can set the default folder on a designer-by-designer basis. The setting is tied to your user name, so even if you sign in on another RPI client application instance, your preferences will be maintained.
When you execute an explicit file search, the results, when displayed, replace the default Search tab display.
Search toolbar
If the file you need is not displayed within the folder search, you may search for one that fulfils your requirements. The search toolbar is displayed at the top of the Search tab.
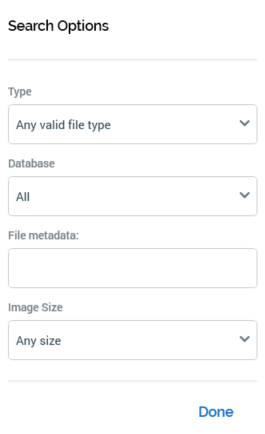
You can start a search by typing the name of the file(s) you are looking for into the Search files field to the left. By default, a search is executed against both a file’s name and its description; to search by file type, click the Show Search Options button to the right of the main search field. This displays the Search Options dialog, in which you can refine your search using the following:
-
Type: you can use the Type drop-down to select a file type to search for. The field lists all file types applicable to the current designer, along with default value “Any valid file type”. Selection of a value executes a search immediately, and the results are limited to the selected file type(s). Unless reset to “Any valid file type”, the file type restriction continues to be applied in addition to any further search criteria you specify.
-
Subtype: this options is displayed when a specific Type has been selected. A dropdown provides access to all of the selected type's subtypes, plus “Any subtype”. If no explicit subtypes are supported at a type, only the “Any subtype” value is available. Application of a Type/Subtype filter limits the files displayed in accordance with the current selections. If an explicit Image size search option has been applied, Type is set to “Asset” and Subtype to “Image”.
-
Database: this field is only available when one or more auxiliary databases have been configured at the current RPI tenant. A dropdown field, it exposes the values “All” (the default), “Data Warehouse”, and one row per configured auxiliary database. In addition, it is only available in the following contexts:
-
Rule Designer
-
Model Project Designer
-
Audience Designer
-
Offer Designer
-
Interaction Designer
-
Asset Designer
-
Smart Asset Designer
-
Export Template Designer
-
Cell List Designer
-
Landing Page Designer
-
Data Connectors Interface
-
Dashboard Designer
-
Configuration Workbench
-
Search results are filtered in accordance with the selection made therein. If an auxiliary database is selected, the following file types may be retrieved:
-
Attribute
-
Selection rule
-
Analysis panel
-
Export template
-
File Metadata
-
Image Size: If you specify an explicit image size, non-image asset files that match other search criteria are not returned; when you set Image size to a value other than Any size, the Type field is set to a read-only “Image assets only”. This dropdown field exposes the following options:
-
Any size (default)
-
Small (Images with an area size smaller than 120,000px (e.g. 400x300))
-
Medium (Images with an area size between 120,000px and 480,000px (e.g. 400x300 to 800x600))
-
Large (Images with an area size greater than 480,000px (e.g. 800x600))
-
An exact size: selection of this option displays width and height fields. Both default to 100, and the minimum permissible value is 1, the maximum 99999.
-
You cannot search by image size at an external content provider or Recent Items.
You can close the dialog by clicking the Close button provided. Clicking off the dialog has the same effect.
Additional information
-
Search results that match the entered criteria are displayed in the folder search after a second's delay following the entry of a character in the search field.
-
As you enter search string characters, if the characters entered match a previous search string, that string is displayed within the search field.
-
The previous search string is removed from display at the point at which the entered characters diverge from it.
-
By further qualifying the search string, and pausing for another second, you can execute another search, the results of which replace the existing results within the folder search. You can also choose to execute an entirely new search, the results of which will replace the previously-displayed search results.
-
Search criteria are not case dependent.
-
Typing
*into the search field retrieves all files of relevance to the current folder search across all folders to which you have access in RPI file system. -
You can view a list of recent searches in a drop-down list, accessed to the right-hand side of the main search field.
-
The dropdown lists the most recent searches undertaken by the currently-logged in user. The list’s contents are displayed in reverse chronological order. You may select a search from the list in order to re-execute it. Up to the 15 most recent searches are displayed. Only search strings in respect of which a search was actually executed are added to the recent searches list.
-
When a search is executed, files are retrieved where:
-
Files are relevant to the current interface – for example, a search executed within the Rule Designer will retrieve attributes, but not audiences.
-
If searching on name and description, the search criteria (as entered literally) are found anywhere with the file’s name (e.g., a search for “first name” returns “Customer first name” but not “Customer name”).
-
If a file type has been specified, only files of that type are retrieved.
-
If searching by image size, image files are of the specified size.
-
Irrespective of search type, the file is persisted within an RPI file system folder to which you have read or write access, within the current search context, or a subfolder thereof.
-
External files are not returned in the results of a search executed across all folders.
At any time, you may click the Cancel Search button to clear the displayed search results in order to return to the default Search tab display. Deletion of your search criteria has the same effect.
Search results
Search results are displayed after execution of a search.
Search results can be displayed across more than one page. The number of results per page is controlled by system configuration setting MaxFileSearchPageSize. Next and Previous Page buttons are displayed to the right-hand side of the Search tab header.
The buttons are enabled only when additional results pages exist. Invocation displays the next or previous page's worth of results (as appropriate).
Search results are grouped by folder. Folders are ordered strictly alphabetically by folder name – irrespective of full folder path. Files are ordered by type, then name within a folder. When you hover over a folder, its full path is displayed in a summary tooltip.
Indication of a file’s linkage to one or more Wiki or web pages is carried out through use of a triangle icon:
You can choose to view search results as file details, or as thumbnails. You can switch between views using the toggle buttons at the bottom of the tab:
-
View details: this option is selected by default, and displays files using icons and names:
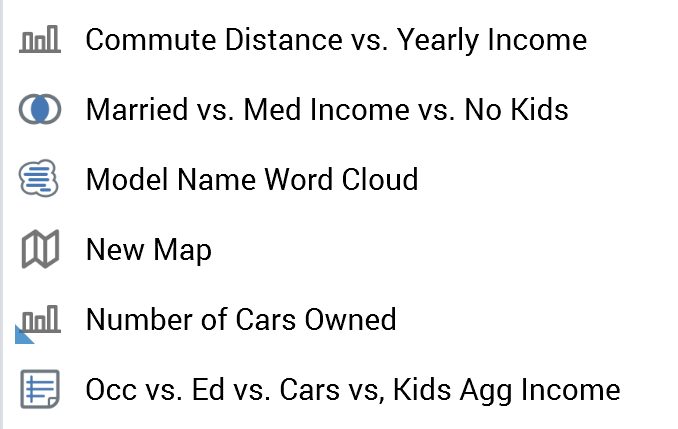
-
View thumbnails: when this option is selected, files are shown using thumbnail images. If a file's type is other than image asset, a file type icon and name are shown:
If a file's type is image asset, a thumbnail representation of an image is shown:
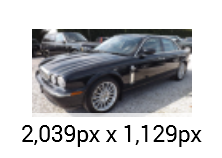
The image's dimensions are shown at the bottom right of the thumbnail. These are also displayed in the informational tooltip shown when hovering over an image asset in search results.
At external images, thumbnails are generated dynamically at initial folder display within each RPI session and are displayed at an open external content provider folder as they are generated. Thumbnails are re-generated at each subsequent RPI session.
If a file is an HTML asset that is used as a template, a thumbnail representation of the template's structure is displayed:
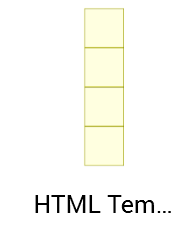
An additional Is template property is shown in the informational tooltip displayed when hovering over an HTML template asset in search results.
You can control the size of thumbnails using the slider displayed when hovering over the View thumbnails button:
Your most recent settings are maintained the next time you access a designer.
Search tab context menu
When you right-click a file in the Search tab, a context menu is displayed. The following options are available:
-
Create New Audience From Template: this option is available when you right-click an audience, interaction, or offer template file. Invocation creates a file of the specified type, based on the template in question, and displays it in new instance of an appropriate designer.
-
View Information: displays the File Information dialog.
-
Configure Attribute: only displayed when the file is an attribute. Displays the Attribute Builder, allowing the attribute to be modified.
-
Manage Values: only displayed when the file is an attribute. Displays the Manage Attribute Values dialog, allowing the values displayed when building a compare to list criterion using the attribute to be managed. This option is not available when the attribute’s type is model project, parameter or exists in table, or when its data type is date or decimal.
-
Open Latest Version: opens the latest version of the file in an appropriate designer (not available for attribute files).
-
Open Linked Page: if the file is associated with a Wiki or web page, this option shows the page within the Linked Page Browser. If no page is associated with the file, the option is disabled.
-
Choose Linked Page…: displays the Choose Linked Page dialog, facilitating linking of the file to a Wiki or web page.
-
View Insights: only available at audiences and basic/standard selection rules. Displays insights relating to the file in question in the Insights Window.
-
Open Data Viewer: this option is only available at selection rule files. Invocation displays the Data Viewer Window. The Data Viewer allows you to view a sample of the records targeted by the current selection rule. For more information, refer to the Rule Designer documentation.
-
Open File Location: invocation of this option launches the File System Dialog, within which the folder in which the selected file is saved is displayed. The file itself is selected.
-
Copy: displays the File System Dialog, within which you can navigate accessible folders in the RPI file system in order to find a suitable folder to which to save a copy of the file.
-
Move: displays the Choose Folder dialog, allowing you to choose a folder to which to move the file.
-
Delete: moves the file from the folder within which it is stored to the file system’s Recycle Bin.
-
Preview: displayed where appropriate (e.g., at an image asset file). Opens the File Information Dialog, and displays a preview of the file in question in its Preview tab.
-
Copy Content Tag to Clipboard: only available at attributes. Copies a unique code to the clipboard, by which the attribute may be referenced when content is authored externally.
-
View Generated SQL: only available if the file is a selection rule.
-
Copy Trace Log to Clipboard: only available if the file is a selection rule.
When you right-click an external file in the Search tab the following context menu items are available:
-
View Information...: displays the external file’s details in the File Information Dialog.
-
Download...: selecting this option displays the Download File To... Windows file system dialog. You can specify a file name and location and click Save to initiate the download. Doing so creates an External file download job and displays it in the My Jobs dialog. On successful completion, an Open Folder button is displayed; clicking it displays Windows Explorer, within which the file is selected.
-
Copy to Folder...: selecting this option displays the Save [filename] as Asset... File System Dialog. When you click Save, if the file already exists in the selected folder, the File Conflict Dialog is shown. If the file does not already exist, or if you elect to proceed with overwriting the existing file, the second File System Dialog is closed, and a Save [filename] to [folder] job is created and displayed in the My Jobs dialog. On its successful completion, an Open Asset button is displayed, which, when clicked, displays the newly-created asset in the Asset Designer. The job will fail if you do not have permission to write to the selected RPI file system folder.
Content tab
This tab is only shown if the current folder search context allows for the listing of files that contain text or HTML content. It is available at:
-
Home Page
-
Landing Page Designer
-
Offer Designer
-
Smart Asset Designer
-
Asset Designer
The tab contains the following, which are as per their equivalents in the Search tab documentation:
-
Search context
-
Search toolbar
-
Search results
Execution of a content search returns any file(s):
-
Appropriate to the current designer.
-
Matching the defined criteria.
-
To which the user has read or write permission.
-
Containing the specified search string in their text or HTML content.
The following file types can be returned:
-
Asset:
-
Text
-
HTML
-
-
Landing Page
-
Offer
-
Email
-
Salesforce
-
SMS
-
Push Notification
-
Push Notification Direct
-
-
Smart Asset
-
Wiki Page
Browse tab
The Browse tab displays a tree view representation of those folders within the RPI file system to which you have access.
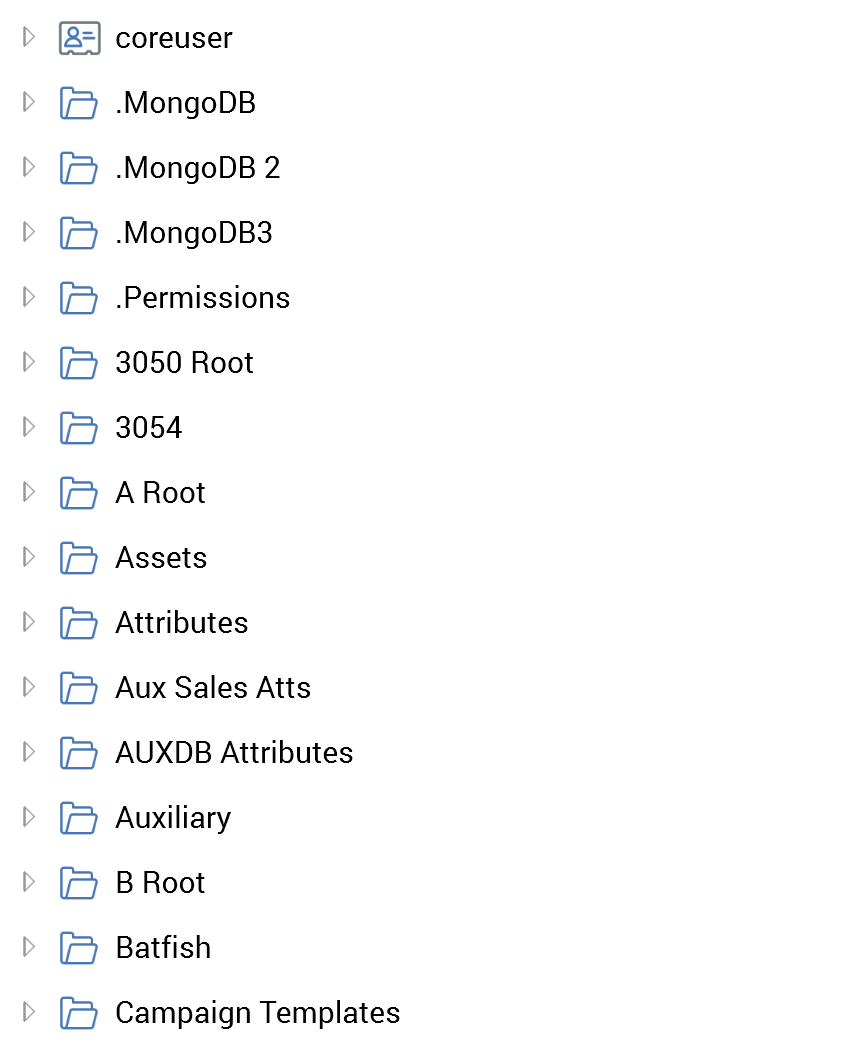
You can roll up and expand folders as required. When a folder contains files, they are similarly displayed within the treeview.
Indication of a file’s linkage to one or more Wiki pages is carried out through use of a triangle icon:
Browse tab context menu
When you right click on a file in the Browse tab a context menu is displayed. The following options are available:
-
Create New…From Template: only available at template files. Creates a new file based on the current template, and displays it in the appropriate designer.
-
View Information: displays the File Information dialog.
-
Configure Attribute: only displayed when the file is an attribute. Displays the Attribute Builder to allow the attribute to be modified.
-
Manage Values: only displayed when the file is an attribute. Displays the Manage Attribute Values dialog, allowing the values displayed when building a compare to list criterion using the attribute to be managed. This option is not available when the attribute’s type is model project, parameter or exists in table, or when the attribute’s data type is date or decimal.
-
Open Latest Version: opens the latest version of the file in an appropriate designer.
-
Open Linked Page: if the file is associated with a Wiki or web page, this option shows the page within the Linked Page Browser. If no page is associated with the file, the option is disabled.
-
Choose Linked Page…: displays the Choose Linked Page dialog, facilitating linking of the file to a Wiki or web page.
-
View Insights: only available at audiences and selection rules. Displays insights relating to the file in question in the Insights Window.
-
Open Data Viewer: this option is only available at selection rule files. Invocation displays the Data Viewer Window. The Data Viewer allows you to view a sample of the records targeted by the current selection rule. For more information, refer to the Rule Designer documentation.
-
Open File Location: invocation of this option launches the File System Dialog, within which the folder in which the selected file is saved is displayed. The file itself is selected.
-
Rename: displays the file’s name in updateable format and allows you to specify an alternative. Renaming a file does not create a new version of the file.
-
Copy: displays the File System Dialog, within which you can navigate accessible folders in the RPI file system in order to find a suitable folder to which to save a copy of the file.
-
Move: displays the Choose Folder dialog, allowing you to choose a folder to which to move the file.
-
Delete: moves the file from the folder within which it is stored to the file system’s Recycle Bin. Protected by an “Are You Sure?” dialog.
-
Preview: displayed where appropriate (e.g., at an image asset file). Opens the File Information Dialog, and displays a preview of the file in question in its Preview tab.
-
Copy Content Tag to Clipboard: only available at attributes. Copies a unique code to the clipboard, by which the attribute may be referenced when content is authored externally.
-
View Generated SQL: only available if the file is a selection rule.
-
Copy Trace Log to Clipboard: only available if the file is a selection rule.
When you right-click on a folder in the Browse tab, a context menu is displayed.
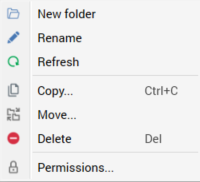
The following options are available:
-
New folder: creates a new folder within the current folder. By default, the folder is called “New folder” (if a folder with that name already exists within the parent folder, the new folder is called “New folder 2” (the number can be incremented if required)).
-
Rename: displays the folder’s name in updateable format and allows you to specify an alternative.
-
Refresh: reloads the contents of the folder from the tenant’s Interaction operational database.
-
Copy: displays the Choose Folder dialog, allowing you to choose a parent folder to which to copy the folder.
-
Move…: displays the Choose Folder dialog, allowing you to choose a parent folder to which to move the folder.
-
Delete: moves the folder and its sub-folders to the file system’s Recycle Bin. Protected by an “Are You Sure?” dialog. You cannot delete a folder that contains one or more files (within itself or its sub-folders).
-
Permissions: displays the Folder Permissions dialog, within which you can control user groups’ access to the folder.
When you right-click an external content provider in the Browse tab, the following context menu items are available:
-
Refresh
When you right-click an external folder in the Browse tab the following context menu items are available:
-
New folder: invocation of this option displays the Create New External Folder dialog, which contains the following:
-
Folder name: set by default to “New folder”. Provision of a name for the folder is mandatory, and it can be a maximum of 100 characters in length.
-
Create Folder: this button is disabled if Folder name is not provided. Clicking it creates the folder as a subfolder within the folder at which New folder was invoked. The new folder is selected automatically at the tree view. If a folder with the same name already exists, a warning message displayed.
-
Cancel: clicking this button removes the dialog from display. Clicking off the dialog has the same effect.
-
-
Refresh
-
Upload to Folder...: this option is only available if you have the File System - Upload File to External Storage functional permission. Invocation displays the Select file to Upload Windows file system dialog. You can select a file and initiate the upload process, which creates an Upload [filename] job and displays it in the My Jobs dialog (see that interface's documentation for full details of the job).
You can also upload multiple files to an external folder by selecting a *.zip file.
Following a successful file upload, you must manually refresh the external folder to view the uploaded file therein.
-
Delete: this option is not available for root external folders. Invocation of this option is protected by an “Are You Sure?” dialog. If you proceed, the folder in question is deleted. If the folder contains file(s) or subfolder(s), a warning message is displayed and you cannot delete it.
When you right-click an external file in the Browse tab the following context menu items are available:
-
View Information...: displays the external file’s details in the File Information Dialog.
-
Download...: selecting this option displays the “Download File To...” Windows file system dialog. You can specify a file name and location and click Save to initiate the download. Doing so creates an External file download job and displays it in the My Jobs dialog. On successful completion, an Open Folder button is displayed; clicking it displays Windows Explorer, within which the file is selected.
-
Copy to Folder...: selecting this option displays the Save [filename] as Asset... File System Dialog. When you click Save, if the file does not already exist, a Save [filename] to [folder] job is created and displayed in the My Jobs dialog. If the file already exists, it is copied to the folder, with an incrementable integer appended to its name.
On the job’s successful completion, an Open Asset button is displayed, which, when clicked, displays the newly-created asset in the Asset Designer. The job will fail if you do not have permission to write to the selected RPI file system folder.
Create new attribute button
When available, you may initiate the creation of a new attribute in an appropriate interface by clicking on the Create new Attribute… button, which is available at the top right of the toolbox’s folder search component.
This option is only available in those interfaces where attributes are relevant:
-
Rule Designer
-
Model Project Designer
-
Audience Designer
-
Cell List Designer
-
Export Template Designer
-
Offer Designer
-
Asset Designer
-
Smart Asset Designer
-
Landing Page Designer
-
Data Connectors Interface
-
Configuration Workbench
Refer to the Attributes documentation for full details on creating attributes.