

Overview
The Results Window is accessed from the Interaction Designer, and the Workflow and Audience Instance Viewers. You can open the Results Window from:
-
The toolbar
-
Workflow activities, via the View Results button available at the activity’s mini toolbar
The contents of the Results Window will vary depending on the context of invocation. The Results Window documentation is written primarily from the perspective of its invocation at the Interaction Designer. Separate addenda describe its invocation from the other contexts of relevance.
Invocations
Workflow Instance Viewer toolbar
When invoked from the Workflow Instance Viewer toolbar, the Results Window displays “Results for [Interaction Name] (Instance ID [x])”. Details of the workflow instance in respect of which the Results Window was invoked are displayed therein.
The currently-selected workflow instance’s related activities appear in the workflow activities list.
You cannot navigate to the Workflow Instance Viewer from a Results Window that was invoked from the same context.
Audience Instance Viewer toolbar
When invoked from the Audience Instance Viewer toolbar’s Results button, the following tabs are available:
Results
-
Toolbar:
-
Copy these details to the clipboard
-
View Insights
-
Refresh
-
-
Activity details panel
-
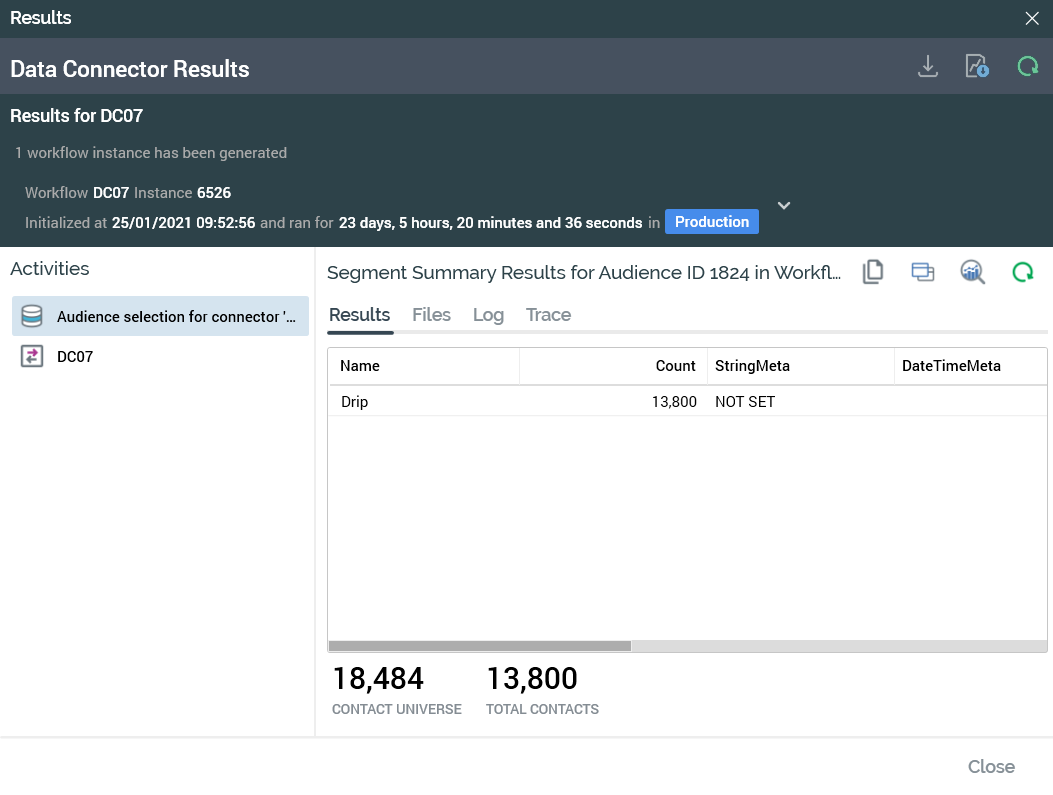
This occupies the whole of the tab and is entitled “Segment Summary Results for Audience ID [x] in Workflow ID [y]”. The panel displays details of the current audience instance (batch, or interactive activity configured with audience). For each audience segment, the following are shown:
-
Name
-
Count
-
For each metadata attribute, its value
-
-
Files
-
Toolbar:
-
Refresh: refresh the files.
-
Files: displayed if the audience’s audience definition is configured to produce validation files. A validation file is produced for each audience segment. Validation files can be accessed either via FTP download or on the RPI server and provide you with an opportunity to gain a preview of the segments that will be generated by the audience during interaction execution. An audience waterfall report is also made available if the audience definition was configured to produce such.
-
Log
Toolbar as per Results tab.
Trace log
Toolbar as per Results tab.
Specific activity
When invoked from a specific workflow activity, the Results Window’s contents depend on the context of its invocation:
-
Manual, scheduled, or activity state trigger: the instance in question is selected in the workflow instances panel.
-
Recurring trigger: the trigger’s most recent instance is selected in the workflow instances panel.
-
Batch audience, interactive activity, offer, export, or control: the workflow instance within which the activity is sited is selected in the workflow instances panel, and the activity is selected in the workflow activities list.
Data Connectors interface
When invoked from the Data Connectors Interface, the following are displayed at the Results Window:
-
Batch Audience: named “Audience selection for connector [Data Connector Name]”. When the data connector is configured with an audience, you can open the audience instance in the Audience Instance Viewer, and view audience insights in the Insights Window. These are not supported when the data connector is configured with a selection rule.
-
Data Transfer activity: named as per the data connector’s name. Note that an Offer activity is shown instead of a data transfer if the data connector is configured to write offer history.
Results Window basics
The Results Window is an independent, non-modal dialog. You can continue to access other RPI interfaces while the Results Window is displayed. The Results Window also continues to be shown if you change the current RPI tab.
It is composed of the following elements:
-
Header
-
Activities list
-
Activity details
Header
When invoked from the Interaction Designer, the top section of the Results Window contains the following:

-
Title: “Results for [Interaction Name]”.
-
[n] workflow instances have been generated. Choose one to view below: Only displayed when one or more workflow instance’s results exist.
-
[Workflow instance details]: this section is displayed to the left of the header. When no workflow instances have yet been created within the interaction, an advisory message is shown.
Workflow instance details
When at least one workflow instance exists within the interaction, the following details of the workflow instance currently being shown in the Results Window are displayed:

Selecting the section displays a dialog-style chooser, which allows you to select the workflow instance you wish to view in the Results Window.
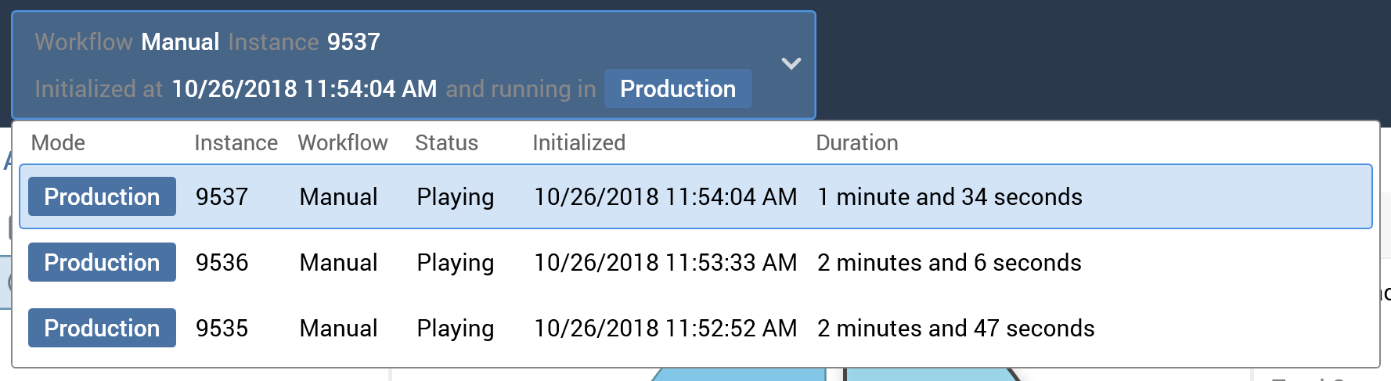
Workflow instances are shown in descending instance ID order, with Test instances shown in yellow text, and Production instances in white. A maximum of 1000 instances are listed. When more than 1000 instances exist, a message is displayed that states “Over 1000 workflow instances have been generated. Showing the latest 1000 workflow instances.
Toolbar
A toolbar is shown to the right of the header.

It exposes the following options:
-
View selected Workflow Instance: this button is available when the Results Window is invoked from the Interaction Designer or Workflow Instance Viewer, and when a workflow instance is selected in the workflow instances panel. Invocation displays its details in the Workflow Instance Viewer.
-
Generate a waterfall report for the selected Workflow Instance: invocation of this option displays the Save Waterfall Report As... Windows file system dialog. By default, the report's filename is “Workflow Instance[WFID] Summary.xlsx”, and its default file type is Excel (which must be installed for the report to be run). You can locate a folder to which to save the report, and then select Save to generate it. Doing so creates Workflow waterfall report job and displays it in the My Jobs Dialog. Full details of the job and Dialog can be found in the My Jobs documentation.
-
Download diagnostic information for this Workflow Instance: selecting this button displays the Download Workflow Diagnostics file Windows file system dialog. The default file name is “Workflow Diagnostics [workflow instance ID]”, and default file type is zip. Selecting Save creates and executes a Save workflow diagnostics job (for more information, please see the My Jobs documentation).
-
Roll back selected workflow instance: this button allows you to remove a specific recurring workflow instance. It is displayed when the currently-selected workflow instance is a Completed recurring Production workflow that is configured to create a new instance at each firing. Its invocation is protected by an “Are You Sure?” dialog; rolling back the selected workflow instance removes records from the Production offer history and offer history meta tables. Any file assets are also removed. When rolled back, the workflow's status is displayed as such in the Result Window's instances list.
-
Refresh the list of Workflow Instances: this button allows you to reload the latest state of workflow instance information, as displayed in the header.
Activities list
The activities list is shown to the left, below the header.
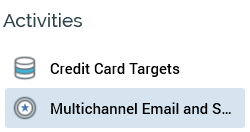
It lists the activities within the current workflow instance for which results are available. You can select an activity to view its details in the activity details panel.
Closing the Results Window
You can close the Results Window by selecting the Close button displayed at its bottom right, or the Close icon displayed to its top right.