

Overview
This document explains the benefits of using Audience Snapshots within Redpoint Interaction (RPI), multiple use cases/scenarios (simple and complex), and how to use Audience Snapshots.
Benefits
By incorporating audience snapshots, you can enhance performance, maintain consistency, and simplify audience management in RPI.
Example use cases
Simple use case: targeting a single segment
You have a campaign targeting "Loyalty Customers." Instead of recalculating this audience dynamically for every Loyalty Campaign, you can do it once and reference the created snapshot table to help with performance and consistency. Here’s how you would do that:
-
Create an Audience of “Loyalty Customers” that you want to use for your audience snapshot.
-
Create a snapshot of "Loyalty Customers" that can run at a specified cadence (e.g., daily or weekly). When setting the cadence for the snapshot refresh, you should take into consideration the frequency of database updates as well as the campaign execution schedule.
-
Use this snapshot in any campaigns for targeting loyalty customers based on the snapshot criteria, ensuring consistent and efficient targeting without querying live data at every execution.
-
Automate the snapshot refresh process, keeping data current.
Complex use case: targeting multiple segments
You’re setting up multiple campaigns to target records that are opted into different marketing channels (Email, SMS, Phone), and would like to have all of that data represented in a single table to reduce the number of times the same logic/queries are run. Here’s how you would do that:
-
Create an audience in which the different segments or opt-ins are represented based on the given database tables and fields using multiple filter blocks.
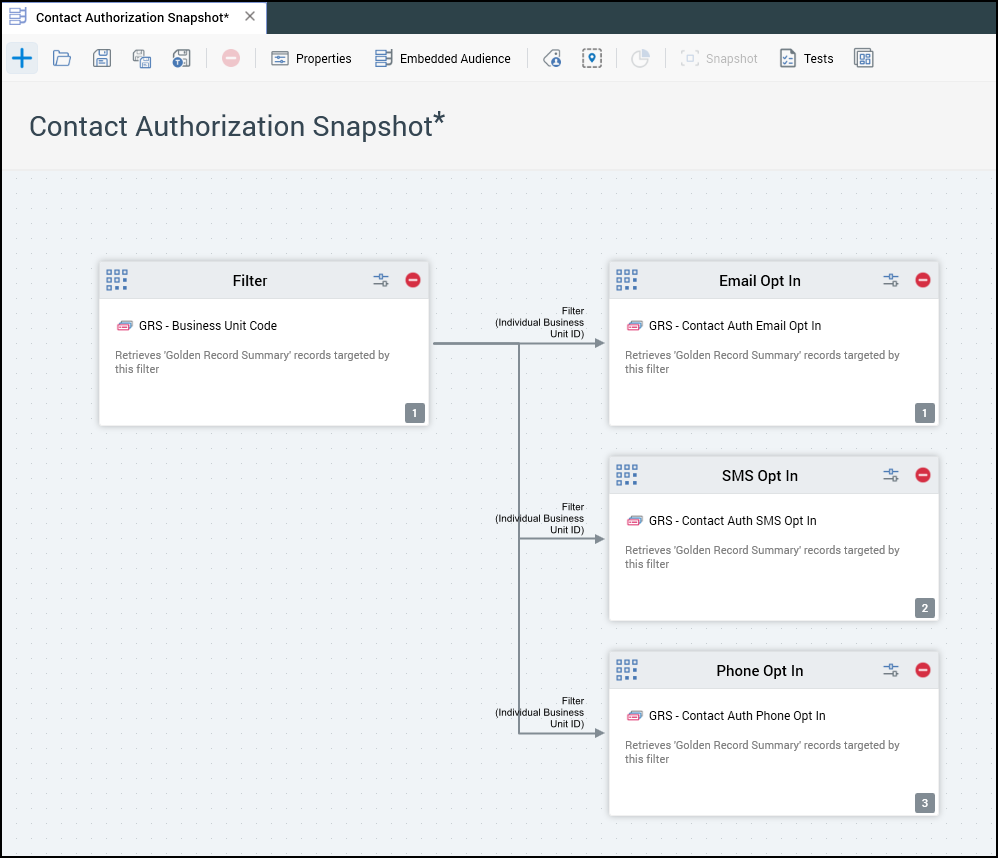
Each of the Opt-In segments are numbered 1-3 by default and based on the order they are connected to the previous process block. This is known as “Single Output Contact,” which would only allow a given record to fall into one of the configured segments.
-
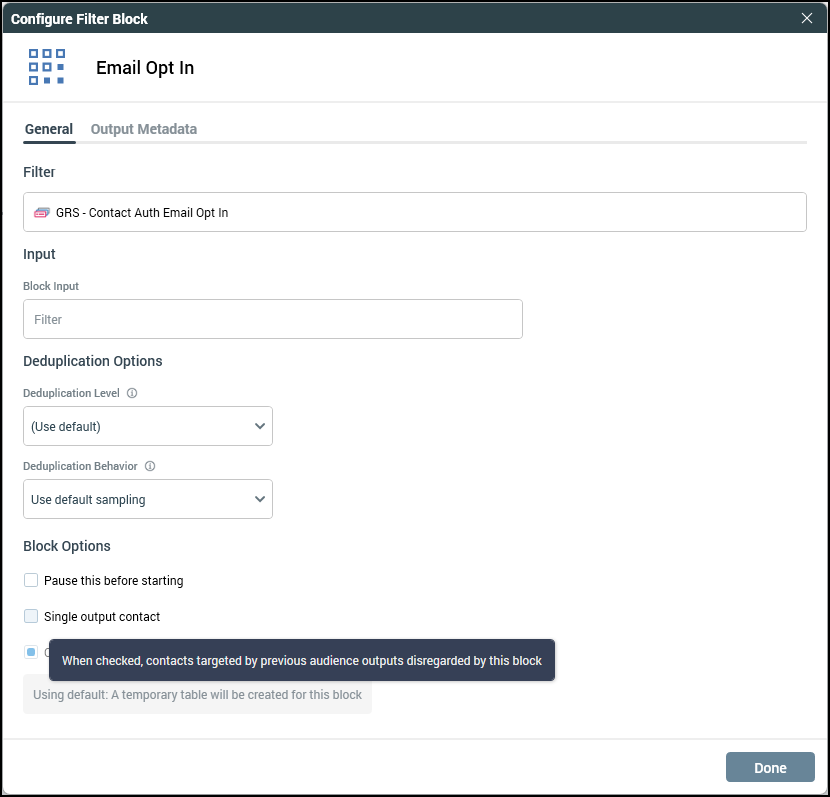
To allow a record to fall into multiple segments and have the audience capture all of the opt-ins for each record, do the following:
-
Configure each of the Opt-In segments and uncheck the “Single Output Contact” option for each.
Counts using Single Output Contact:

Counts without using Single Output Contact:
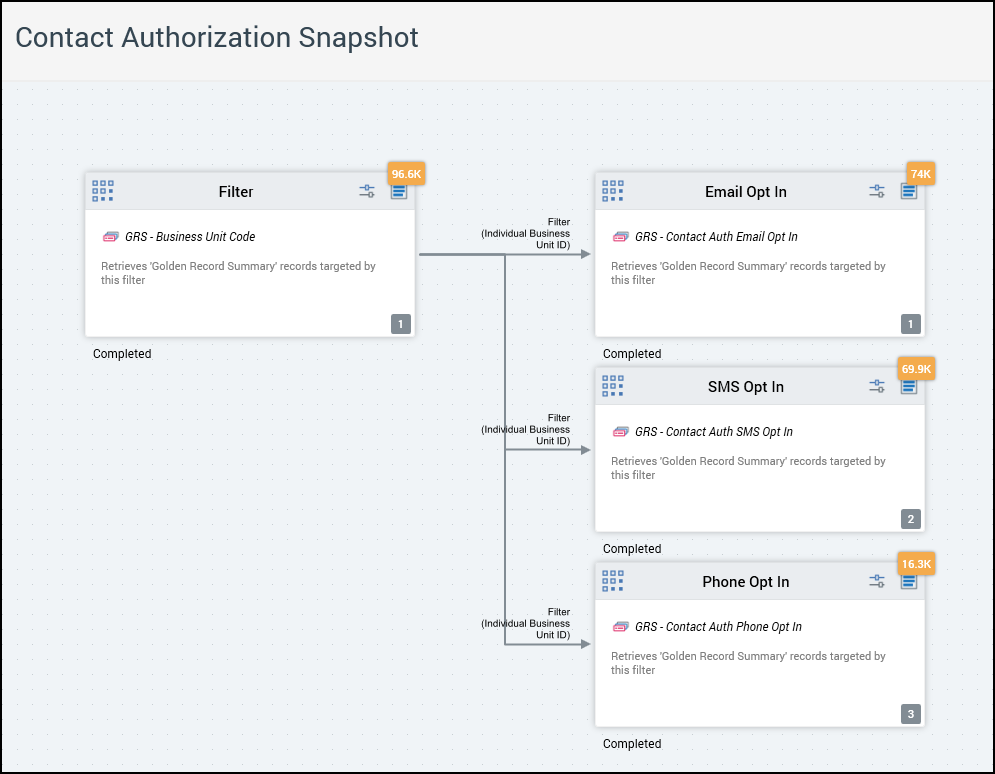
By not using the Single Output Contact this will allow records with multiple channel opt-ins to be written to the same table, even though they share the same ID field within the database.
-
Single output contact: this checkbox is checked by default. At a block’s execution, if its execution order is greater than 1:
-
If the property is checked, any contacts made via preceding blocks at the same level within the audience are not targeted by the block.
-
If the property is unchecked, contacts made via preceding blocks at the same level within the audience are targeted by the block.
-
This process will only work for segments that are coming from the same input process block.
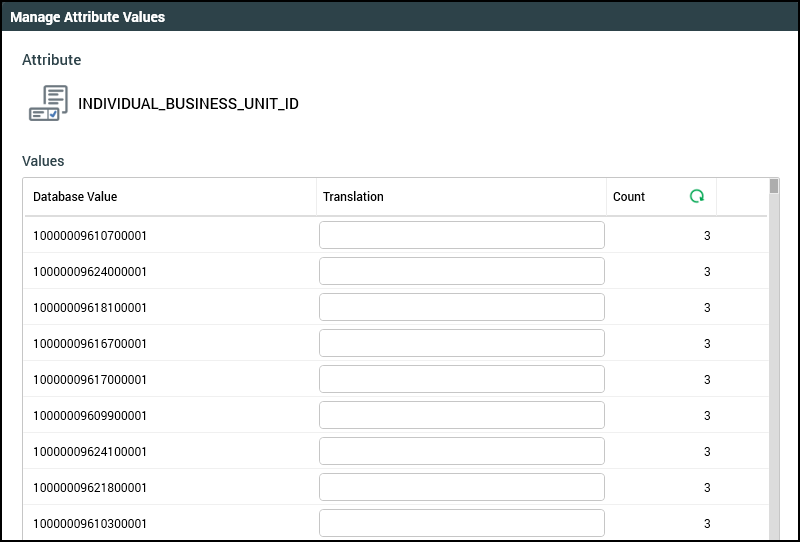
Below are the counts of each segment based on the database table that was created from running the Audience Snapshot:
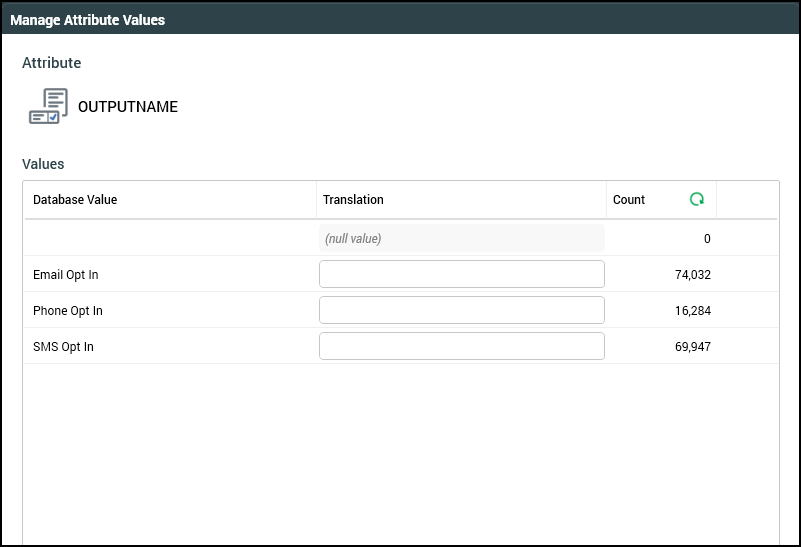
For example purposes, you are able to see that a given Individual_Business_Unit_ID is able to exist multiple times within the created database table to account for having multiple Opt-Ins based on the different segments.
Using the image below you can see that each of the IDs has 3 records within the table. This tells us that each of those records are opted into each of the segments/channels that were defined within the audience. If the record was showing a count of 2, then that record would only be opted into 2 of the segments/channels, and so on.
Using audience snapshots
Now that the audience has been created, and the audience snapshot has been configured, it is now time to use the created database table within selection rules and audiences to further target records. Use the following steps to take advantage of this process:
-
Create required joins between the base resolution table to the audience snapshot table based on the ID field.

-
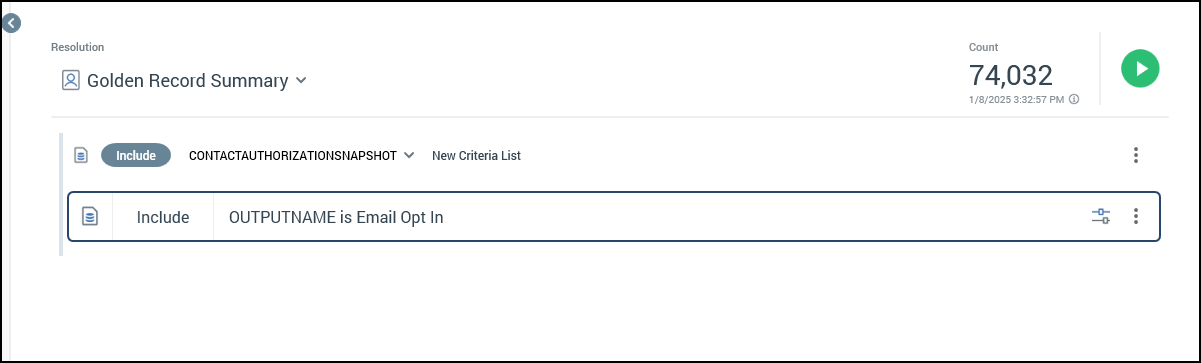
Create attributes from the snapshot table so they can be used within selection rules. The
OutputNamefield would be the main field needed in order to target specific segments.
-
Create selection rule(s) using the new data from the audience snapshot table to further target records with opt-in information.

Additional resources