

Overview
This page walks through the steps of configuring and using a PURL adapter with Offer History metadata fields as a source of the attribute values for the URL parameters in the PURL adapter. For example, you can add query string parameters (such as UTM parameters) to URLs to track campaign analytics more efficiently using a PURL adapter.
Prerequisites
There are the following prerequisites for using Offer History metadata fields as values for PURL adapter URL parameters:
-
RPI configured with an audience definition
-
RPI configured with a channel that supports PURL adapters
-
Access/ability to:
-
Configure audience definitions
-
Configure PURL adapters (web adapters)
-
Configure channels
-
-
A test interaction to validate functionality
High-level configuration steps
These are the general steps that need to be done to be able to use Offer History metadata fields as a source of values for a PURL adapter:
-
Add metadata fields to the audience definition.
-
Create attributes from Offer History metadata for new fields.
-
Create and configure the PURL adapter.
-
Add the PURL adapter to the channel.
-
Test using the PURL adapter with an email channel.
Detailed configuration steps
This section walks through each of the steps to configure and use Offer History metadata in a PURL adapter.
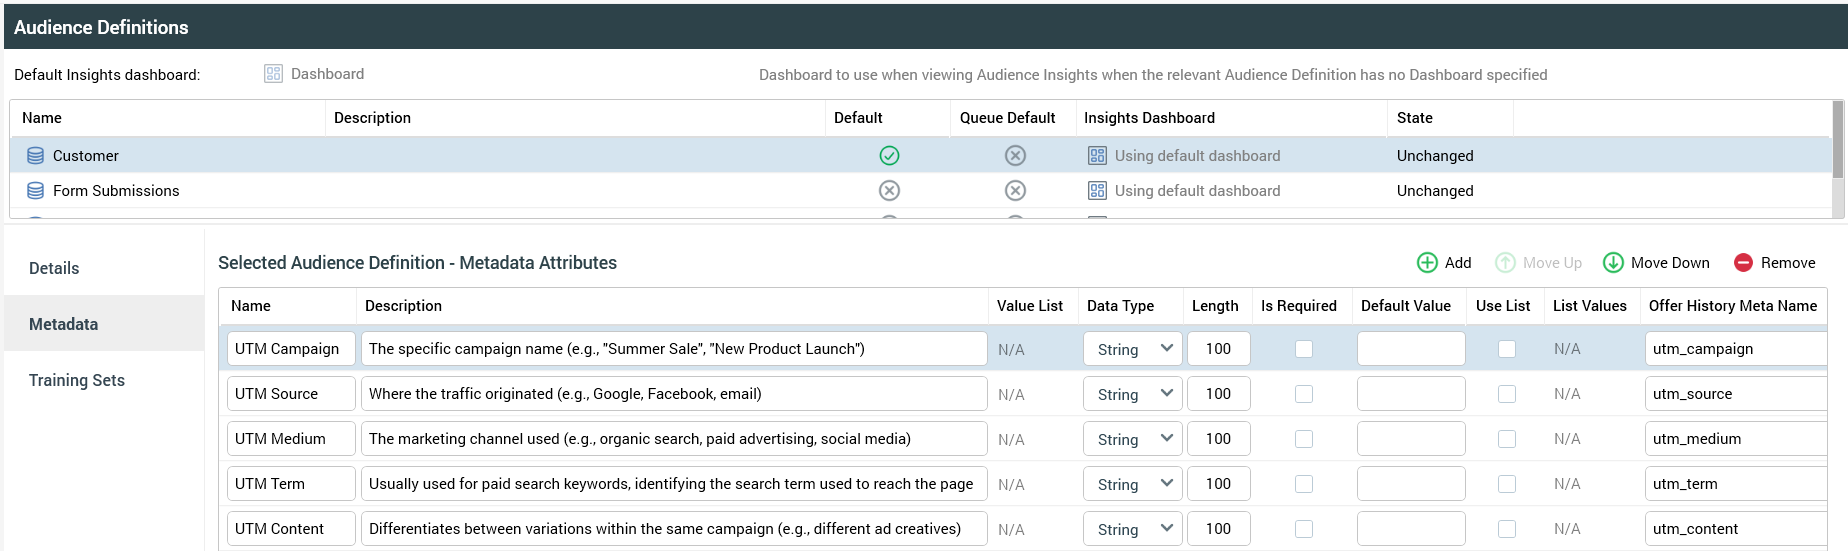
Step 1: add metadata fields to the audience definition
If your audience definition is already configured to capture the metadata that you plan to use as values for query string parameters of a URL, then you can move on to step 2.
If your audience definition is not yet configured to capture the metadata that you plan to use as values for query string parameters of a URL, then you need to add them.
-
Set up a series of UTM parameters as metadata fields.
-
Make the fields free-form string fields (this is what we’re using for this example, but any type of supported metadata type would work as a field to use as a value for the PURL adapter).
-
Save the updated audience definitions with the metadata. The fields will be added to the offer history meta table if they do not already exist.
In the next steps, we will use those new fields to create attributes and configure a PURL adapter with those attributes.
Step 2: create attributes from Offer History metadata for new fields
Now that the audience definition is configured to capture metadata, you need to create attributes from the database fields.
If attributes already exist for these fields, then you can move on to step 3.
-
Navigate to the Configuration section within RPI and then go to the Catalog.
-
From there go to the
OfferHistoryMetatable that is defined in the audience definition. -
Select the fields that were created to be used in the PURL adapter. In this example we will create attributes for all of the UTM fields.

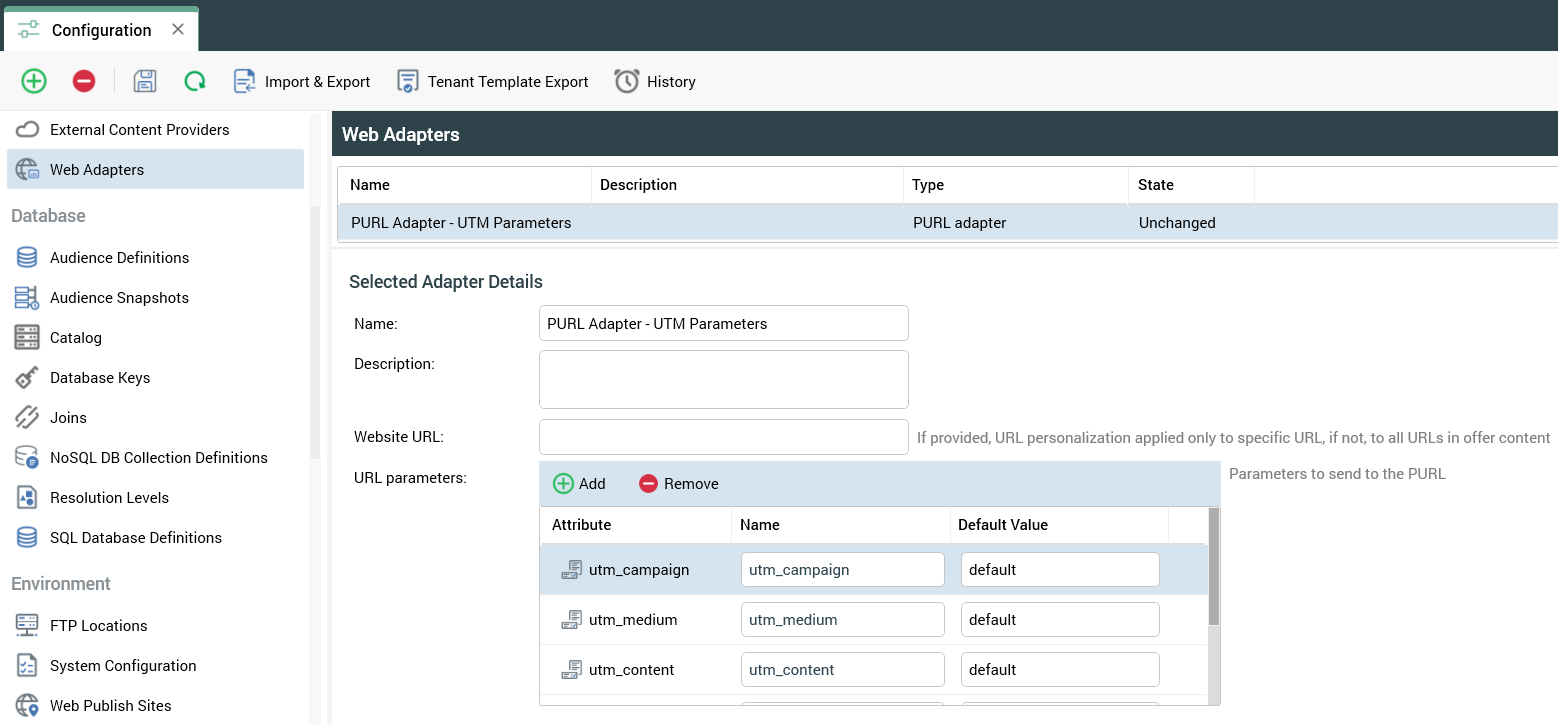
Step 3: create and configure PURL adapter (web adapter)
Now that you have attributes created for the offer history metadata fields you want to use as the values of the URL parameters (query string parameters) in the PURL adapter, you need to create and configure the PURL adapter:
-
Open Configuration.
-
Go to the Web Adapters section.
-
Create a new PURL adapter.
-
To configure the PURL adapter, add the URL parameters by adding the attributes from the previous step and then configuring the name and the default values.
Leaving the Website URL field blank will cause the PURL adapter (web adapter) to add the URL parameters to every HREF in the content used with a channel that includes the web adapter.
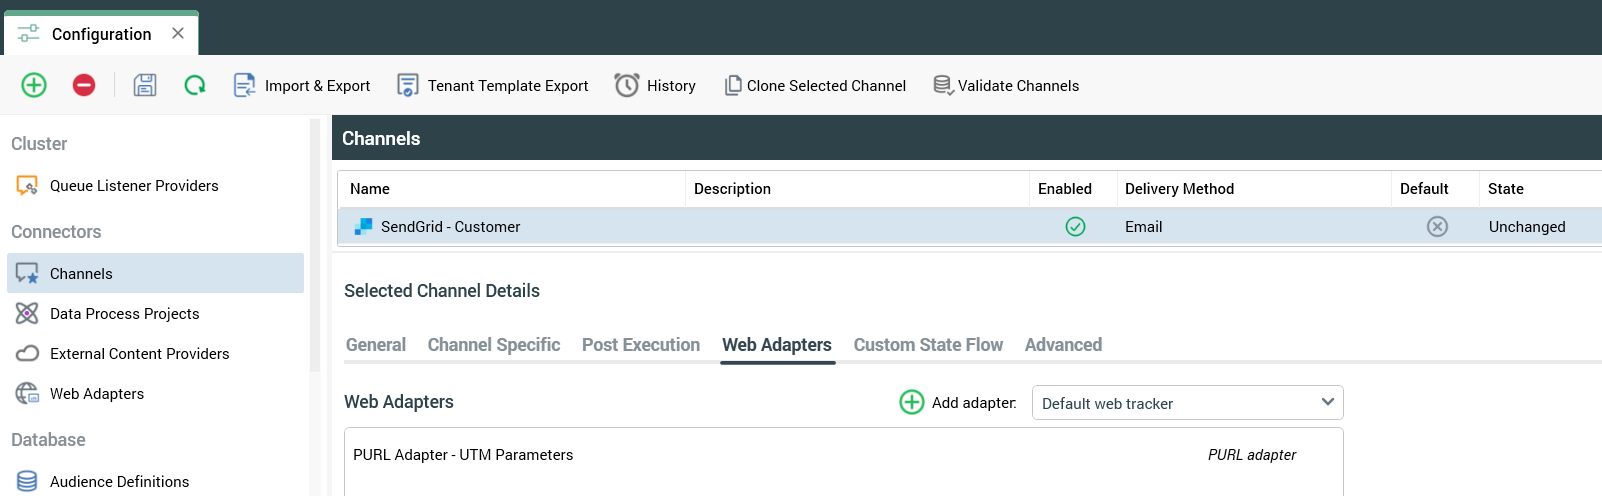
Step 4: add the PURL adapter to the channel
Now that you have configured a PURL adapter, you need to add it to the channel(s) that you want to apply the query string parameters to based on the Offer History metadata.
-
In the Configuration section, go to Channels.
-
Select the appropriate channel(s).
-
On the Web Adapters tab click Add adapter and then select the PURL adapter you added in the last step.
-
Save the channel.
Step 5: test using the PURL adapter with an email channel
Now that everything has been configured to use the PURL adapter, you are ready to create an email offer to test the functionality.
Step 5a: configure a test audience
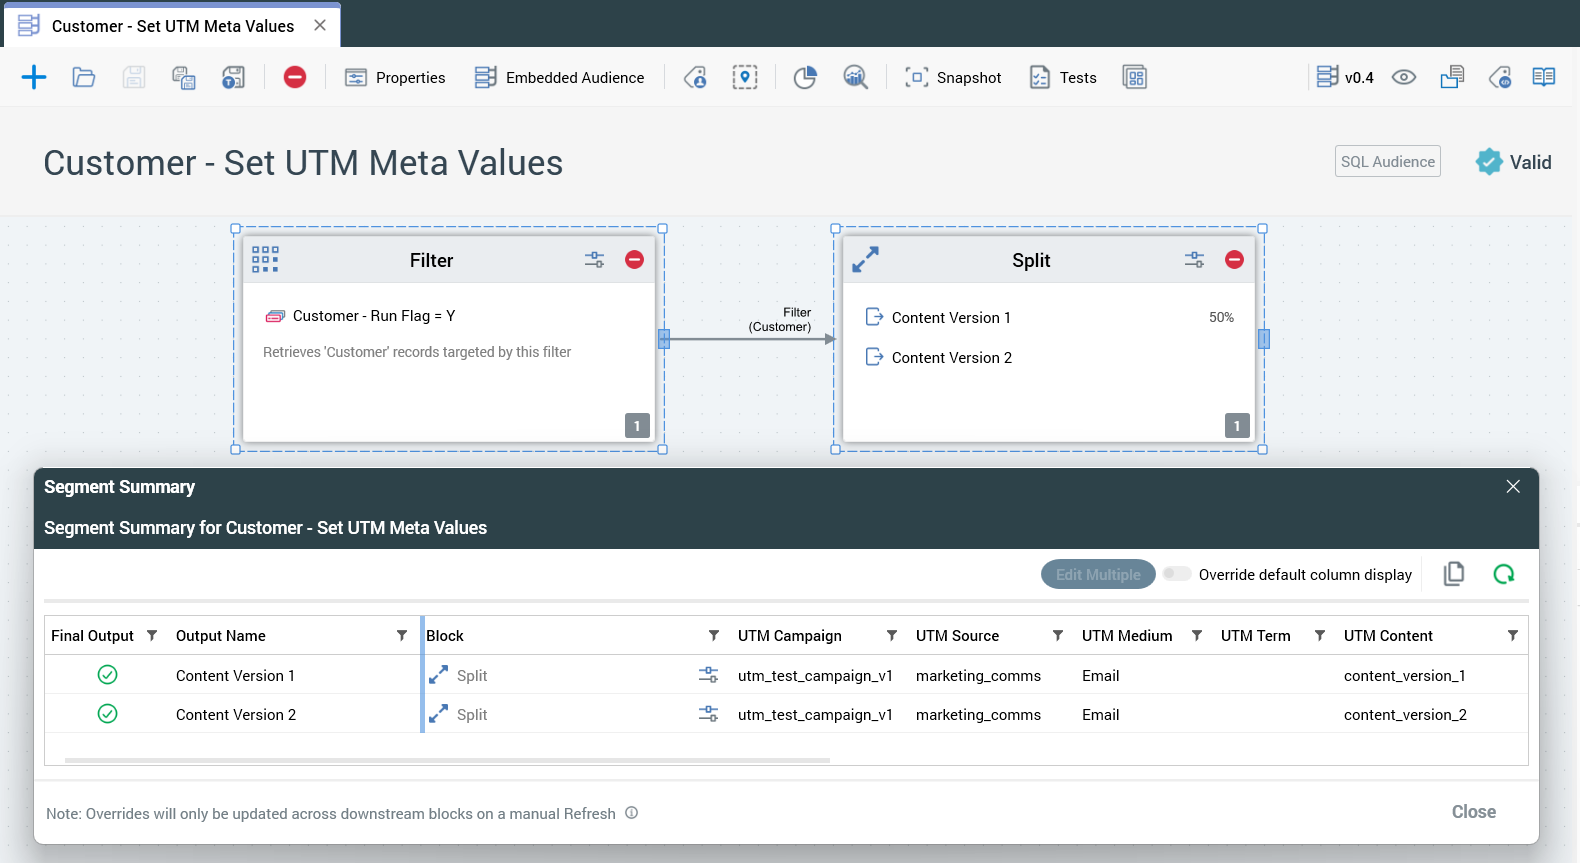
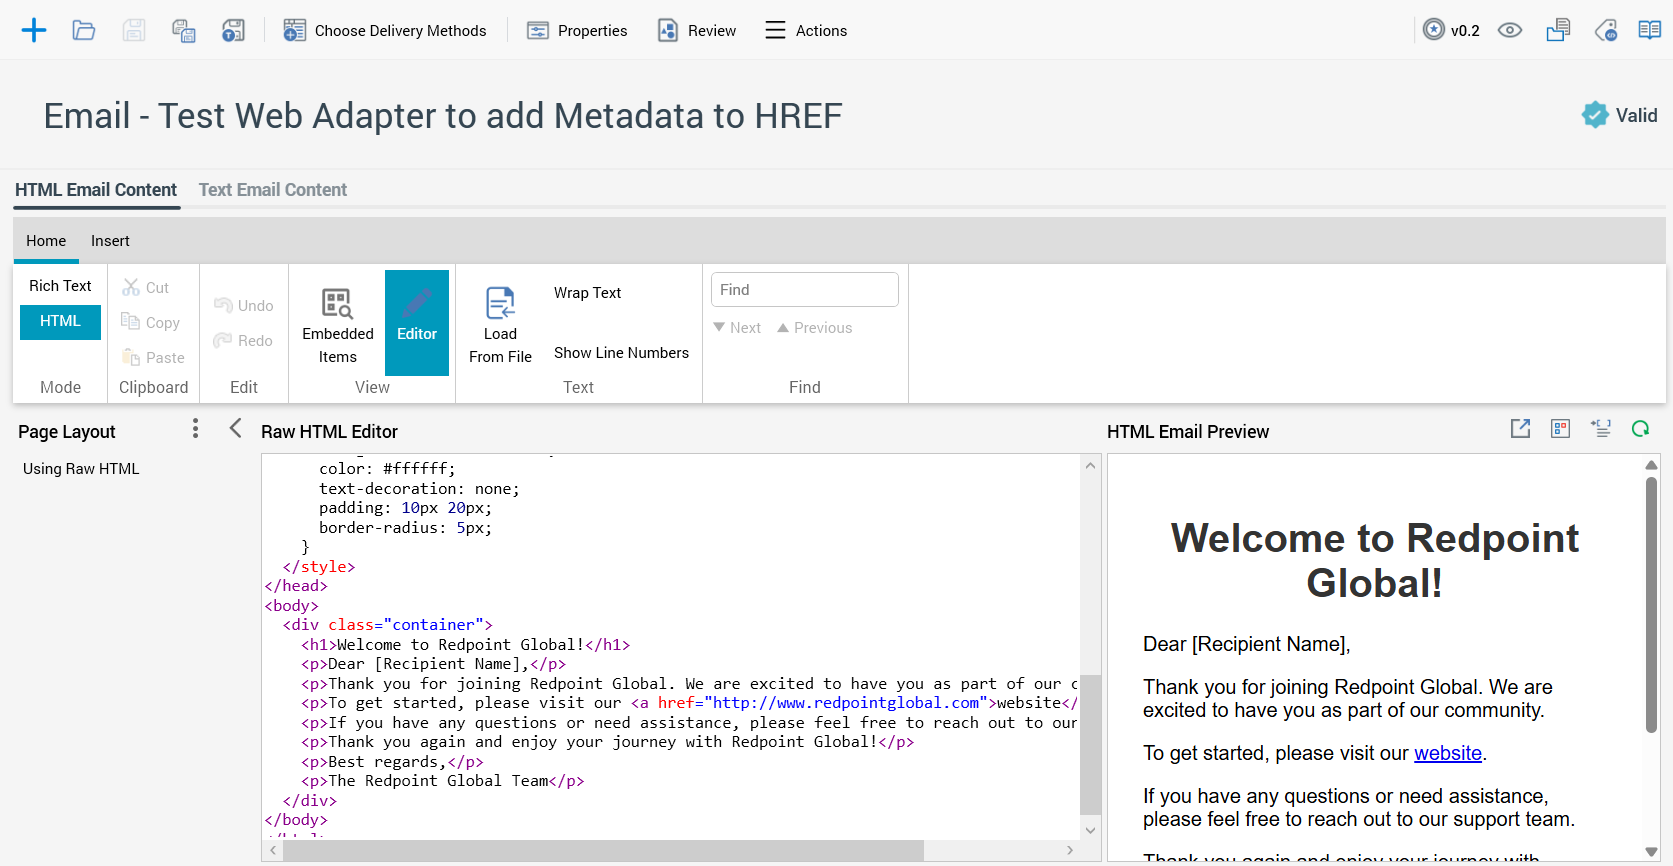
Step 5b: configure test email content
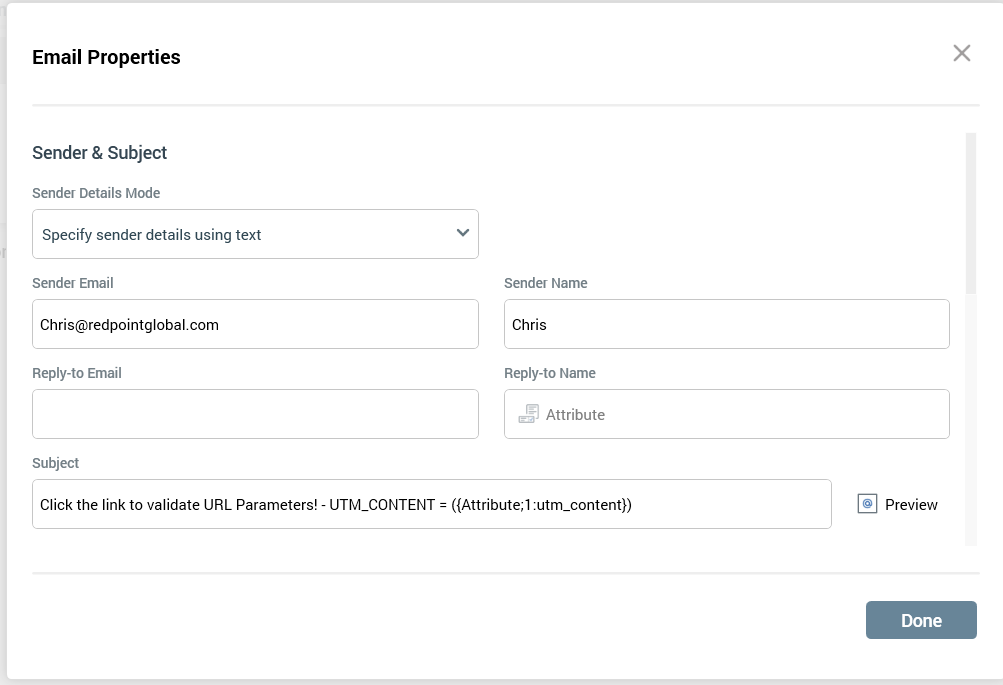
Subject line includes UTM_Content metadata field:
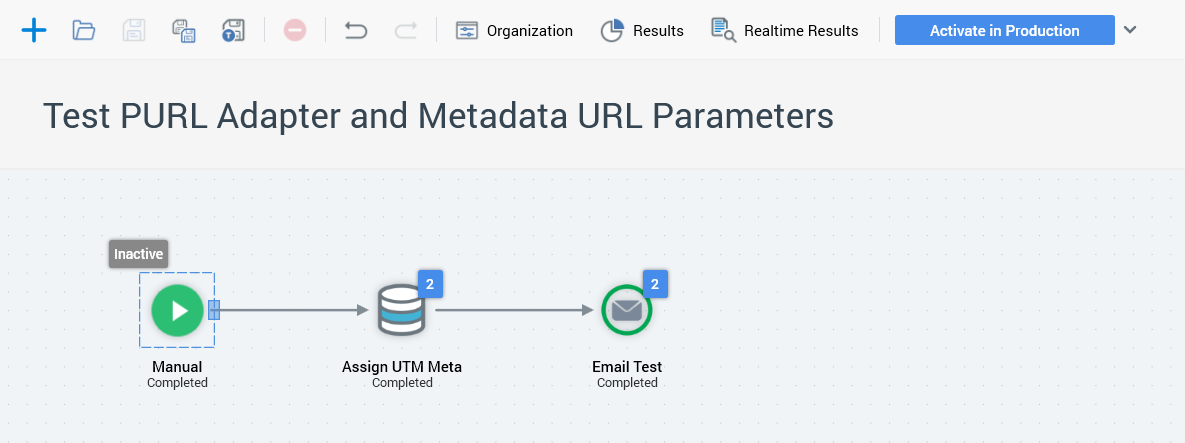
Step 5c: configure test interaction
This interaction will use the audience configured previously and send the recipients an email via the channel that has the web adapter associated to it.
Step 5d: validate test email
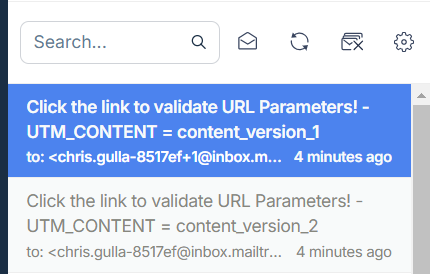
Below we are validating that we received the 2 email messages, one for each content version.
-
Confirm that both versions were received in the inbox, based on the content version in the subject line.
Below is the email content of one of the versions. Next we’ll validate that the query string parameters were populated correctly.
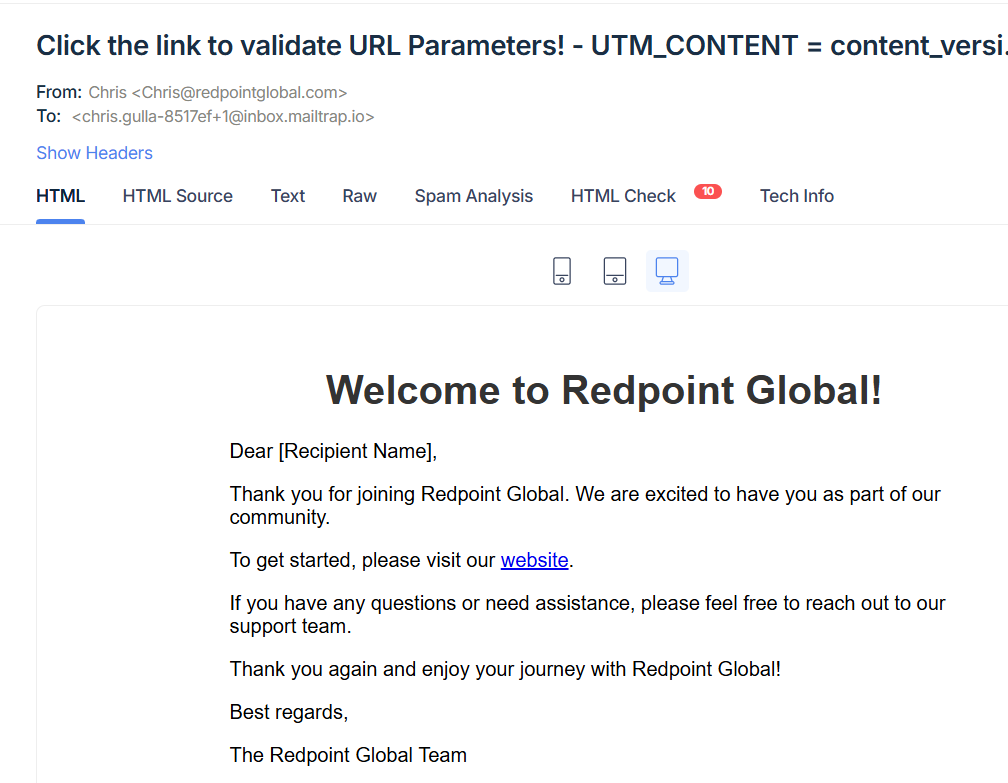
Step 5e: validate URL parameters were added to the HREF
Now that we have the email, and the subject lines look correct, validate that the links are correct for each of the email versions:
-
Click the “website” link in the email, and look at the URL to validate that the links are correct for each of the email versions.
Both of the links are listed below, and the UTM parameters are correct for both.
UTM content = content_version_1

UTM content = content_version_2

Additional resources