Overview
The steps on this page need to be completed within the SendGrid UI.
Create a Parent Account
-
Navigate to https://www.sendgrid.com.
-
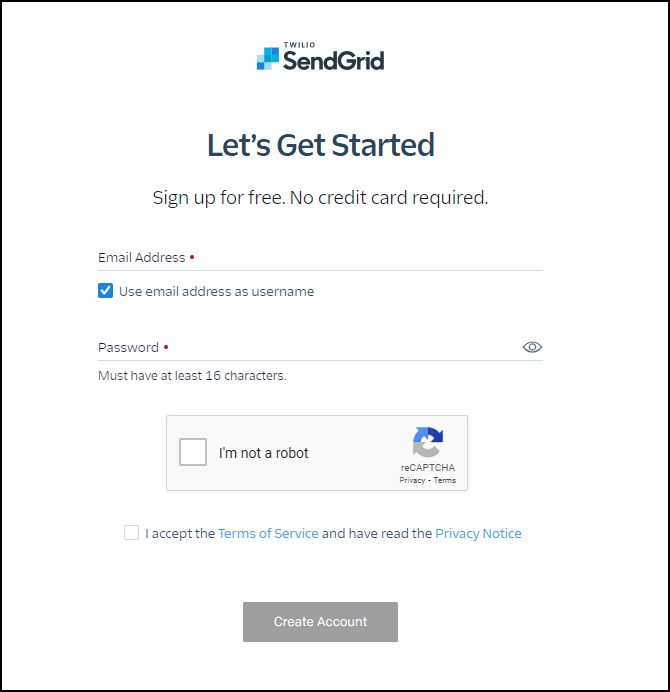
At the top-right of the home page select Start for Free.
-
Supply an Email Address and Password and select Create Account to start a free account.
-
Supply the following information on the next screen.

-
Select Get Started once you have completed that section. SendGrid will then send an email to the email address provided asking you to set up two-factor authentication.
-
From the Parent account screen, select the drop down next to the Parent Account name and select Account Details>Your Products.
In this section you need to select either a Pro or Premier plan to have the ability to add subuser accounts in the following section. Once that is completed you can log into your SendGrid Parent Account, which allows you to complete the following steps.
Create a Subuser
Details on using subuser accounts - Demystifying Twilio SendGrid Account Structure | Twilio SendGrid
-
Navigate to Settings.
-
From the Parent Account, select Subuser Management.
-
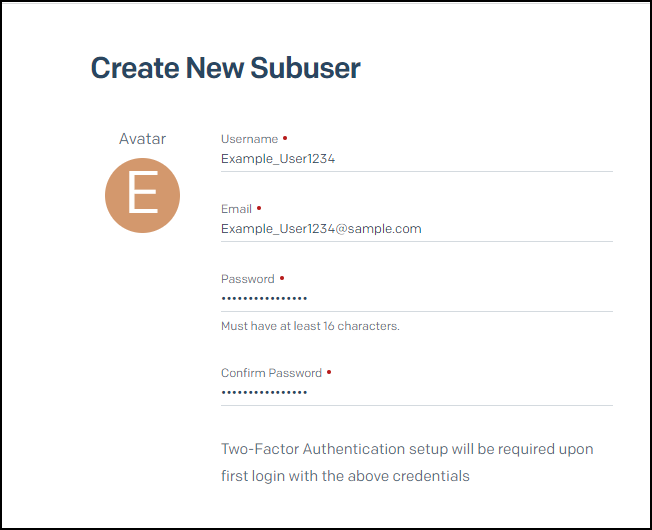
Select Create New Subuser.
-
Enter the following required information into the corresponding fields:
-
Username: the username your subuser will use to send emails and access the API.
-
Email Address: the contact email address for this subuser. This must be an active email account as SendGrid may contact a subuser to provide support, resolve sending and deliverability issues, or to enforce SendGrid's Terms of Service. Whenever SendGrid contacts a subuser, it is their policy to contact the parent account email address at the same time.
-
Password: the password your subuser will use to access SendGrid.com.
-
Configure IP addresses
Follow the steps in the next sections to set up your IP addresses.
Determine how many IP addresses you need
Based on the attached warmup document, you need to decide how many IP addresses will be needed based on how many records your organization plans to send out of SendGrid.
-
https://sendgrid.com/en-us/resource/email-guide-ip-warm-up: Recommended send volume per IP address
Set up new IP addresses
-
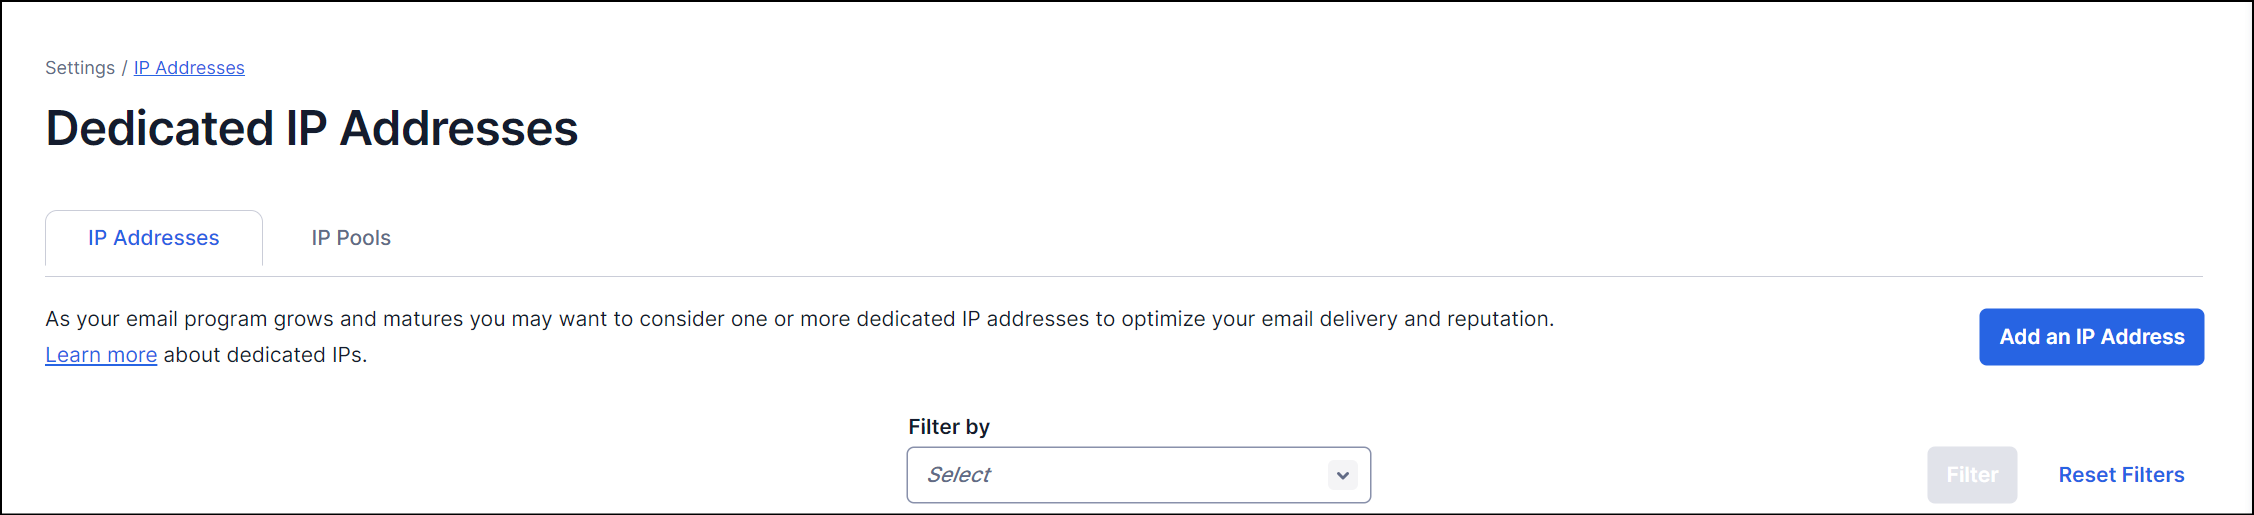
In the left navigation, select Settings and then choose IP Addresses. Here you will see a list of your current dedicated IPs. Your IPs in warmup will have a warmup label.
-
Select Add an IP Address.
-
Assign an IP address to the subuser account. You are assigned a dedicated IP address when you create a Pro 100k plan or higher. If you send at a high volume and you are using subusers to separate out your sending traffic, it's best practice to purchase a separate IP for each sending type (Transactional vs. Marketing Messages).
You are only allowed to create one new IP address every 30 days. If multiple addresses are needed, then you will need to contact SendGrid Support.
Set up and verify Sender Authentication for created IP
-
In the SendGrid UI, select Settings>Sender Authentication.
-
Select Authenticate Your Domain and populate the following sections.
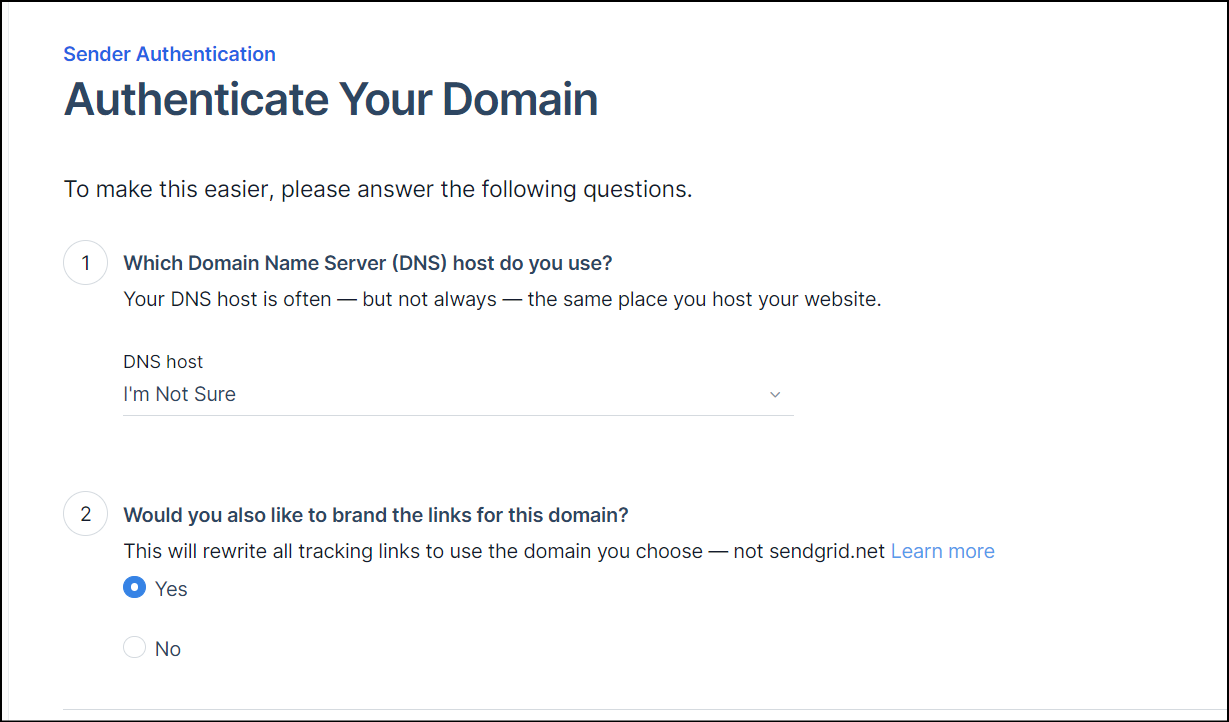
-
Select Next.
-
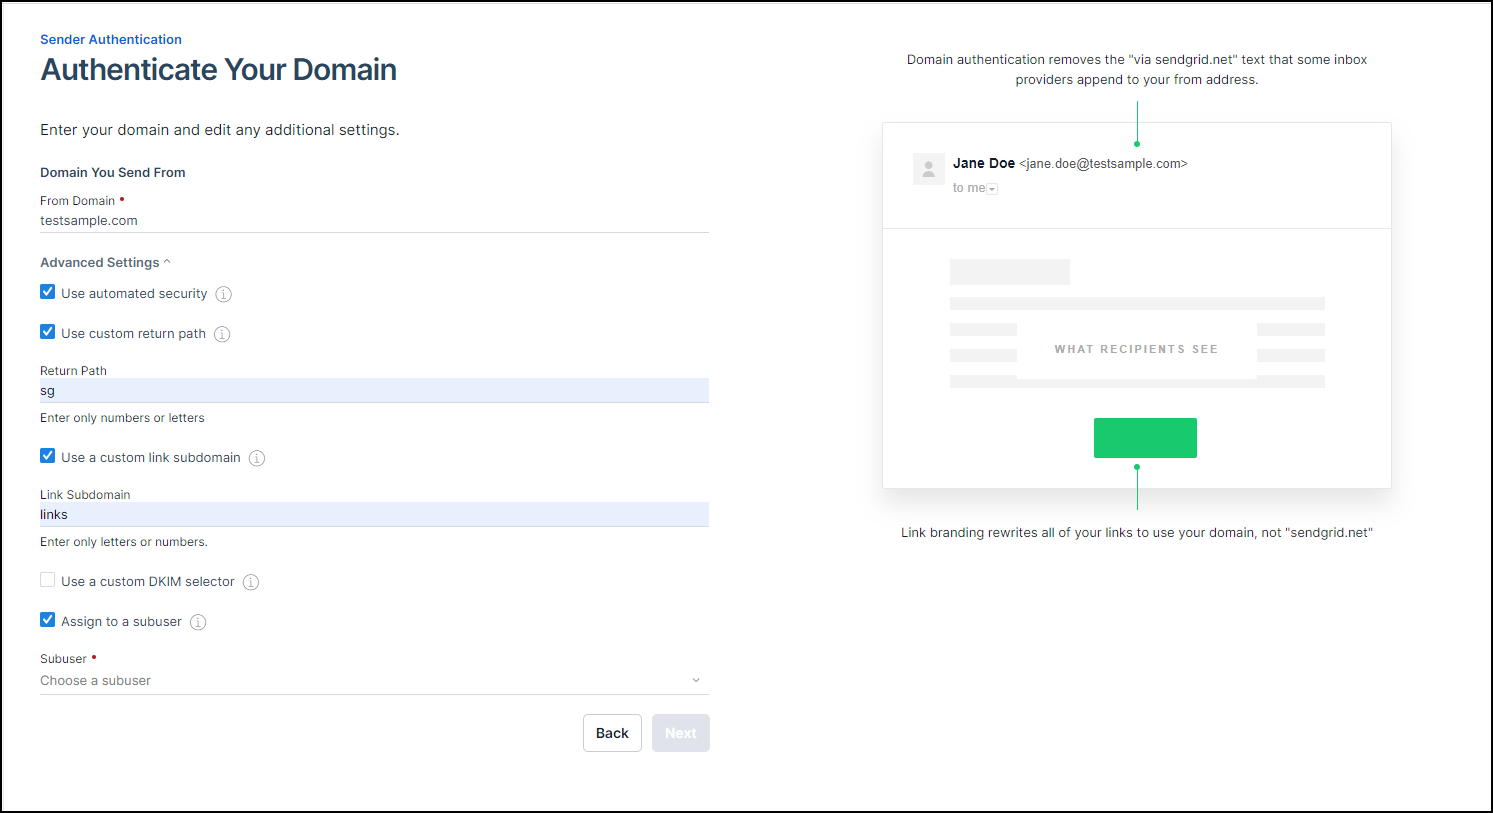
On the next screen, populate the domain as follows:
-
Check Use custom return path.
-
Set Return Path to
sg. -
Check Use a custom link subdomain.
-
Set Link Subdomain to
links. -
Check Assign to a subuser.
-
From the Subuser drop down, select the subuser this domain will be assigned to.
-
Select Next.
-
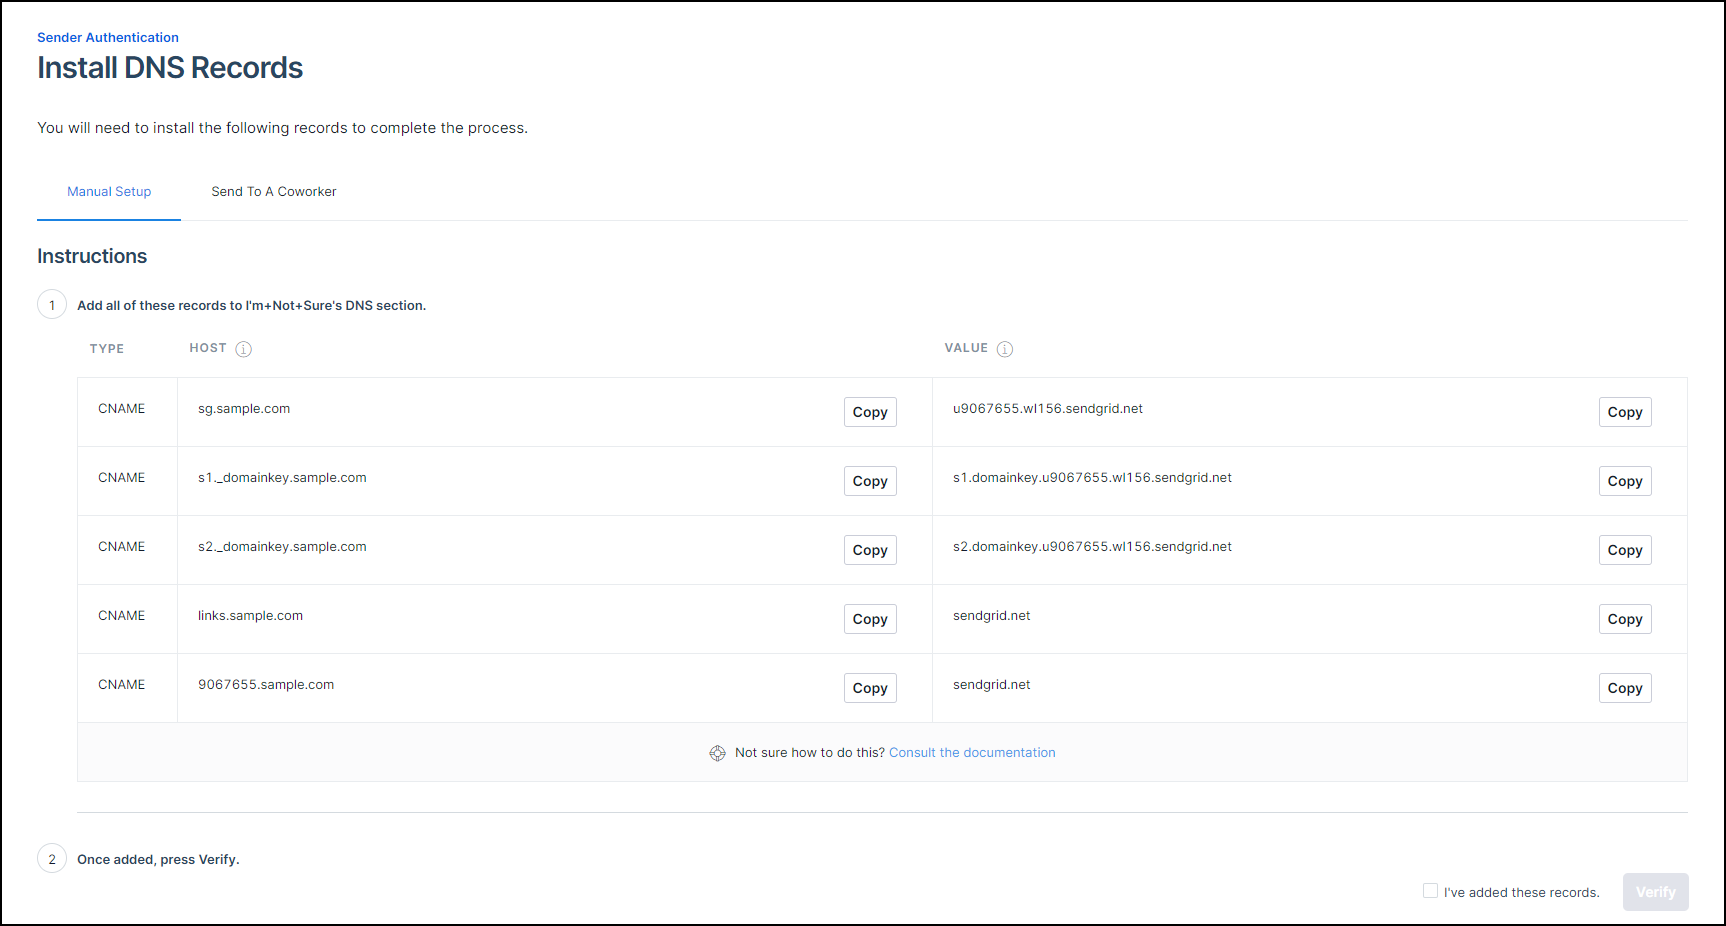
-
Install DNS Records into DNS Host. Once completed, select Verify to ensure SendGrid is able to see those updates.
Set up and verify reverse DNS for created IP
-
In the reverse DNS section, select Get Started.
-
Next, select the IP to set up reverse DNS.
-
Add a subdomain.
-
Select or enter a domain you want to associate with the IP. Make sure that you only enter the name of your root domain. Do not include
wwworhttp://wwwin this field! Your domain needs to match the domain of your “from” address on the emails you are sending out. For example, if you’re sending from:marketing@sendgrid.com, set my domain to besendgrid.com. -
Select Save and then Confirm. An individual IP address can only have one reverse DNS set up.

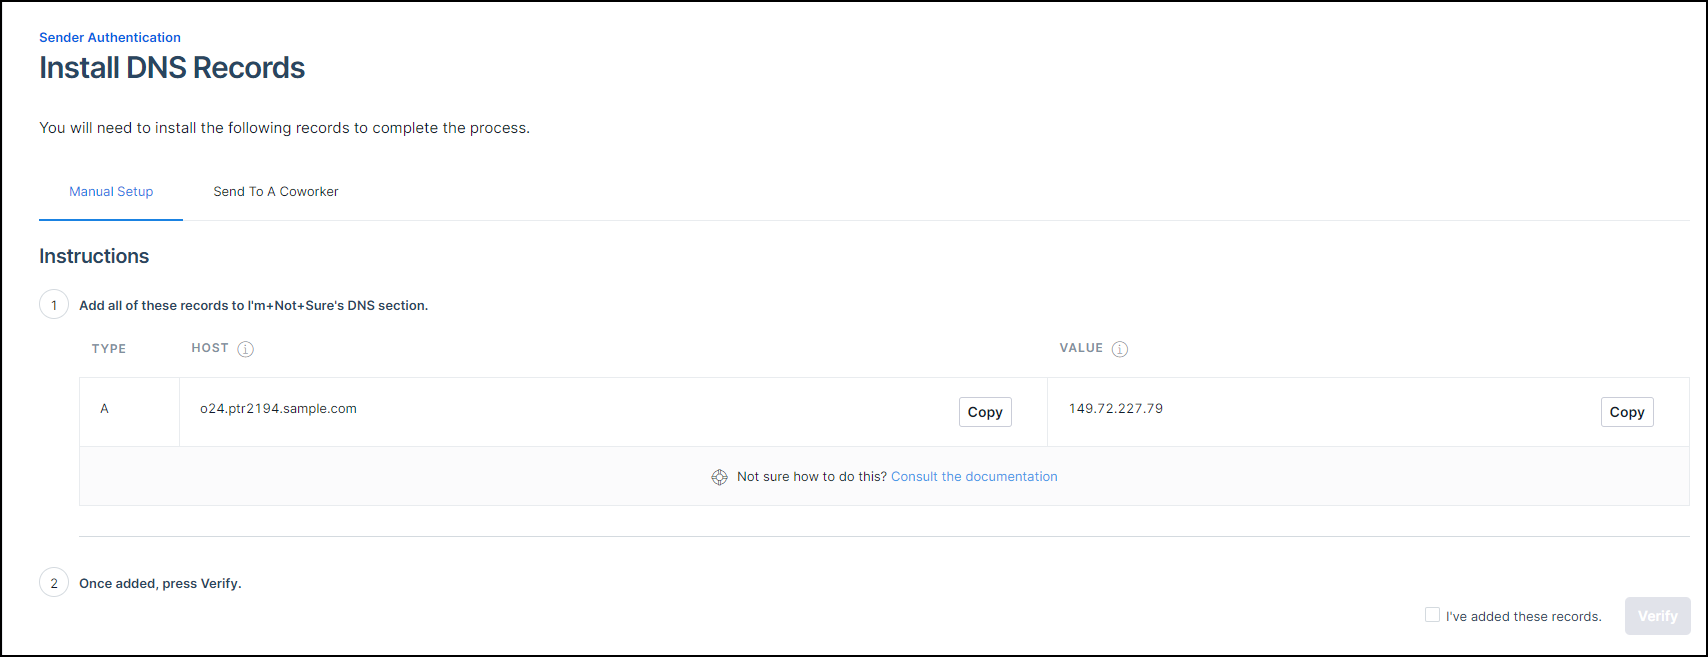
-
Next, you need to add all the A Records on this screen to your DNS host. This process varies depending on your DNS host.
Obtain an API Key
To establish a connection to the SendGrid application you must have an API (Application Programming Interface) key.
Your application, mail client, or website can all use API keys to authenticate access to SendGrid services. We suggest that you use API keys for connecting to all of SendGrid’s services. They are the preferred alternative to using a username and password because an API key can be revoked at any time without having to change your username and password.
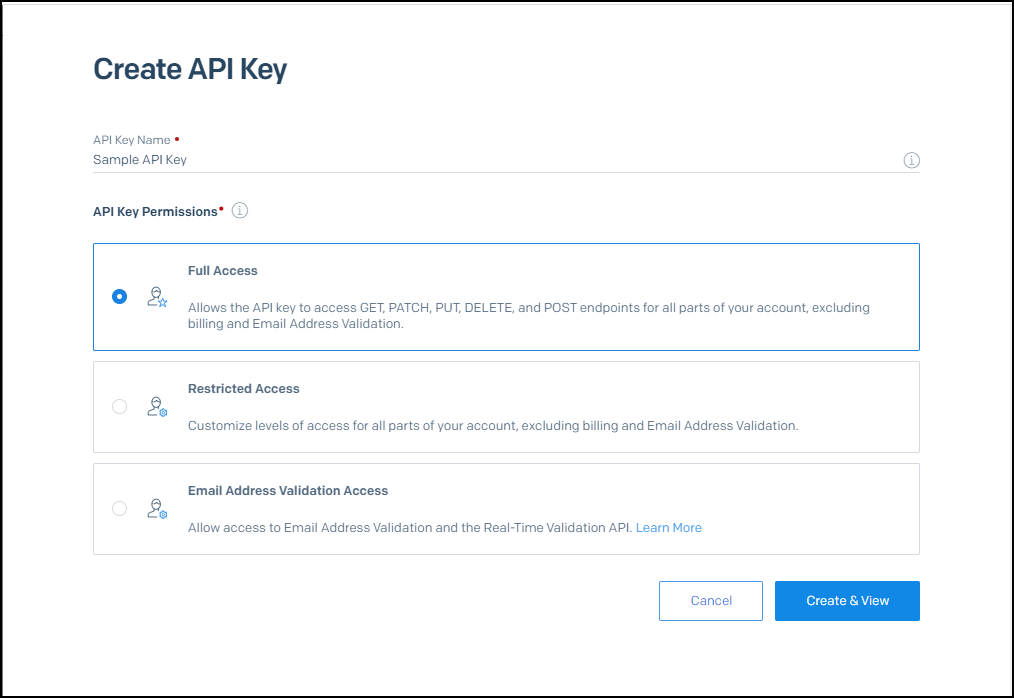
SendGrid API keys include the following access levels:
-
Full Access: allows the API key to access
GET,PATCH,PUT,DELETE, andPOSTendpoints for all parts of your account, excluding billing and Email Address Validation. -
Restricted Access: customizes levels of access for all parts of your account, excluding billing and Email Address Validation.
-
Billing Access: allows the API key to access billing endpoints for the account.
Creating an API key
-
Within the Subuser account, on the left navigation bar navigate to Settings and choose API Keys.
-
Select Create API Key.

-
Give your API key a name.
-
Select Full Access, Restricted Access, or Billing Access.
-
If you are selecting Restricted Access or Billing Access, select the specific permissions to give each category. For more information, see API key permissions.
-
Select Create & View.
-
Copy your API key somewhere safe. For security reasons, do not put it directly in your code, or commit it somewhere public like GitHub.
The created API key will be needed to configure the RPI Channel.

Set up SendGrid callback service
To set up either the Standard or Web API call back service, the following prerequisites must exist:
-
A public-facing web server (installing on the same VM as RPI is NOT recommended).
-
A SendGrid callback service website hosted in IIS.
Redpoint CDP Clients will be provided with the path and location of the SendGrid Callback Service.
Install and configure the SendGrid callback service (RPI)
The SendGrid callback service is a separately installed web service that is designed to listen and react to state update events coming from SendGrid. For more information, see the RPI Admin guide.
Enabling response events (Webhook)
-
Navigate to the newly created Subuser account.
-
In the SendGrid UI, select Settings>Mail Settings.
-
Under Event Settings, select Event Webhook.

-
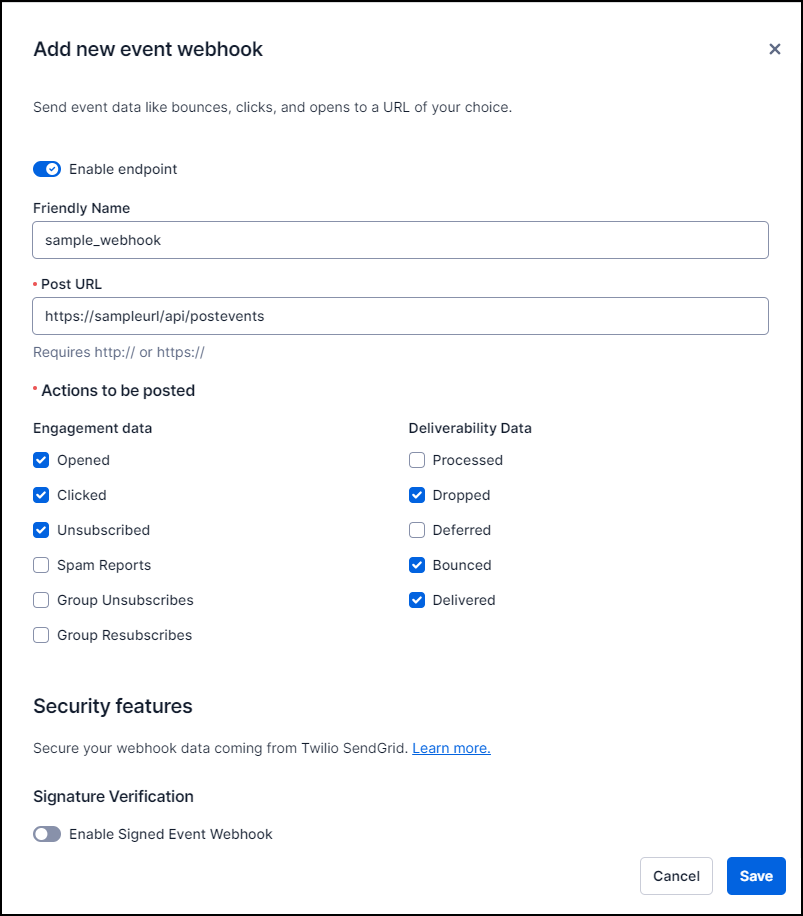
Select Create new Webhook.
-
Set Friendly Name.
-
Set Post URL to folder location for callback service.
-
Redpoint CDP clients will be provided this information.
-
RPI clients will use the URL that was created in the above install and configure steps.
-
-
Under Actions to be Posted, select the requested data points to be loaded into the SendGrid Events table. By default, none are selected (processed and deferred can be skipped for performance reasons).
-
Select Save.