Overview
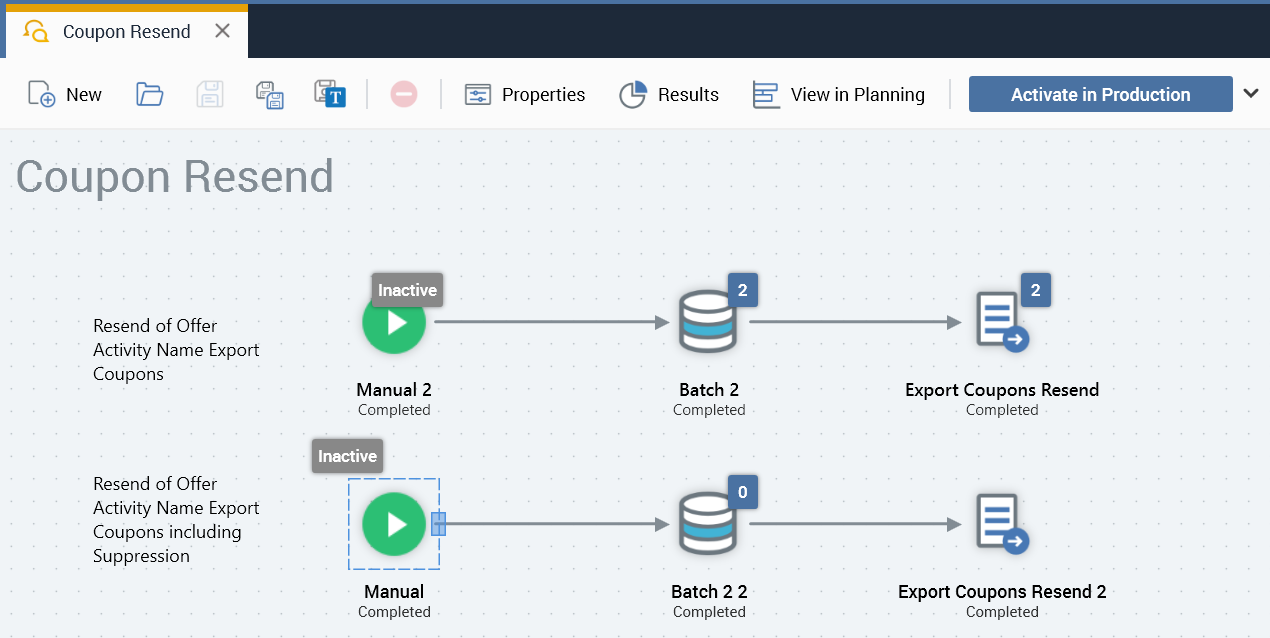
In some cases, you may want to resend a coupon if it has not been used. Knowing it has not been used requires the appropriate data to be brought back to the CDP so that you can determine if the coupon has been used or not, but that is beyond the scope of this document.
This is an example of how a coupon resend process could be configured, but the implementation depends on how you intend to use the resend process. This approach should be tested to ensure it meets your specific needs. Additionally, this example is only using a single resolution, but can be extended to support multiple resolutions.
The approach we will use here for resending coupons is to create a new resolution and audience, which we will call Coupon, that allows you to start from the coupon assignment table and work your way out from there. There are a few caveats when doing this:
-
To use the coupon assignment table in this fashion, we need to join the coupon assignment table to
OfferHistorybased on the resolution key of the coupon assignment table, which iscoupon_assignment_id. Given you can only join a table to another table one way in RPI we will need to create a view of the coupon assignment table with a slightly different name; in our example, it will be namedRPI_Coupon_Assignment_Resend. -
To ensure that the fulfillment activity targets the right data, we need to include some additional fields in this view to simplify the process and minimize the joins defined within RPI, which may introduce unanticipated data or results.
In this example, we will include a few fields from the person table in the view as well as one from the offer history table. Both of these can be expanded on, but we will start with the additional fields listed in the table below. These fields listed below are included in the view create statement found in the Appendix of this document. For performance related reasons, it is recommended that you materialize the view to a physical table as views have a tendency to degrade in performance over time. In this example, we are using a view to simply illustrate the approach.
|
Field Name |
Source Table |
|---|---|
|
First Name |
Person |
|
Last Name |
Person |
|
PID |
Person |
|
EmailAddress |
Person |
|
OfferActivityName |
Offer History |
Step 1: Bring the coupon assignment resend view into RPI
-
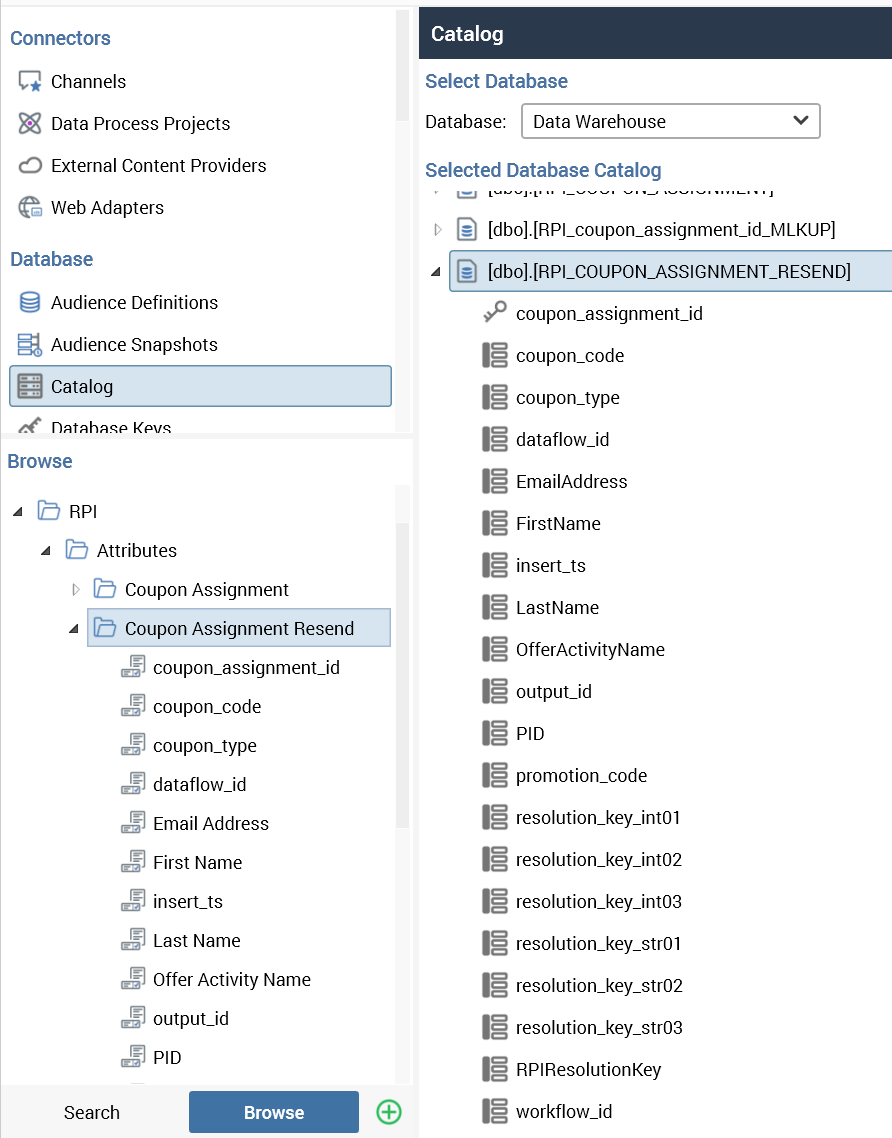
After creating the view defined in the previous section, synchronize the catalog so that we can see the new view that we created.
-
After syncing the catalog, create attributes from the table to be used in fulfillment activities.
-
Also set the primary key of the coupon assignment resend table to
coupon_assignment_id.
Step 2: Create joins for coupon assignment resend
There are two joins that are defined in the view that consist of joining:
-
Coupon_Assignmenttable to thePersontable onresolution_key_int01(in this example) toPID. -
Coupon_Assignmenttable toOfferHistorytable on the same fields that theCoupon_Assignmenttable is configured with; in this example, they areresolution_key_int01toPID,WokflowID, andDataflowID.
See the create view statement in the Appendix for reference.
Step 3: Create basic components for a new resolution and audience definition
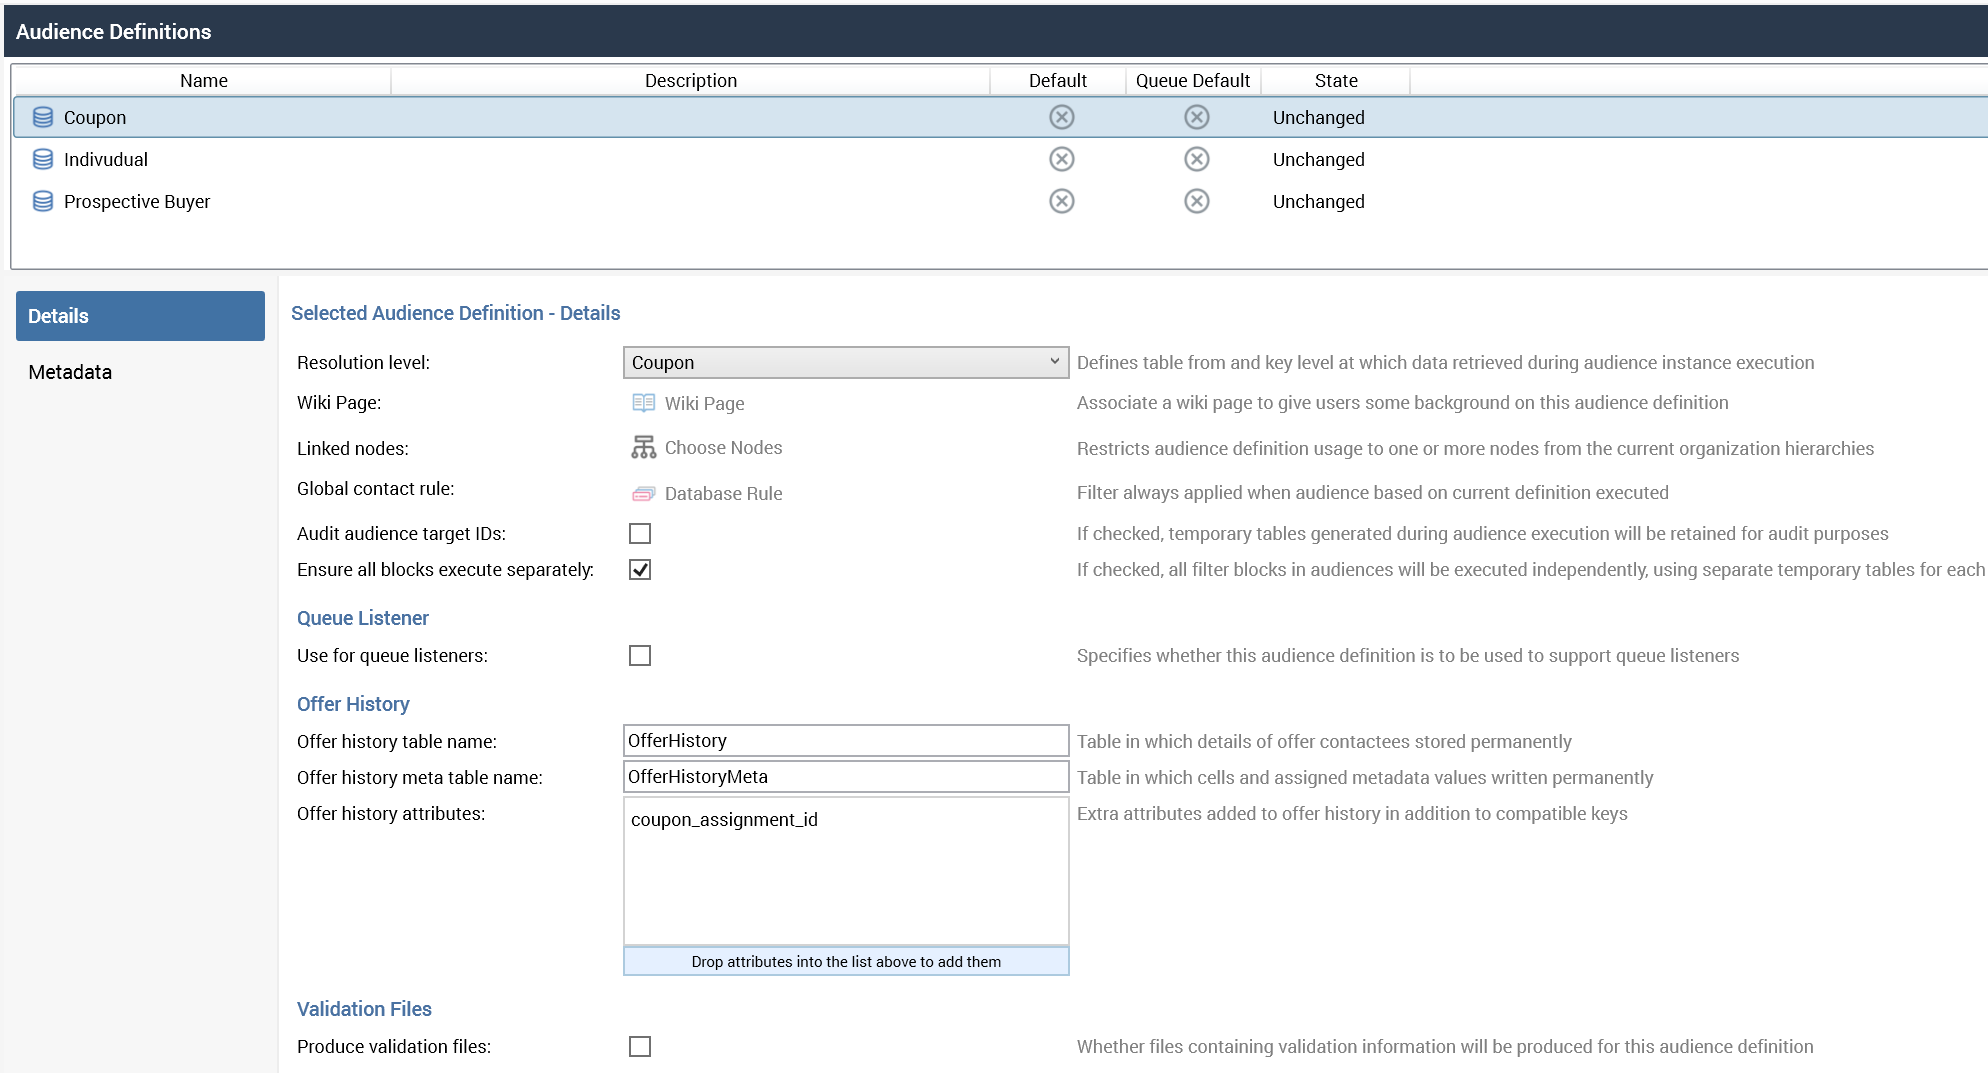
From there, start by setting up the database key, resolution, and audience definition. There are implications of this approach, depending on what channel you are using. For example, if you are using the email channel and you have more than one unused coupon for the same email address, you may have to run the interaction multiple times to ensure each of the coupons that are assigned to that email are sent out.
This is an advanced topic, and each approach is unique; you should consult your professional services resources for details on the approach you are looking to deploy if you have any questions about the problem you are trying to solve and the approach you intend to take.
Step 3a: Set up the database key
In this case, the database key will be coupon_assignment_id.

Step 3b: Create a resolution
Create a resolution for the coupon assignment resend view.

Step 3c: Create an audience definition
Create an audience definition with the new resolution.
Step 4: Create a selection rule
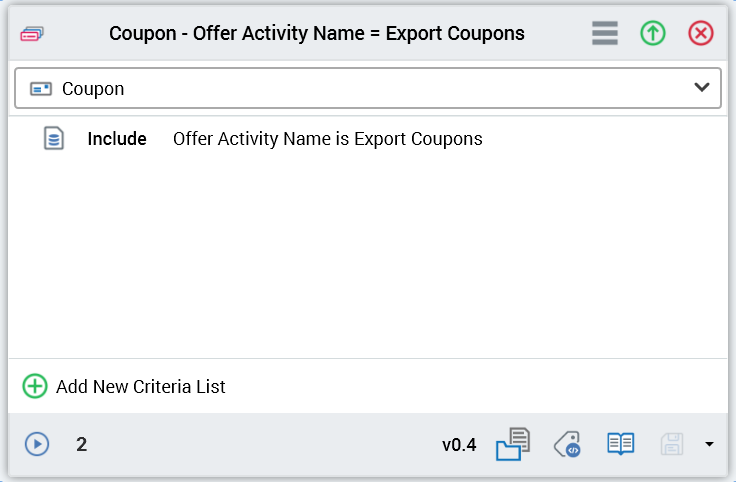
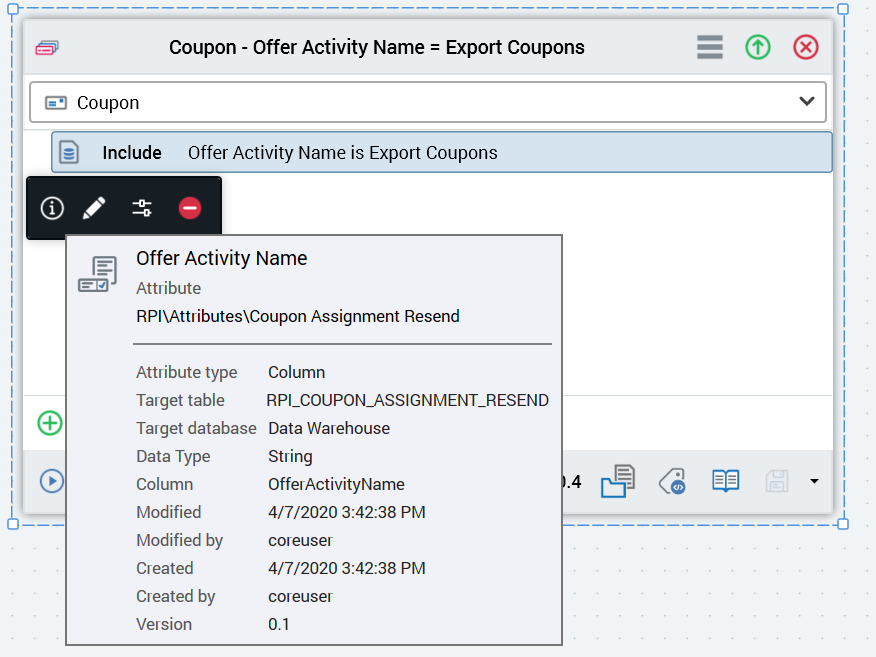
Create a selection rule using the new resolution. We want to select records that are targeted by the previous coupon example, which has an offer activity name of Export Coupons. The offer activity name that should be used to compare is the one that resides on the RPI_Coupon_Assignment_Resend view.
Showing the source of the attribute:
Step 5: Create an audience
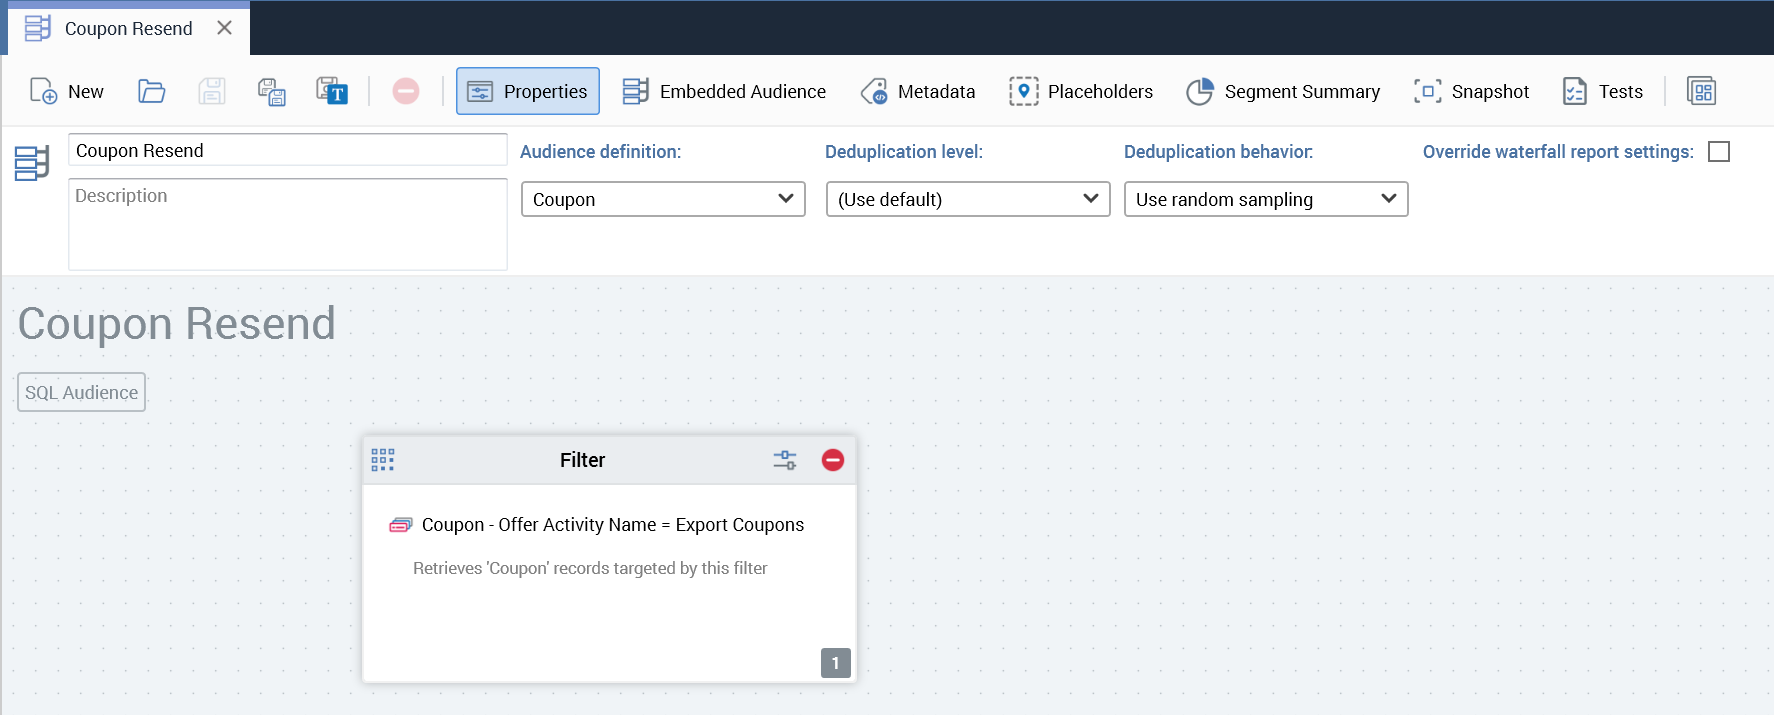
Create an audience using the selection rule and the new coupon audience definition.
Step 6: Create an export template
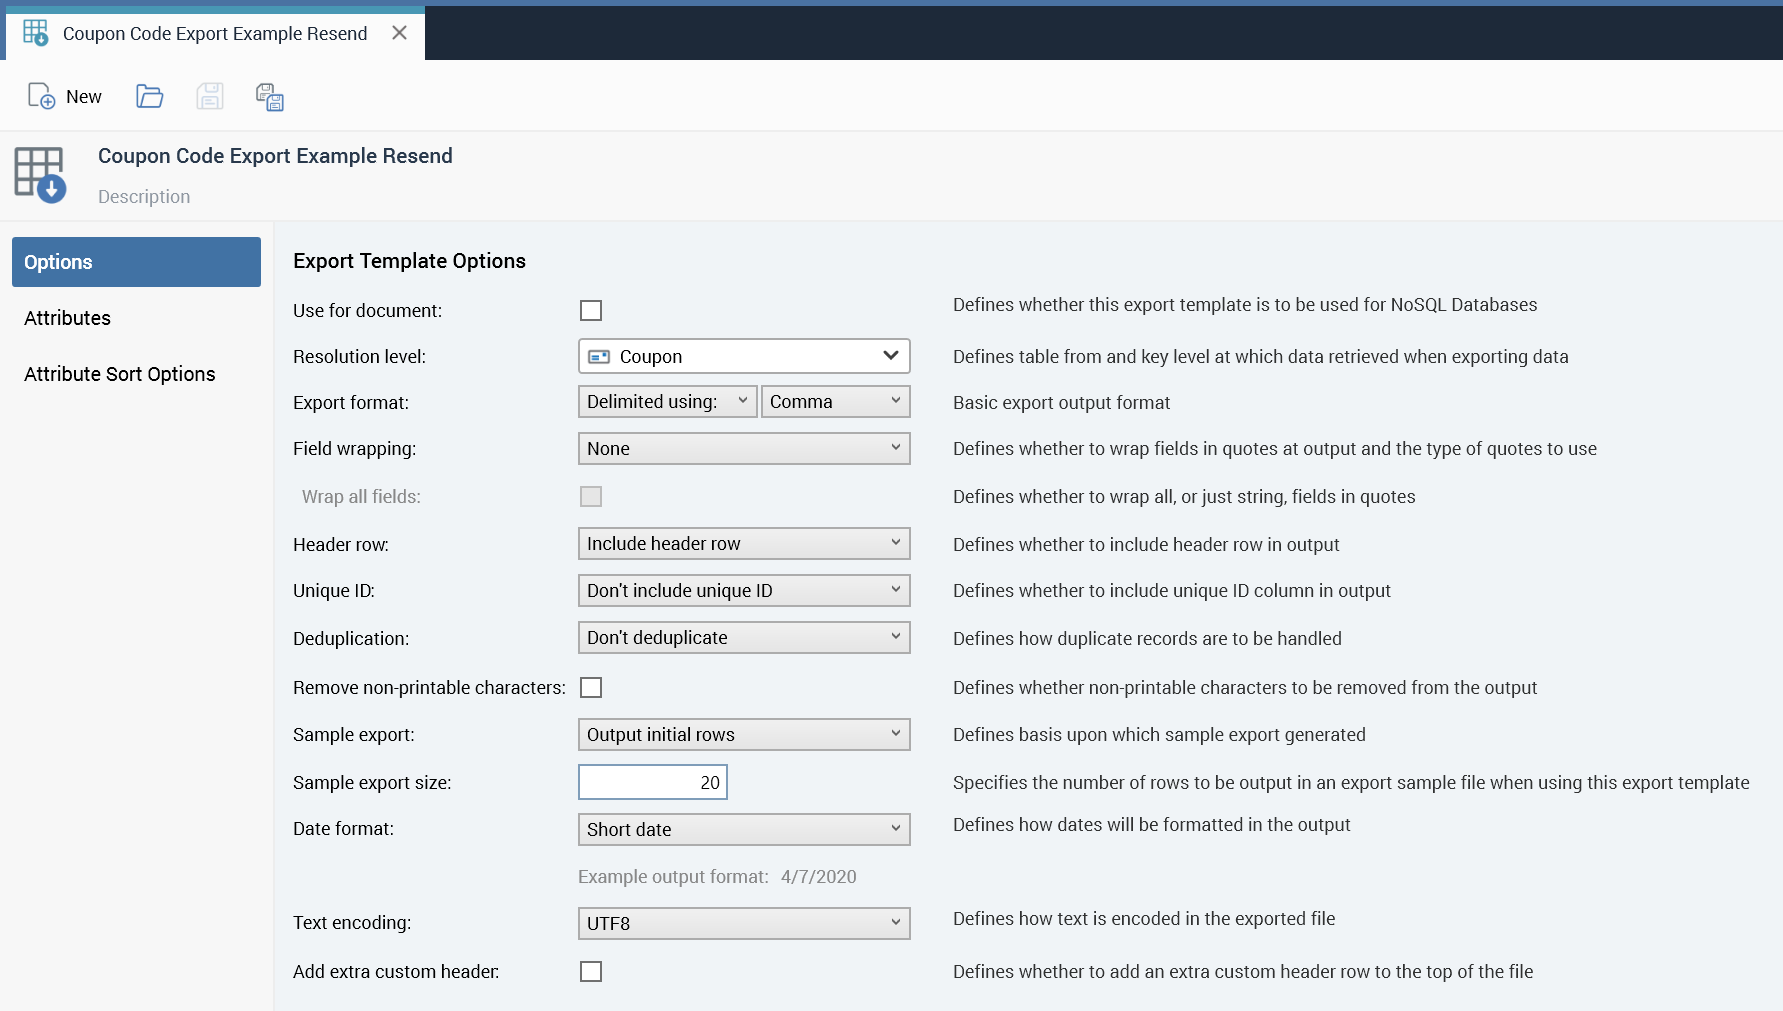
Create an export template that uses the fields from the coupon assignment resend view, and the options should be using the coupon resolution.
Options:
Attributes:

Step 7: Create a coupon resend interaction
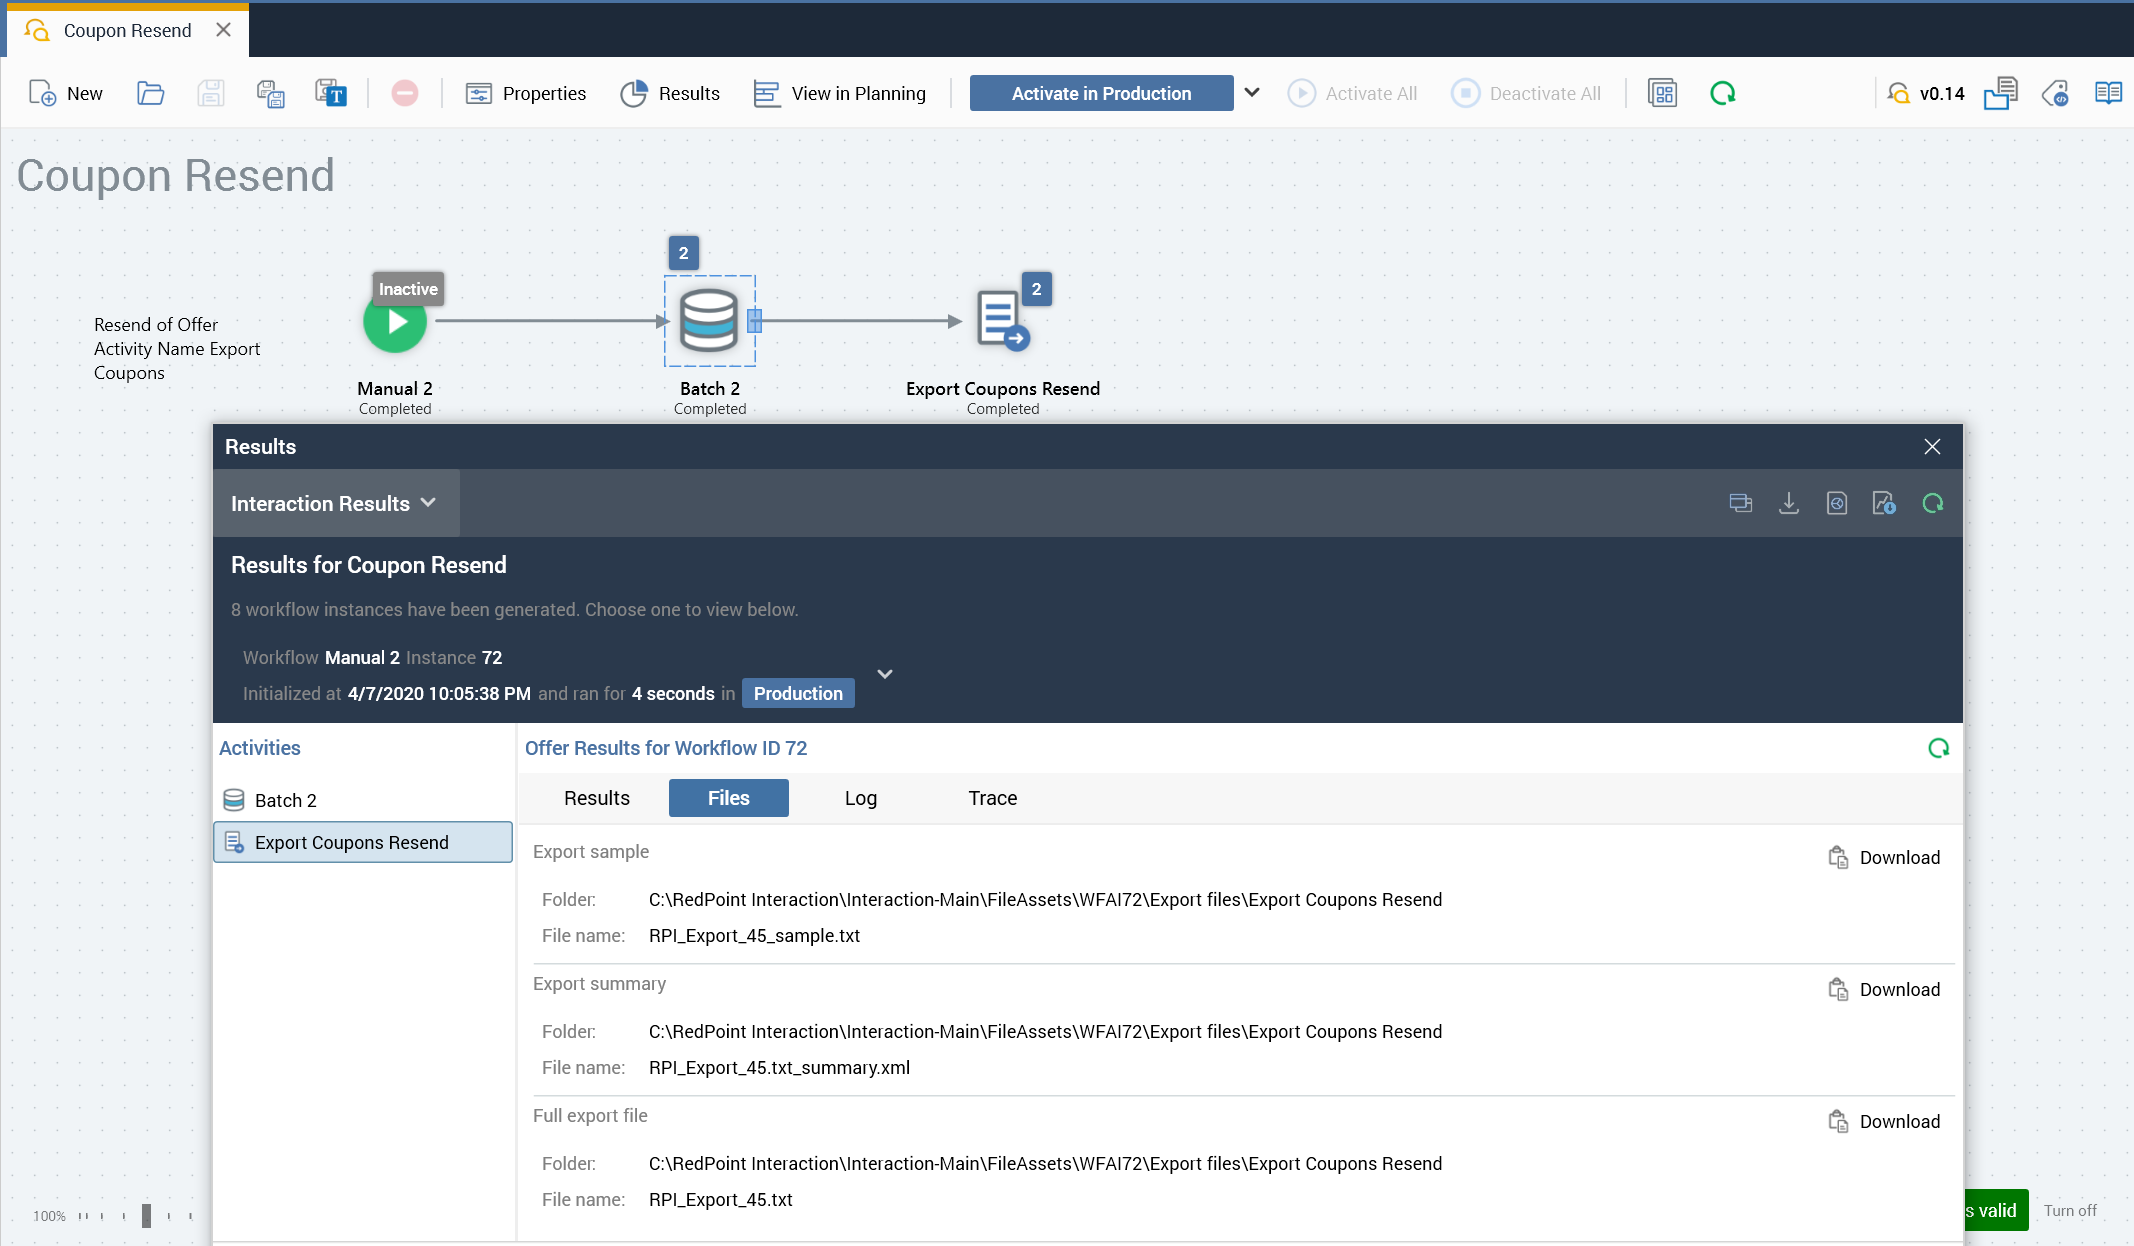
Create an interaction that selects records that have not used a coupon and generate an extract for down stream systems.
Step 8: Compare file outputs
Compare the original output from the coupon assignment data process project previously created in this document to the file created in this resend process. The files should generate essentially the same results. There is a slight difference in the resend file, where email address is additionally included.
Original file:
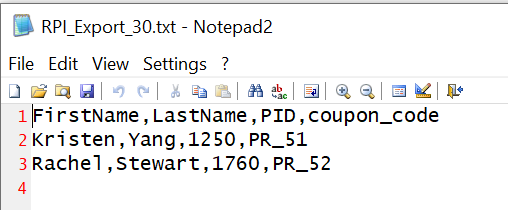
Resend file:
This file also included email address, but all the other data is the same.

Step 9: Configure interaction to send a single resend
In some cases, we only want to resend a coupon a single time. In order to do that, we apply suppressions as we would in any other interaction. In this section, we will show the simple application of a suppression to allow for only a single resend of a coupon. This also may be used in recurring interactions.
-
Start by creating a selection rule to be used as the suppression.
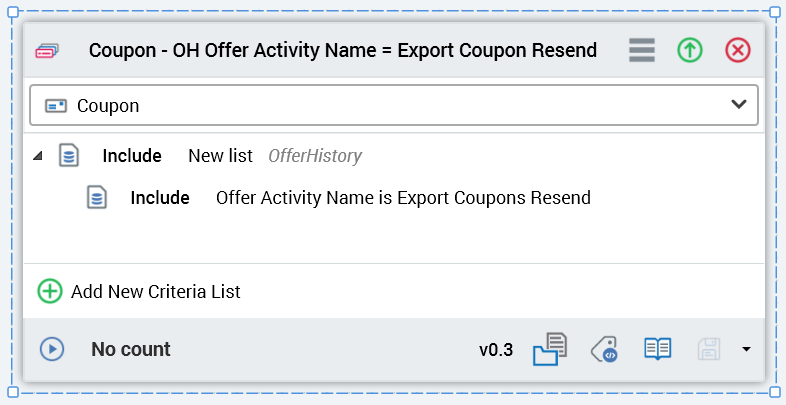
-
Add that to the audience.
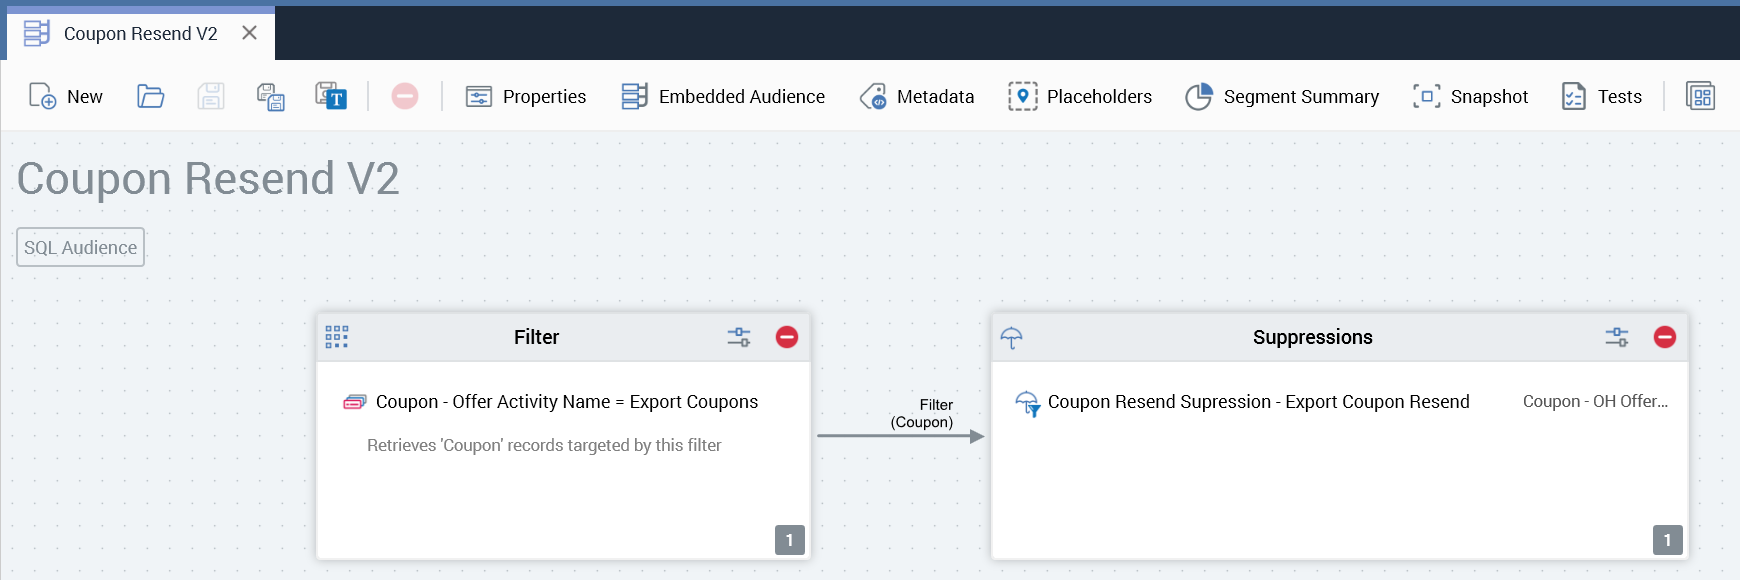
-
Add another workflow to the interaction to show that when the suppression is added, there are no records eligible to resend at this time.
