

Overview
The onboarding wizard guides you through setting up Redpoint Identity Studio (RIS) for the first time. A three-step visual stepper at the top of each screen tracks your progress through the stages: Welcome, Prepare Data, and Complete.
Step 1: Welcome
The welcome screen introduces RIS and previews the configuration steps:
-
Prepare Data Source: Upload and map your customer data
-
Build & Submit AI Prompt: Use AI assistance to generate the SQL mapping
-
Copy & Run Downloaded SQL: Execute the generated SQL in your Snowflake environment
Click Get Started to begin the configuration process.
Step 2: Prepare your data
This step helps you prepare your input data using AI-assisted (or manual) SQL generation. The goal of this step is to populate the INPUT table with your data.
Keep in mind that this will populate the INPUT table with your source table(s) in their current state; any modifications to your source table(s) will require you to make updates to your INPUT table.
Choose how to create the SQL mapping from the Mapping Mode dropdown.
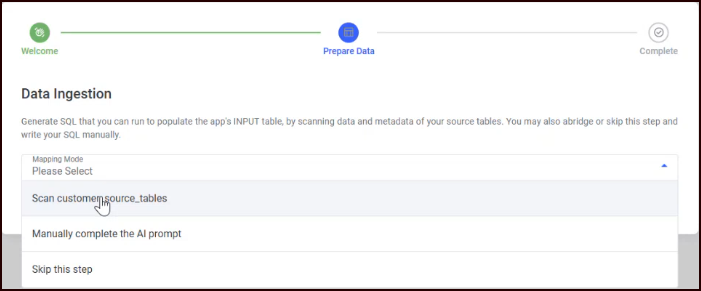
Select one of three modes from the dropdown:
|
Mode |
Description |
|---|---|
|
Scan customer_source_tables |
RIS auto-scans your Snowflake source tables and generates an AI prompt |
|
Manually Complete Prompt |
You load a default prompt template, edit it, and submit it to AI |
|
Skip |
Bypass AI assistance entirely (if you have already prepared your data or want to write the SQL manually) |
Mapping mode: Scan customer source tables
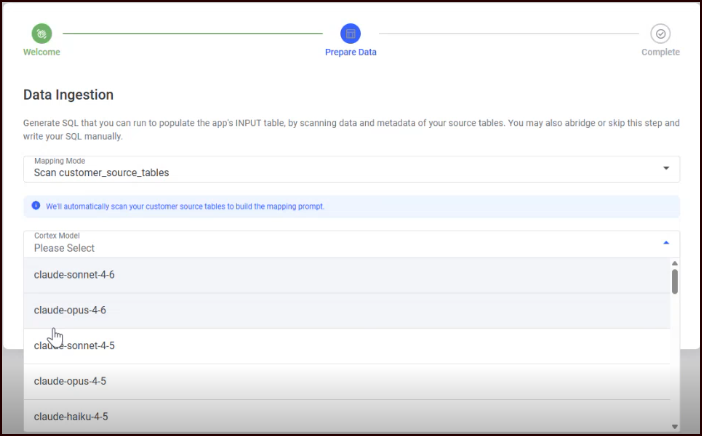
During the app installation, a “reference” named customer_source_tables was created. You should have been prompted to add source tables to this reference. If you added tables, at this point you can select Scan customer_source_tables as the mode.
-
Select a Cortex AI Model from the dropdown (models are loaded from your Snowflake environment; if you don’t see any models, make sure you’ve enabled Cortex AI).
-
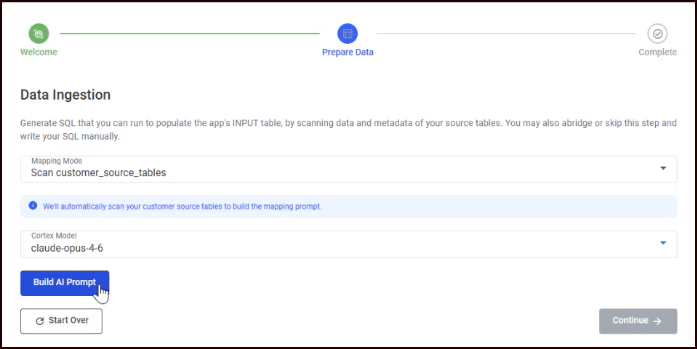
Click Build AI Prompt. A loading indicator appears while RIS scans your tables and generates the prompt. This prompt is dynamically generated relative to the source(s) that were selected during the installation process.
-
Once complete, the AI Prompt appears in a collapsible expansion panel.

Review the generated AI prompt, and make any edits you want to more accurately reflect the nature of your data. Type instructions with any specific details or instructions about your data. For example, we added “use compact sql” in the second line to ensure the generated SQL is concise.
-
Click Submit Prompt to AI. A loading indicator appears while the AI generates the SQL mapping.
-
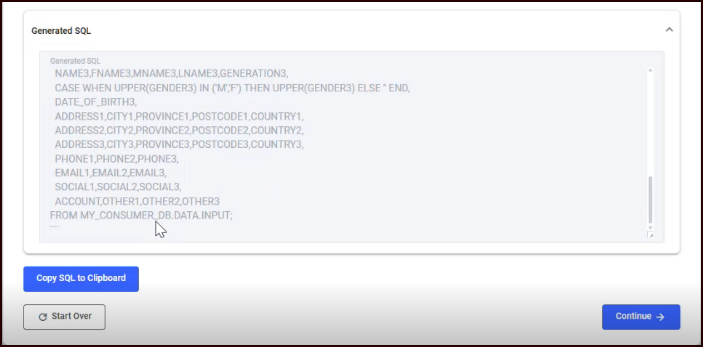
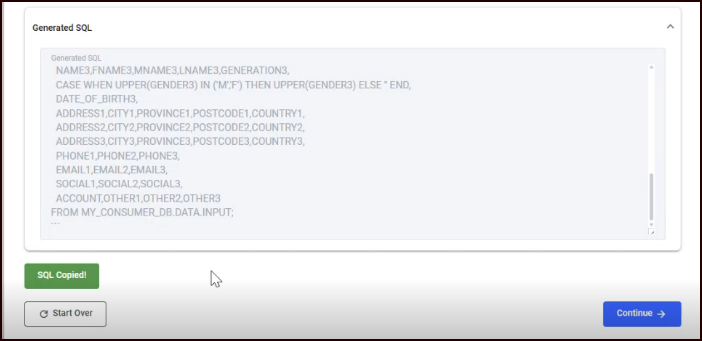
The Generated SQL appears in a second collapsible expansion panel (read-only).
-
Click Copy SQL to Clipboard. The button changes to SQL Copied! on success.
You can hand-edit the generated SQL to make it more accurate. You own the SQL and are responsible for running it before triggering the app to run a match job.
-
Execute the copied SQL in your Snowflake environment to populate the
INPUTtable.-
In the Snowflake web UI, navigate to Project > Workspaces.
-
Add a new SQL file and paste the code you copied in the last step into the sheet.
-
You can optionally edit the SQL before executing it.
-
Select all and run the SQL.
-
-
Return to the app and click Continue to proceed to the next step.
Mapping mode: Manually complete prompt
This mode lets you work from a default prompt template and customize it before submitting. Unlike the Scan Customer Source Tables mode, this mode does not scan your tables, so the prompt is generic and much more likely to need substantial editing before running it.
-
Select a Cortex AI Model from the dropdown.
-
Click Load Default Prompt. A loading indicator appears while the template is loaded.
-
The AI Prompt expansion panel opens with an editable text area pre-filled with the default template.
-
Edit the prompt as needed to describe your data structure.
-
Click Submit Prompt to AI to generate the SQL mapping.
-
The Generated SQL expansion panel appears. Review and click Copy SQL to Clipboard.
-
Execute the SQL in your Snowflake environment to populate the
INPUTtable.-
In the Snowflake web UI, navigate to Project > Workspaces.
-
Add a new SQL file and paste the code you copied in the last step into the sheet.
-
Since the prompt was not tailored to your data, you’ll likely need to edit the SQL before executing it.
-
Select all and run the SQL.
-
-
Return to the app and click Continue to proceed.
Mapping mode: Skip
This mode bypasses AI assistance entirely; you must prepare and run your SQL manually.
-
Write your SQL. It must load a unique-valued ID column and as many PII columns as your source data has available.
-
Execute the SQL in your Snowflake environment to populate the
INPUTtable.-
In the Snowflake web UI, navigate to Project > Workspaces.
-
Add a new SQL file and paste your code into the sheet.
-
Select all and run the SQL.
-
-
Return to the app and click Continue to proceed.
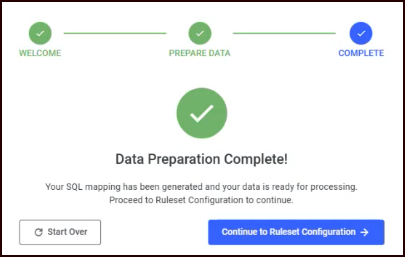
Step 3: Data preparation complete
After clicking Continue, a confirmation screen indicates that your data preparation is complete. The stepper shows all three steps as completed with check marks.
Two options are available:
-
Continue to Ruleset Configuration: RIS analyzes your prepared data. A progress indicator shows that the system is loading and analyzing your data. Once analysis is complete, you advance to ruleset configuration.
-
Start Over: Return to the Welcome screen to begin the process again.
Step 4: Ruleset Builder
The Ruleset Builder has three sub-steps, shown as progress dots at the top of the page.
Step 4a: Coverage Report
The Coverage Report displays the quality and completeness of your data across nine field categories.

Record Count is shown prominently at the top.
Each field is displayed as a card showing:
|
Field |
Description |
|---|---|
|
Name |
Person or entity names |
|
Date of Birth |
Birth date values |
|
Address First Line |
Street address (number + street + unit) |
|
Address Last Line |
City, province, postal code |
|
Phone |
Phone numbers |
|
|
Email addresses |
|
Social |
Social media identifiers |
|
Account |
Custom account fields |
|
Other |
Customer-defined fields |
Each card displays:
-
Unique Count: Number of distinct values for this field
-
View Sample: Click to see example values from your data
-
Population Status: Color-coded badge:
-
Good (green): 90% or more of records have this field populated
-
Poor (yellow): 70-89% populated
-
Missing (red): Below 70% populated
-
-
Population Percentage: Exact percentage of records with data in this field
Review the report, and if the results are as expected, click Continue to Configuration to proceed.
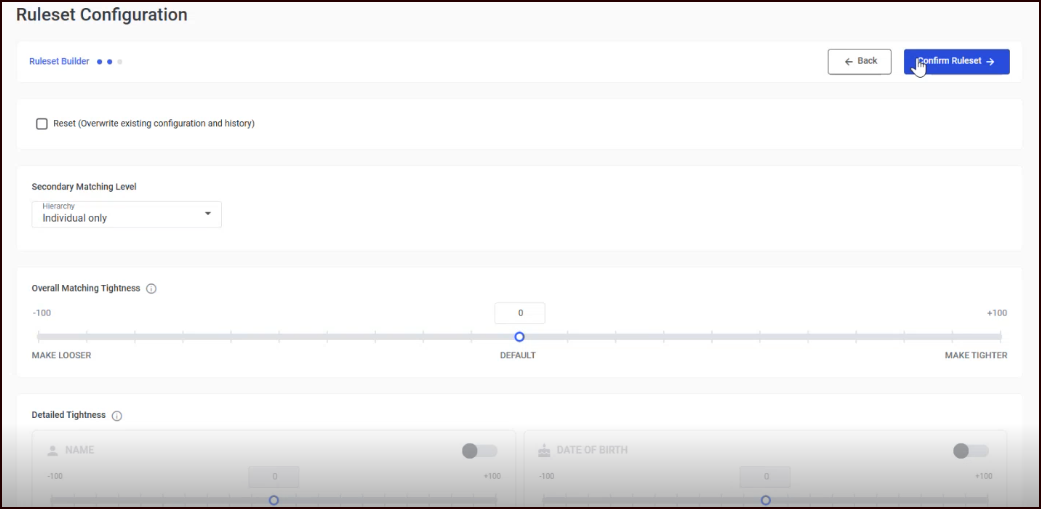
Step 4b: Matching parameters
This screen lets you configure how RIS matches records. It contains several sections, described below.
The default match settings behave well for many uses without modification. On your first attempt, we recommend the following:
-
Choose the Hierarchy
-
Leave the Tightness thresholds at default
-
Set the Match Options if you have specific needs
-
Leave the Transitive Groups settings at default
-
Leave the Frequency Limits at default
You will be given a chance to run a production matching job and review the results, after which you can come back to this step or fine-tune the match rules using “experiments”.
Hierarchy
Select the matching level from the dropdown:
-
None: Match at the individual level only
-
Household: Match at both individual and household levels
Households are a hierarchical grouping of individuals.
Overall Matching Tightness
A slider controlling the global sensitivity of matching. The scale runs from -100 (looser) to +100 (tighter), with 0 as the default. Looser matching finds more potential matches but may include false positives. Tighter matching is more conservative but may miss valid matches.
Detailed Tightness (Per-Field)
Eight field-specific tightness cards let you override the overall tightness for individual fields: Name, Date of Birth, Address, Phone, Email, Social, Account, and Other. Each card has a toggle switch; when disabled, the field uses the overall tightness value. When enabled, you can set a separate tightness value for that field.
Match Options
Four checkboxes control specialized matching behavior:
|
Option |
Default |
Description |
|---|---|---|
|
Don't match gender |
Off |
When checked, the GENDER field is ignored during matching. This has the practical effect of allowing similar but different-gender names to match (e.g. ALEXANDER vs ALEXANDRA). |
|
No match first/middle initial |
Off |
When checked, a match between a first name and a middle initial is disallowed, for example “JOHN SMITH” would not match “ROBERT J SMITH” but would still match “ROBERT JOHN SMITH”. |
|
Disable first/last name swap |
Off |
When checked, the system will not consider swapped first/last names as potential matches. For example, “DAVID HENRY” and “HENRY DAVID” would not be considered interchangeable when matching. |
|
Phone is mobile |
On |
When checked, the PHONE1 field is treated as a mobile number. This has the practical effect of making matches between PHONE1 fields of different records stronger than would be otherwise (PHONE1 is considered a strongly unique key since mobile numbers tend to be long-lived and personal). Matching to PHONE2/PHONE3 is not affected. |
Peer Fields
Four dropdowns let you associate peer fields with the Account and Other fields. Peer fields are matched together with their parent field. Options include: None, FNAME1, LNAME1, ADDRNBR1, STREET1, POSTCODE1, PHONE1, EMAIL1, SOCIAL1, OTHER1.
Transitive Groups
Three sliders control grouping behavior for transitive match chains:
-
Group Stickiness: Controls how strongly records stay grouped together in the face of incompatible group members. Lower numbers keep larger groups together; higher numbers split groups apart. (-100 to +100)
-
Group Brittleness: Influences how many parts a group splits into when it must be split. Lower numbers causes splits to result in more fragments, higher numbers produce smaller numbers of larger clumps. For example, if A->B->C is chained, but A and C do not match, a lower number tends to produce a {A,B},{C} or {A},{B,C} grouping, but a higher number would produce a {A},{B},{C} grouping. (-100 to +100)
-
Group Reach: Controls the group-breaking algorithm’s treatment of “ropey” or “long chain” groups in which many records are chained together but a majority of them do not match each other. Lower numbers split long chains aggressively, and higher numbers are more forgiving. (-100 to +100)
Frequency Limits
Click Configure Frequency Limits to open a dialog where you set per-field frequency thresholds. Each field type (Name, Phone, Email, Social, Account, Other, Address, Address+Postcode) can have:
-
A numeric limit (values occurring more frequently than this threshold are suppressed)
-
An "Unlimited" checkbox to remove the threshold
-
An "Ignore Patterns" option for regex patterns that should be excluded from suppression
Notes
A free-text area for documenting your configuration decisions.
Click Confirm Ruleset when finished.
Step 4c: Configuration review
A read-only summary of your configuration choices:
-
Hierarchy: Displayed as "Individual Only" or "Household"
-
Overall Tightness: Shown as "Looser", "Default", or "Tighter"
-
Detailed Tightness: Per-field values displayed as badges
-
Match Options: Each option shown as Yes or No
-
Notes: Your configuration notes (or "No notes" if empty)
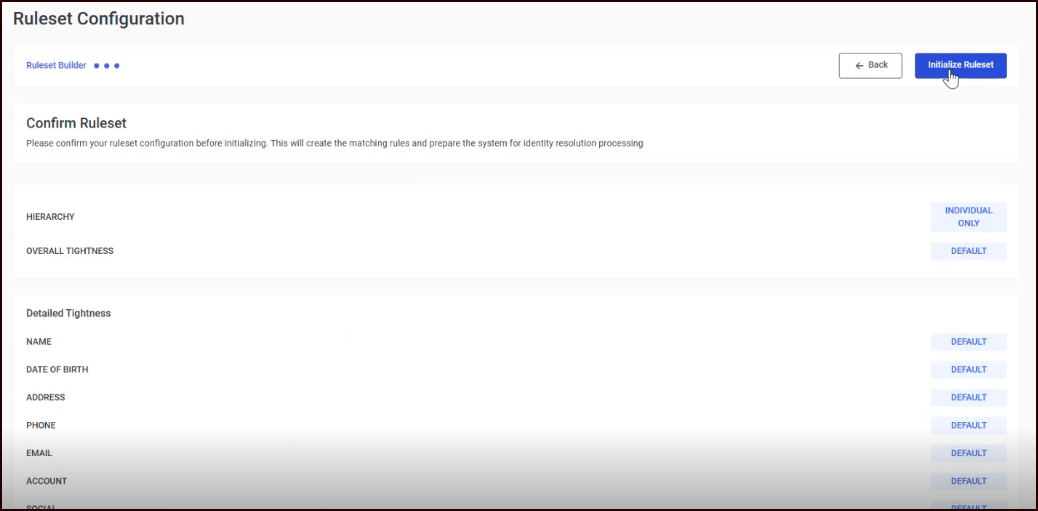
Review the summary and click Initialize Ruleset to finalize your configuration. This creates the initial production ruleset and prepares the system for matching.
Step 5: Success
A confirmation screen indicates that your ruleset was initialized successfully.
Click Go to Production Match to navigate directly to the Production page to run your first full match job. This is where address standardization and hygiene will take place.