

Overview
The steps in the Control group specify how data moves within the automation.
Branch
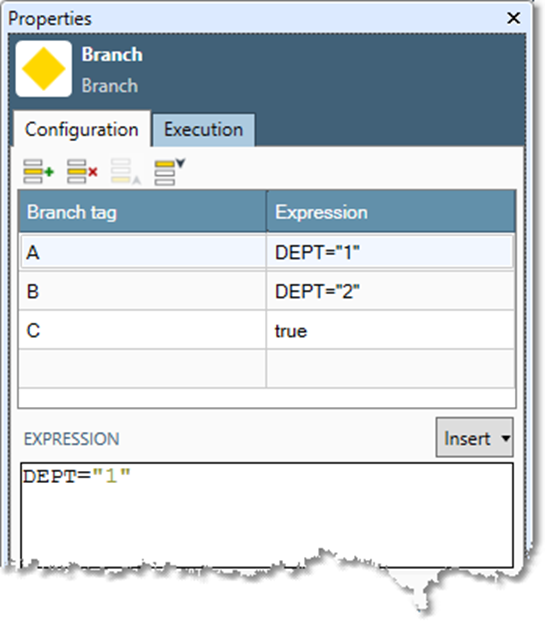
Use the Branch step to choose one of several control-flow outputs, based on which output's condition is true. As in the Data Management Filter tool, each condition is a Boolean expression. The conditions are evaluated in the order they are listed, and the first one that evaluates to True signals the corresponding output connection. If you want to activate a connection when none of the conditions are True, define the final condition on the list as True. If no expression evaluates to True, the error output is signaled.
In the following example, the DEPT automation variable is tested. Depending on its value, either output A, B, or C is signaled.
Configuring a Branch step:
-
Select the Branch step.
-
Select the Configuration tab on the Properties pane.
-
Define branching logic:
-
Branch tag is a label identifying the conditional expression. The first letter of this tag is used to label its corresponding output branch. Tags should be short and have unique initial letters.
-
Expression is any combination of variables, mathematical operations, and functions that evaluates to a value of True or False. If the expression evaluates to True, its output branch is signaled.
-
You can also select Insert and use the Functions and Variables lists to help you construct your expression more quickly.
-
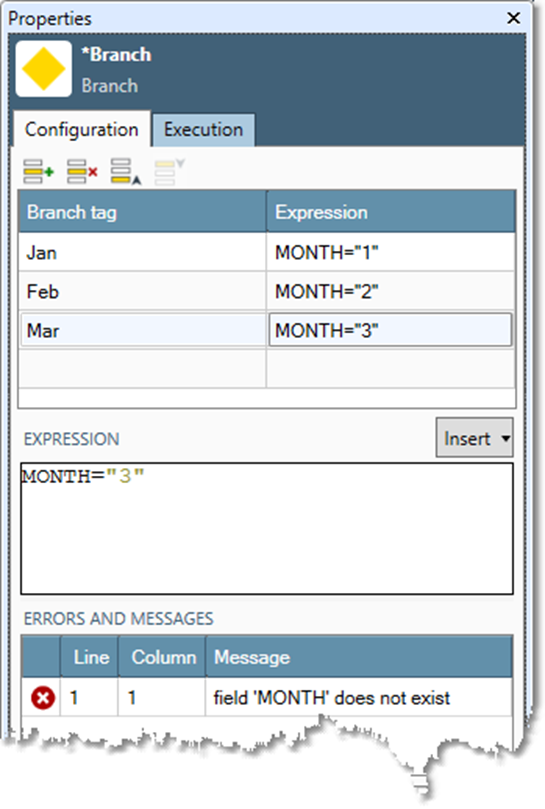
As you type, any errors in expression syntax are listed in the Errors and Messages box. Selecting an error message will highlight the incorrect part of the expression.
-
Optionally, select the Execution tab and set execution options:
-
Select Skip to bypass this step at run time. Do not leave this option enabled in production environments.
-
Select Ignore error on this step to suppress step failure and continue processing in case of error.
-
Break
The Break step can be used to cause a looping group (such as For Each or While) to quit at the next iteration, or outside a group to interrupt a Wait step.
Consider a situation where you want to wait for one of several events to happen. As soon as one of these events occurs, you want to perform some processing for the event that occurred. However, you also want to stop waiting for all of the other possible events.
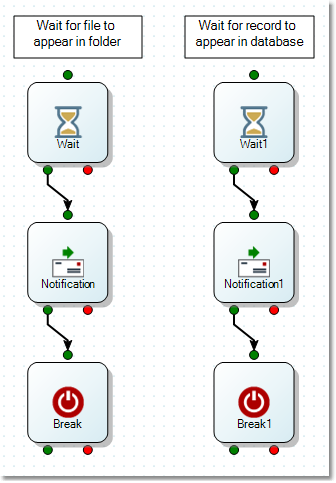
To configure this automation, select the Interrupt wait steps option on both of the Break steps. When one Wait step completes, it causes the other Wait steps to abort without triggering any downstream steps.
Configuring a Break step:
-
The Break step has a single configurable option: Interrupt wait steps.
Expression
Similar to Data Management's Calculate tool, Expression performs calculations using existing field values, numbers, strings, mathematical operations, and a variety of other functions. The Expression step evaluates expressions and assigns the results to variables.
Configuring an Expression step:
-
Select the Expression step.
-
Go to the Configuration tab on the Properties pane.
-
In the Variable assignments section, select a row in the grid.
-
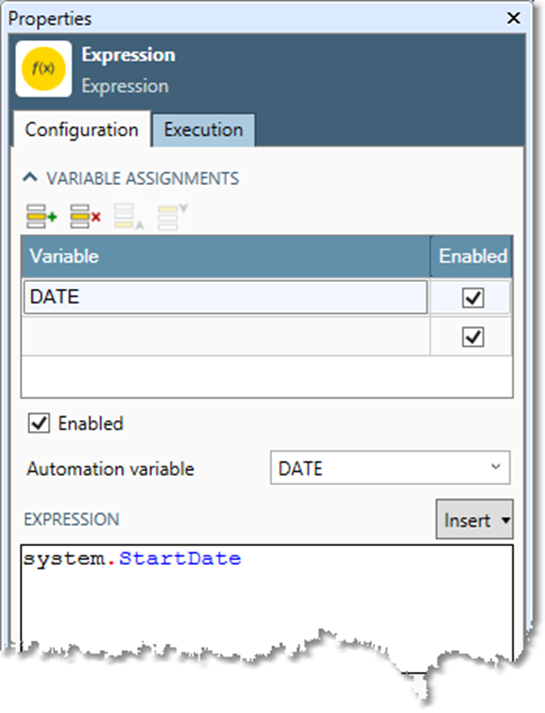
In the Expression section, select Variable and then either choose a variable name from the list or select New to define a new variable.
-
Enter the expression to calculate in the Expression box. Use any combination of mathematical operations and functions that is appropriate for your data. Variables referenced in an expression must be previously defined. As you type, any expression errors will be listed in the Errors and Messages box. Select an error message to highlight the incorrect part of the expression. The expression editor's autocomplete feature will show a pop-up list of fields, variables, and functions as you type. You can also select Insert and use the Functions and System Variables lists to help you construct your expression more quickly.
-
Repeat steps 2 through 4 for each additional variable assignment.
-
Optionally, select the Execution tab and set execution options:
-
Select Skip to bypass this step at run time. Do not leave this option enabled in production environments.
-
Select Ignore error on this step to suppress step failure and continue processing in case of error.
-
-
Each individual expression can be disabled by clearing its Enabled check box. This is useful when you want to disable some processing but don't want to delete the expression permanently.
-
See the Expression Reference and Function Reference for details about expression syntax and available functions.
-
Automation variables are assigned in the order in which they are listed in the grid. This order can be important if an expression uses the results of a previous assignment. To change the order, select a field then select


Logic
A Logic step accepts multiple control connection inputs, and signals its output when the right condition is met.
Configuring a Logic step:
-
Select the Logic step, and then go to the Configuration tab on the Properties pane.
-
Specify the Logic Type.
|
Type |
Explanation |
|---|---|
|
AND (all) |
All inputs must be signaled before the step will trigger. Skipped connections as are treated as signaled. If all connections are skipped, produces a skipped signal on output. |
|
OR (any) |
The step triggers when any input is signaled. Skipped connections are treated as unsignaled. If all connections are skipped, produces a skipped signal on output. |
-
Specify an action to perform if any input is in a skipped state.
|
Skip action |
Explanation |
|
Ignore |
Skipped inputs are ignored in the AND/OR logic unless all inputs are skipped, in which case the step is skipped. The is the default behavior. |
|
Error |
Any skipped input results in an error. |
|
Skip |
Any skipped input results in this step being skipped. |
-
Optionally, select the Execution tab and set execution options:
-
Select Skip to bypass this step at run time. Do not leave this option enabled in production environments.
-
Select Ignore error on this step to suppress step failure and continue processing in case of error.
-
Connecting both the success and error output connections from a step into a Logic with Or Type will cause an automation to proceed regardless of the success or failure of the step.
Wait
The Wait step pauses processing until a specified event or condition occurs. This may be the existence of a file or table, or a defined time interval or date/time.
Configuring a Wait step:
-
Select the Wait step.
-
Go to the Configuration tab on the Properties pane.
-
Select the wait Type:
-
File waits until a specified file or a file matching a defined file name pattern exists and is complete.
-
Calendar waits for the next defined calendar event.
-
Delay waits for the defined time interval.
-
Database records waits for the specified table or query to be non-empty.
-
-
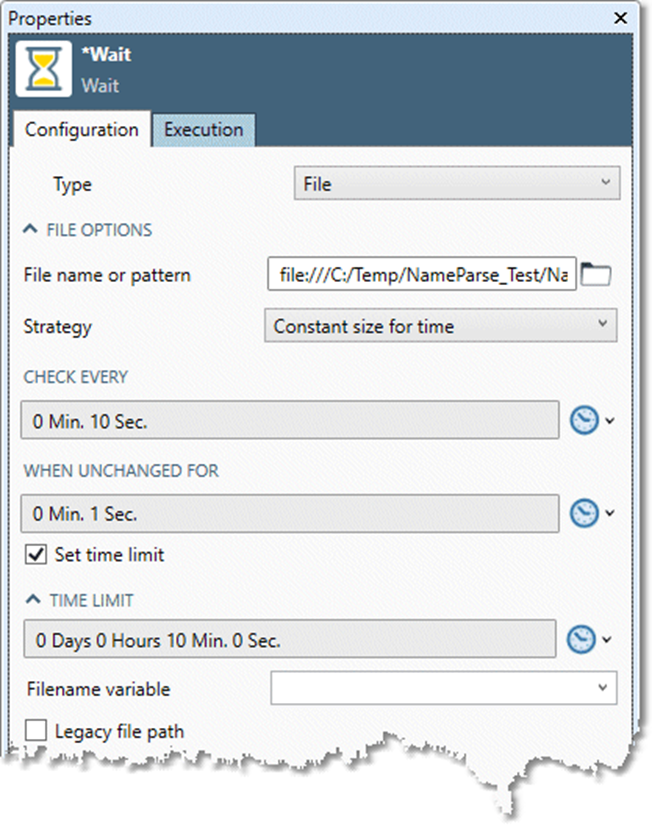
Configure options for the specified wait Type.
File options:
|
Setting |
Options |
|---|---|
|
File name or pattern |
Full path with wildcards specifying the file name pattern to match, or a simple file path. |
|
Legacy file path |
If selected, the file path in Filename variable will be stored as a native file path (such as |
|
Strategy |
Specifies how to determine if the file is ready for processing and step is triggered:
|
|
Check every |
Frequency to check for files. |
|
Set time limit |
Specifies how long the Wait step will wait before triggering an error. |
|
Filename variable |
Automation variable that will receive the name of a file that passes the readiness strategy test. You can select a predefined variable or define a new one. |
|
Legacy file path |
If selected, the file path in Filename variable will be stored as a native file path (such as |
Calendar options:
|
Setting |
Options |
|---|---|
|
Frequency |
Specifies how calendar event triggers are calculated:
|
Delay options:
|
Setting |
Options |
|---|---|
|
Time |
Time to wait from from initial step trigger. |
Database records options:
|
Setting |
Options |
|---|---|
|
Database records |
Select a repository Data connection. |
|
Read records from |
Specify data source: either Direct table read or SQL query. If you select Direct table read, choose a Table and optionally a Schema. You may need to select Refresh tables to see available tables. Optionally, you can select Filter tables to refine the list of available tables. If you select SQL query, type an SQL query in the box. |
|
Interval |
Frequency with which the file or database is checked. |
|
Set time limit |
Specifies how long the Wait step will wait before triggering an error. |
-
Optionally, select the Execution tab and set execution options:
-
Select Skip to bypass this step at run time. Do not leave this option enabled in production environments.
-
Select Ignore error on this step to suppress step failure and continue processing in case of error.
-