

Overview
Building automations is similar to building other Data Management projects. Here are the general steps you will follow to create a Data Management automation:
-
Start by creating a new automation.
-
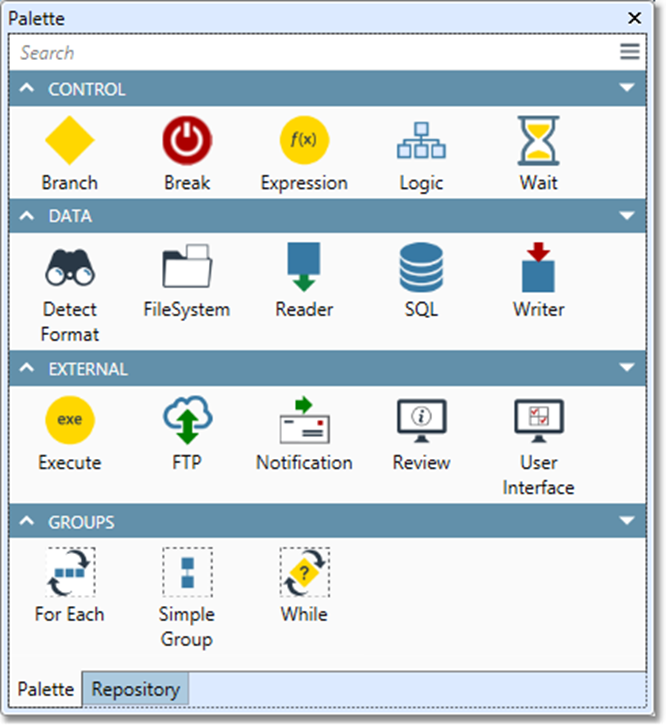
Next, drag projects from the repository and automation steps from the Palette to your canvas in the main window.
-
Once you've arranged projects and steps on the canvas, connect control flow and staging connections.
-
Finally, configure the projects, steps, and optionally automation settings.
-
Now your automation is ready to run.
Creating a new automation
To create a new automation:
-
Select New Automation Project.
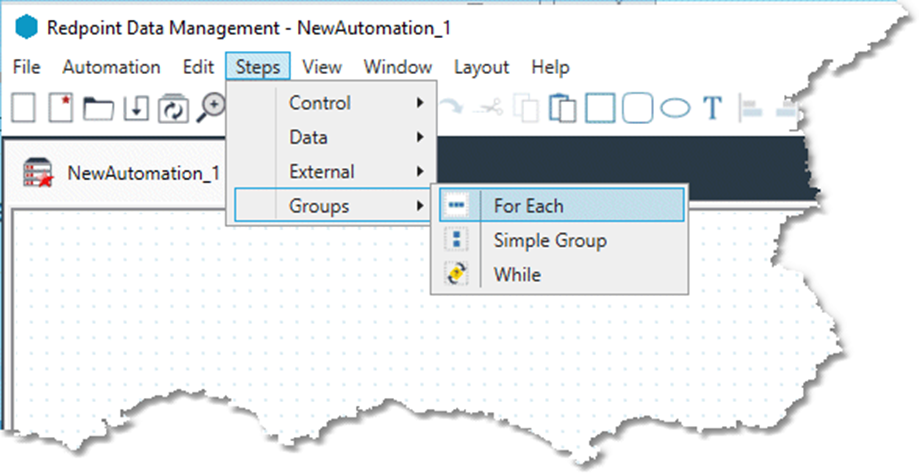
When you view an automation project, the Palette changes to display automation steps.
Automation steps are also available on the Steps menu.
Configure automations
Automations have configurable global properties that control the behavior of the entire automation. Changes to Automation settings will override the default Site settings and Machine settings for that automation only. Most of the time, you should accept the default Site and Machine settings. However, you may find it useful to tune JVM memory with certain kinds of automations. You may also want to turn on logging for the project, or configure the trace level setting of the server debug log.
To change an automation's global properties:
-
Open an automation.
-
Select Settings on the Automation menu.
-
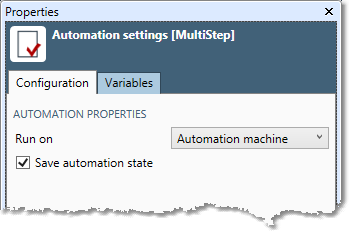
Select the Configuration tab on the Properties pane.
-
Optionally, you can change the Run on setting to indicate where the automation project steps should run by default:
-
Automation machine: run on the same computer that is running the automation itself.
-
Cluster load balance: run on any machine in a defined Data Management cluster.
-
-
Optionally, select Save automation state to cause the automation's state (including variables and completed steps) to persist when the automation is closed. This allows you to return to a partially completed automation without restarting it. The partially completed automation is listed under the Automation states repository icon.
-
If your automation will use a lot of JVM memory, you may want to increase the amount of JVM memory from the default setting of 200MB. Locate the JVM settings section, select Override site/machine-level settings, and then enter the desired amount of memory. See About JVM memory for guidance.
-
Optionally, select the Variables tab to define automation variables. Many automation steps use variables to communicate information to other steps. However, you can usually wait until you are configuring a step that uses or produces a variable, and define the variable when you configure the step.
To configure server debug verbosity for an automation:
-
Open the project.
-
Choose Settings from the Automation menu.
-
On the Properties pane, select the Settings tab, and then locate the Server debug logs section.
-
Select Override, and enter a Trace level other than the default 1. Higher trace levels produce more verbose logging.
To configure logging for an automation:
-
Start the Data Management client and log in to the Data Management Site Server.
-
Open the automation.
-
Choose Settings from the Automation menu.
-
On the Properties pane, select the Settings tab, and then locate the Log file section.
-
Select Create a log file for this automation and browse to the location where the log file is to be created.
-
Either specify a file name for the log, or select Generate unique name to generate a file name based on the automation name and time stamp.