

Overview
You can configure the appearance and behavior of many functions and features in the Data Management client to suit your needs and personal preferences.
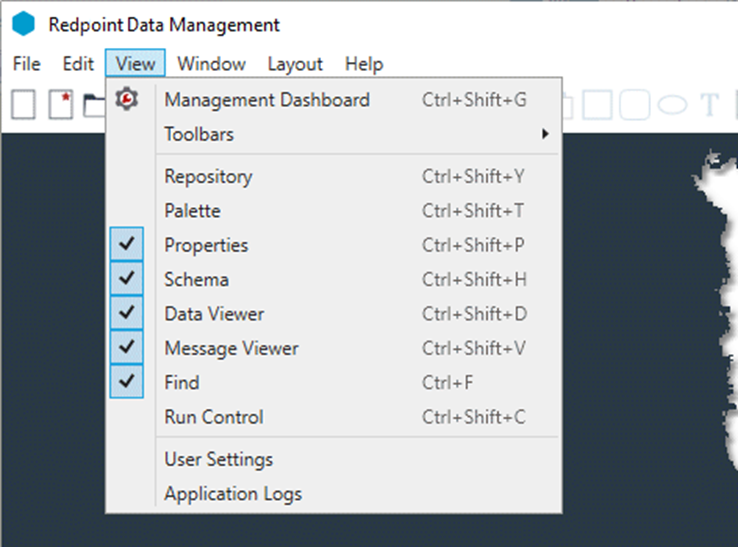
View menu customization options
The View menu contains options for switching the display of windows and panes on and off, restoring the workspace to its default settings, and navigating to user settings.
-
Select User Settings from the View menu to configure options that control other elements of Data Management's user interface and default behavior.
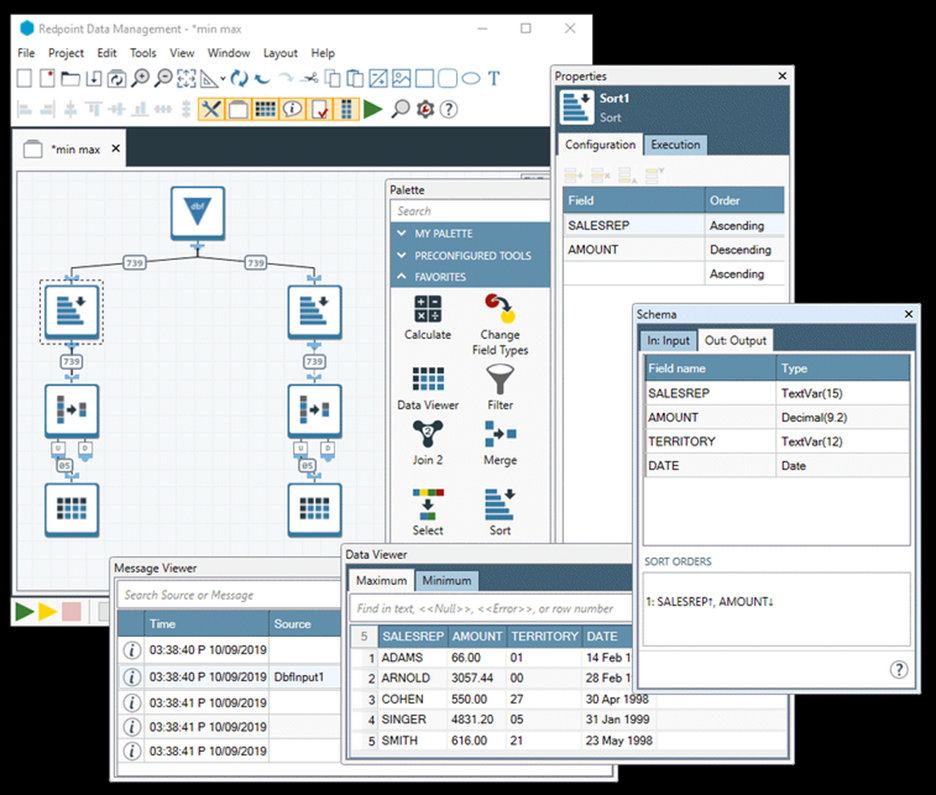
Customize the layout
Data Management's window panes can be docked to the Project window or undocked and floated.
-
To undock the panes, drag them onto the desktop with the mouse. Undocking these components and placing them outside the main program window can make working easier if you have a larger monitor or a dual-monitor system.
-
To re-dock a pane, drag it back into the main program window and drop it on the arrow nearest the desired location.
-
To restore the workspace to the default configuration, select Restore Default Layout on the Layout menu.
-
To save a custom workspace, select Export Layout on the Layout menu. To load a previously saved custom workspace, select Import Layout on the Layout menu.
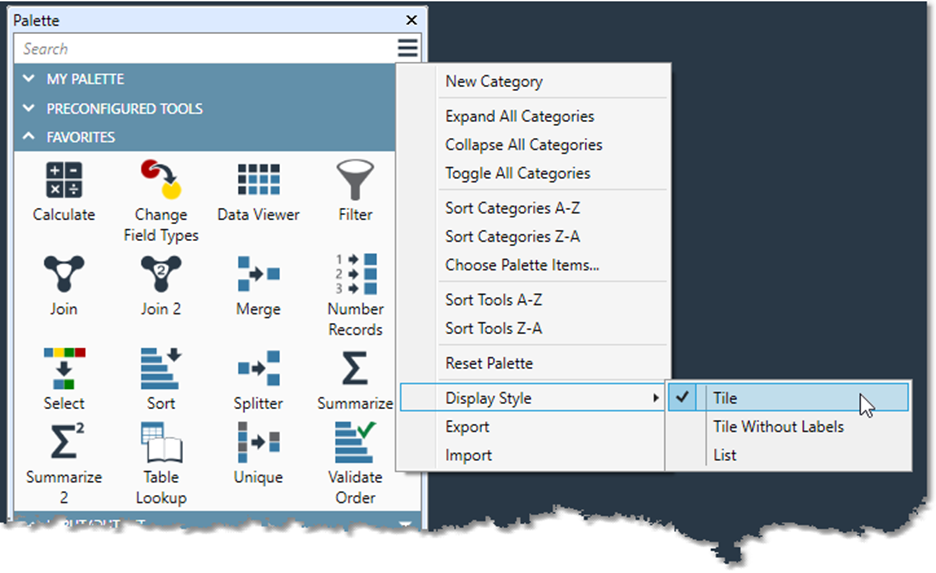
Customize the tool palette
You can customize the tool palette in a variety of ways:
-
To see palette customization commands, select the three horizontal lines button.
-
To view or hide palette groups, select the down arrow and up arrow buttons on the group title bar.
-
To select which tools to display on the palette, use Choose Palette Items.
-
To hide an individual tool, right-click the tool on the palette, and then select Hide.
-
To organize the tools you use the most, use the My Palette group. You can drag items between palette sections, or drag macros or projects from the repository tree.
-
To easily access tools with predefined properties, use the Preconfigured Tools group.
-
To remove a tool from the My Palette or Preconfigured Tools groups, right-click the tool on the palette, and then select Delete.
-
To restore the palette to its original appearance, select the three horizontal lines button, and then choose Reset Palette.
-
To save and load custom palette configurations to and from the file system, select Export and Import.
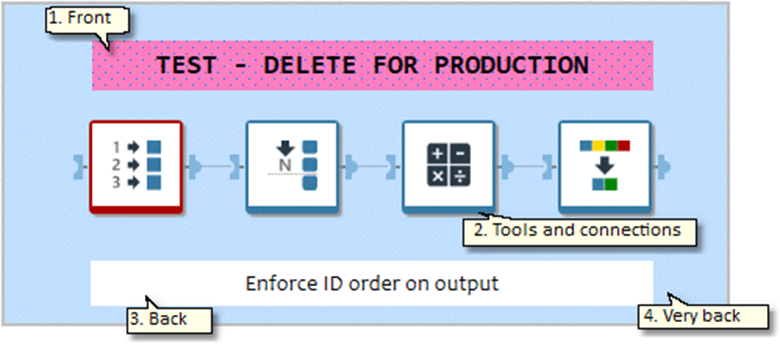
Arrange objects
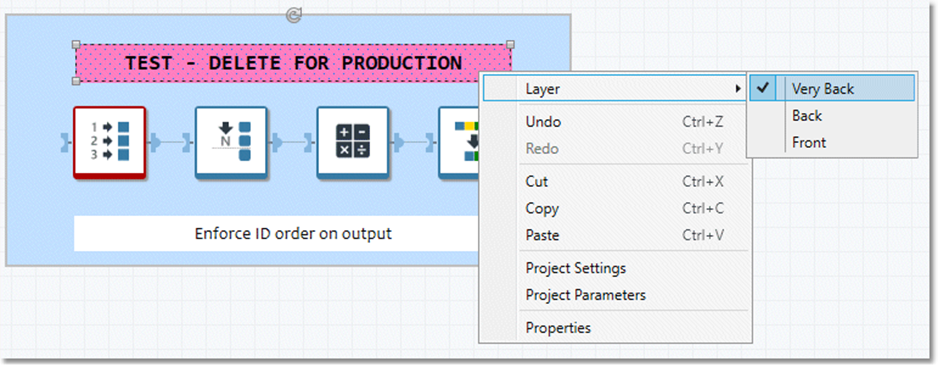
The Data Management canvas organizes objects into four virtual layers with the following stacking order:
-
Front: Annotations can be placed here and will appear on top of all other layers.
-
Tools and connections
-
Back: Text annotations are placed here by default, but can be configured to appear on layers 1 or 4 instead.
-
Very back: Shape and line annotations are placed here by default, but can be configured to appear on layers 1 or 4 instead.
To change the stacking order of an annotation object, select the object, and then right-click and select Layer on the context menu.
Change orientation
By default, Data Management places tool connectors at the top and bottom of tools for a vertical orientation:

However, you can change this orientation to a horizontal layout:
-
To change the orientation of tools on the canvas, select the Set Tool Orientation button and choose the desired option.
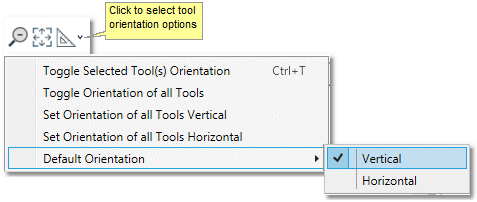
The toggle orientation command and horizontal orientation are unavailable in Automations.
Change routing
You can change the default appearance of tool connectors in User settings.
If you select a Routing option other than Line, projects with a large number of tools and connections may take a long time to load.
-
Select User Settings on the View menu, scroll to Routing (in the Data Flow Editor group), and then select the desired style of tool connector:
-
Line
-
Rounded elbow
-
Elbow
-
Spline
-
This setting applies only to new projects.
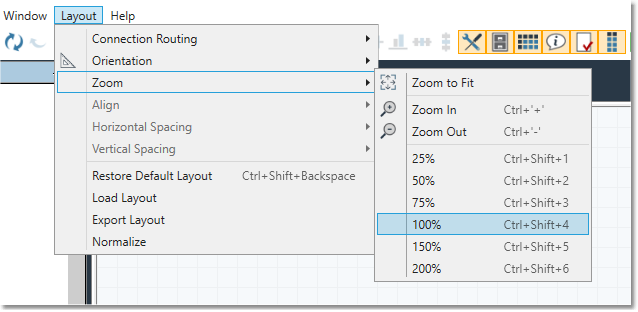
Zoom the canvas
To zoom in or out on the canvas, select the Zoom tool buttons shown below.
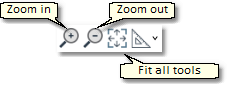
You can also zoom with the mouse wheel while pressing Ctrl.
The Zoom to Fit button sets the canvas magnification such that all objects in the project are visible within the canvas. You can also set the zoom explicitly using commands on the Layout menu, or using the project navigator.
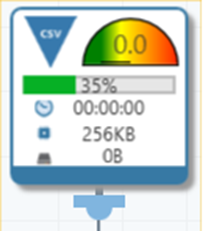
At 200% zoom, each tool shows statistics on memory and processor use, degree of completion, elapsed time, and processor load.
Pan the canvas
-
To pan the canvas, hover the pointer over the project window while pressing the Ctrl key, and then click-drag the canvas.