Filter block
Overview
Filters are used to narrow down the set of records to be retrieved when an audience instance is run.
A filter must always be associated with a single selection rule. The selection rule is applied to the output, or one of the outputs, of the block that precedes the filter (if one exists) in order to further refine the data set.
For example, consider an audience that contains a filter, to which a selection rule that selects only females is attached. Another filter is added, and a connection created from the original to the new filter. A selection rule that selects only married people is added to the second filter. The second filter is applied to the output of the first, so that only married females are selected.
Adding a Filter to an Audience
You can add a new filter block to an audience by dragging a filter block from the Audience Blocks section within the toolbox. Doing so creates a new, unconfigured filter block within the workspace.
The new filter is selected automatically and, by default, is named “Filter”. If a filter named “Filter” already exists within the current audience, the newly-created filter is named “Filter 2” (note that, if required, the numerical value can be incremented accordingly).
Following the addition of a filter block, an asterisk is appended to the audience’s name displayed within the current tab, indicating that unsaved changes now exist.
Adding a Filter by Dropping a Selection Rule
You can create a filter by dragging a selection rule from the toolbox and dropping it directly onto the Audience Designer workspace.
The new filter is named by default in accordance with the name of the selection rule. If a filter of that name already exists within the current audience, the newly-created filter is named “[Filter Name] 2” (note that, if required, the numerical value can be incremented accordingly).
The new filter's Selection rule property is set to the rule that was dropped onto the workspace. The link between the block and selection rule is dynamic—that is, the block is always linked to the most up-to-date version of the selection rule. The selection rule’s name is shown in the filter, which is selected automatically.
Following the addition of a filter block, an asterisk is appended to the audience’s name displayed within the current tab, indicating that unsaved changes now exist.
Configuring a Filter in the Workspace
A filter has only a single unique property that may be configured directly within the workspace:

Selection Rule: a filter must be associated with a single selection rule. You can browse for a filter's selection rule by selecting the button displayed when you hover over the Selection rule property. Doing so displays the File System Dialog, within which you may navigate the RPI file system to locate a selection rule for the filter (only selection rule files are shown).
You can also drag a selection rule from the toolbox and drop it onto the filter block.
The link between the block and selection rule is dynamic – that is, the block is always linked to the most up-to-date version of the selection rule. Having added a selection rule to a filter, the rule's name is displayed within the filter block. If you add an incorrect selection rule to a filter, you can replace it by either browsing or dragging and dropping.
Having configured a filter with a selection rule, a message is displayed at the block. The message shown depends on whether the audience’s audience definition is transactional, and whether the selection rule with which the filter is configured shares the definition’s transactional resolution level (for more details on transactional audience definitions please see the Configuration Workbench documentation).
If the audience definition is transactional and the filter’s selection rule shares the transactional resolution level, a message is displayed stating “Retrieves ‘Customer” records along with a matching 'Sales’ record for each, as targeted by this filter”.
In this example, the audience definition’s resolution level is “Customer” and transactional resolution “Sale”.
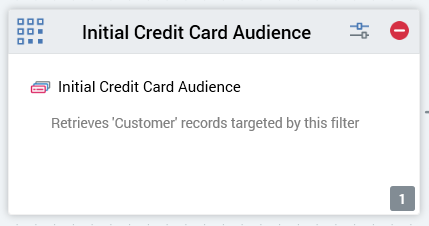
In all other circumstances a message is displayed that states “Retrieves ‘Customer’ records targeted by this filter”.
In this example, the audience definition’s resolution level is ”Customer”.
Having configured a filter with a selection rule, you can select Open Latest version to display the rule in question in the Rule Designer. If the Designer is already open, the rule is displayed there. If the Designer is not open, the rule is displayed in a new Designer instance.
Note:
You may, if desired, remove a selection rule from a filter using the Clear button within the filter block.
You cannot use an anonymous auxiliary database-resolving selection rule in a Filter block.
Configuring a filter using the Audience Block Builder
The following properties can be managed for filter blocks in the General tab of the Audience Block Builder:
Filter: you must configure the block with a selection rule. Details on doing so can be found in the Configuring a Filter in the Workspace section.
Create temporary table: a tri-state checkbox.
If unchecked, a temporary table is not created for the block during audience execution. If checked, a temporary table is created for the block.
If in an indeterminate state (as pictured), the block adopts the default position adopted by the audience definition upon which the template is based. If the definition's Ensure all blocks execute separately property is unchecked, a temporary table is not created for the block at audience execution. If the property is checked, a temporary table is created.
A read-only description of the ramification of the current state of the checkbox is displayed at the bottom of the tab that states “Using default: A temporary table will not be created for this block”.
Note that the property is only available if the filter is followed by another filter. A temporary table is always created for the last filter in a chain thereof (in such a case, if all blocks' Create temporary table checkboxes are unchecked, all filters' SQL is concatenated and executed in a single statement).