

Overview
You can invoke the Offer Designer in the following ways:
From the quick access menu’s Offers menu. The menu exposes the following options:
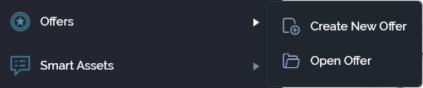
-
From a Tasks or File Type widget: typically, these might be displayed at your Home Page. For more information on widgets, please see the Dashboard Designer documentation.
-
By double-clicking an offer file in the File System Dialog: or by highlighting an offer and selecting OK in the same context.
-
By viewing the latest version of an offer contextually: for example, from an offer activity’s configuration panel in the Interaction Designer.
Note that access to the Offer Designer is controlled via the Offer – Design functional permission. If none of the user groups of which you are a member are associated with this permission, you will not be able to able to access the Offer Designer.
Offer Designer basics
The Offer Designer is displayed in a separate tab.
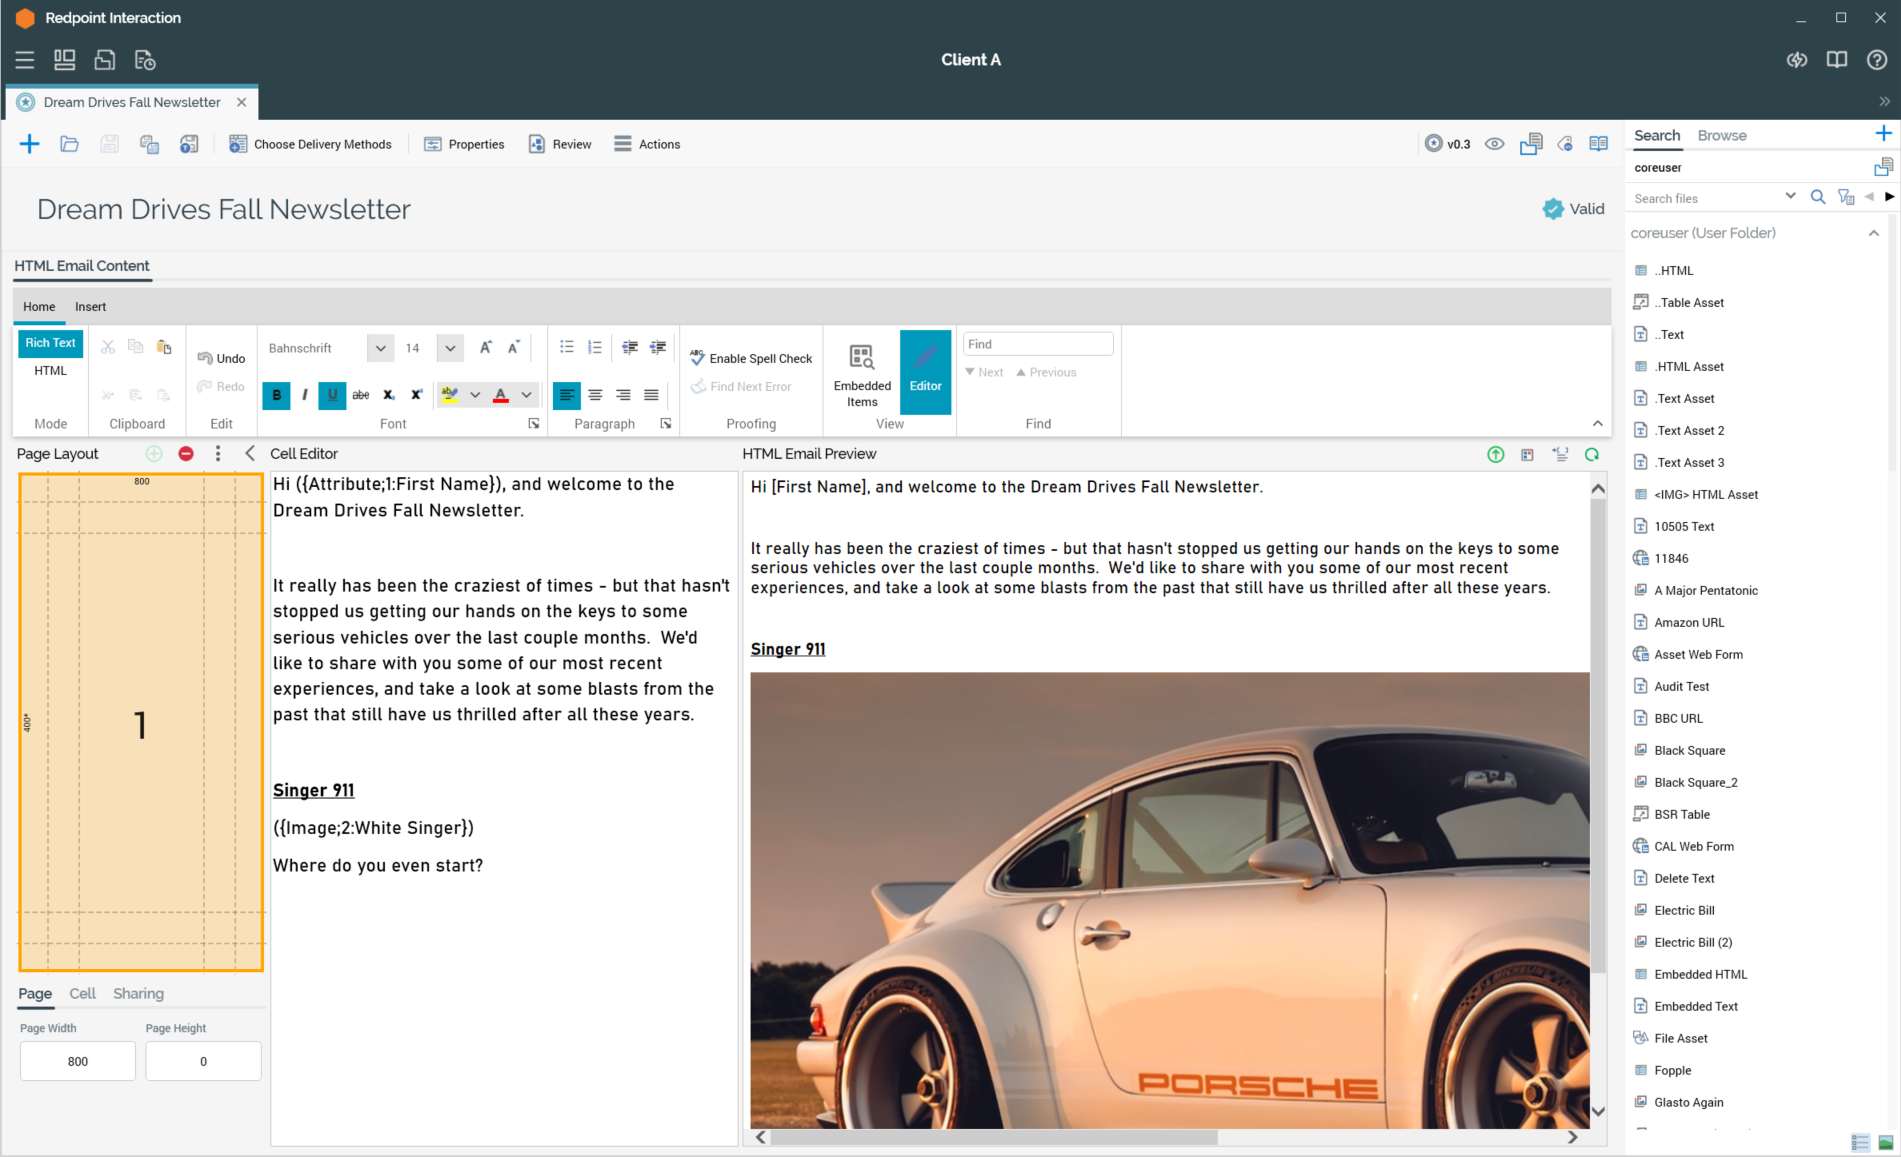
It is composed of the following elements:
-
Toolbar
-
Properties panel
-
Toolbox
-
Offer content (if single delivery method supported) or tab set (if multiple delivery methods supported).
If you close a tab containing the Offer Designer, within which an offer to which changes has been made is displayed, or you close RPI itself under the same circumstances, a dialog is shown.
You can:
-
Save the changes and proceed with closing the tab or RPI.
-
Abandon the changes and proceed with closing the tab or RPI.
-
Cancel closing the tab or RPI.
Start page
The Offer Designer Start page is shown upon invocation of Offers at the quick access menu, and also on selecting Create new Offer at the Offer Designer toolbar. It contains the following:
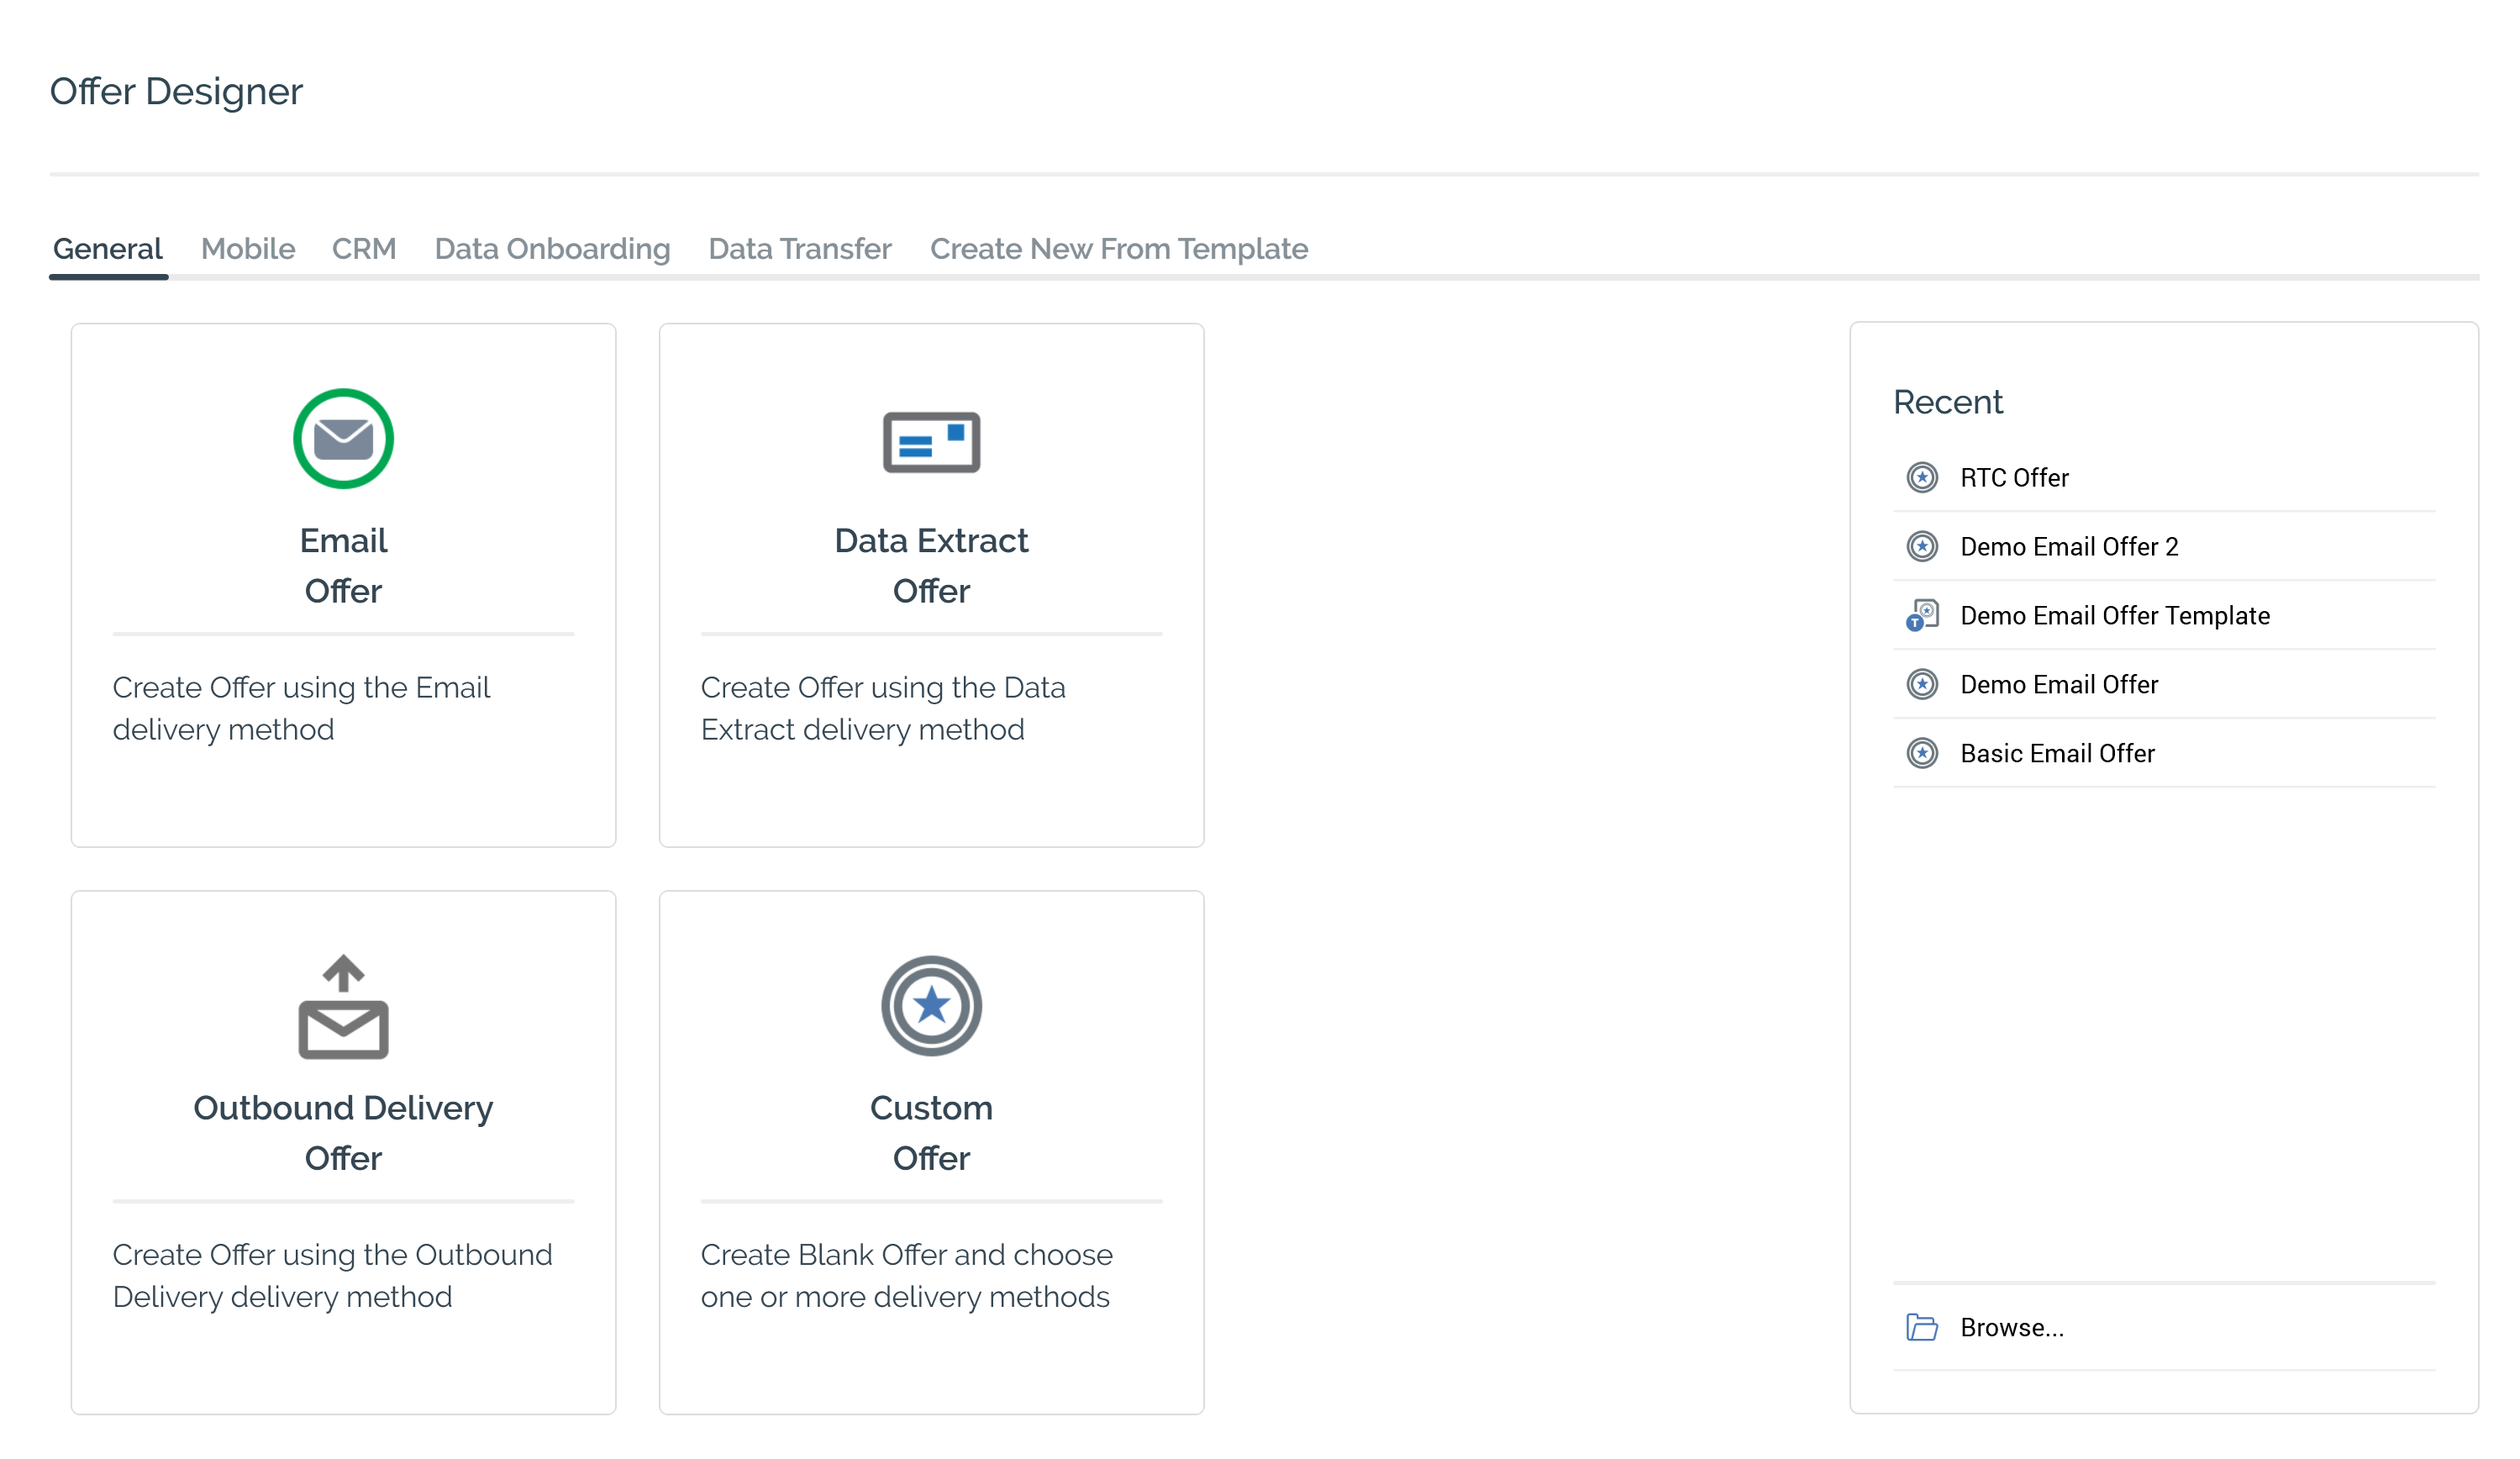
-
Separate tabs facilitating creation of the following Offer types: selection of a specific offer type creates a single-channel offer supporting the delivery method in question.
-
General
-
Email Offer
-
Data Extract Offer
-
Outbound Delivery
-
Custom Offer
-
Selecting this option displays the Choose Delivery Methods overlay. This allows you to select one or more delivery methods of your choice. It is covered elsewhere in this documentation.
-
-
-
Mobile
-
SMS Offer
-
Push Notification Offer
-
Push Notification Direct Offer
-
-
CRM
-
Salesforce Offer
-
-
Data Onboarding
-
Facebook Audience Offer
-
Google Ads Customer Match Offer
-
-
Data Transfer
-
Salesforce Marketing Cloud Data Transfer
-
-
-
Create New From Template tab: lists any offer templates configured at the current RPI tenant:
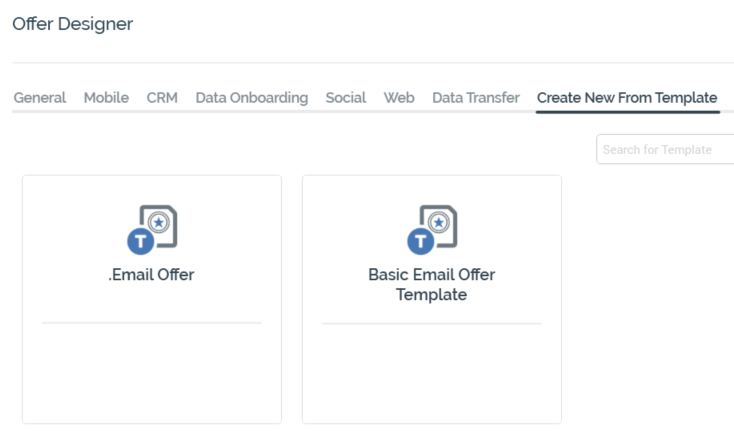
More information on offer templates is provided elsewhere in this documentation.
You can search for a template using the field and button provided. If multiple search results are displayed, they can be accessed using the Previous and Next buttons.
-
Recent: lists recently-accessed offers, facilitating the opening of the same.
-
Browse: displays the Open Offer File System Dialog, allowing you to select an offer to open.
A Cancel button is shown at the top of the Start Page. Selecting it removes the Start Page from display, and redisplays the Offer Designer. The Cancel button is only shown on invocation of the Start Page by selecting Create new Offer at the Offer Designer toolbar.
Toolbar
The Offer Designer toolbar exposes the following options:
-
Create new Offer: selecting this button displays the Offer Designer Start Page. A close button is shown to its top right; selecting it removes the overlay from display. If an Offer containing unsaved changes is displayed at invocation of Create New, an “Are You Sure?” dialog is shown, from which you can:
-
Save the changes
-
Abandon the changes
-
Abandon creation of the new Offer
-
-
Open an existing Offer: displays the File System Dialog, allowing you to navigate those folders within the RPI file system to which you have access in order to locate an offer to open.
-
Save the current Offer: saves the current offer to an existing filename; if the offer is yet to be saved, Save behaves like Save as…
-
Save the current Offer as...: allows you to specify the offer’s filename and storage location within the RPI file system by displaying the File System Dialog.
-
Save the current Offer as a Template...: allows you to specify a filename and storage location within the RPI file system by displaying the File System Dialog, and then to create a new offer template based on the current offer. More information can be found elsewhere in this documentation.
-
Save current Offer Template as File: this button is only available when an offer template is displayed in the Offer Designer. Selecting it displays the “Save Offer Template as new Offer” File System Dialog. Selecting a folder and selecting Save removes the dialog, and saves a new offer based on the current state of the offer template. The new file is shown in the Offer Designer.
-
Choose Delivery Methods: displays the Choose Delivery Methods overlay, allowing you to define the types of content that the offer will provide. Any previously-selected delivery methods are selected. Note that if you deselect a previously-selected delivery method having added content to its content panel, any unsaved content you added is lost—no “Are you sure?” warning is provided. Full details of the Choose Delivery Methods dialog are provided elsewhere.
-
Properties: displayed for email offers only, and covered separate in this documentation.
-
Review: displayed for email offers only, and covered separate in this documentation.
-
Actions: displayed for email offers only, and covered separate in this documentation.
-
Version number: the version number of the offer currently being viewed is always displayed, irrespective of the offer file type’s approval status.
-
Approval panel: if offer file approval is available in the current RPI installation, the approval panel is shown to the right of the Offer Designer toolbar. Full details of the approval panel can be found in the File Approval documentation.
-
Follow/Unfollow File: covered in the RPI Framework documentation.
-
File options: covered in the RPI Framework documentation.
-
File Metadata: covered in the RPI Framework documentation.
-
Linked Page options: covered in the RPI Framework documentation.
Choose delivery methods
Selection of an offer’s delivery methods is carried out in the Choose Delivery Methods overlay.
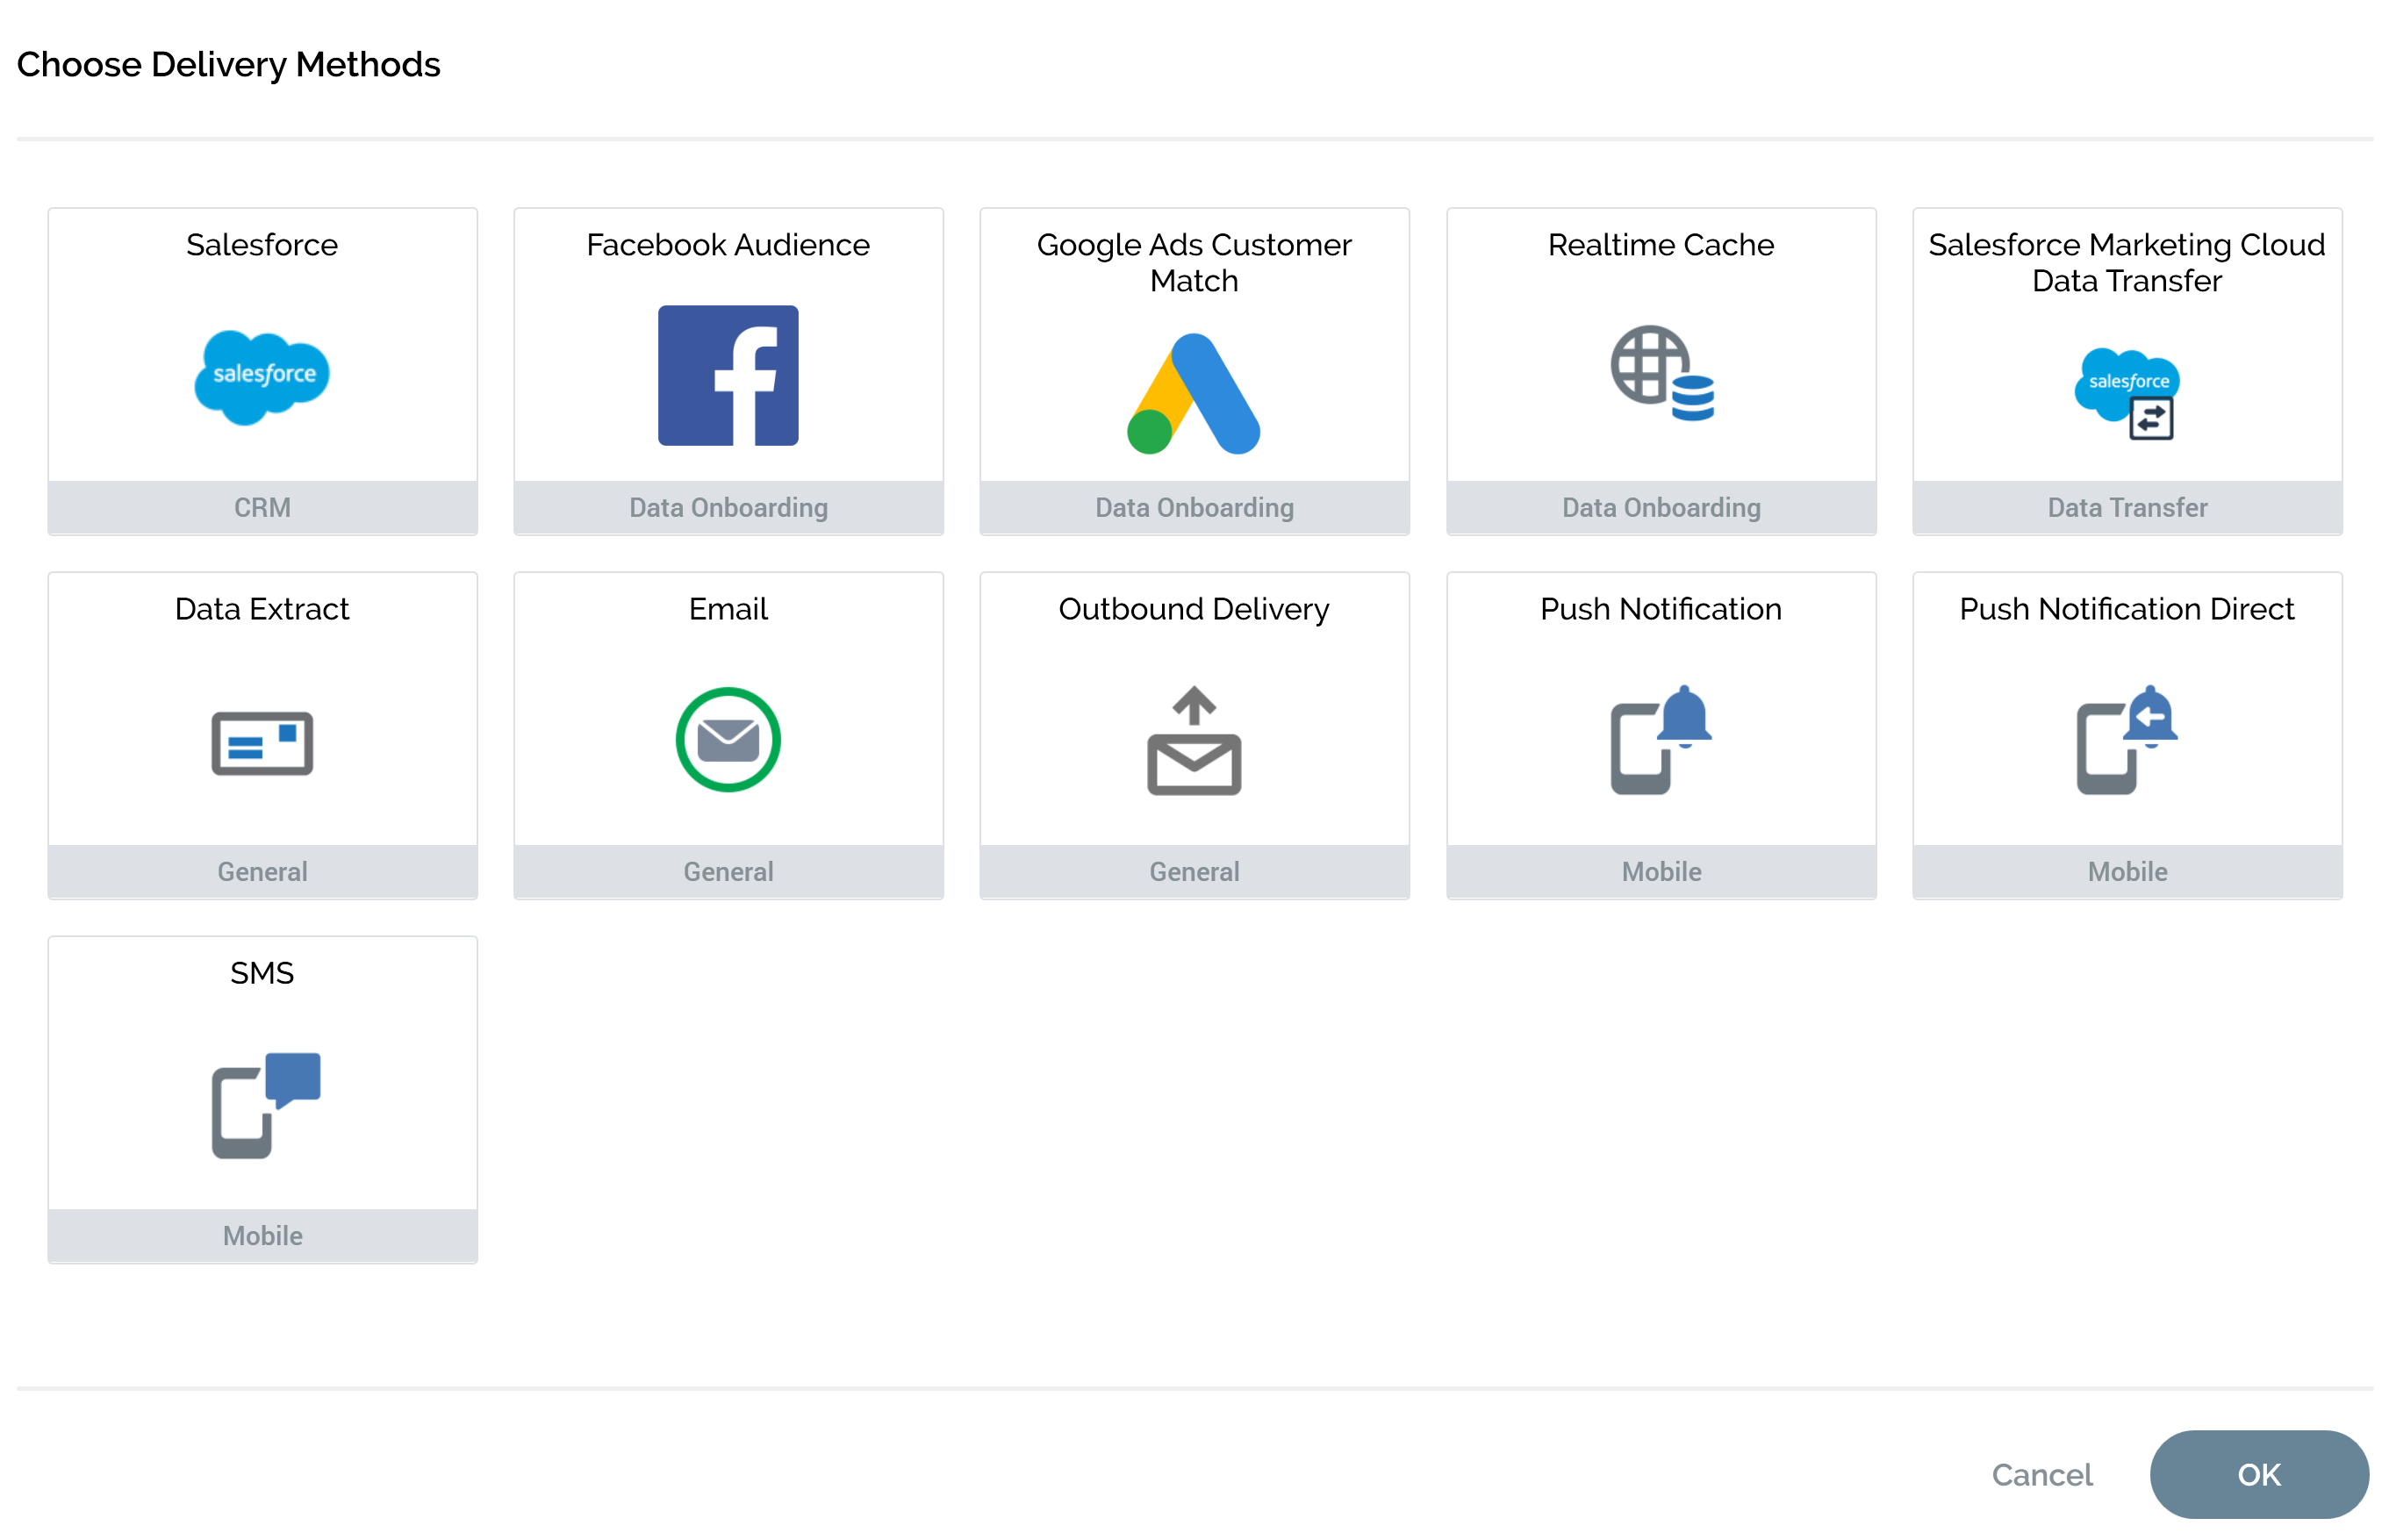
A list of the supported delivery methods is displayed.
Note that you cannot define offer content for control channels.
You can select one or more delivery methods from the list. Selecting on a delivery method icon surrounds the delivery method with a border.
Selecting the delivery method again removes both of these.
When you invoke Apply changes and close:
-
If you selected a single delivery method, a content panel supporting your selection is displayed. The tabset is not shown.
-
If you selected more than one delivery method, one tab per selected delivery method is displayed in the Offer Designer.
Tabs are entitled in accordance with selected delivery method names and are displayed in alphabetical order.
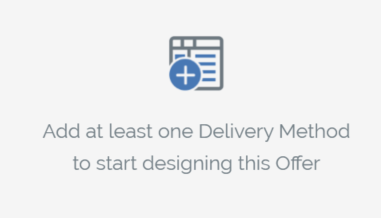
If you Cancel the Choose Delivery Methods dialog, or invoke Apply… without selecting at least one method, an empty Offer Designer is shown, in which is displayed the following message:
Having selected a new offer’s delivery methods, it is displayed in the Offer Designer. By default, its name is “New Offer”.
Saving an offer as a template
This button is only shown when a non-template offer is displayed in the Offer Designer. Selecting it displays the Save Offer as Template File System Dialog. You can specify a name for the new template file and select Save. When you do so, the file is saved with a modified icon that indicates that it is a template. For more information on offer templates, please see Offer Templates.
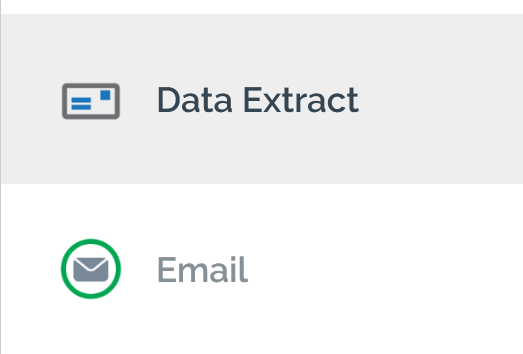
Toolbox
The Offer Designer toolbox exposes a Folder Search component. For more information, please see the Dashboard Designer documentation.
The toolbox is your source of the attributes, assets, smart assets and landing pages that you will need when building offers.