

Overview
The trigger configuration panel contains a tab set of up to four tabs. The most common tabs are General, Prioritization, Auto Replay, and Alerts. The available tabs depend on the trigger you’re using.
General tab
Input Workflow
The Input Workflow property is available within the General tab for all trigger types.
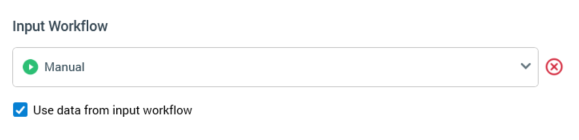
Input Workflow is used to indicate that the input data set for the current trigger’s workflow will be constrained to some of the records targeted by the Input Workflow.
If no other workflows are available to serve as input workflow, a message is shown at the property:

Use of Input Workflow at the activity state trigger is discussed within that trigger type’s documentation.
For all triggers other than the activity state trigger, Input Workflow is optional. The property is set using a drop-down that lists the names of all other workflows’ triggers within the interaction, in alphabetical order. Having selected an Input Workflow, you can clear it.
You can only select a queue listener workflow as an input workflow in the event that contains at least one queue activity that generates offer history.
On selection of an Input Workflow, the Inputs tabs of all activities downstream from the trigger list all of the input workflow’s fulfillment channels, along with fulfillment states for each.
At the first tree level, you can select fulfillment channels. Having selected a channel, at the second tree level, you can select specific fulfillment states within it. Any records in the selected state(s) at the point of the activity’s execution will serve as its input data set. A validation error is raised if no inputs are selected.
Having specified an Input Workflow you can, if desired, attach a fulfillment activity directly to the trigger in question without a validation error being raised:
If a trigger’s Input Workflow has been set, on attachment of downstream activities to the trigger, their inputs are set automatically to the Targeted state within the first of the Input Workflow’s channels.
If an Input workflow is specified, all fulfillment activities within the current workflow must be named differently to fulfillment activities within the input workflow.
At execution of a trigger with an Input Workflow, the dataset upon which the workflow’s activities act is determined by the fulfillment state selections described above.
If attempt is made to execute an activity in a workflow when an Input Workflow has not provided data (e.g. has yet to run), the activity enters a Paused state. You can view details as to why the activity was Paused in its log.
If an input workflow executed in production mode, following execution of the Fulfillment state flow counts update system task, a second workflow can utilize for input purposes any fulfillment state counts generated by the first workflow. This applies even if the second workflow is to execute in Test mode.
Constraints
Trigger constraints are available at all four trigger types, and also within the wait for event activity. They are shown within the General tab within a trigger’s configuration panel.
When you elect to display trigger constraints within a configuration panel, the button toggling display of trigger details and constraints reads Show trigger.
The trigger constraints panel contains the following options.
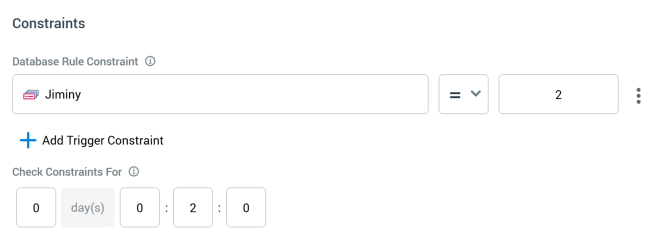
Constraints list
A list of database rule and external trigger constraints.

If a database count constraints, the following properties are shown:
-
Information icon: hovering over the small info icon to the right of the constraint’s title displays a tooltip that says “Constraint met when rule count satisfies specified criterion”.
-
Selection rule: mandatory. You can browse those folders within the RPI file system to which you have access to choose a selection rule; you can also drag a selection rule from the toolbox.
Once you have chosen a selection rule, you may clear it. You can also open the latest version of the selection rule. If the Rule Designer is already open, the rule is shown there. If it is not, a new instance of the Rule Designer is opened to display the rule.
Use of selection rules with auxiliary database resolutions is supported in this context.
-
Operator: you can choose an operator for the constraint using a drop-down list, which defaults to >= (more than or equal to).
-
Value: a mandatory integer, which defaults to 0.
-
Options: exposing a single Remove option.

If an external trigger constraint, the following properties are shown:
-
Information icon: hovering over the small info icon to the right of the constraint’s title displays a tooltip that says “Constraint met when this unique key is used. Click the button below to view more information”.
-
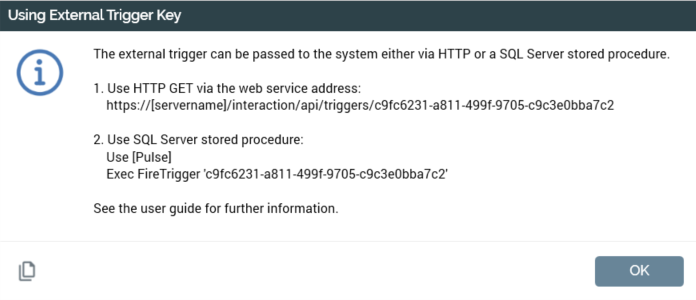
GUID: a system-generated value that is unique to the workflow. The GUID is used by a caller to identify the specific trigger constraint that is to be satisfied. Note that if you save an interaction as another name, a new GUID is generated.
-
Information icon: Selecting the icon displays a dialog, which describes how the trigger constraint can be satisfied (using either an HTTP post or a SQL Server stored procedure). An external application can call RPI, using either of the methods described, to satisfy the trigger constraint. You can copy the contents of the dialog to the clipboard.
-
Stop checking at: only relevant if a manual, scheduled, or activity state trigger. This date/time value is optional, and no default is set. The field can be populated manually or by using a calendar control. The property is accompanied by an information tooltip that says “Using local time zone”.
-
Check constraint(s) for: only relevant if a recurring trigger. This optional timespan property is displayed when at least one database count or external constraint has been supplied. When supplied, each time the trigger fires, if any of the supplied constraint(s) have not been not met by the end of the supplied timespan, one of the following occurs. If the recurrence was the final one scheduled, the workflow enters a Completed state; otherwise, the workflow enters a Waiting for Next Trigger state.
-
Options: exposing a single Remove option.
Add Trigger Constraint
Invoking this button allows you to select the type of trigger constraint you wish to add from a menu (database count or external trigger constraint). Note that, when configuring a wait for event, you may only add database count constraints. Invocation creates a new, unconfigured constraint of the appropriate type within the constraints list.
Prioritization tab
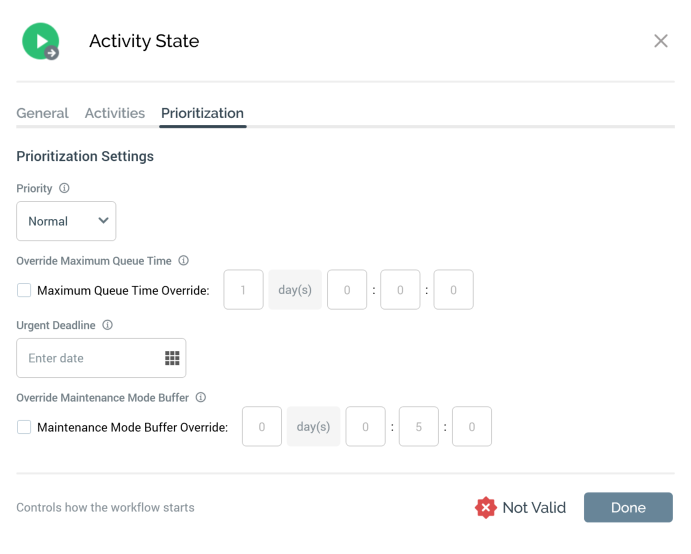
The Prioritization tab is available for all trigger types. It allows you to configure properties that relate to the prioritization of the trigger's workflows.
The tab contains the following:
-
Priority: if workflow prioritization is enabled at the current RPI tenant, this property allows you to set the priority of any activity in workflow instances created by the trigger. A dropdown property, it exposes values Urgent, Normal (the default) and Low.
-
Override Maximum Queue Time: this property allows you to override the system default for how long an activity within the workflow can wait on the queue. A checkbox, it is unchecked by default. When checked, the Maximum Queue Time Override property is enabled.
-
Maximum Queue Time Override: this property accompanies Override Maximum Queue Time, and set to 1 day by default.
-
Urgent Deadline: this field allows you to specify the date and time at which any activity within the workflow will become Urgent priority. It is blank by default.
-
Override Maintenance Mode Buffer: this property allows you to override the system default for the amount of time prior to scheduled maintenance during which activities will be placed on the wait queue. A checkbox, it is unchecked by default. When checked, the Maintenance Mode Buffer Override property is enabled.
-
Maintenance Mode Buffer Override: This property accompanies Override Maintenance Mode Buffer, and is set to 5 minutes by default.
Auto Replay tab
The Auto Replay tab is available for all trigger types. It allows you to specify how RPI will behave in the event of the occurrence of certain types of error.
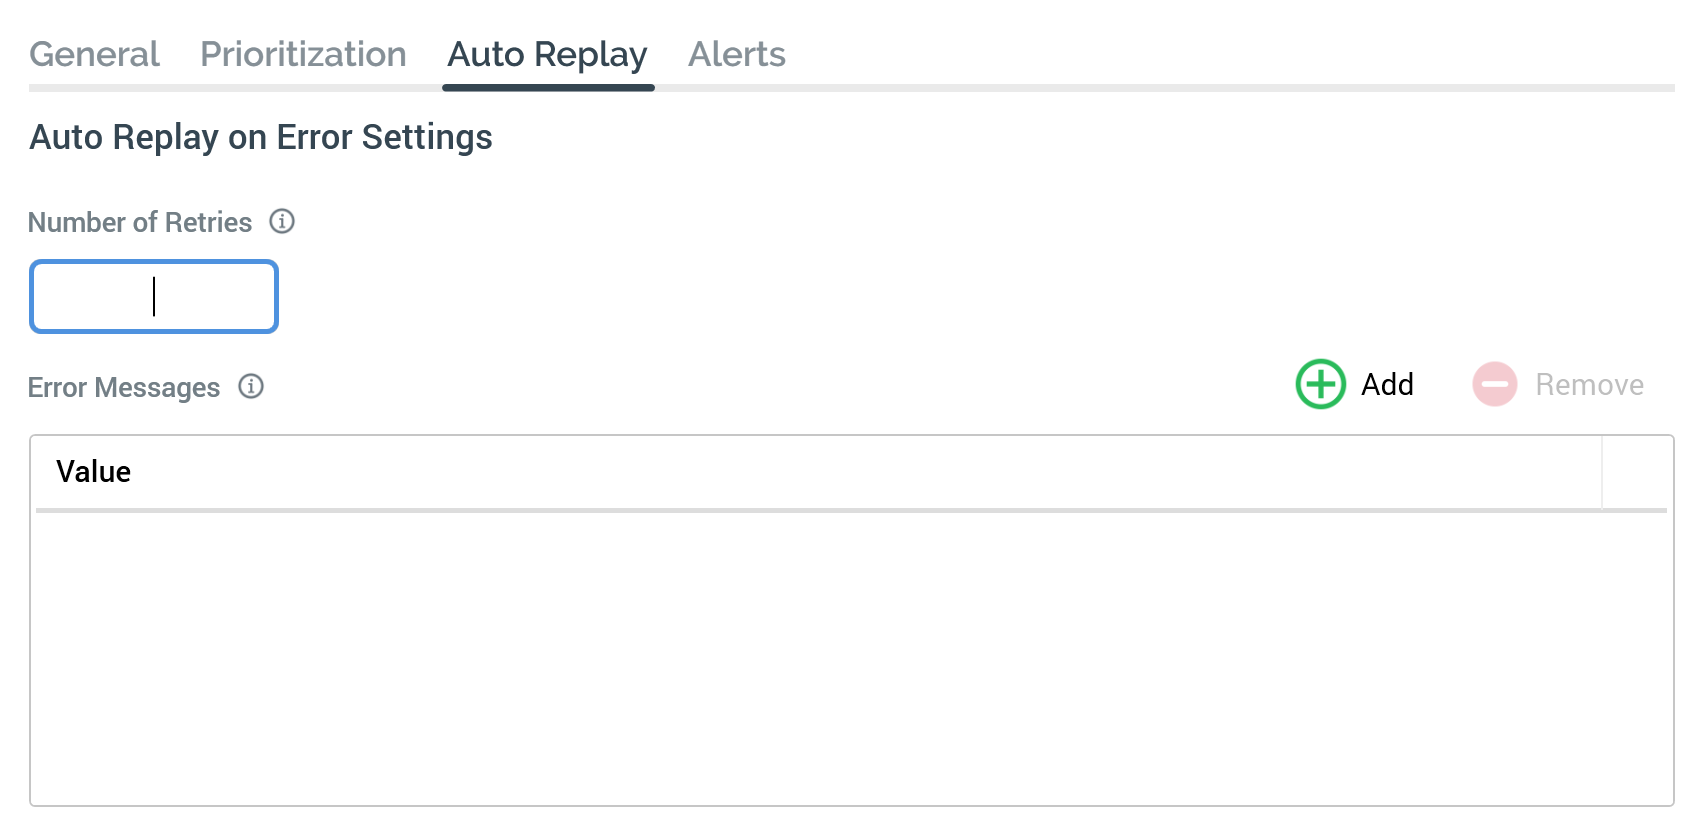
The tab contains the following:
-
Number of retries: this integer property defaults to 0, and accepts a maximum of 99. It allows you to specify the number of times RPI will attempt to perform retries upon the occurrence of one of the specified errors.
-
Error Messages: this property consists of a toolbar and a list of error messages.
-
Toolbar: exposing the following:
-
Add new Error Message: selecting this button adds a new error message to the list. The new message's default text is '[replace with error message for retry]'.
-
Remove selected Error Messages: selecting this button removes the selected error message(s).
-
-
List of error messages: you can optionally specify a series of error messages. An error message is a string of characters, which, when an error occurs, RPI will attempt to match to the resultant error's message text. If a partial match occurs, RPI will retry the action that caused the error to occur. Retries will be performed a number of times in accordance with the Number of retries setting, and retry details written to the activity’s execution log. The delay between retries increases each time to a maximum of one hour.
-
Each entry in the list must contain a text string.
Alerts tab
The Alerts tab is available for all trigger types.
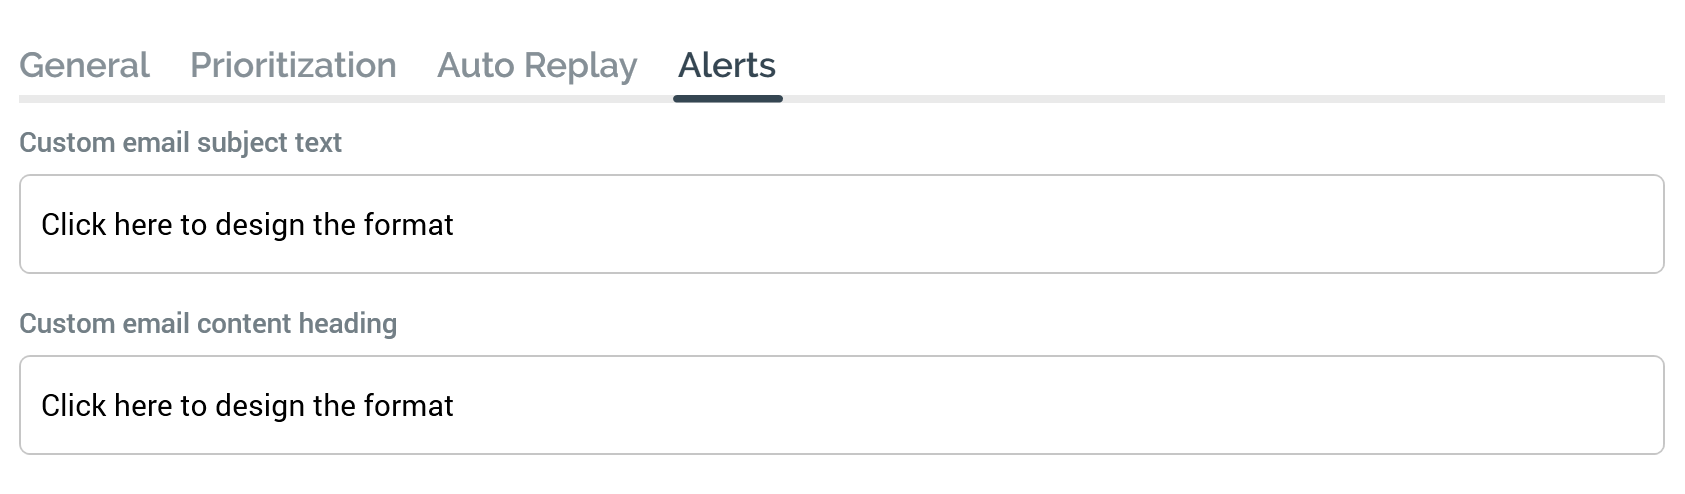
It allows you to configure the following types of alerts (for more details on alerts, please see the Framework documentation):
-
Interaction Audience Complete - Production
-
Interaction Audience Complete - Test
-
Interaction Fulfillment Complete - Production
-
Interaction Fulfillment Complete - Test
Two properties facilitate customization of these alerts:
-
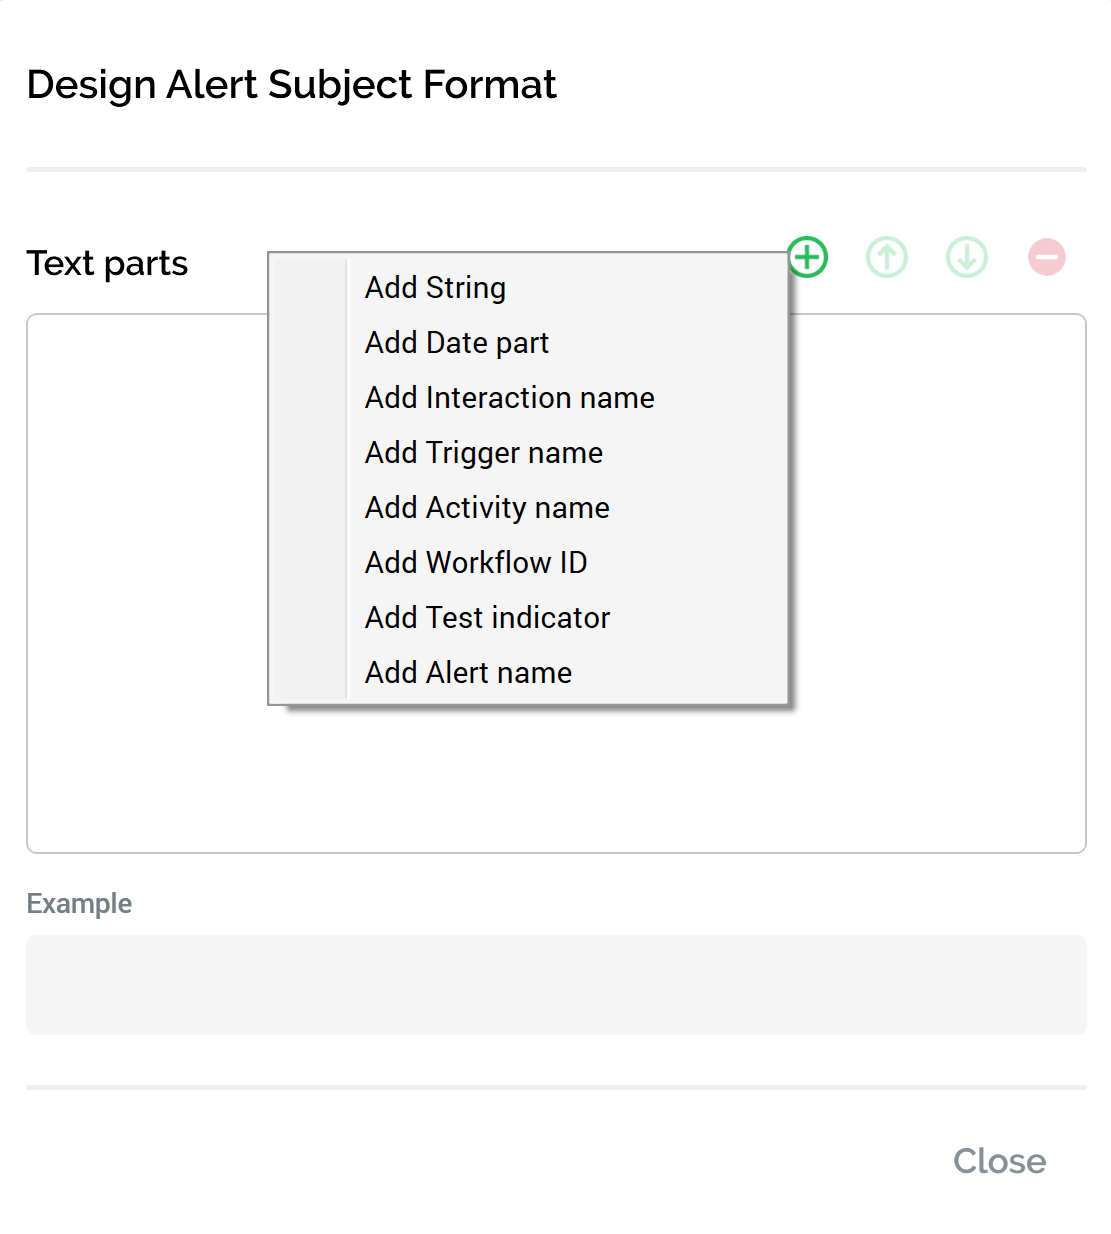
Custom email subject text: this optional text property allows you to customize alerts' subject lines. It is set using the Design Alert Description Format dialog. On configuration of Custom email subject text, a summary thereof is displayed at the property.
-
Custom email content heading: this optional text property allows you to customize the first line of text to be shown in the aforementioned alerts. It is also set using the Design Alert Description Format dialog.