

Overview
An audience defines a group of targets (people, transactions, prescriptions, etc.) and performs segmentation on those targets. Primarily, you’ll use these segments to communicate to via a channel like email or SMS, but you can also use them as a control group for reporting purposes, etc. Audiences are versatile and fully customizable.
To build an audience, you’ll use one or more blocks. The steps on this page represent a simple audience with two blocks: a filter block and a suppressions block. This example can be modified as needed to fit your use case.
The video below walks through the process detailed on this page.
Prerequisites
-
Selection rules: selection rules are required for most audience blocks. You can pre-build them, or create them as you go.
Open the Audience Designer
In this use case, we’re going to build an audience that targets customers who are subscribed to our loyalty program. The audience will be part of an interaction that sends a promotional offer to our loyalty members. The first step in building an audience is navigating to the Audience Designer.
To get to the Audience Designer:
-
From the RPI home page, go to the quick access menu and select Audience>Audiences>Create New Audience.
-
Choose SQL Audience.
-
The Audience Properties pane appears. For the purposes of this example, you can leave the properties set to their defaults and select the X to close the window.
You can update the properties at any time when building an audience by selecting the Properties button in the toolbar.
The Audience Designer is now open with an empty workspace. We’re going to build the audience one block at a time in the following sections.
Configuring audience blocks
Audiences are composed of blocks, and can be as simple as a single block, or contain multiple blocks linked together.
These blocks include:
-
Filter
-
Multi Filter
-
Suppressions
-
Split
-
…and more
The following use case includes only the Filter and Suppressions blocks, but other blocks such as Splits are commonly used as well.
Learn more about audience blocks.
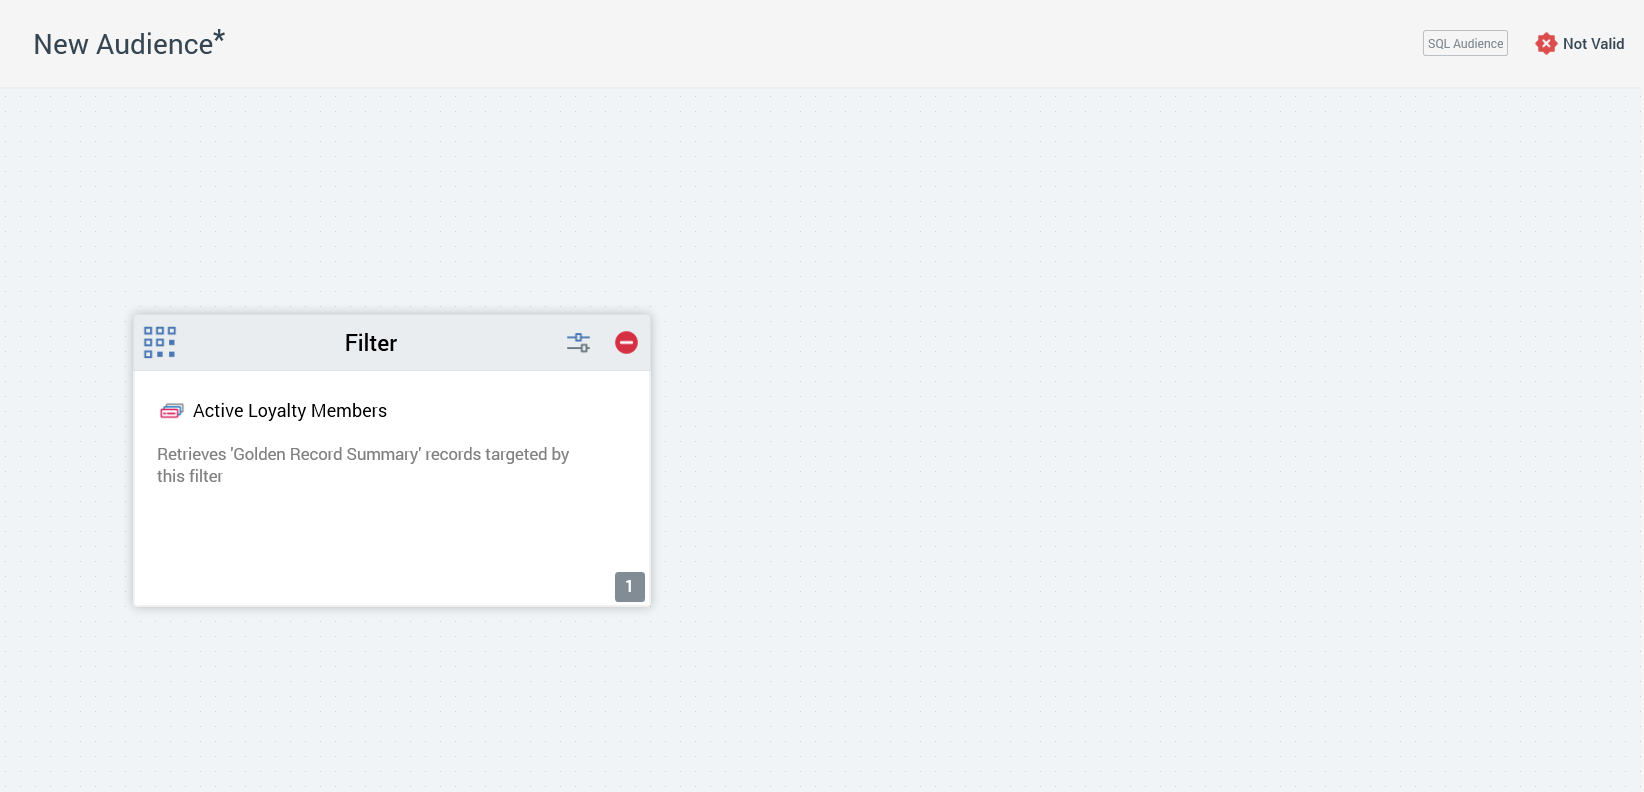
Filter block
The first block we need to configure for this audience is the Filter block.
The steps below are the minimum requirements for configuring the Filter block. You may wish to further configure the Filter block beyond what is described in these steps.
To configure the Filter block:
-
From the Audience Blocks menu, drag the Filter block onto the workspace.
-
Select the Selection Rule field to browse for a selection rule. You can also create a new selection rule by selecting the + icon.
-
Choose the selection rule you’d like to use for this block.
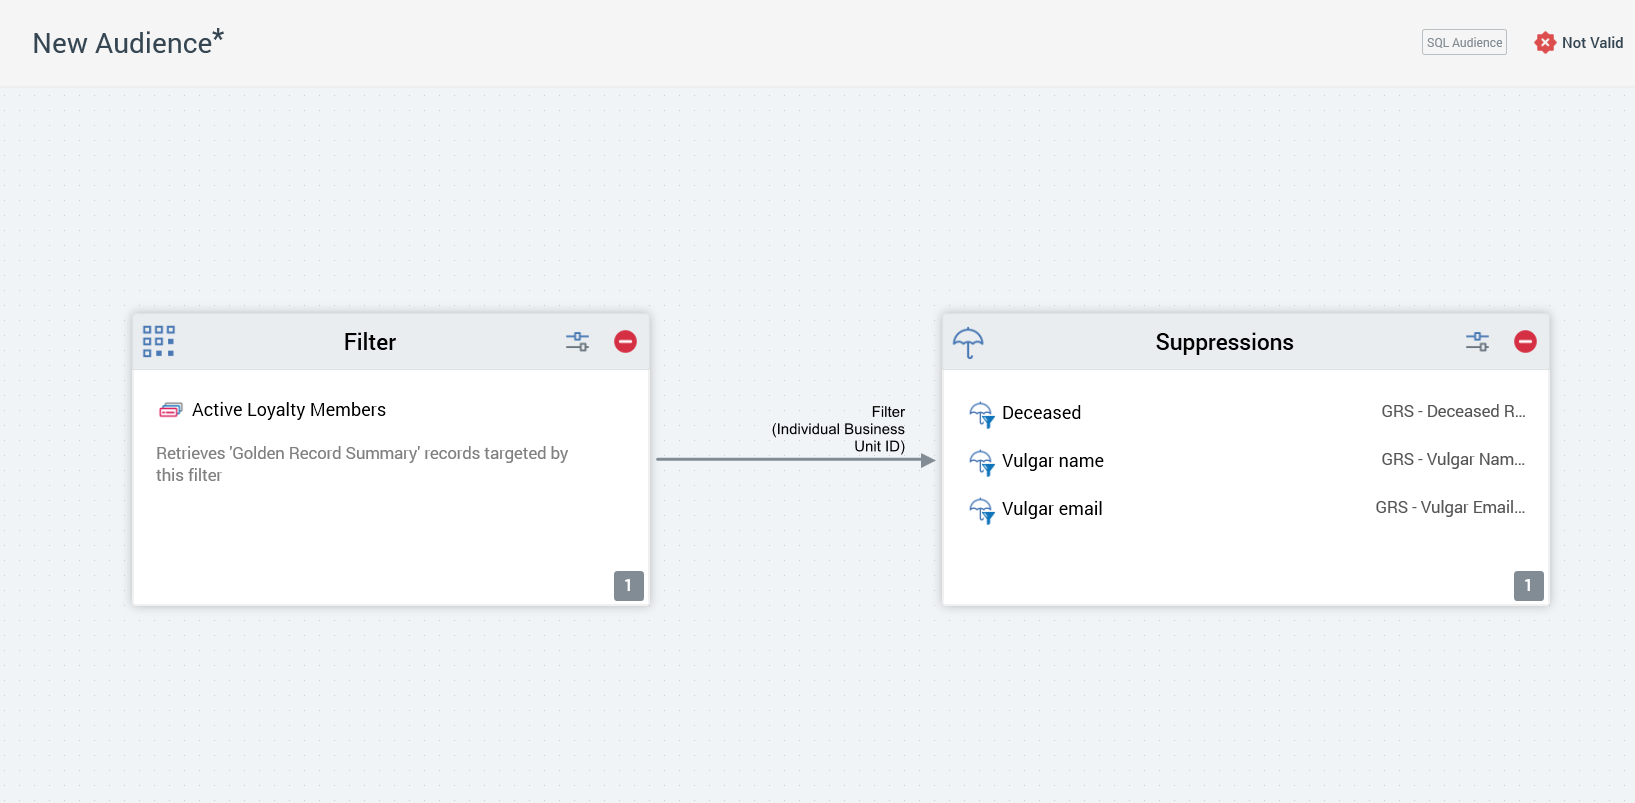
Suppressions block
The final block we need for this example is the Suppressions block. Suppressions allow you to exclude customers that fit the Filter block criteria, but should be left out for other reasons. You can add as many suppressions as you need.
The steps below are the minimum requirements for configuring the Suppressions block. You may wish to further configure the Suppressions block beyond what is described in these steps.
To configure the Suppressions block:
-
From the Audience Blocks menu, drag the Suppressions block next to the Filter block, creating a connection between the two.
-
Select the Configure button on the block.
-
Go to the Suppressions tab.
-
Choose Add New Suppression.
-
Give the suppression a name.
-
Choose a selection rule that represents the records you want to suppress. You can also create a new selection rule by selecting the + icon.
-
Repeat steps 4-6 for as many suppressions as you need.
-
Select Done.
Configure audience metadata
Once you’ve added all the blocks you need, the final step is to configure the metadata for this audience.
The steps below reflect the metadata requirements for this specific implementation of RPI. The metadata requirements may be different for your configuration of RPI.

To configure the audience metadata:
-
Select the Show Audience-Level Metadata button from the toolbar.
-
Enter the Campaign Code into the corresponding field. You may also enter any additional metadata you’d like to include at this time.
-
Select Done.
Finalize your audience
Now that our audience is configured, all we need to do is name and save the audience to make it ready to use.
To name and save the audience:
-
Select the default name “New Audience*” and enter a unique name for the audience.
-
Select the Save icon from the toolbar.
-
Choose a location to save your audience.
-
Select Save.
Your audience is complete and ready to use.