

Overview
The Landing Page Designer toolbar exposes the following options:
-
Create new Landing Page: selecting this button displays the Landing Page Designer Start Page. A close button is shown to its top right; selecting it removes the overlay from display. If a Landing Page containing unsaved changes is displayed at invocation of Create New, an "Are You Sure?" dialog is shown, from which you can:
-
Save the changes
-
Abandon the changes
-
Abandon creation of the new Landing Page
-
-
Open existing Landing Page: invocation of this option displays the Open Landing Page File System Dialog. You can navigate accessible folders in the RPI file system to locate the Landing Page that you wish to open. Only Landing Page files are shown. Having located a Landing Page, you can select OK or double-click it to display it in the Landing Page Designer. You can also select Cancel to close the File System Dialog without opening a Landing Page.
If a Landing Page containing unsaved changes is displayed, you can:-
Save the changes
-
Abandon the changes
-
Abandon opening the Landing Page
If required, you can open a previous version of a landing page. This can be done in the following contexts: -
Realtime Details Report
-
File Information Dialog’s History tab
-
Landing Page Designer’s Publish History dialog
-
If you make changes to a version of a landing page that is not the current version, on invocation of Save, the File Conflict dialog is displayed.
If you open a previous version of a landing page, if you elect to view a linked (smart) asset therein, the latest version of the asset is displayed in an instance of the (Smart) Asset Designer.
-
Save Landing Page: this option is unavailable when no outstanding changes are present within the Landing Page. If the Landing Page has not been saved, Save behaves like Save As.... If the Landing Page has previously been saved, invocation of this option saves any landing page changes to the existing Landing Page file.
-
Save Landing Page as...: invocation of this option displays the Save Landing Page As… File System Dialog, allowing stipulation of the filename to which to save the new landing page file.
-
Properties: selecting this button displays the Landing Page Properties overlay, which is covered later on this page.
-
Goals: selecting this button displays the Landing Page Goals overlay, which is covered later on this page.
-
Publish: selecting this button displays the Publish Landing Page overlay, which is covered later on this page.
-
History: selecting this button displays the Landing Page History overlay, which is covered later on this page.
-
Results: selecting this button displays the currently-displayed version of the landing page in the Realtime Details Report. If invoked prior to the page’s being published, Realtime Details advises that there are "No details to display".
-
Version number: the version number.
-
Follow/Unfollow File: please see the RPI Framework documentation.
-
File options: please see the RPI Framework documentation.
-
File Metadata: please see the RPI Framework documentation.
-
Linked Page options: please see the RPI Framework documentation.
Landing Page Properties
The Landing Page Properties overlay is shown on selecting Properties at the Landing Page Designer toolbar. It is also displayed immediately on creation of a new landing page.
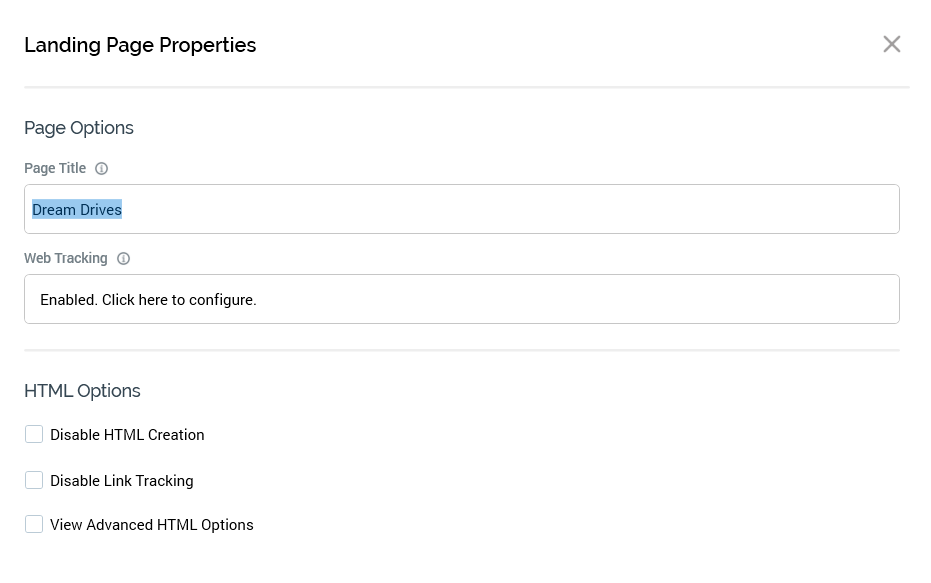
It contains the following:
Page Options section
-
Title: the title of the landing page, as shown at the browser tab in which the landing page is displayed. Provision of a Title is mandatory, and it can be a maximum length of 100 characters.
-
Web tracking: this button allows you to control whether web tracking is to be configured for the landing page. Web tracking is configured by associating one or more Piwik, web events, generic, Google Analytics and/or Kissmetrics adapters with the landing page (please see the Configuration documentation for full details about web adapters).
-
Attaching a Piwik adapter to a landing page causes script to be added to the page which, in turn, allows visitors (anonymous or directed to the page by an RPI communication) to be tracked at a Piwik dashboard.
-
When a Google Analytics adapter is attached to a landing page, Google Analytics script is added to the landing page when it is published. If an interaction contains an offer that fulfills using an outbound channel to which a Google Analytics adapter has been attached, and the offer contains a link to a landing page to which a Google Analytics adapter has also been attached, Google Analytics results will be made available at the offer (note that this may take a period of time; note also that Google Analytics results are collated by system task Fulfillment state flow count updates).
-
Kissmetrics adapters function in a similar manner to Google Analytics adapters, other than that the collation of metrics is effected by the Kissmetrics external provider, rather than Google.
-
When you attach a Generic web adapter to a landing page, you can consistently apply script declarations to the page’s HTML <HEAD> tag, and the start and end of its <BODY> tag.
-
If you wish to make use of one or more goal smart assets in a landing page, you must associate a web events adapter with the page’s Web tracking property.
When a landing page is yet to be associated with web adapters, the button’s text reads "Not enabled. Click here to configure". Selecting the button displays the Configure Web Tracking dialog.
The dialog contains the following:-
Text: "Choose and configure the adapters to enable web tracking on this page".
-
Web adapters: all Piwik, web events, generic, Google Analytics, and Kissmetrics adapters configured for the current client are listed. For each, the following are displayed:
-
[Selected checkbox]
-
Unchecked by default; allows you to specify that this adapter should be attached to the landing page. Checking the checkbox displays the Report page name field.
-
-
[Icon]
-
[Adapter name]
-
-
Report page name: this optional field is only displayed for Piwik adapters, when selected. It represents the name by which the page will be referred to at the Actions column at the Visitor Log at the Visitor tab within the Piwik dashboard. If not provided, the page's title is used instead.
-
-
If no adapters are configured, a message is displayed ("No adapters that support web tracking are available").
When configured, the button’s text reads "Enabled. Click here to configure". Selecting it displays the Configure Web Tracking dialog, in which you can make changes to the page’s existing web tracking configuration.
A validation error is raised if you attach more than one web adapter of the same type to a landing page.
HTML Options section
-
Disable HTML Creation: this checkbox, which is unchecked by default, is only displayed when Page Layout is set to one of HTML template or Raw HTML. When unchecked, the following tags are provided within the current content:
-
<html> -
<head> -
<title> -
<body>
-
When checked, content entry in rich text mode is not supported. The <html> tag must be supplied manually (a validation message is shown if it is not provided). If <head> and /or <body> tags are supplied, they are used as provided; otherwise they are created by RPI. If a <title> is supplied, it is overridden with the value provided at the landing page's Properties dialog; otherwise it is added automatically by RPI.
The View HTML options property is removed from display when Disable HTML creation is checked.
-
Disable Link Tracking: when checked, this checkbox (which is unchecked by default), prevents the tracking of link clicks on the landing page. When unchecked, link clicks on the page are tracked. Note that the property must be unchecked if the landing page contains a link click-based goal.
-
View Advanced HTML options: This checkbox, unchecked by default, allows you to show or hide the Advanced HTML Options section. It is removed from display when Disable HTML creation is checked.
Advanced HTML Options section
-
HTML Doc Type: this optional field, set to "html" by default, allows you to specify the page's
HTML !DOC TYPEdeclaration. It is displayed when View HTML options is checked. -
HTML Header: this optional field allows you to specify any styles and/or scripting to be applied to the
<HEAD> HTMLelement. You can use this field to include references to local style sheets. It is displayed when View HTML options is checked.
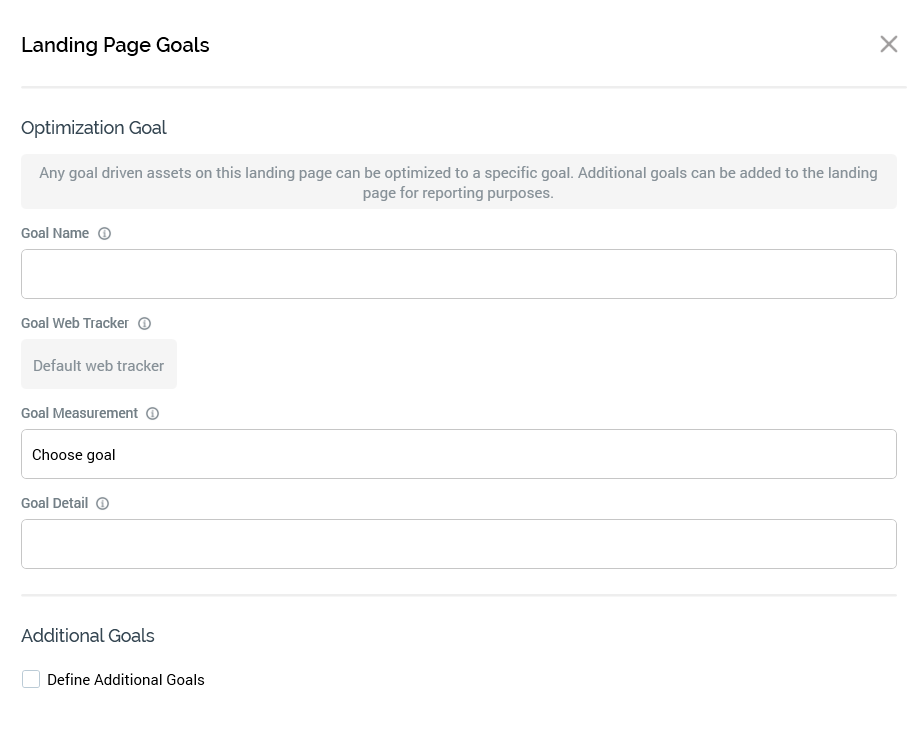
Landing Page Goals
The Landing Page Goals overlay is shown when the Goals toolbar button is selected.
The overlay allows you to define goals that can be achieved by site visitors within a landing page. Goals represent an outcome of the user’s interacting with a page; for example:
-
Clicking a hyperlink
-
Submitting a web form
-
Undertaking a custom action that results in the execution of a JavaScript function.
Optionally, one goal can be defined as the landing page’s optimization goal. The optimization goal is used by any goal smart assets contained within the landing page. A goal smart asset determines which of a series of content elements is most effective in encouraging a user to undertake the defined optimization goal.
For example, consider a travel company’s landing page, in which the optimization goal is defined as submission of a web form to request a brochure. A goal smart asset is included within the landing page. This initially serves a series of random images (e.g. Eiffel Tower, Taj Mahal, Golden Gate Bridge) to page visitors. RPI tests the relative efficacy of each of these images in encouraging visitors to submit the form. On determining the most effective image, the winner is served to new site visitors thereafter.
If the landing page contains more than one goal smart asset, they all will share the same optimization goal.
For more details on goal smart assets, please see the Smart Asset Designer documentation.
Additional goals can also be defined, over and above the optimization goal. An additional goal can be:
-
Used for reporting purposes, being displayed in the Realtime Tracker.
-
Used in Realtime variation of web content, through use of the Goal decision criterion in a Web Tracking Realtime decision (e.g. to display different content should a goal have or have not been attained; for more information, please see the Realtime Decisions documentation).
-
Persisted in the Data Warehouse, having been captured and stored in the Realtime cache. Thereafter this data can be used when targeting outbound communications from RPI.
Goals can be defined without goal smart assets’ inclusion in the landing page.
The Landing Page Goals dialog contains the following:
Optimization Goal section
-
Text as follows: “Any goal smart assets on this landing page can be optimized to a specific goal. Additional goals can be added to the landing page for reporting purposes.”
-
Goal name: this property represents the name by which the goal will be referred to in the Realtime Tracker. It must be defined if one or more goal smart assets are included within the landing page and can be a maximum of 100 characters in length. No default is provided. The name of the optimization goal must be unique across all goals defined within the landing page.
-
Goal web tracker: this property represents the web events adapter that will be used to supply goal metrics, gathered at the landing page, to RPI (goals are collated by executing the Web events importer system task). The property is read only and is set automatically to the first web events adapter selected in the page's Web tracking property. Its provision is mandatory.
-
Goal measurement: this property represents the goal by which the comparative success of competing content elements is to be measured. For example, a goal might be defined as encouraging a user to click-through on a specific hyperlink within a landing page, or to submit a web form contained therein. You can select the property to choose a goal. This displays the Choose Fulfillment State dialog.
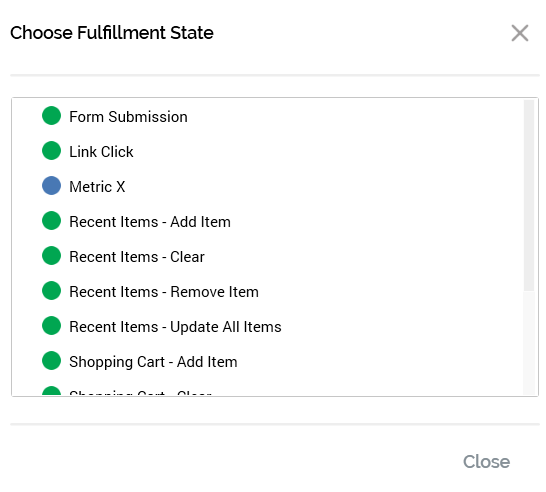
The dialog lists standard and custom metrics made available by the selected web adapter. Selection of a goal measurement is mandatory. Having selected the goal, you can clear it if so desired.
A validation error is raised if a Link Click Goal measurement is selected and no link exists in the landing page, or if Form Submission is selected and no web form exists in the landing page.
-
Goal detail: this property allows you to optionally qualify the optimization goal through specification of all or part of a link address or web form name. A goal will be deemed to have been achieved if e.g. a link to a URL containing the supplied detail string is selected; selecting other URLs will not result in the goal being met.
Additional Goals section
-
Define additional goals: this checkbox is shown below the Optimization Goal section. It is unchecked by default. Checking it displays the Additional Goals grid. Once checked, it is mandatory to define at least one additional goal.
-
Additional Goals grid: this is displayed when Define additional goals has been checked. It consists of a toolbar and a grid.
-
Toolbar: two buttons are available:
-
Add new Goal: selecting this button adds a new, unconfigured additional goal to the grid. The goal's Measurement and Detail properties are not set.
-
Remove selected Goal: selecting this button removes the selected goal from the grid, without display of an "Are You Sure?" dialog.
-
-
Grid: the grid itself contains the following columns:
-
Name: provision of a Name for the additional goal is mandatory, and it can be a maximum of 100 characters in length. Name must be unique across the optimization goal and additional goals within the page.
-
Measurement: it is mandatory to supply a goal measurement, by selecting one from the Choose Fulfillment State dialog. Validation errors can be raised as per the Goal measurement property within the Optimization Goal section.
-
Detail: as per the equivalent property at the Optimization Goal section, an additional goal can be qualified through the provision of a goal detail.
-
-
Publish Landing Page
The Publish Landing Page overlay is shown when the Publish toolbar button is selected.

It contains the following:
-
Location: this property allows you to choose a web publish site or folder to which the landing page will be published. Full details of web publish folders can be found within the Configuration Workbench documentation. The property is mandatory. Prior to the property's population, a Choose publish location button is displayed. Selecting the button displays the Choose Publish Location dialog.
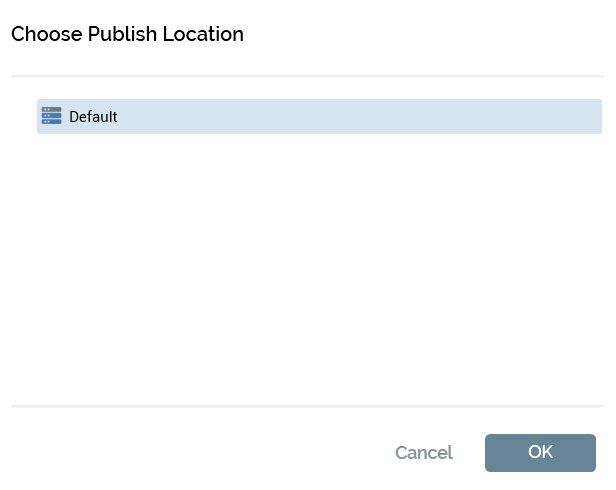
A treeview displays all configured web publish sites, and the folders they contain. You can select a site or folder and select OK to specify the Publish to location.
If you select a site, it is displayed as "[site name] – Root". If you select a folder, it is displayed as "[site name] - [folder name]".
Selecting Cancel removes the Choose Publish Location dialog from display (selecting off it has the same effect).
Having selected a site or folder, you can select it again to redisplay the Choose Publish Location dialog, should you wish to change it.
-
Default Filename: this property contains a Use Default Filename checkbox, which is checked by default. When checked, the accompanying Filename property is renamed "Default Landing Page Filename", and is set automatically to the current RPI file system file name, with an ".htm" suffix appended. Any characters not permitted in a URL are replaced by underscores. When unchecked, the filename property is writeable and blank by default.
-
Filename: you must specify the full name, including the extension, of the landing page file. The value provided can be a maximum of 100 characters in length and must be a well-formed filename. Note that this property can also be entitled "Default Landing Page Filename".
-
Generate preview: this checkbox is initially checked by default (your selection is thereafter persisted as a user setting). When checked, on publishing the landing page, a preview image is generated for display in the Realtime Details Report. The image is not generated when the checkbox is unchecked.
-
Publish: this button is availabled when available when the landing page is valid. Selecting it publishes the landing page by creating a Publish Landing Page job, which is displayed in the My Jobs Dialog. For more information, please see the My Jobs documentation.
If the landing page contains unsaved changes, the button is named Save & Publish. On invocation, if the landing page has yet to have been saved, the File System Dialog is presented to facilitate its saving, after which the page is published. If already saved, changes are written to the existing landing page file, after which the page is published.
System configuration setting LandingPageJavascriptLibraryURL is used to control the path to the RPI JavaScript web client in a published landing page. If the setting is blank, the path is set to the default relative path, e.g.:
<script type="text/javascript" src="/RPIFormValidation/shared/js/rpiwebclient/rpiWebClient-6.2.js"></script>
If the setting is set to a website URL, the path is fully qualified, e.g.:
<script type="text/javascript" src="https://local.rphelios.net/RPIFormValidation/shared/js/rpiwebclient/rpiWebClient-6.2.js"</script>>
If you attempt to publish a landing page containing a web form with a Form identifier already used by another web form in the current RPI client, the publish job will fail with the following error:
"The form identifier ‘[Form identifier]’ has been used by another published web form File name ‘[Filename]’, published on page ‘[Landing Page]’ by [user] on [date]"
If you attempt to publish a landing page containing a smart asset, at which images are to be published to an external folder, and a default smart asset location has not been configured, an error occurs.
Multiple attempts to publish the same landing page to the same location in quick succession may result in the failure of one or more Publish jobs.
Publishing a landing page creates an audit record with Audit Type "Object Execution" and Audit Sub Type "Landing Page Publish".
When a landing page associated with file metadata is published, the metadata is persisted at data warehouse table RPI_WebPages_Meta, in the PageMeta column.
Landing Page Publish History
This overlay is displayed on selecting the History toolbar button.
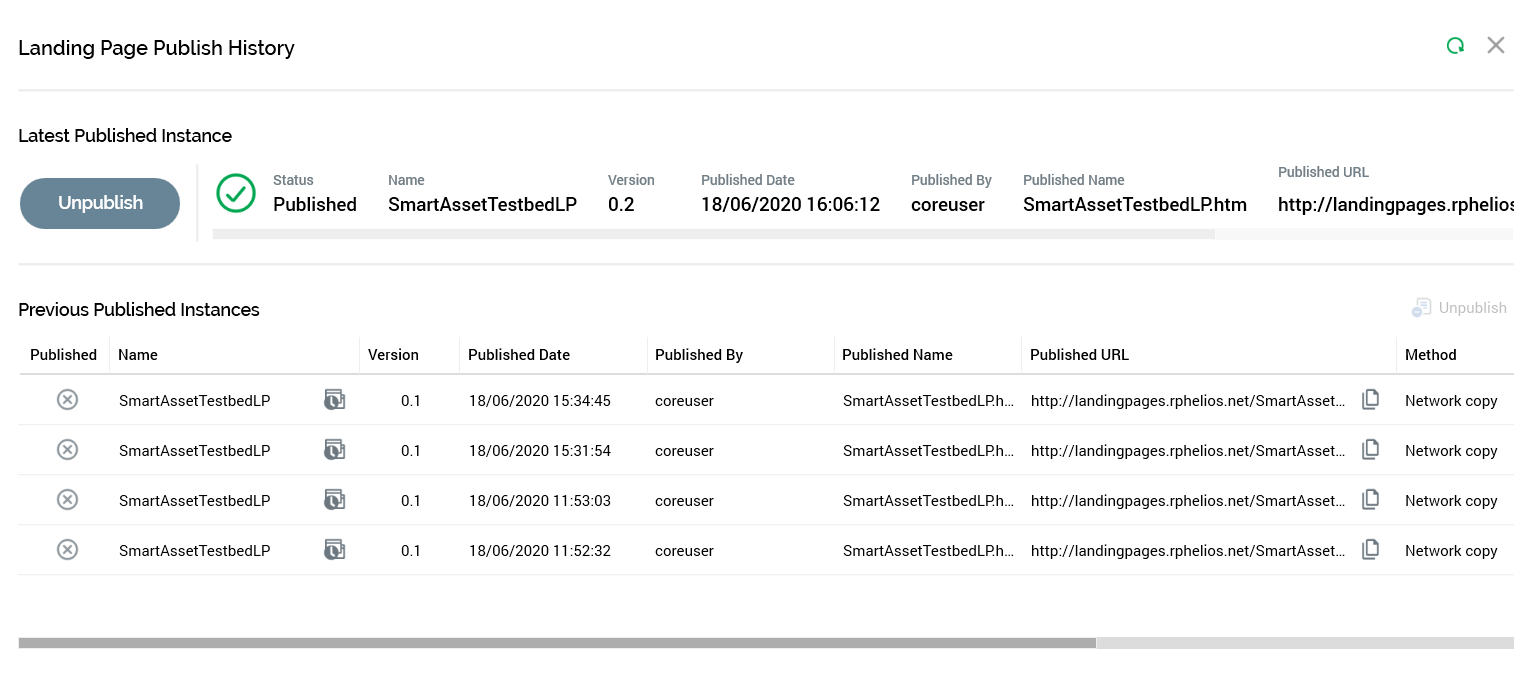
It consists of Latest Publish Instance and Previous Published Instances sections.
Refresh and Close buttons are shown at the top of the overlay.
Latest Published Instance
This section is shown when an instance of the landing page is currently published. It contains the following:

-
Unpublish: invocation of this button is protected by an "Are You Sure?" dialog. Invocation creates a new Unpublish... job and displays it in the My Jobs Dialog (full details can be found in that section's documentation). Unpublishing a landing page deletes it from the context to which it was published and creates an audit record with Audit Type "Object Execution" and Audit Sub Type "Landing Page Unpublish".
The following read-only properties are also shown:
-
[Status icon]
-
Status
-
Name
-
Version
-
Published Date
-
Published By
-
Published Name
-
Published URL
-
Copy URL to Clipboard (button)
-
Method
-
Instance ID
Previous Published Instances
This section contains a toolbar and a read-only grid.

The toolbar exposes a single option:
-
Unpublish: available when a previous instance was published to multiple locations.
When a landing page has yet to be published, a message ("No instances were found") is displayed.
When previously-published instances exist, they are listed in the grid, which contains the following columns:
-
Published
-
A tick or cross
-
-
Name
-
Open this version (button)
-
Allows you to open the version of the landing page in question in the Landing Page Designer. If not invoked in respect of the currently-displayed landing page version, the opened version is shown in a new Landing Page Designer instance.
-
-
Version
-
Published Date
-
Published Name
-
As defined by the page's Filename property.
-
-
Published URL
-
Copy URL to Clipboard (button)
-
Method
-
One of FTP, Network copy, or External content provider.
-
-
Unpublished Date
-
Unpublished By
-
Instance ID
Publishing file with a given name to location where the file already exists results in the automatic unpublishing of the previous published instance in the same location.