

Overview
You can invoke the Smart Asset Designer in the following ways:
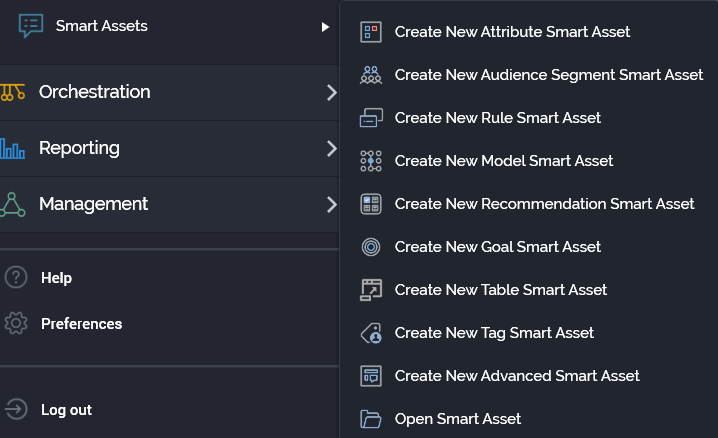
From the quick access menu’s Smart Assets menu. The menu exposes the following options:
-
From a Tasks or File Type widget: typically, these might be displayed at your Home Page. For more information on widgets, please see the Dashboard Designer documentation.
-
By double-clicking a smart asset file in the File System Dialog: or by highlighting a smart asset and selecting OK in the same context.
-
By viewing the latest version of a smart asset contextually: for example, from an orchestration Realtime decision’s Smart Asset property.
Access to the Smart Asset Designer is protected by a series of functional permissions:
-
The Smart Asset - Design permission gives access to the Asset designer, but does not allow you to open, edit or create assets. You may import assets if required.
-
To open, edit or create assets, you must be associated with an appropriate functional permission. For example, to work with attribute smart assets, you must be associated with the Smart Asset - Attribute - Design functional permission. The following smart asset type-specific functional permissions are provided:
-
Smart Asset - Advanced - Design
-
Smart Asset - Attribute - Design
-
Smart Asset – Audience Segment - Design
-
Smart Asset - Goal - Design
-
Smart Asset - Model – Design
-
Smart Asset - Recommendation – Design
-
Smart Asset - Rule – Design
-
Smart Asset - Table – Design
-
Smart Asset - Tag – Design
-
-
The Smart Asset – Publish functional permission allows you to publish smart assets. More information on publishing smart assets can be found elsewhere in this documentation.
Smart Asset Designer basics
The Smart Asset Designer is displayed in a separate tab in the RPI framework.

It is composed of the following elements:
-
Toolbar
-
Name
-
Validation status indicator
-
Published section
-
Supported In section
-
Toolbox
-
Content panel
If you close a tab containing the Smart Asset Designer, within which a smart asset to which changes have been made is displayed, or you close RPI itself under the same circumstances, a dialog is displayed.
You can:
-
Save the changes and proceed with closing the tab or RPI.
-
Abandon the changes and proceed with closing the tab or RPI.
-
Cancel closing the tab or RPI.
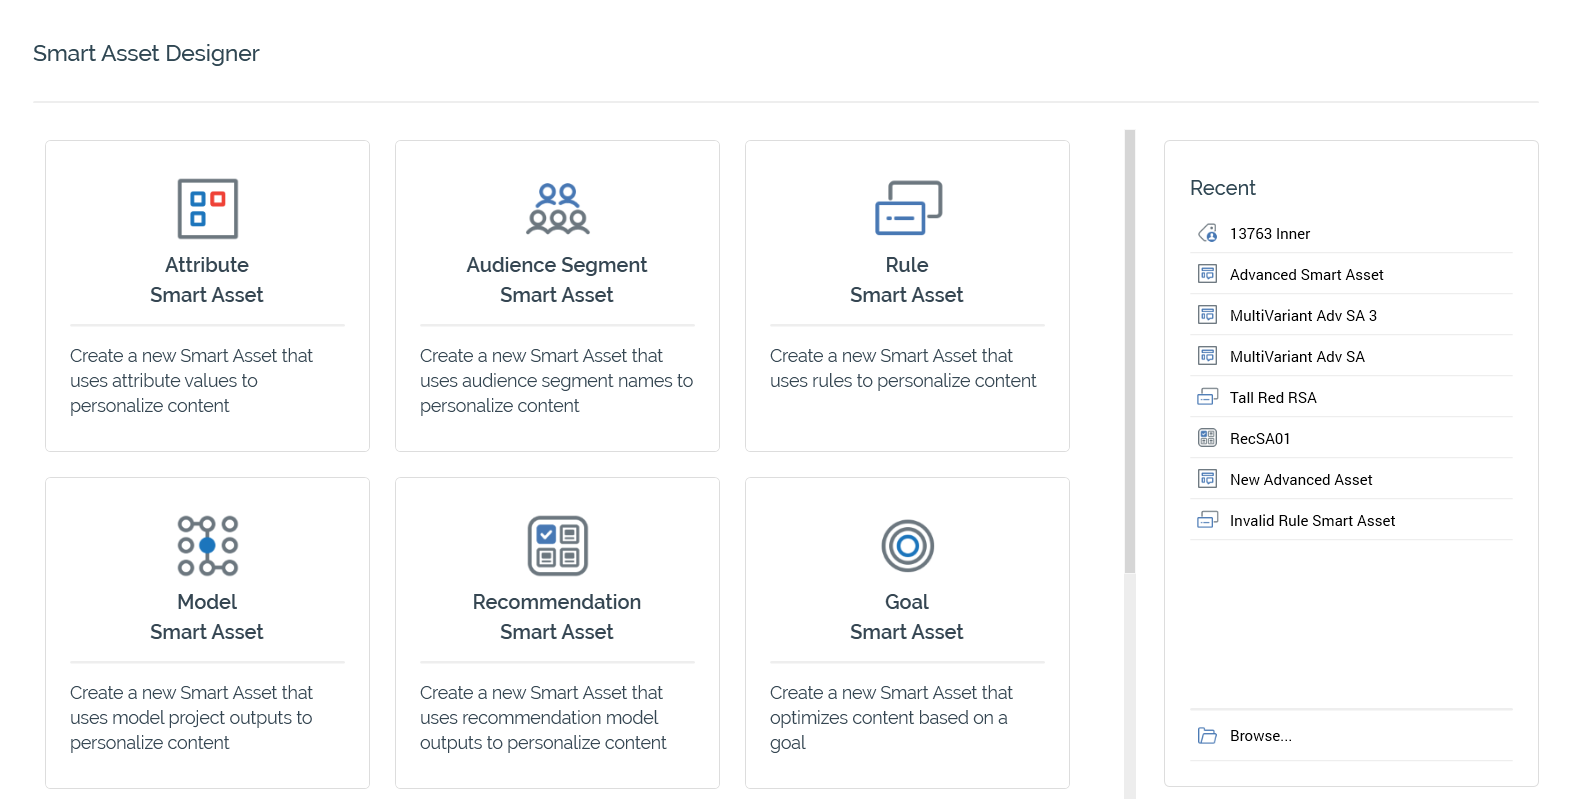
Start page
The Smart Asset Designer Start page is shown upon invocation of Smart Assets at the quick access menu, and also on selecting Create new Smart Asset at the Smart Asset Designer toolbar. It contains the following:
-
Buttons: facilitating creation of the following smart asset types:
-
Attribute Smart Asset
-
Audience Segment Smart Asset
-
Rule Smart Asset
-
Model Smart Asset
-
Recommendation Smart Asset
-
Goal Smart Asset
-
Tag Smart Asset
-
Table Smart Asset
-
Advanced Smart Asset
-
-
Recent: lists recently-accessed smart assets, facilitating the opening of the same.
-
Browse: displays the Open Asset File System Dialog, allowing you to select an asset to open.
A Cancel button is shown at the top of the Start Page. Selecting it removes the Start Page from display, and redisplays the Smart Asset Designer. The Cancel button is only shown on invocation of the Start Page by selecting Create new Smart Asset at the Smart Asset Designer toolbar.
Toolbar
The Smart Asset Designer toolbar exposes the following options by default:
-
Create new Smart Asset: displays the Smart Asset Designer Start Page (covered separately in this documentation). If a smart asset containing unsaved changes is displayed at invocation of Create New, an “Are You Sure?” dialog is shown, from which you can::
-
Save the changes and create the new smart asset.
-
Abandon the changes and create the new smart asset.
-
Abandon creating the new smart asset.
-
-
Open an existing Smart Asset: displays the Open Smart Asset File System Dialog, allowing you to navigate those folders within the RPI file system to which you have access in order to locate a smart asset to open. Only smart asset files are displayed in the File System Dialog. When you open a smart asset, if changes have been made to a smart asset displayed currently in the Smart Asset Designer, a dialog is displayed. You can:
-
Save the changes and proceed with opening the smart asset.
-
Abandon the changes and proceed with opening the smart asset.
-
Abandon opening the smart asset.
-
-
Save current Smart Asset: saves the current smart asset to an existing filename; if the smart asset is yet to be saved, Save behaves like Save as.
-
Save current Smart Asset as...: allows you to specify the smart asset’s filename and storage location within the RPI file system by displaying the File System Dialog. Save as creates a new, independent smart asset based on the original.
In addition, the following toolbar buttons are shown for all smart asset types other than attribute and audience segment:
-
Publish Options: covered separately in this documentation.
-
Realtime API Scripts: covered separately in this documentation.
-
Publish to Realtime API: covered separately in this documentation.
-
History: covered separately in this documentation.
-
Results: selecting this button displays results relating to the current smart asset in the Realtime Details Report, which is shown in separate tab. More information can be found in that interface’s own documentation.
-
Version number: the version number.
-
Follow/Unfollow File: please see the RPI Framework Documentation.
-
File options: please see the RPI Framework Documentation.
-
File Metadata: please see the File Metadata Configuration documentation.
-
A unique feature of File Metadata in the context of Smart Assets is that any values will be persisted in the
OfferHistory_Content_Metadatatable. This allows easier downstream analysis of content in terms of a more granular understanding of what a recipient of content containing this Smart Asset was shown. -
The Value List for File Metadata must be set at the parent level of the Smart Asset in order to set at each content individually.
-
-
Linked File options: please see the RPI Framework Documentation.
Name
A smart asset’s name is set using the property displayed at the top of the Smart Asset Designer interface. By default, a smart asset is named “New [Type] Smart Asset”.
You can edit a smart asset’s name by selecting the property. This make it editable. A smart asset’s name can be a maximum of 100 characters in length. Provision of a name is mandatory.
Validation Status indicator
Before a smart asset can be used, it must be valid.
A validation status indicator is provided at the top right corner of the Smart Asset Designer. When the smart asset is valid and contains no validation errors, the validation status indicator is shown as a blue checkmark.
Specific validation errors are outlined in the documentation provided for each specific smart asset type. When one or more validation errors is present, the validation status indicator is shown as a red “x” icon.
Selecting the indicator lists the validation errors in a dialog:
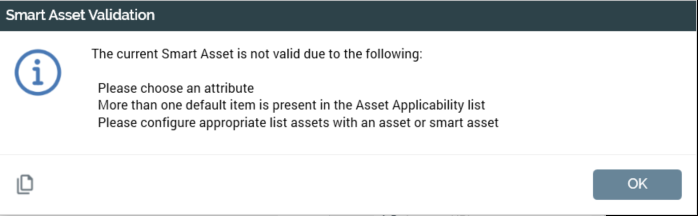
You can use the button at the bottom left of the dialog to copy the validation error details to the clipboard. You can close the dialog using the OK button.
Published section
This section provides information on the current published status of the smart asset. It is not shown at attribute and audience segment smart assets. A smart asset can have one of three published statuses:
-
Never published
-
Published
-
Unpublished
When hovering over the information icon to the right of the Never Published status, the following is displayed in a tooltip:

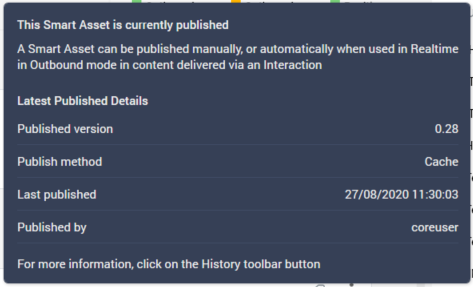
When hovering over the information icon to the right of the Published status, the following is displayed in a tooltip:
When hovering over the information icon to the right of the Unpublished status, the following is displayed in a tooltip:
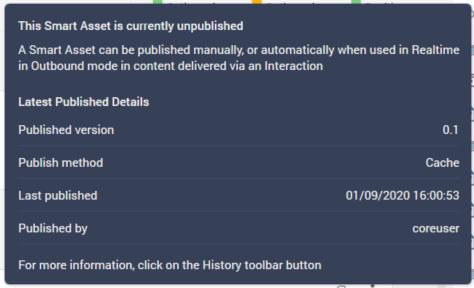
The published status is updated after 30 seconds, which may mean a slight delay prior to display of the correct status having published a smart asset.
Supported In section
This section provides a summary of three contexts in which smart assets can be used, and the current smart asset's ability to be utilized in each of them.
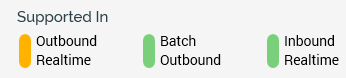
The three contexts in which smart assets are supported are:
-
Outbound Realtime: the smart asset in included in an outbound message (e.g. an email offer), and the RPI Realtime API is used to make content applicability decisions when the message is consumed by its recipient. This means that an image rendered to an email recipient can be changed dynamically when the mail is viewed in her or his inbox.
-
Batch Outbound: the smart asset is included in an outbound message (e.g. an email offer), and the decision as to which content to serve is made prior to the message being sent.
-
Inbound Realtime: the smart asset is used in a Realtime capacity—e.g. via a call to an RPI Realtime Decision endpoint, or when hosted in a landing page.
Each context is accompanied by a status indicator, indicating the following:
-
Green: the current asset is fully supported in the context.
-
Gray: the current asset is not supported in the context.
-
Yellow: shown at Outbound Realtime and Batch Outbound; indicates that the smart asset can be supported in the context but is not currently.
Statuses are calculated in real time, as a smart asset is updated. They are determined as follows:
-
Outbound Realtime:
-
If an Attribute smart asset:
-
Not Supported
-
-
If an Audience Segment smart asset and configured for Realtime use:
-
Supported
-
-
Else if an Audience Segment smart asset and not configured for Realtime use:
-
Not Supported
-
-
If a Rule or Model smart asset:
-
If all content is set to image assets, or to inline absolute URLs:
-
If When...used in Outbound is set to “Determine...once...”:
-
Can be supported, but is not currently
-
-
If When...used in Outbound is set to “Determine...in Realtime...”:
-
Fully Supported
-
-
-
Else:
-
Not supported
-
-
-
If a Goal smart asset:
-
If all content is set to image assets, or to inline absolute URLs:
-
Fully Supported
-
-
Else:
-
Not Supported
-
-
-
If an Advanced smart asset:
-
If at least one variant and its messages are configured with all image content:
-
Fully Supported
-
-
If Outbound Realtime is supported, the tooltip shown on hovering over the same displays this message: “Outbound Realtime is currently supported for this Smart Asset. suitable for use as a dynamic open time content in an outbound context such as email. Applies only at variants that are configured with images only”.
-
If Outbound Realtime is not supported, the same tooltip displays the following message: “Outbound Realtime is not currently supported for this Smart Asset. All content provided for at least one variant must be all images”.
-
-
-
Batch Outbound:
-
If an Attribute or Audience Segment smart asset:
-
Fully Supported
-
-
If a Rule smart asset:
-
If all content is configured with selection rules:
-
If When...used in Outbound is set to “Determine...once...”:
-
Fully Supported
-
-
If When...used in Outbound is set to “Determine...in Realtime...”:
-
Can be supported, but is not currently
-
-
-
Else:
-
Not supported
-
-
-
If a Model smart asset
-
If When...used in Outbound is set to “Determine...once...”:
-
Fully Supported
-
-
If When...used in Outbound is set to “Determine...in Realtime...”:
-
Can be supported, but is not currently
-
-
-
If a Goal smart asset:
-
Not Supported
-
-
If an Advanced smart asset:
-
Not Supported
-
-
-
Inbound Realtime:
-
If an Attribute or Audience Segment smart asset:
-
Not Supported
-
-
If a Rule, Model, Goal or Advanced smart asset
-
Fully Supported
-
-
Note that wider caveats about smart assets’ suitability for inclusion in offer content also apply; for example, to use an outbound Realtime asset in an SMS offer, it would be necessary to use it to personalize a link with dynamically determined URL content. Inclusion of standard text content is precluded by the statements above, and images cannot be used in SMS offers.
Toolbox
The Smart Asset Designer toolbox exposes a Folder Search component. For more information, please see the Framework documentation.
The toolbox is your source of the other files you will need when building a smart asset.