

Overview
The following features are available at a standard selection rule when it is displayed in expanded mode.
Toolbox
The standard selection rule’s toolbox is shown to the left.
Its display is controlled using the Show/Hide Toolbox button. The toolbox is shown by default.
The toolbox contains three tabs: Tools, Options, and Comments. Each is documented below.
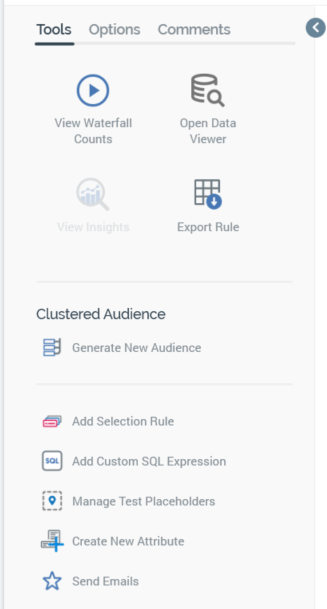
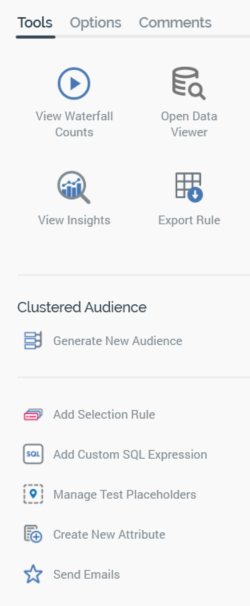
Toolbox: Tools tab
The toolbox’s Tools tab exposes the following:
-
View Waterfall Counts: selecting this button displays the selection rule’s waterfall counts in the Waterfall Counts Window, which is described in the Rule Designer documentation.
-
Open Data Viewer: selecting this button displays the Data Viewer Window. The Data Viewer allows you to view a sample of the records targeted by the current standard selection rule. For more information, please see the Rule Designer documentation.
-
View Insights: this button is available when a standard selection rule has been saved. Selecting it displays insights relating to the current standard selection rule in the Insights Window. For more information, please see the Rule Designer documentation.
-
Export this Rule: allows you to export the records that match the standard selection rule's criteria to a file. For more information, please see the Rule Designer documentation.
You can export data from an anonymous auxiliary database-resolving standard selection rule using an export template resolving to an anonymous auxiliary database. An error occurs at the resultant Export Rule job when you attempt to export an attribute with a column name not in the anonymous database's list of exportable keys, or when the number of records exported is fewer than the database's Minimum export count.
-
Clustered Audience section: access to this section is controlled by the Selection Rule—Standard—Generate Clustered Audience functional permission. It is described in the Clustered Audiences section, elsewhere in this documentation.
-
Add Selection Rule: allows you to choose an existing standard or basic selection rule from the RPI file system in order to link it to the current rule or create a criteria list in the current rule based upon it, using the Linked or Embed an existing Selection Rule dialog. This is described elsewhere in the standard selection rule documentation.
-
Add Custom SQL Expression: this option allows you to add a custom, inline SQL expression to the standard selection rule, using the Add Custom SQL Expression dialog. This is described elsewhere in the standard selection rule documentation
-
Manage Test Placeholders: selecting this button allows you to set placeholder attribute values to be used when the rule is run, using the [Selection Rule Name]—Test Attribute Placeholders dialog. Please see the Placeholder Attributes section in the Rule Designer documentation, and the Attribute Placeholders Dialog section in the Framework documentation, for more information.
-
Create new Attribute: selecting this button initiates the creation of a new attribute using the Create New Attribute dialog. Please see the Attributes documentation for further information.
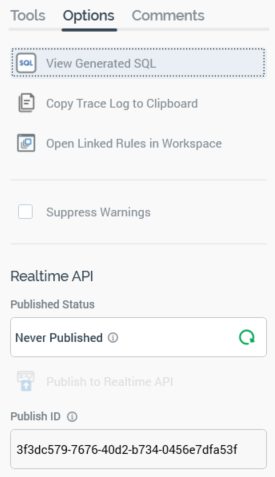
Toolbox: Options tab
The toolbox’s Options tab exposes the following:
-
View Generated SQL: selecting this button allows you to view the SQL that will be executed on running a rule in the "[Rule name]—Generated SQL" dialog. For more information, please see the Rule Designer documentation.
-
Copy Trace log to Clipboard: this option is always available, irrespective of as to whether the standard selection rule has been saved or contains outstanding changes. If the rule has not been run before, an informational message advises that “No trace log entries were found for this selection rule”. If the rule has been run, a message advises that the SQL trace log has been copied to the clipboard. The content contains the trace logs associated with the standard selection rule's count execution. A maximum of 100 log entries are copied to the clipboard. The following are captured for each log entry:
-
Execution type
-
Context
-
Query status
-
Query result
-
Started
-
Ended
-
Duration
-
File
-
Query string
-
Error Message (if applicable)
-
-
Open Linked Rules in Workspace: upon invocation, all selection rules linked to the current rule are opened in the same Rule Designer instance. Linked rules are opened in collapsed mode. Any rules that are already open in the workspace are ignored. A message is displayed to advise of any rules that are already open in other Rule Designer instances. A message is also shown if no rules are found to open.
-
Suppress Warnings: should you no longer wish to display ‘exclusion confusion’ and/or ‘sibling selection’ warning messages at a specific standard selection rule, you can check this option. Doing so removes any warning icons from display. Unchecking displays the warnings again.
Note that this option is applied on a rule-by-rule basis.
-
Realtime API section: containing the following:
-
Published Status: read-only, and one of:
-
Never Published: the tooltip says “This file has never been published. This file can be published to the Realtime API manually”.
-
Published: the tool tip contains the following information: “This file is currently published. This file can be published to the Realtime API manually.” Also contains latest published details, publish version, publish method, last published date/time, published by, and instance ID.
-
Unpublished: the tool tip contains the following information: “This file is currently unpublished. This file can be published to the Realtime API manually.” Also contains latest published details, publish version, publish method, last published date/time, published by, and instance ID.
-
-
Refresh: you must select this button to manually refresh the file's latest Published Status (published status changes are not displayed automatically).
-
Publish to Realtime API: selecting this button allows you to publish the file for use with the RPI Realtime API. It is available when the file is valid, and contains no unsaved changes. Invocation creates a Publish job and displays it in the My Jobs dialog. Following a successful publish, the file's Published Status is set to Published, and the Unpublish from the Realtime API button is displayed.
-
Unpublish from Realtime API: this button is displayed and available when a file is Published. Selecting it unpublishes the file, meaning it can no longer be used by the RPI Realtime API, and is protected by an "Are You Sure?" dialog. Upon invocation, an Unpublish job is created and displayed in the My Jobs dialog. Following a successful unpublish, the file's Published Status is set to Unpublished, and the Unpublish from the Realtime API button is hidden.
-
Publish ID: this read-only GUID is used to uniquely identify the rule during evaluation by the Realtime API. You can select it to copy it to the clipboard.
-
When a rule is evaluated using the Realtime API, if its criteria are satisfied, the returned ResultContent is true. If not satisfied, the returned ResultContent is false.
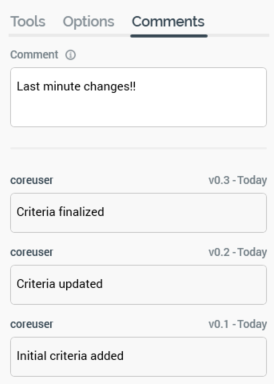
Toolbox: Comments tab
The toolbox’s Comments tab exposes the following:
-
Comment: you can add optionally add comments to the rule, which will be persisted with the new version of the file created when it is next saved. Comments are added using a multi-line text field, and can be a maximum of 1000 characters in length.
-
Comment history: if no comments have been saved with the rule, a message is displayed that says “Thre is no comment history available for this file”. If comments have been saved, they are displayed in reverse chronological order. The following read-only information is displayed for each comment in the comment history:
-
Username
-
File version
-
Date/time added
-
Comment
-
Resolution Level
A standard selection rule’s resolution level defines the data warehouse or auxiliary database table from, and the key level at which, records are to be counted when the rule is run. It is set using a dropdown.
The list contains those resolution levels that have been set up within the current RPI installation. A new standard selection rule’s resolution level defaults to the value defined as default within the Resolution Levels configuration interface.
If any resolution levels have been configured against auxiliary databases, they are displayed with the name of the database in parentheses.
When you select an auxiliary database resolution level, it is differentiable through the augmentation of its icon with a “database” image:

If you change a standard selection rule’s resolution level to a value from another database, a warning is displayed at the rule. Hovering over the warning displays its details in a tooltip. You can select the warning button to copy its details to the clipboard via a context menu option.
Restricting access to specific resolution levels is carried out in the Resolution Levels configuration interface, in which you can link a resolution level to one or more organization nodes.
If your user account is linked to an organization node user group that matches a resolution level’s linked organization node, you will have access to that resolution level. If a resolution level is associated with more than one organization node, a user need be associated with only one of the nodes to access the resolution level. If a resolution level is associated with a descendent node from an organization hierarchy, a user associated with an ancestor node may access the resolution level.
For more information, please see the Configuration Workbench documentation.
When you select the button, it is selected, and its text set to Hide restricted items. A list of restricted resolution levels is displayed at the bottom of the chooser.
You can select a restricted resolution level; however, on its display at the standard selection rule, it is accompanied by a warning indicator. A tooltip is shown when you hover over the warning icon
Restricted Items are hidden again on redisplay of the chooser. If no restricted resolution levels exist, the Restricted Items button is not shown.
Custom Table Resolution Levels
A Use Custom Table option is available at the bottom of the resolution level dropdown.
When selected, the standard selection rule's resolution level value is replaced with by the following:

Selecting the “Using…” text displays the resolution level chooser again and reverts the property to the most-recently selected resolution level.
The following additional mandatory properties are displayed when Use Custom Table is selected:
-
Custom Resolution Table: defaults to the default resolution level's database table. If no default resolution level has been defined, the property defaults to the first-created resolution level's database table. You can change the selected value using the Choose Database Item dialog, which lists all available database table names (you can choose a table from an auxiliary database if required). On selection of a table, the Column Name property is updated to reflect the selected table's primary key. If no primary key exists, the property defaults to the first column (alphabetically) in the table.
-
Custom Resolution Table Key: this property defaults to the selected table's primary key as described above. You can select the property to change it using the Choose Database Item dialog, which lists the columns within the currently-selected database table.
Having elected to use a Custom Table, if you create a criterion within the rule based on an attribute with a resolution table matching the Custom Table, it is not created inside a criteria list. Otherwise a criterion is created inside a criteria list.
Note that, for a Custom Table standard selection rule to run correctly, joins must exist between the Custom Table and any standard resolution level attributes therein.
If a linked standard selection rule uses a Custom Table, if added within an automatically-created criteria list, the list is named as per the Custom Table. The linked rule's resolution level is set to the Custom Table name. On selecting the Change Resolution button at the linked rule's adorner menu, the table name is displayed to the right of the adorner and is grayed out/unavailable.
You can use Custom Table standard selection rules in audiences and interaction workflows without restriction.
Count
A standard selection rule’s count describes the number of records that matched the standard selection rule’s criteria at the point in time when the count was last refreshed.
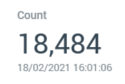
The date and time at which the count was generated is display immediately below the count itself.
When you open a selection rule, if a count had been generated previously, the most recently-generated version thereof is displayed automatically at the panel. If the count is more than an hour old, an information icon is shown. A tooltip is shown on hovering over a previously-generated count:

Refresh Count
You can refresh a standard selection rule's count by selecting the green play button shown to the right of its count.
A Refreshing count… indicator is displayed while the system determines the number of records that match the rule’s criteria.
The act of getting a standard selection rule count creates a Count job. The My Jobs Dialog is not shown automatically at such a job’s creation. You can view count jobs that match the current filter settings within the Dialog. Details of the job and Dialog are provided in the My Jobs documentation.
If you attempt to get a standard selection rule's count when a restricted resolution level has been selected, a Permission Denied dialog is displayed, and an error is thrown.
If an error occurs when refreshing a standard selection rule's count, exception details are written to the server and client logs.
When the current RPI installation is using a SQL Server data warehouse or auxiliary database, if the system is unable to connect when running a standard selection rule count (for example due to the database server not being found, the database login failing (due e.g. to the database being detached) or because of a deadlock), a series of attempts to reach the database are made (over a maximum of a 10-minute period). After this time the series of retries are abandoned. All retry details are logged to the server log.
Note that, if the SQL generated by a standard selection rule at count execution is not supported at the database against which the rule is being run, a “Failed to refresh count” message will be displayed at the rule. Details as to why the count failed will be found in the Server Log.
Canvas
The standard selection rule’s canvas initially displays a message:
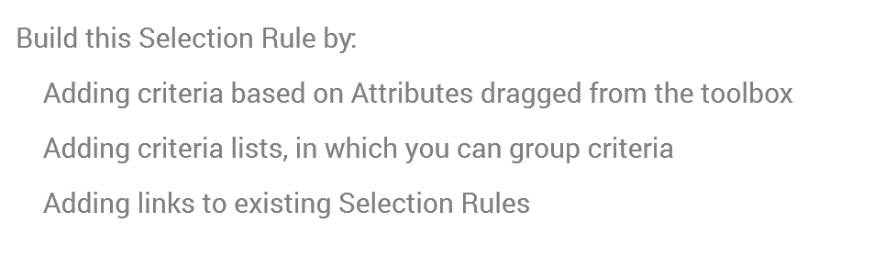
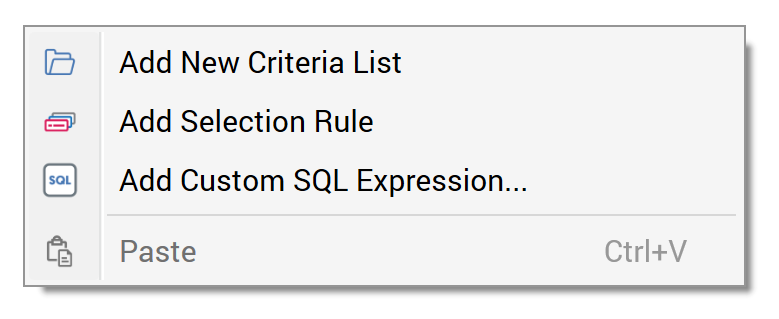
The following options are available when you right-click a standard selection rule’s canvas:
-
Add New Criteria List: adds a new, empty criteria list to the standard selection rule.
-
Add Selection Rule: allows you to choose an existing standard or basic selection rule from the RPI file system in order to link it to the current rule or create a criteria list in the current rule based upon it, using the Linked or Embed an existing Selection Rule dialog.
-
Add Custom SQL Expression: this option allows you to add a custom, inline SQL expression to the standard selection rule, using the Add Custom SQL Expression dialog. This is described elsewhere in the standard selection rule documentation.
-
Paste: only available if the clipboard contains something that may legitimately be pasted into the rule (e.g. a criterion or criteria list).
Add New Criteria List
This button is displayed below the standard selection rule’s canvas.
Selecting it adds a new, unconfigured criteria list to the standard selection rule. The criteria list is added to the root level of the currently-selected rule, after all existing criteria, criteria lists and linked selection rules.
Details on criteria lists are provided elsewhere in the standard selection rule documentation.