

Overview
This topic covers configuring Amazon Simple Email Service (SES) Data Streams to SQS, S3 Bucket, and Callback Service API.
Important note:
Code blocks that contains values enclosed in angle brackets “<>” should be replaced with appropriate values, e.g.:
-
<AWS-ACCOUNT-ID> -
<IAM-ROLE-NAME>
Prerequisites
The following resources are required prior to proceeding to the configuration sections:
AWS SES to SQS data stream configuration
This section covers the configuration of streaming data from Simple Email Service (SES) to SQS (Simple Queue Service).
Requirements
The following resources are required to be provisioned:
-
IAM Policy to be attached on your IAM User:
-
Go to your AWS IAM Console >
<YOUR-USER>and select Permissions tab > Add permissions > Create inline policy: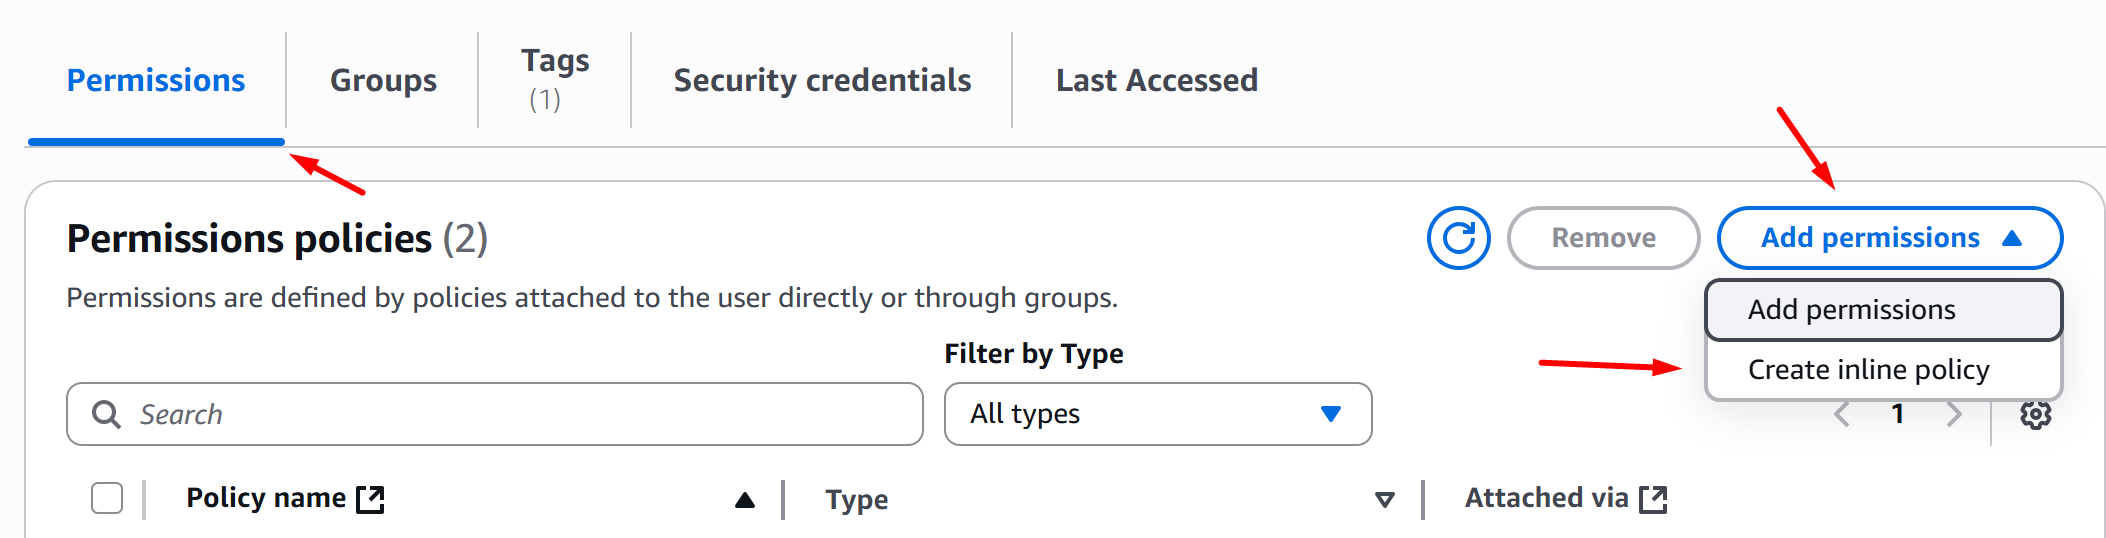
-
In the Policy Editor section, choose JSON and override the policy definition with the definition below, then click Next, Add your policy name, and click Create Policy:
-
Configuration
-
Go to your AWS SES Console and click Configuration Sets > Create Set:
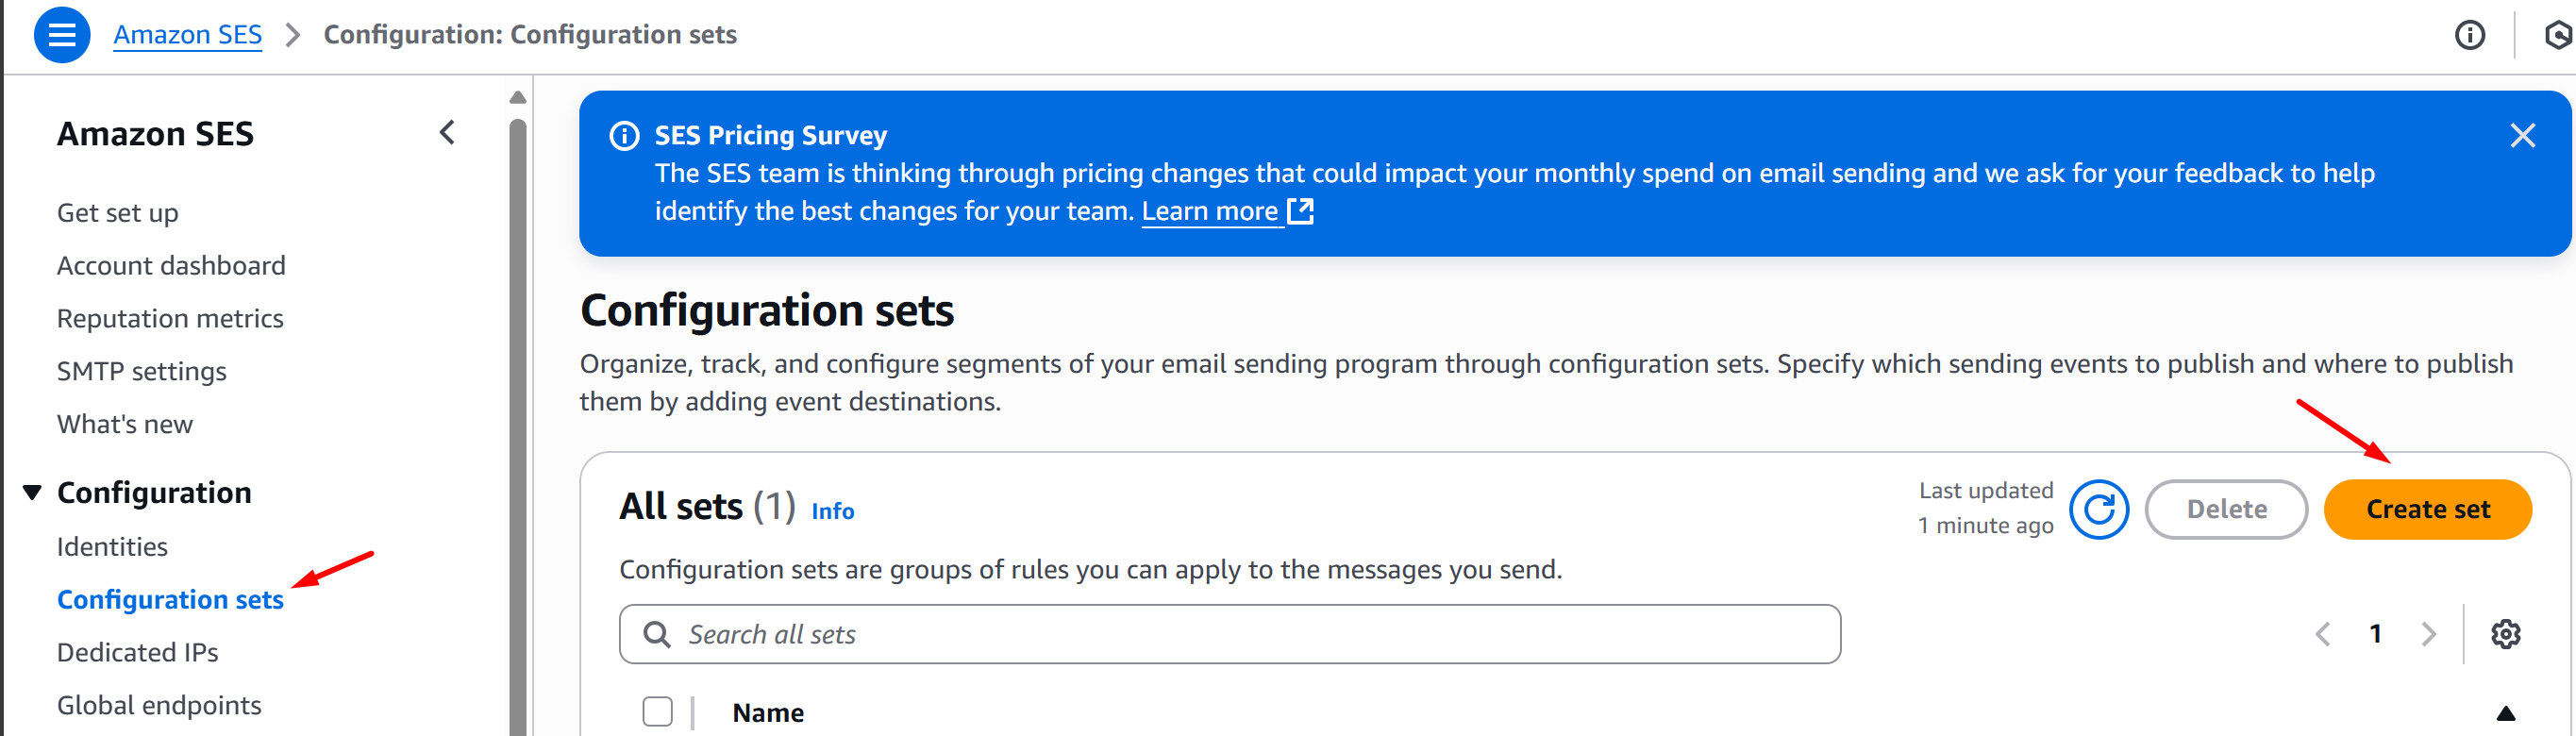
-
Fill in the Configuration set name, choose your Sending IP pool, and click Create set:
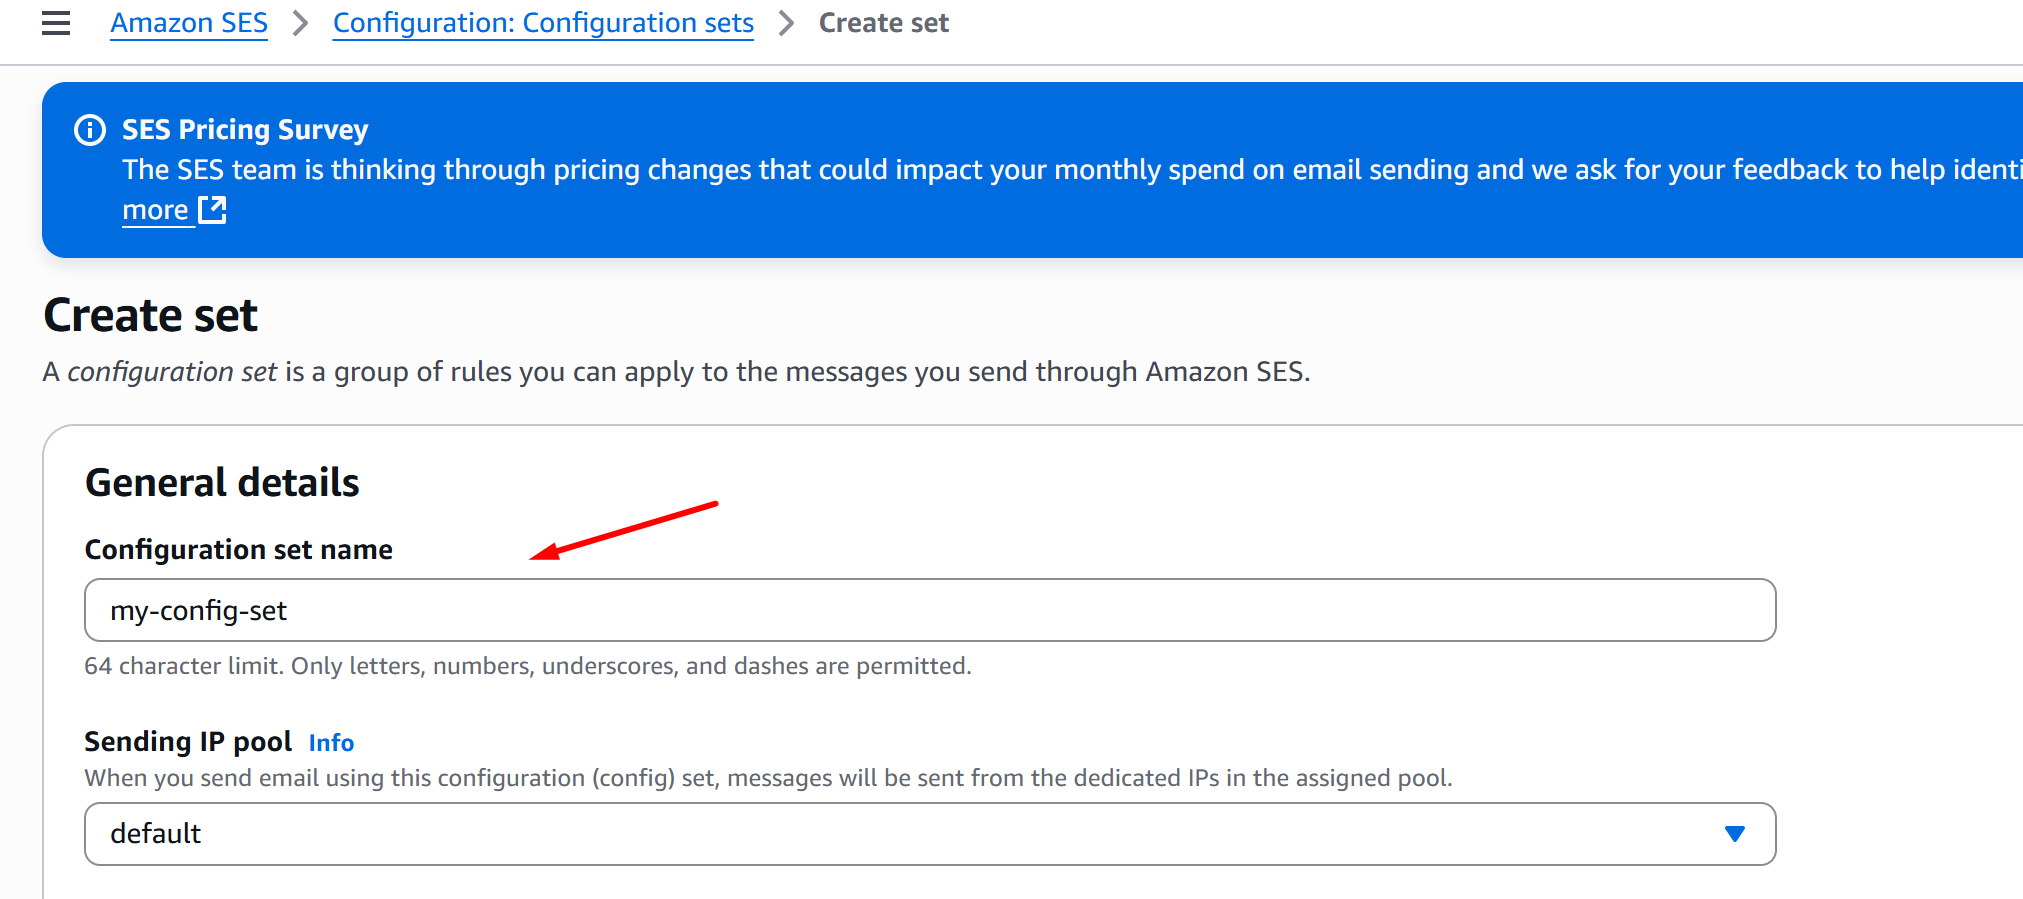
-
Once you’ve successfully created a Configuration Set, click Event destinations > Add destination:
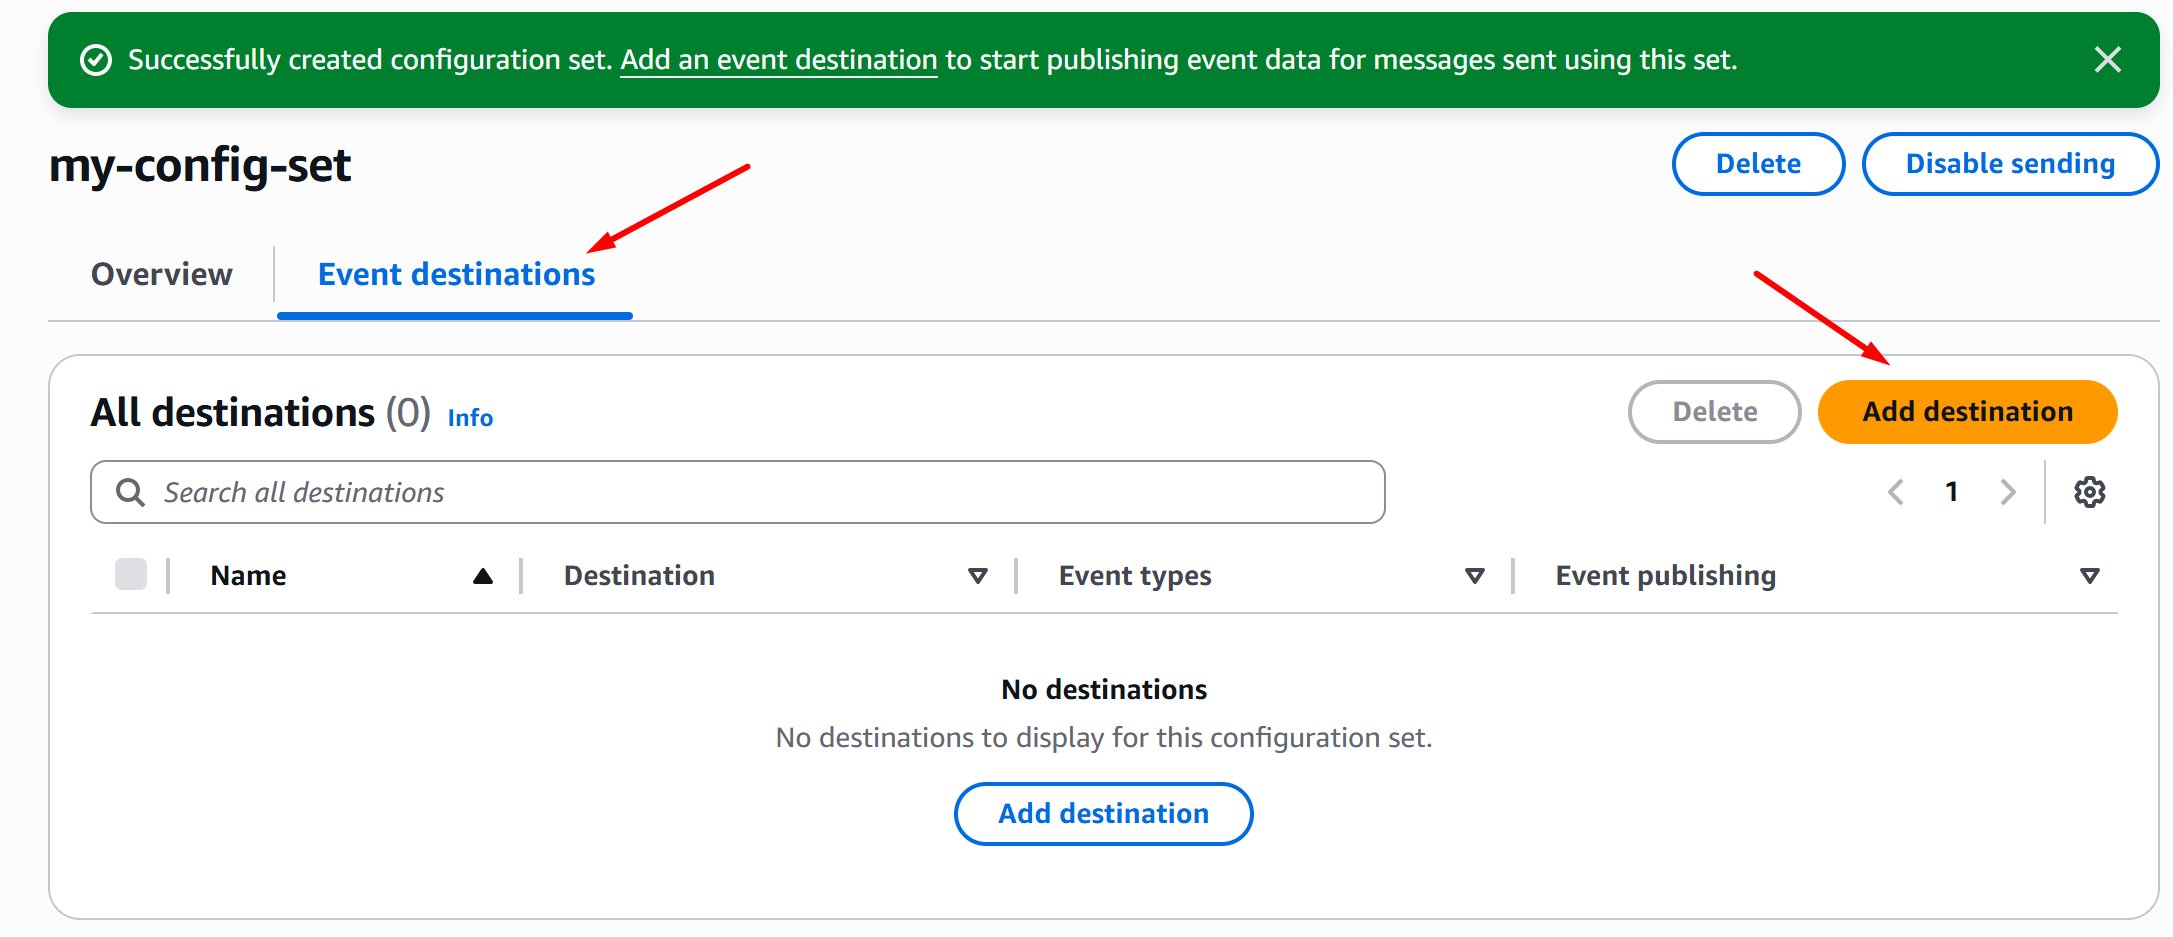
-
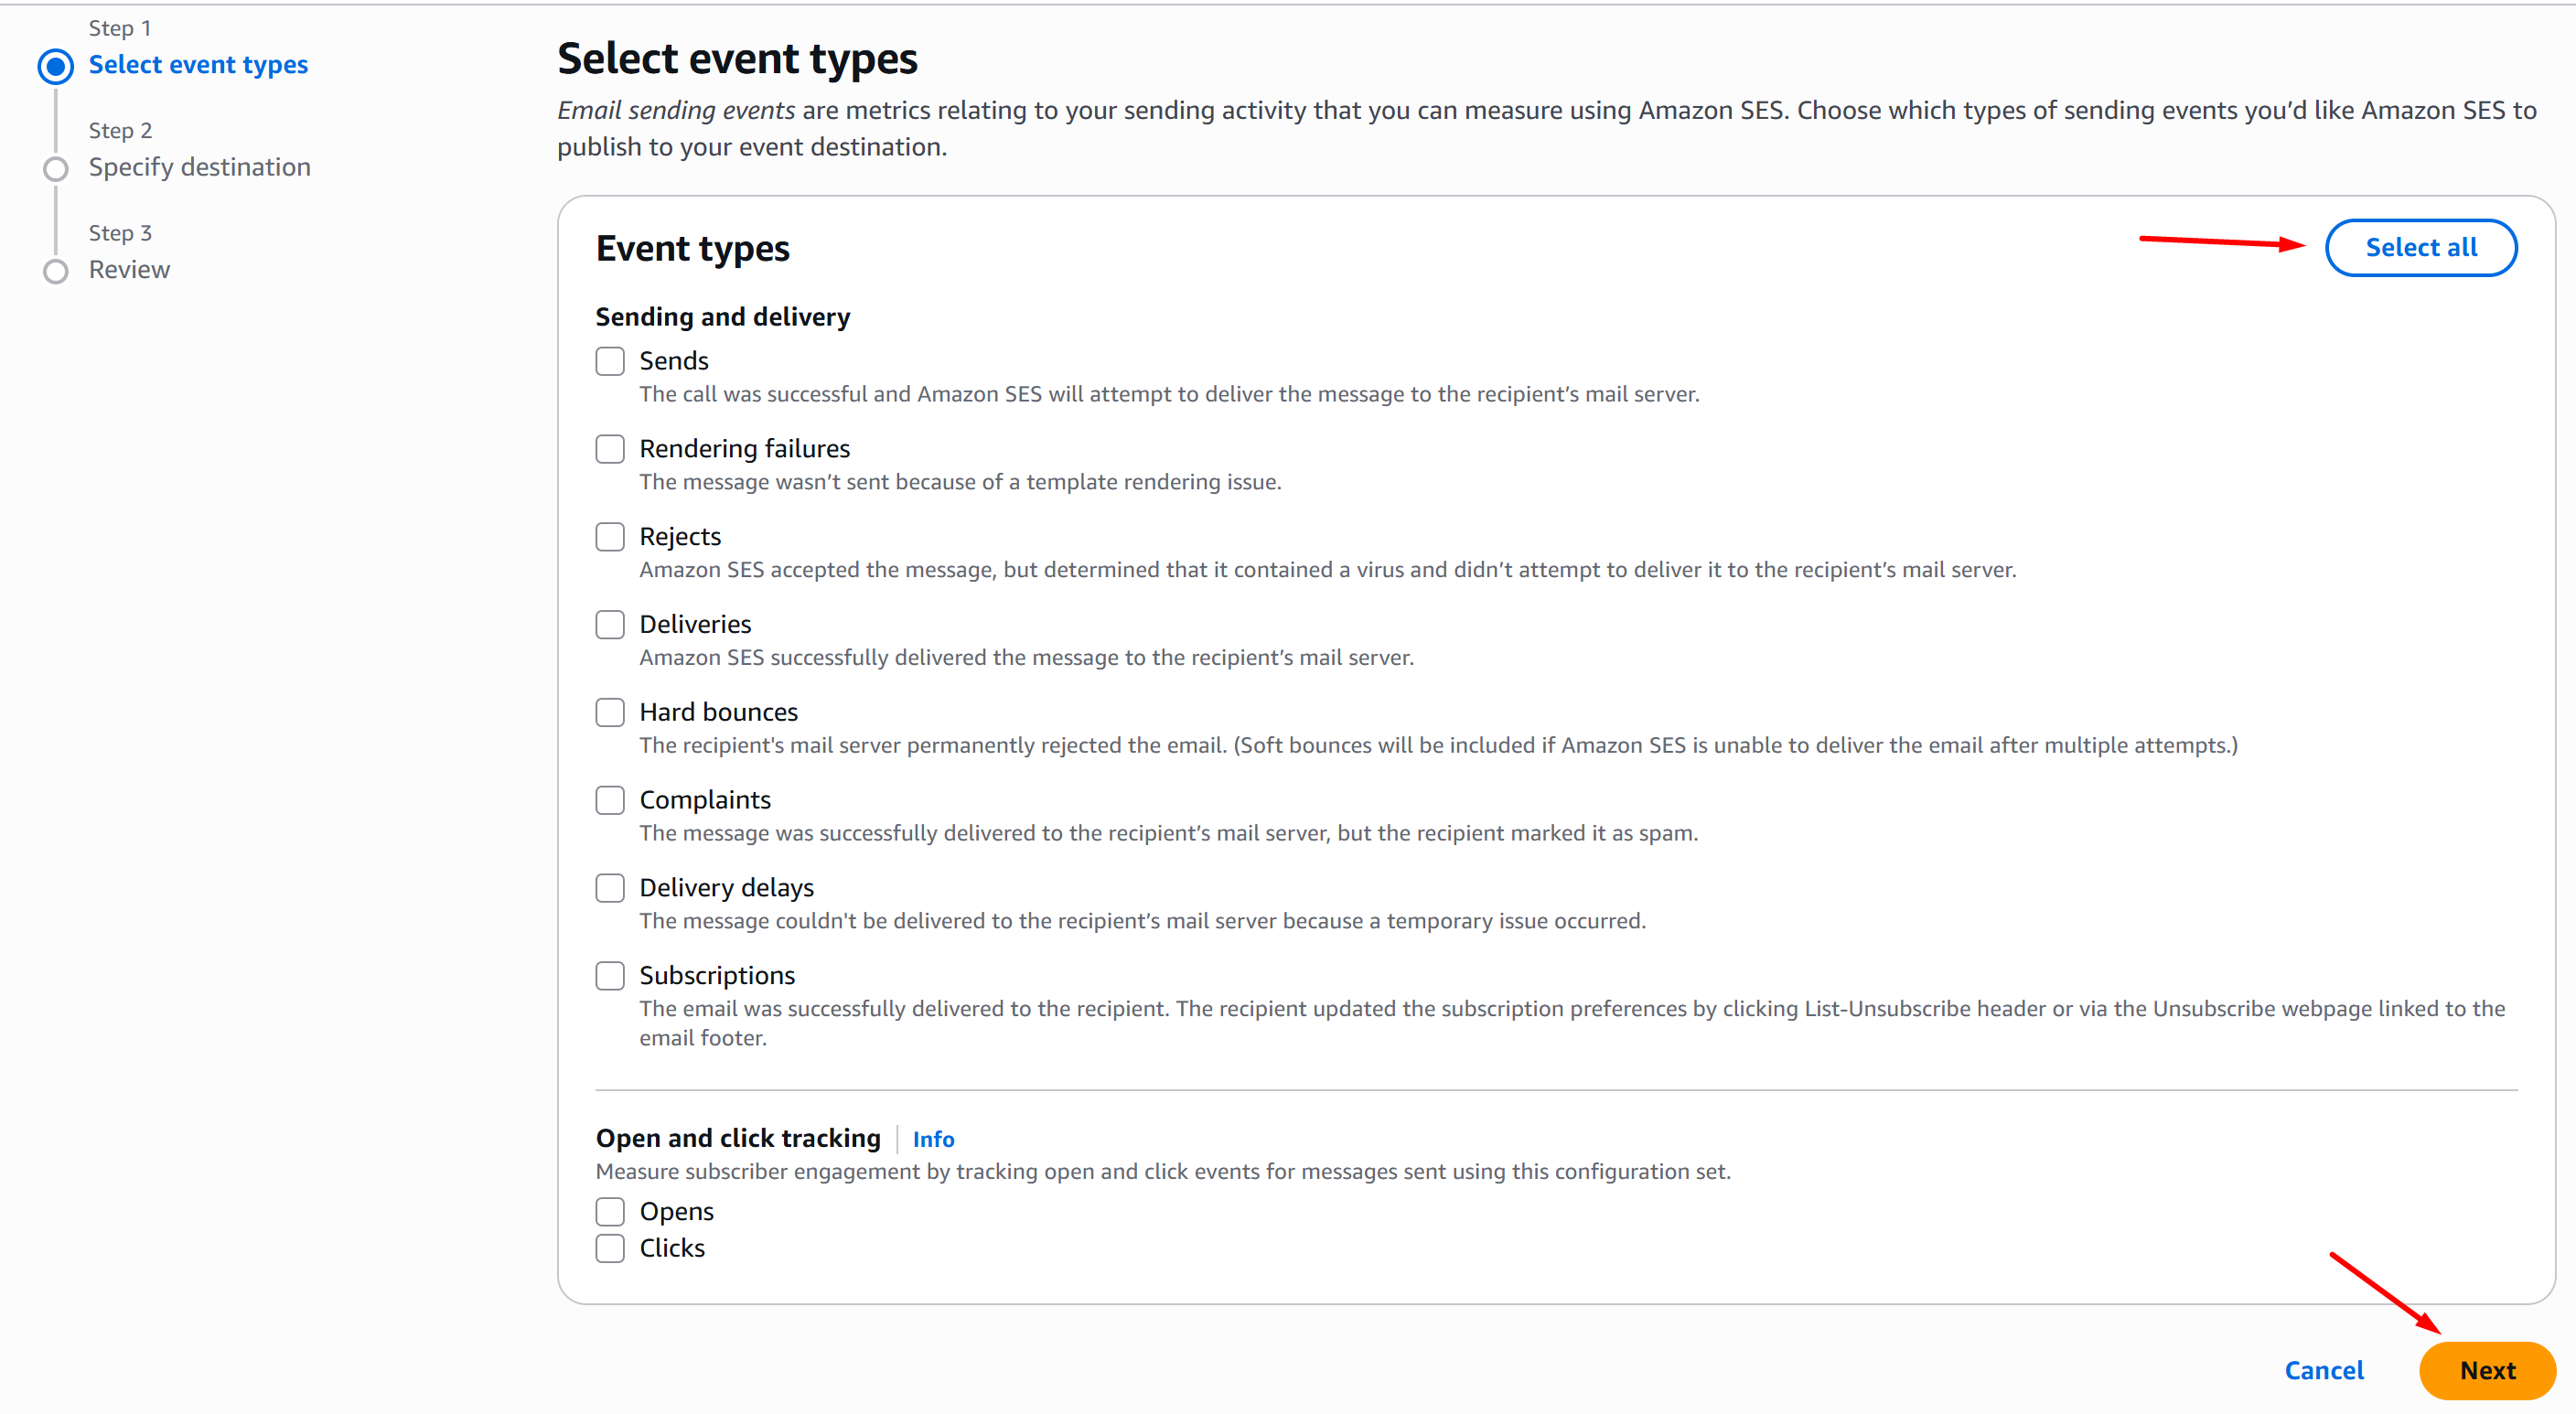
On the Select event types page, click Select all and Next:
-
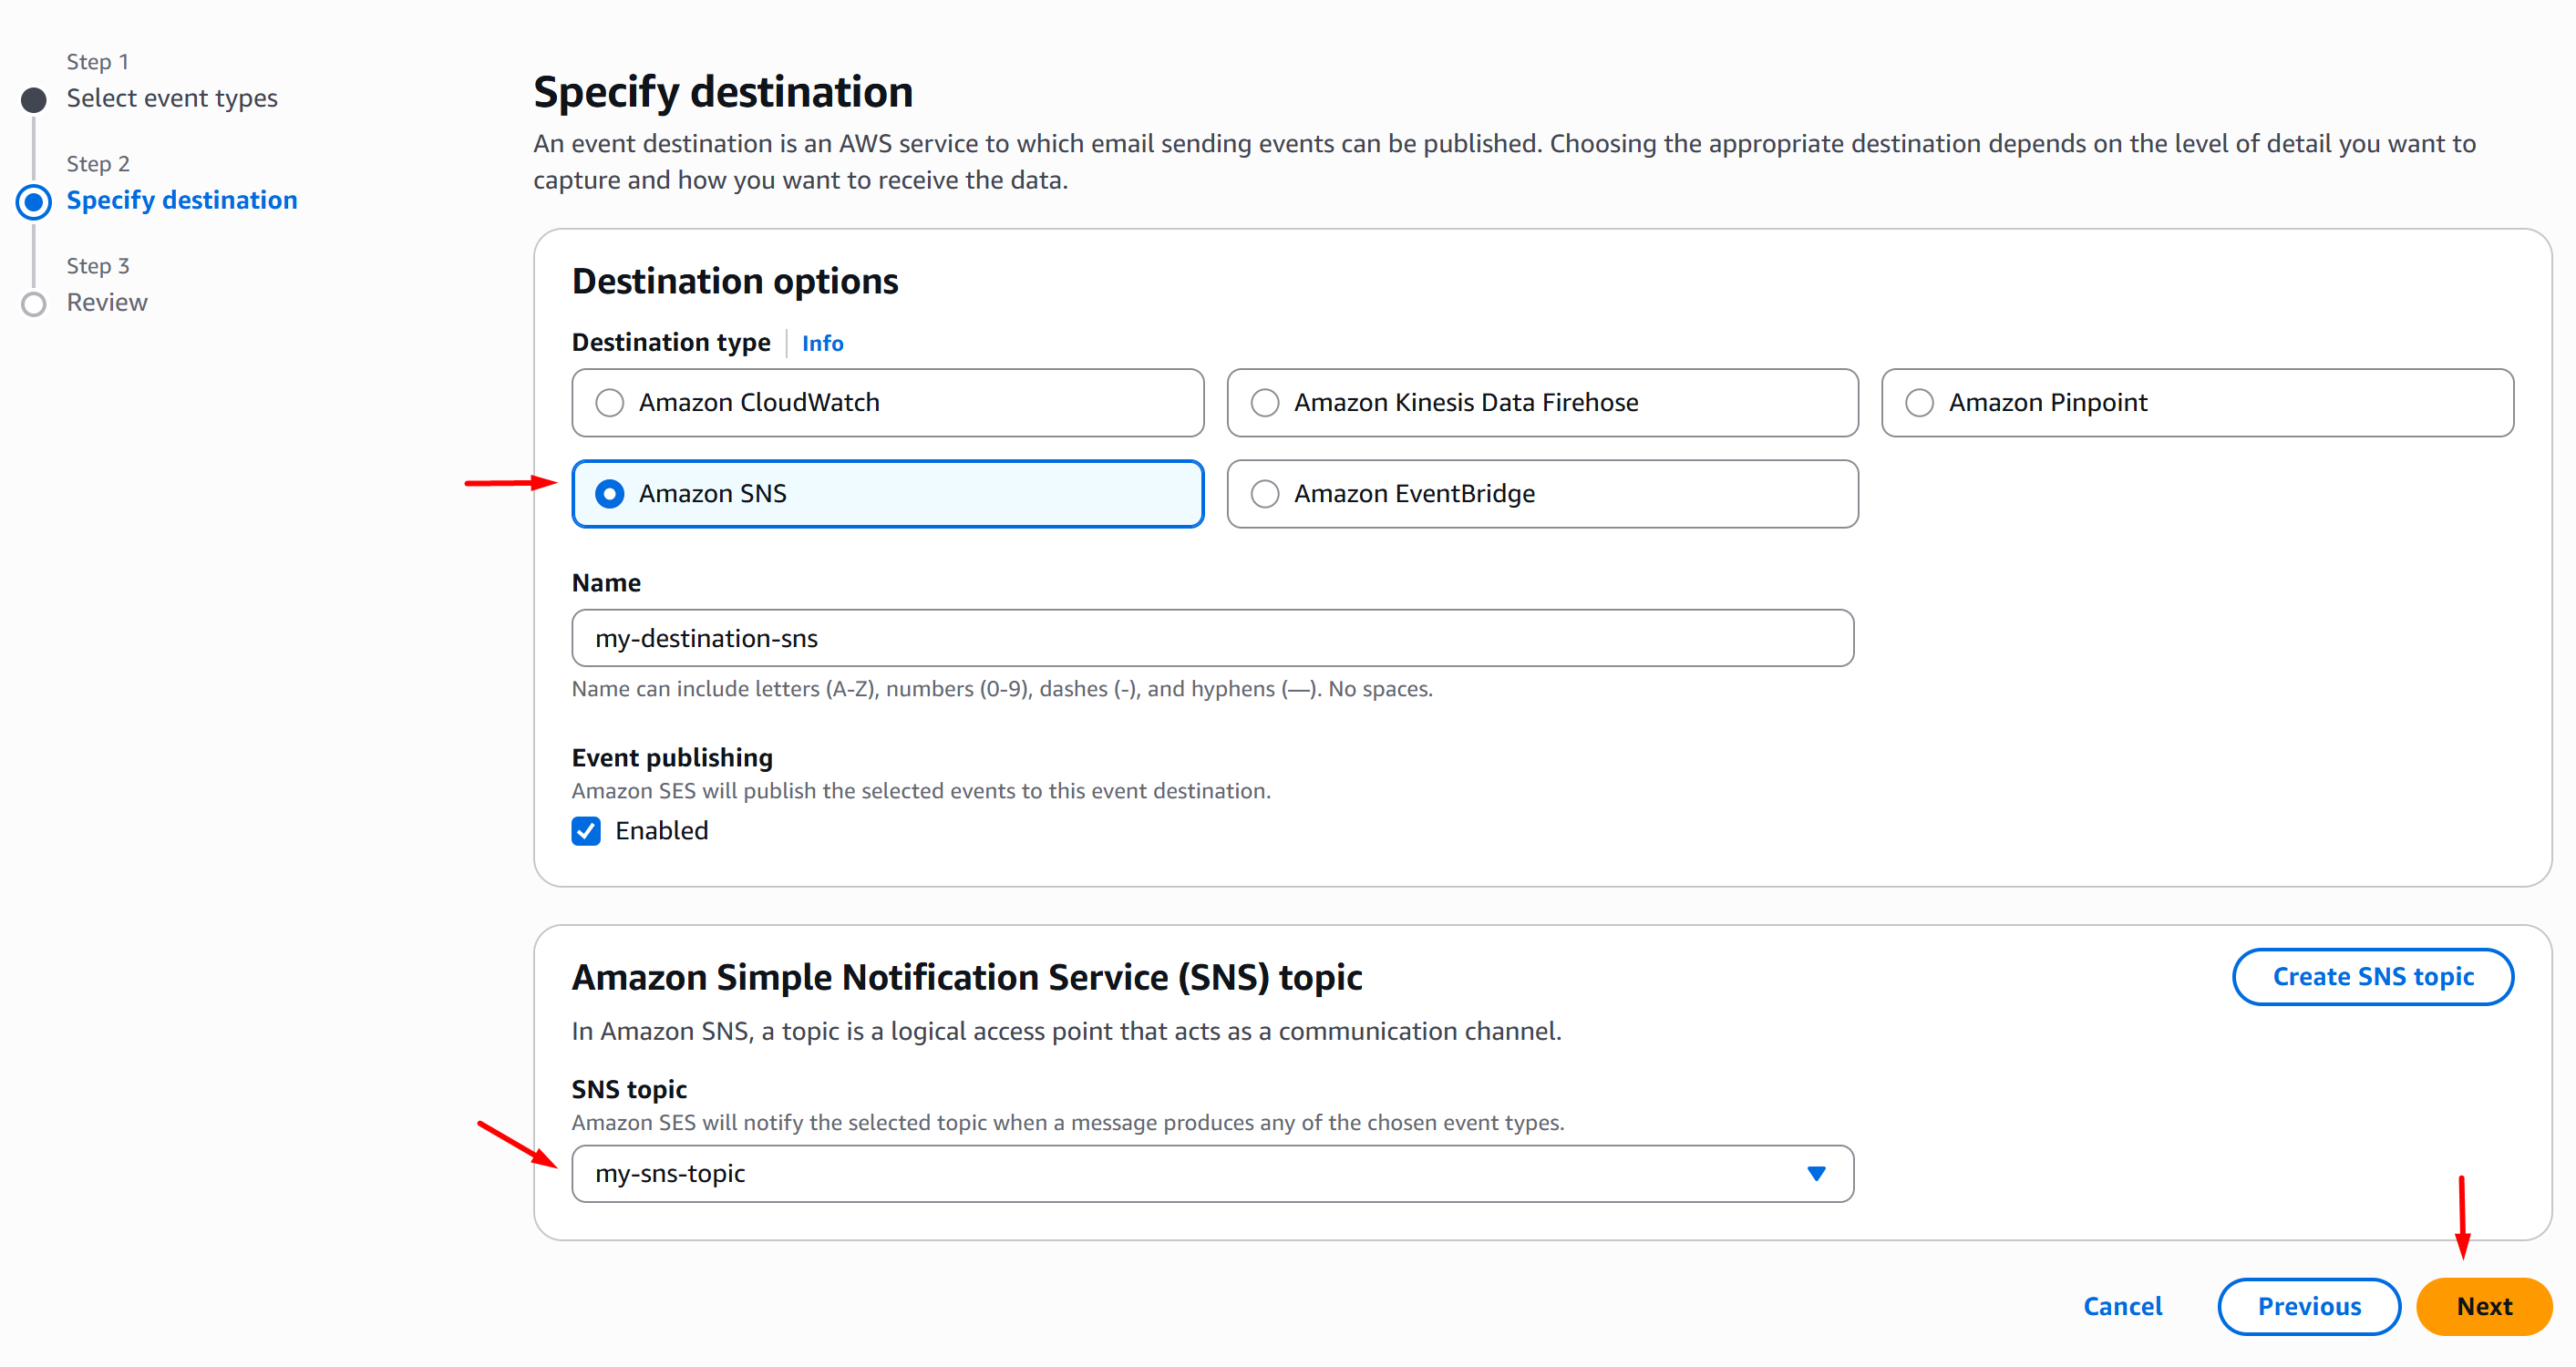
On the Specify destination page, choose Amazon SNS, fill in the destination Name, select your SNS topic, and click Next:
-
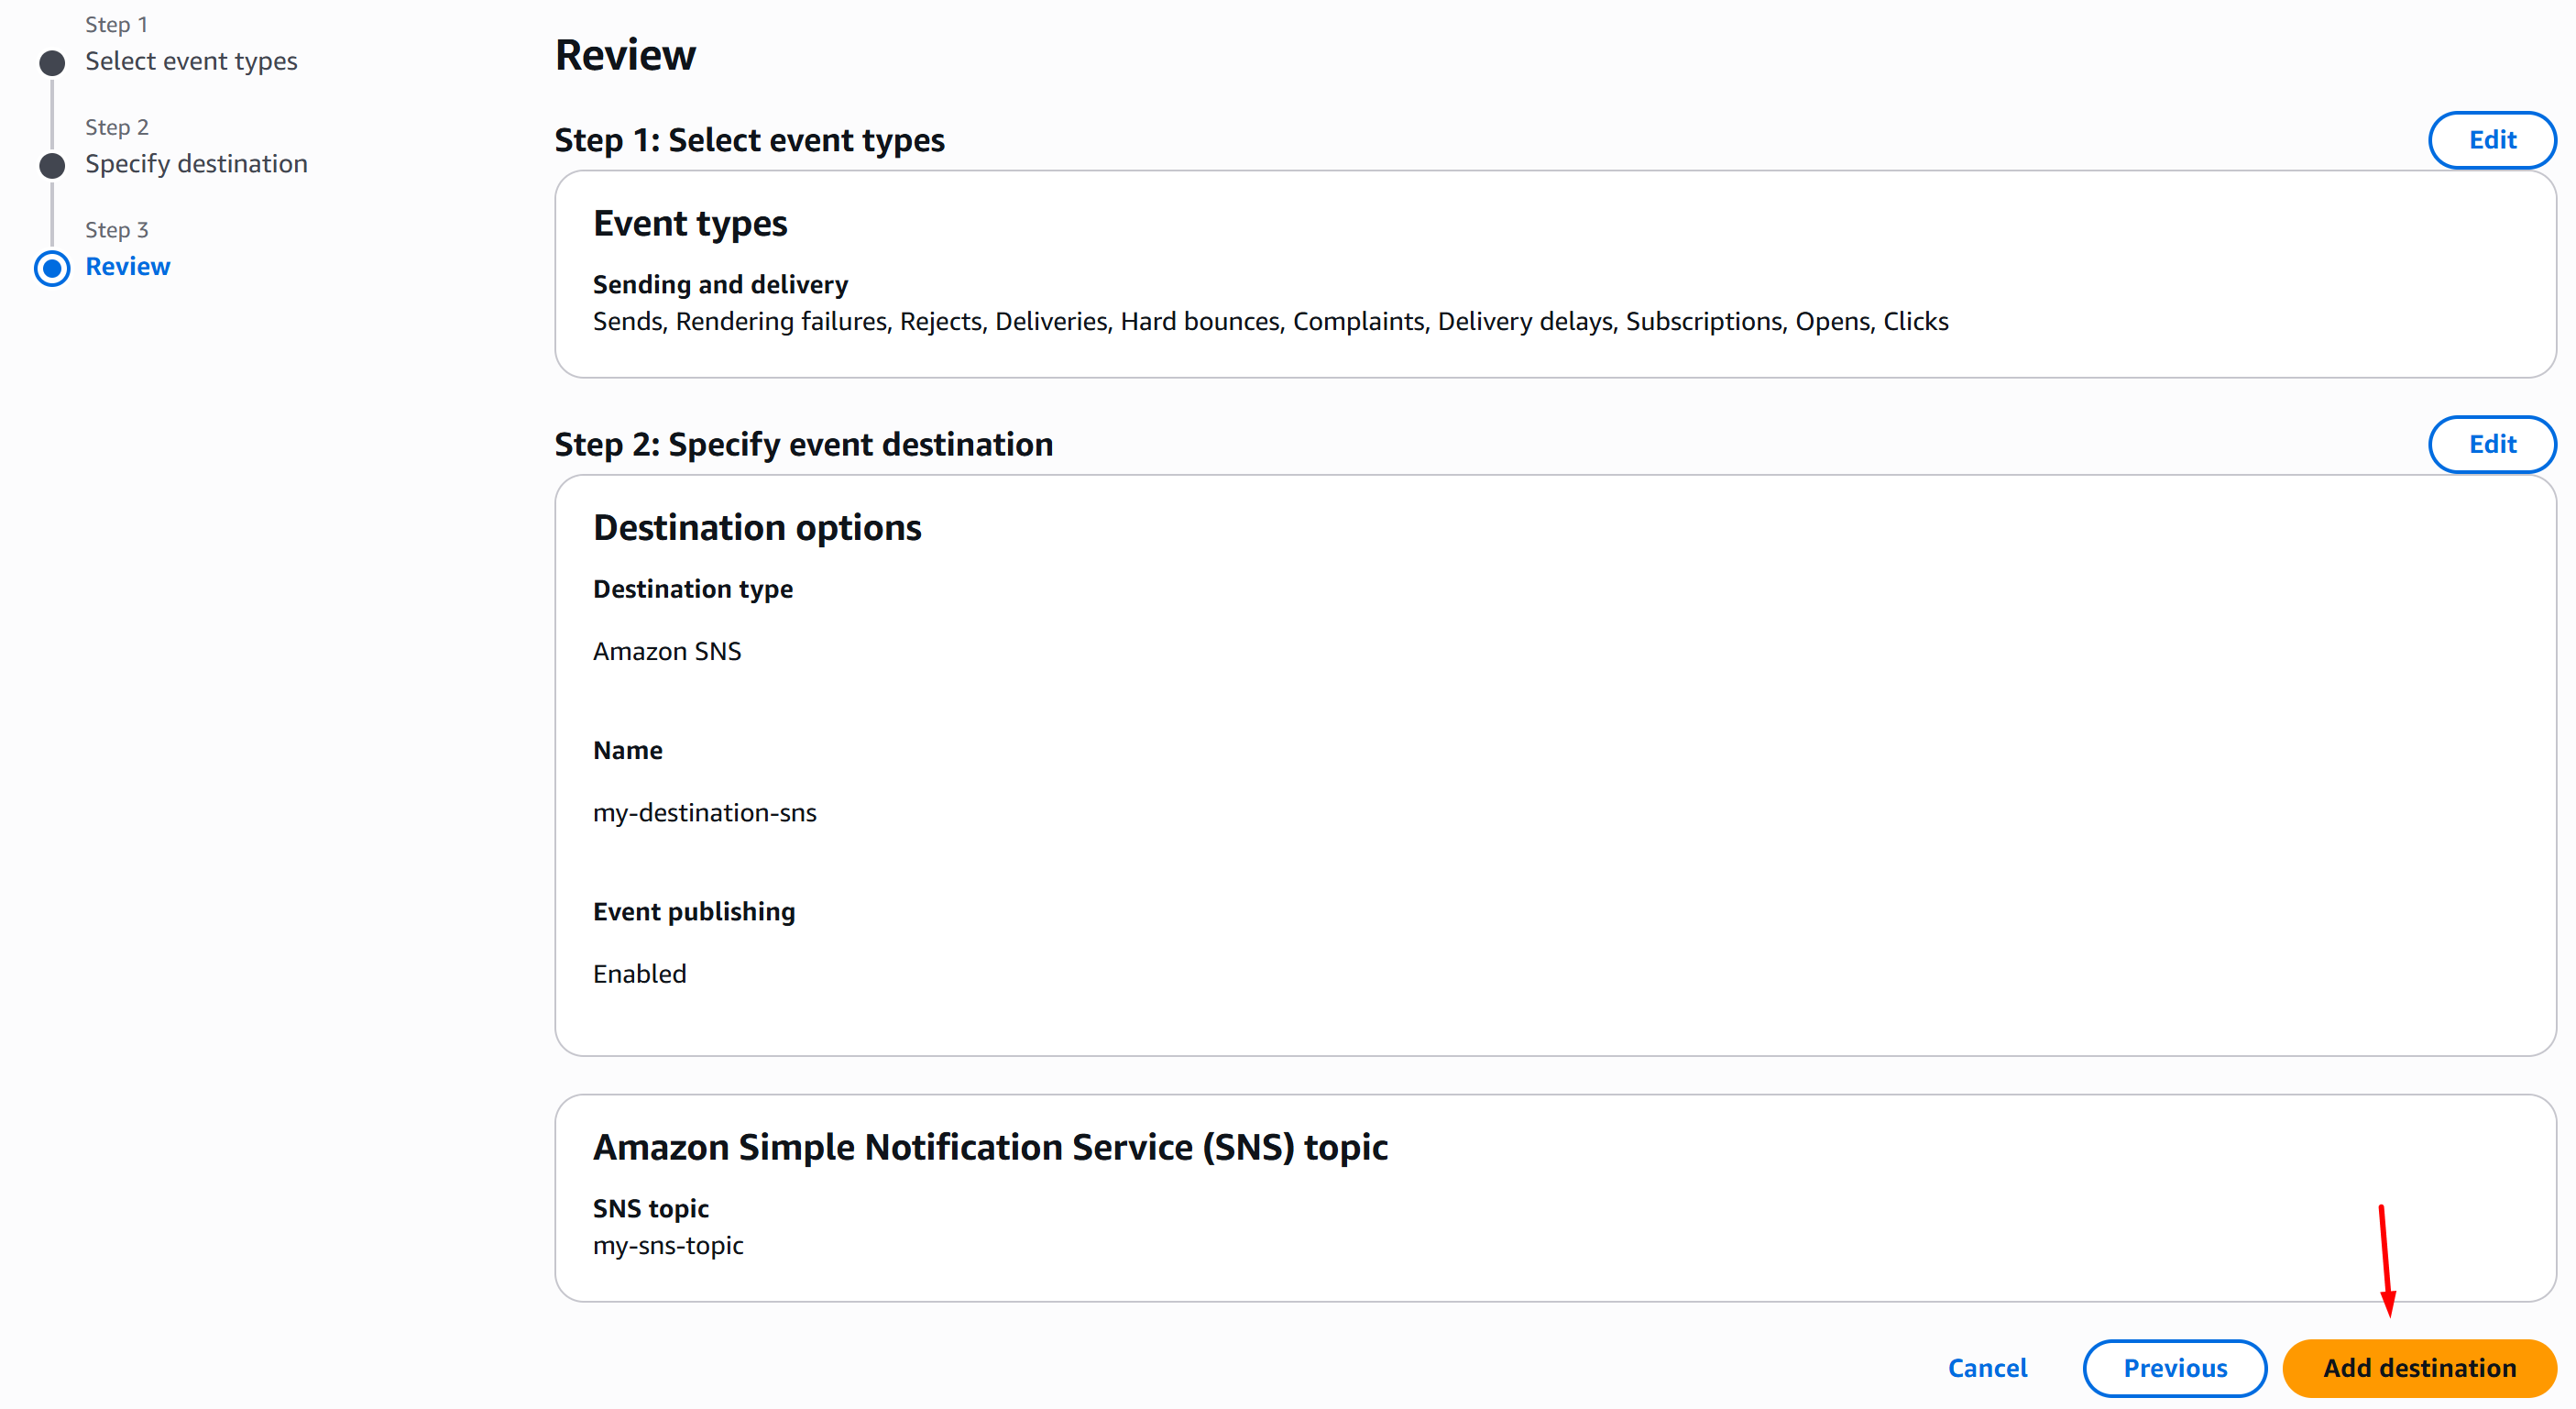
On the Review page, once you validated your config, click Add destination:
-
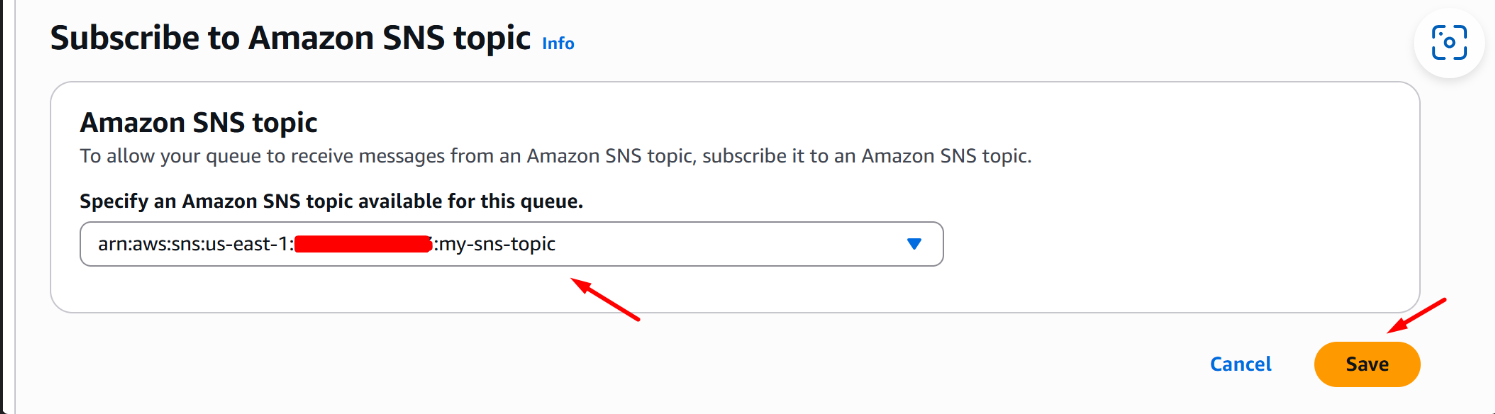
On your AWS SQS Console, go to Queues > SNS subscriptions and click Subscribe to Amazon SNS topic:

-
On the Subscribe to Amazon SNS topic page, choose your SNS topic and click Save:
AWS SES to S3 Bucket data stream configuration
This section covers the configuration of streaming data from Simple Email Service (SES) to S3 Bucket.
Requirements
The following resources are required to be provisioned:
Configuration
-
Go to your Amazon Data Firehose console and click Firehose streams > Create Firehose stream:

-
In the Choose source and destination section, choose Direct PUT for Source and Amazon S3 for Destination:

-
In the Firehose stream name section, fill in your Firehose stream name:

-
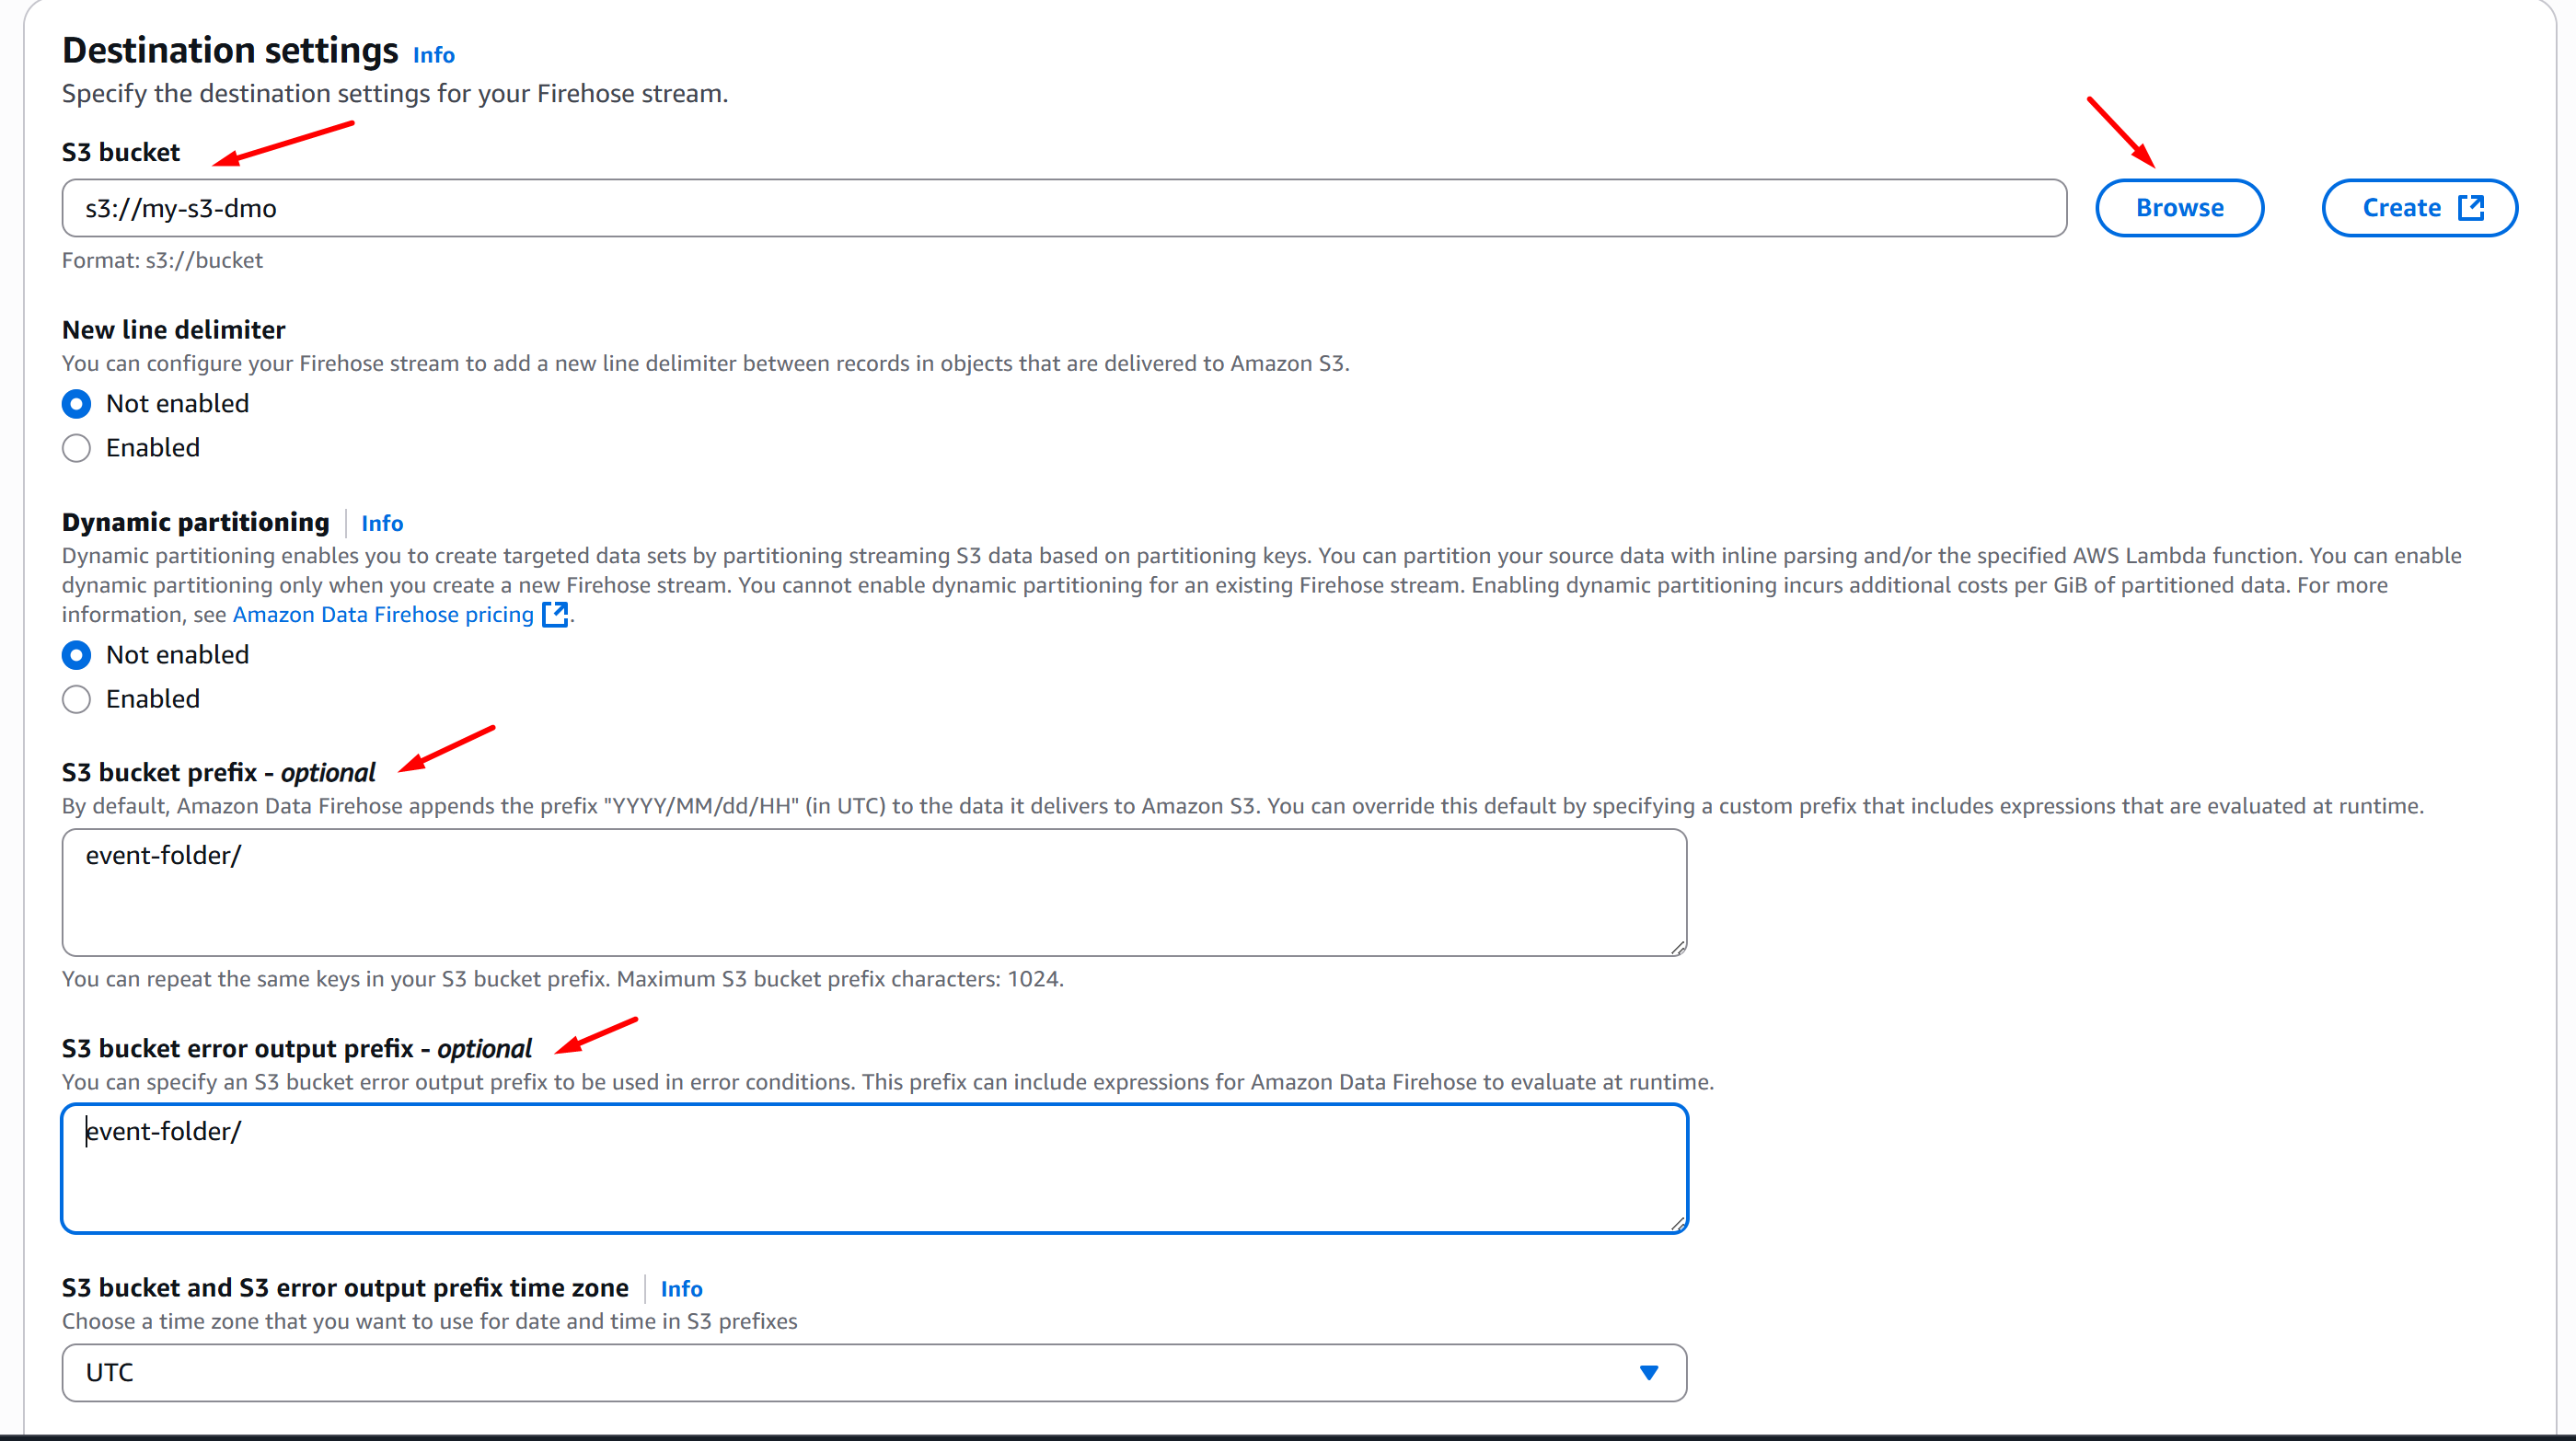
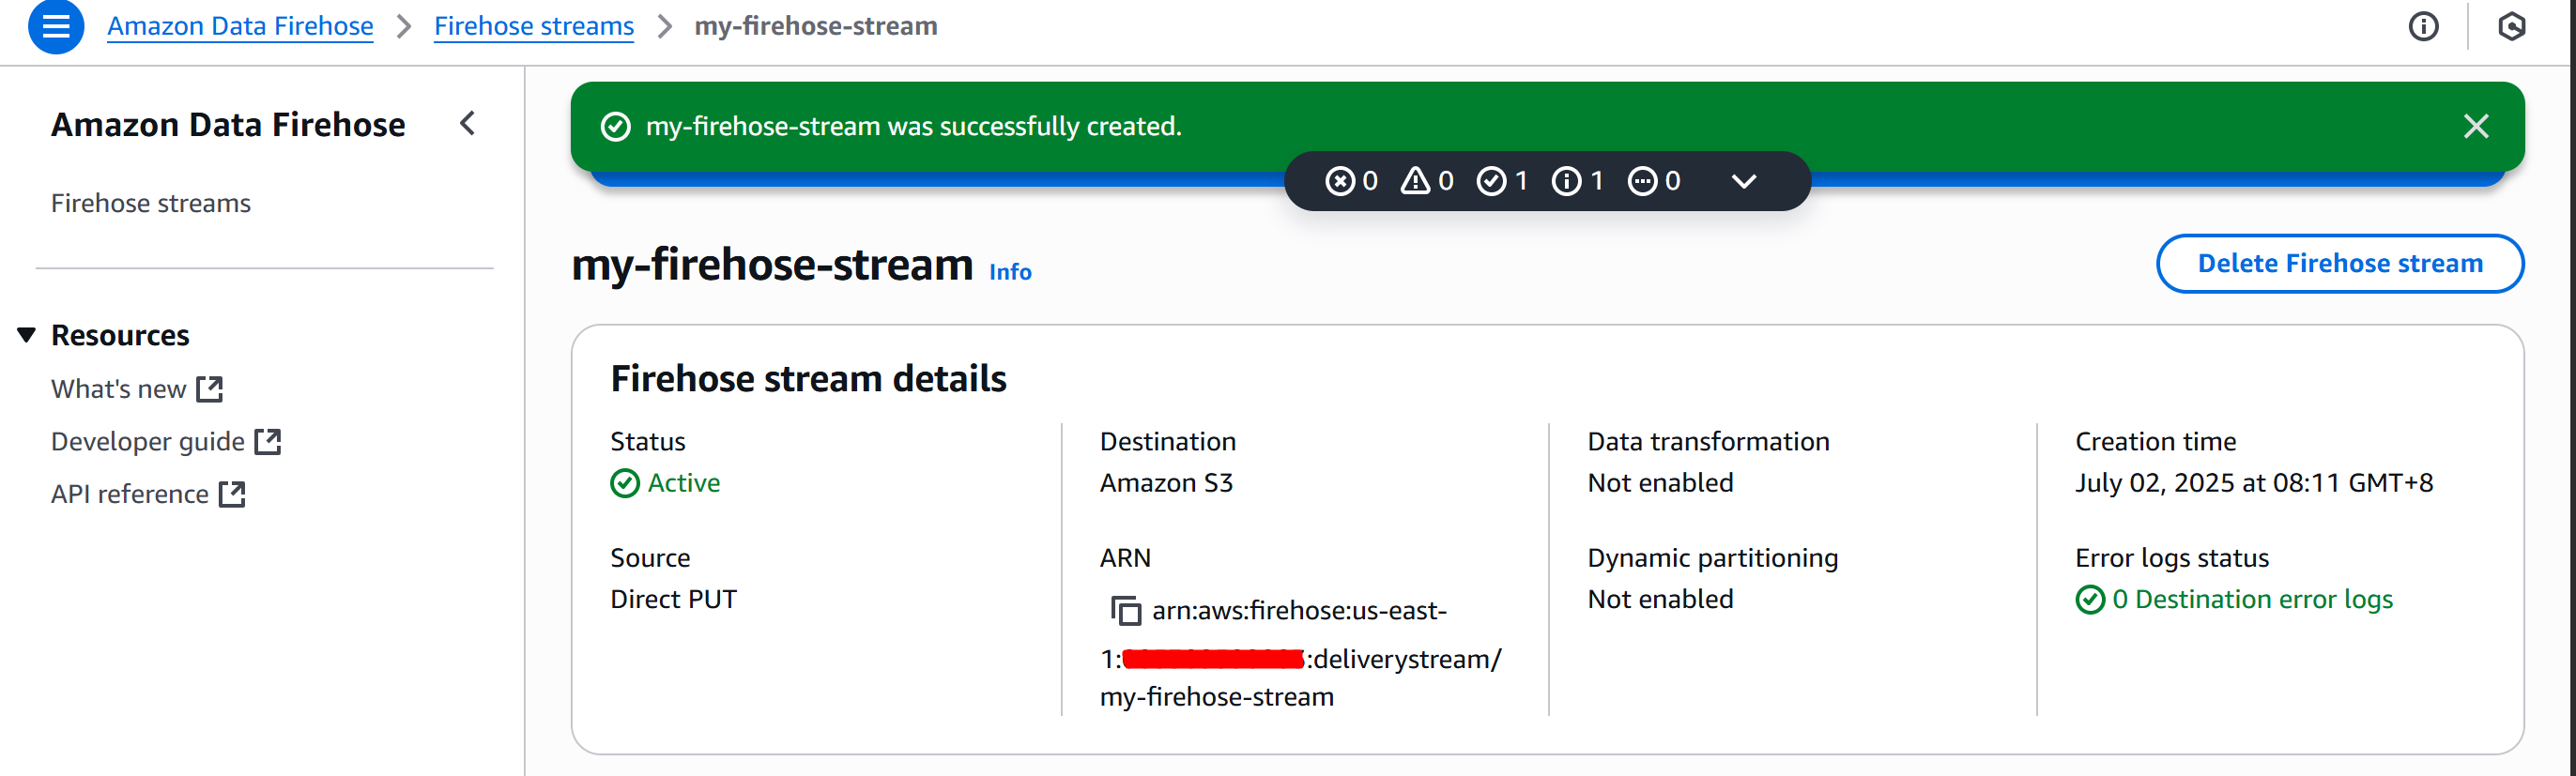
In the Destination Settings section, hover over S3 bucket > Browse and choose your S3 Bucket. Next, optionally, if you want to stream data in a directory on the S3 Bucket, go to S3 Bucket prefix - optional section and fill in your desired directory. Click Create Firehose Stream:
-
Notice that there’s an error: Your Firehose stream was not created. This is expected. That first attempt created the IAM Role and IAM Policy for the configuration. Now, expand the error and take note of the IAM Role Name that has been created:

-
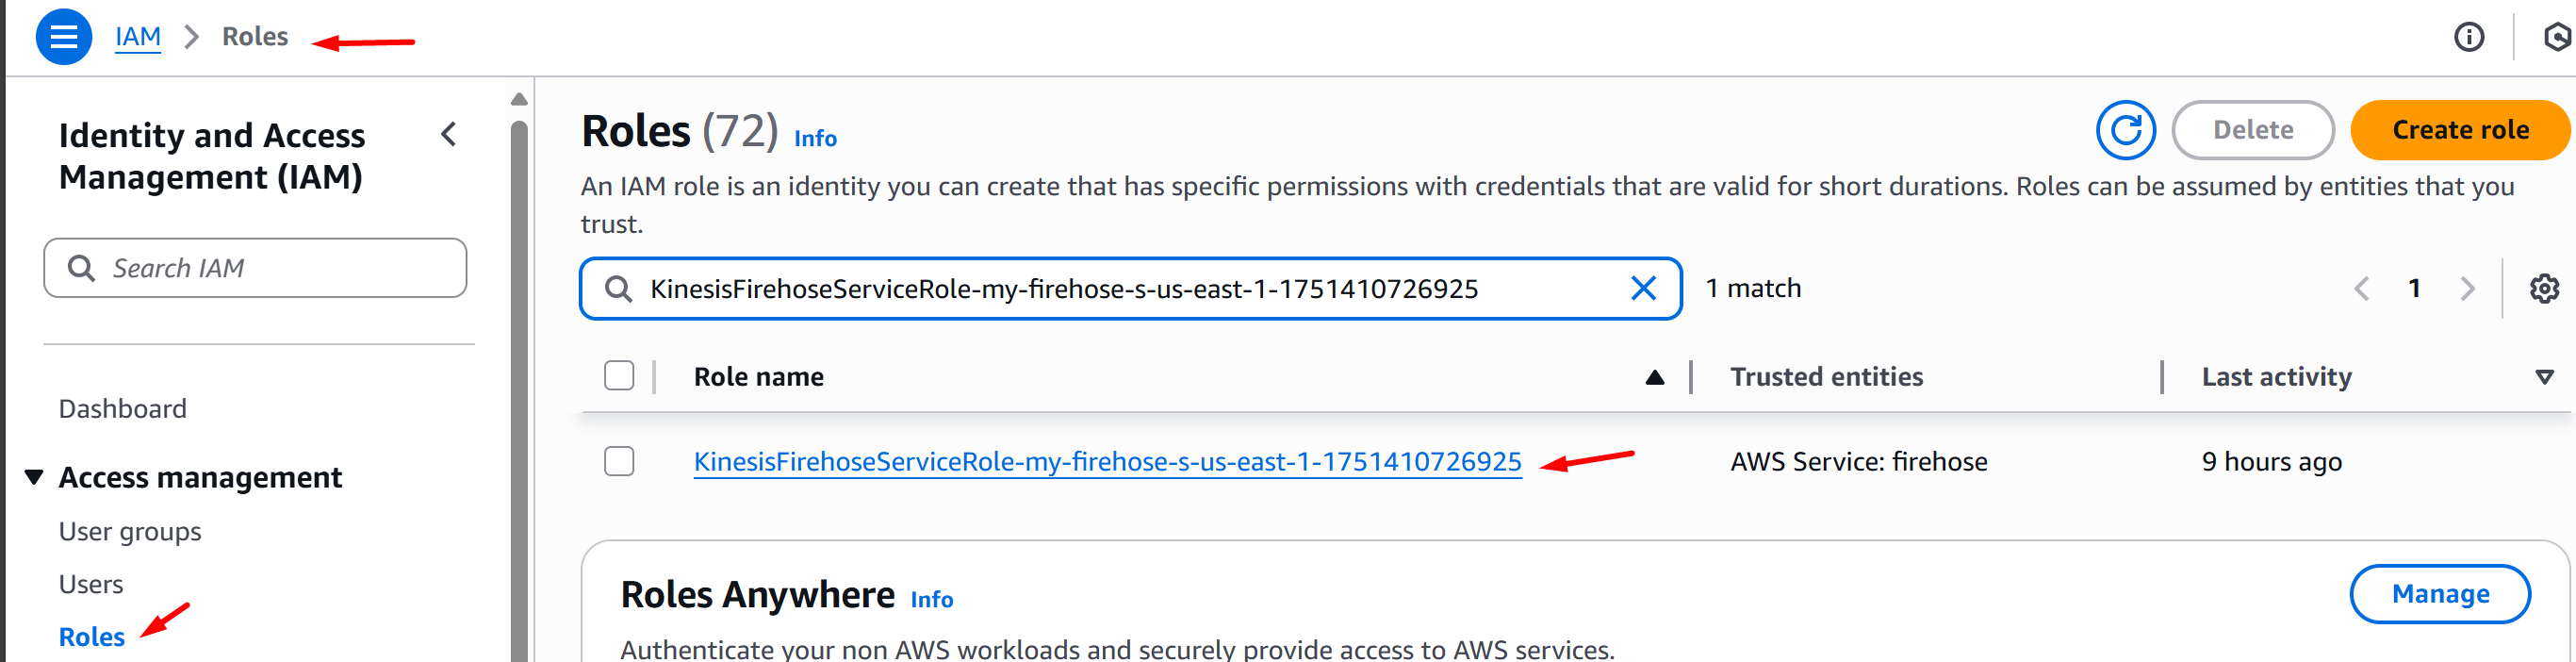
Now, open another instance of your browser and go to your AWS IAM Console > Roles and search for the IAM Role that you noted from the previous step, in this case:
KinesisFirehoseServiceRole-my-firehose-s-us-east-1-1751410726925, then click the IAM Role: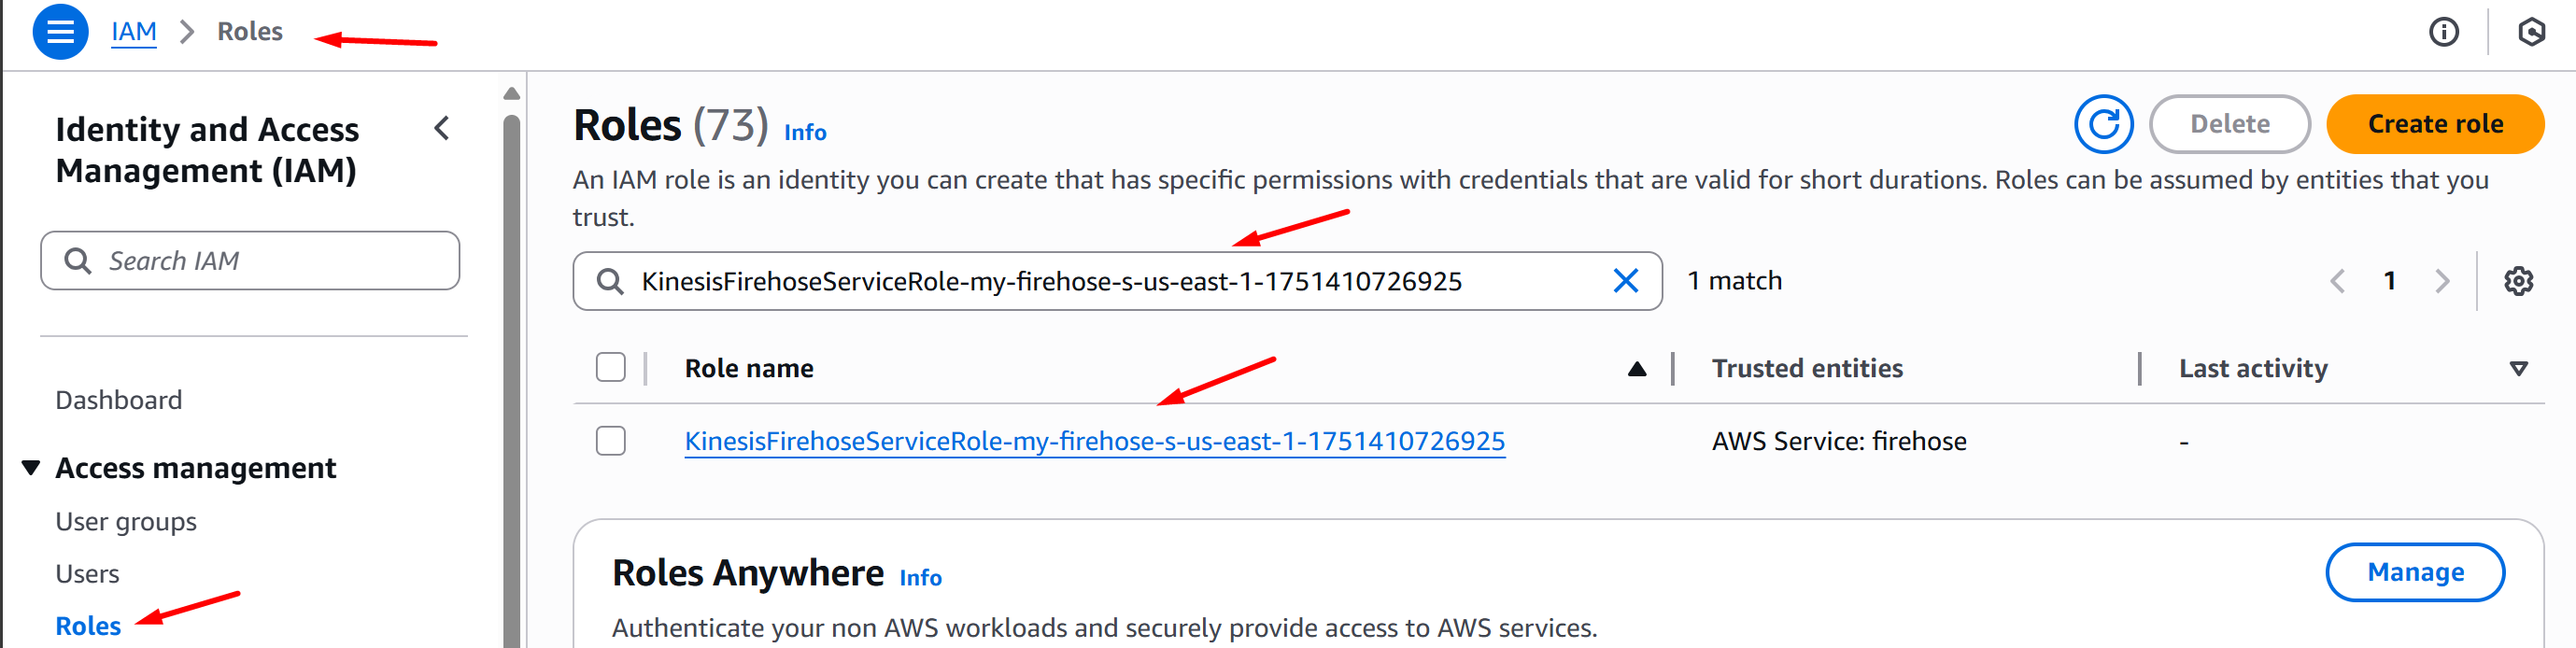
-
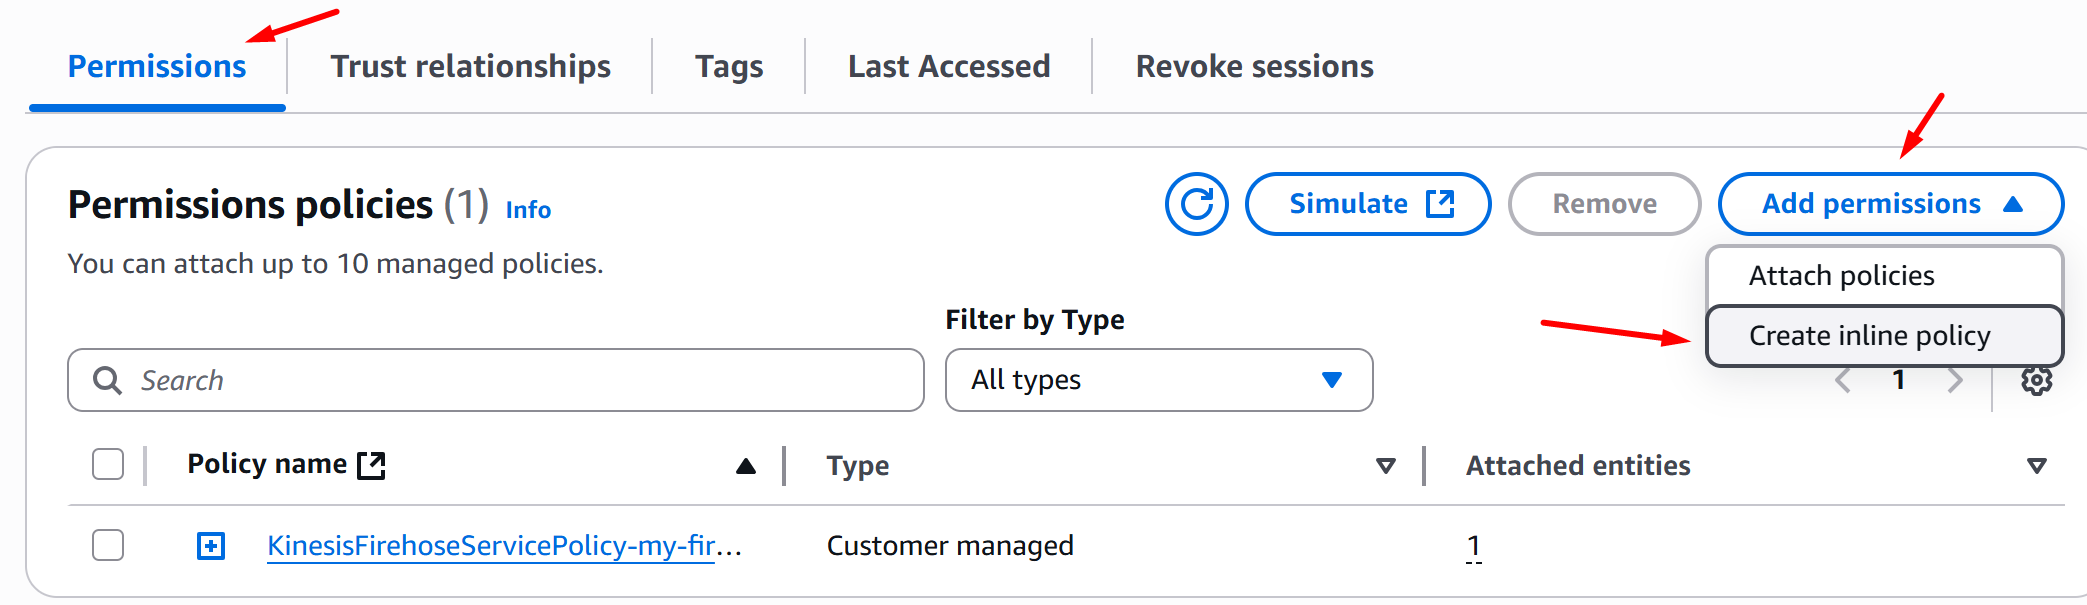
On the Permissions tab, select Add permissions > Create inline policy:
-
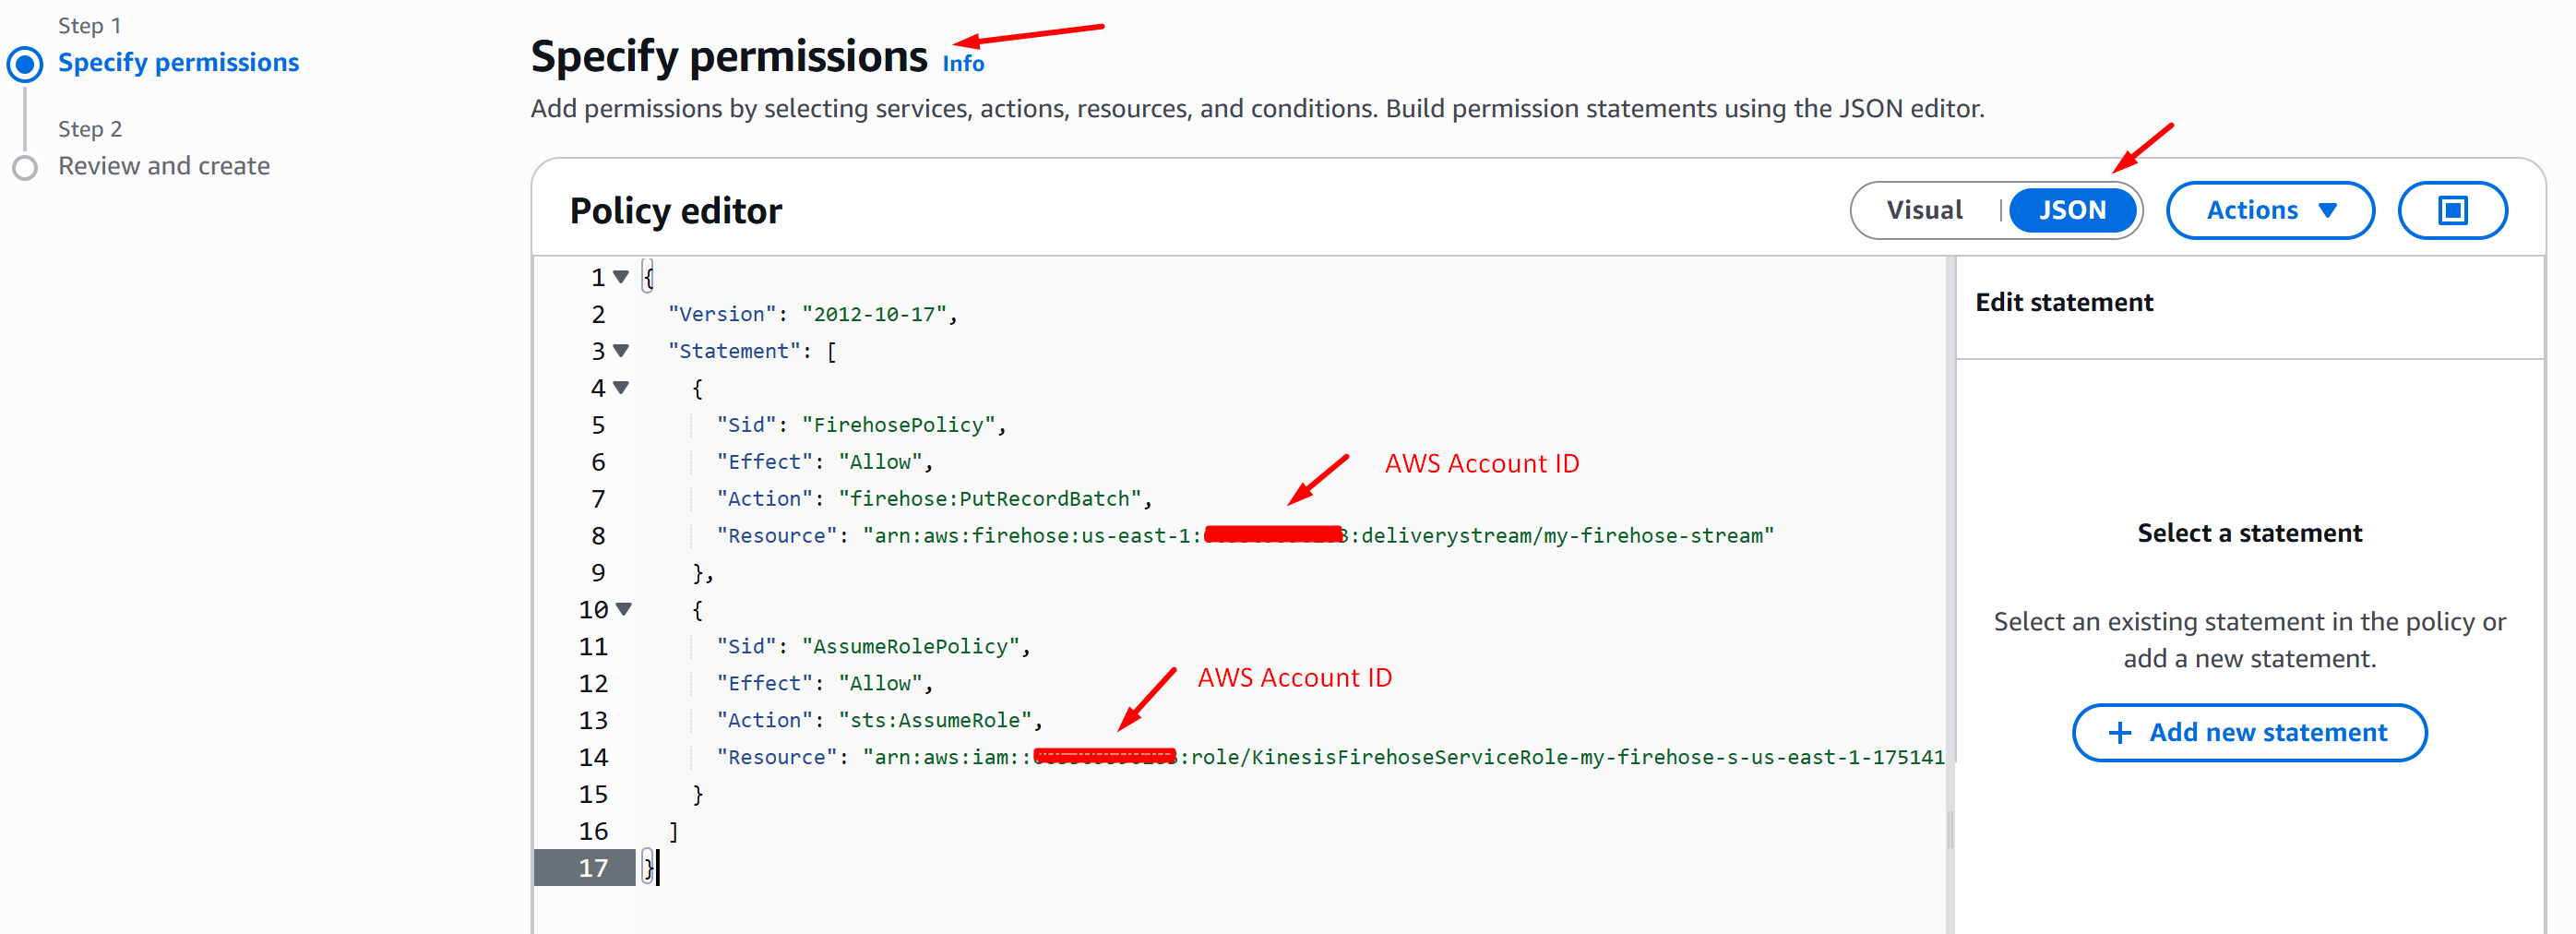
On the Policy Editor section, click JSON and replace the policy definition with the IAM Role Policy below then click Next:
-
On the Policy details section, fill in the Policy name and click Create policy:
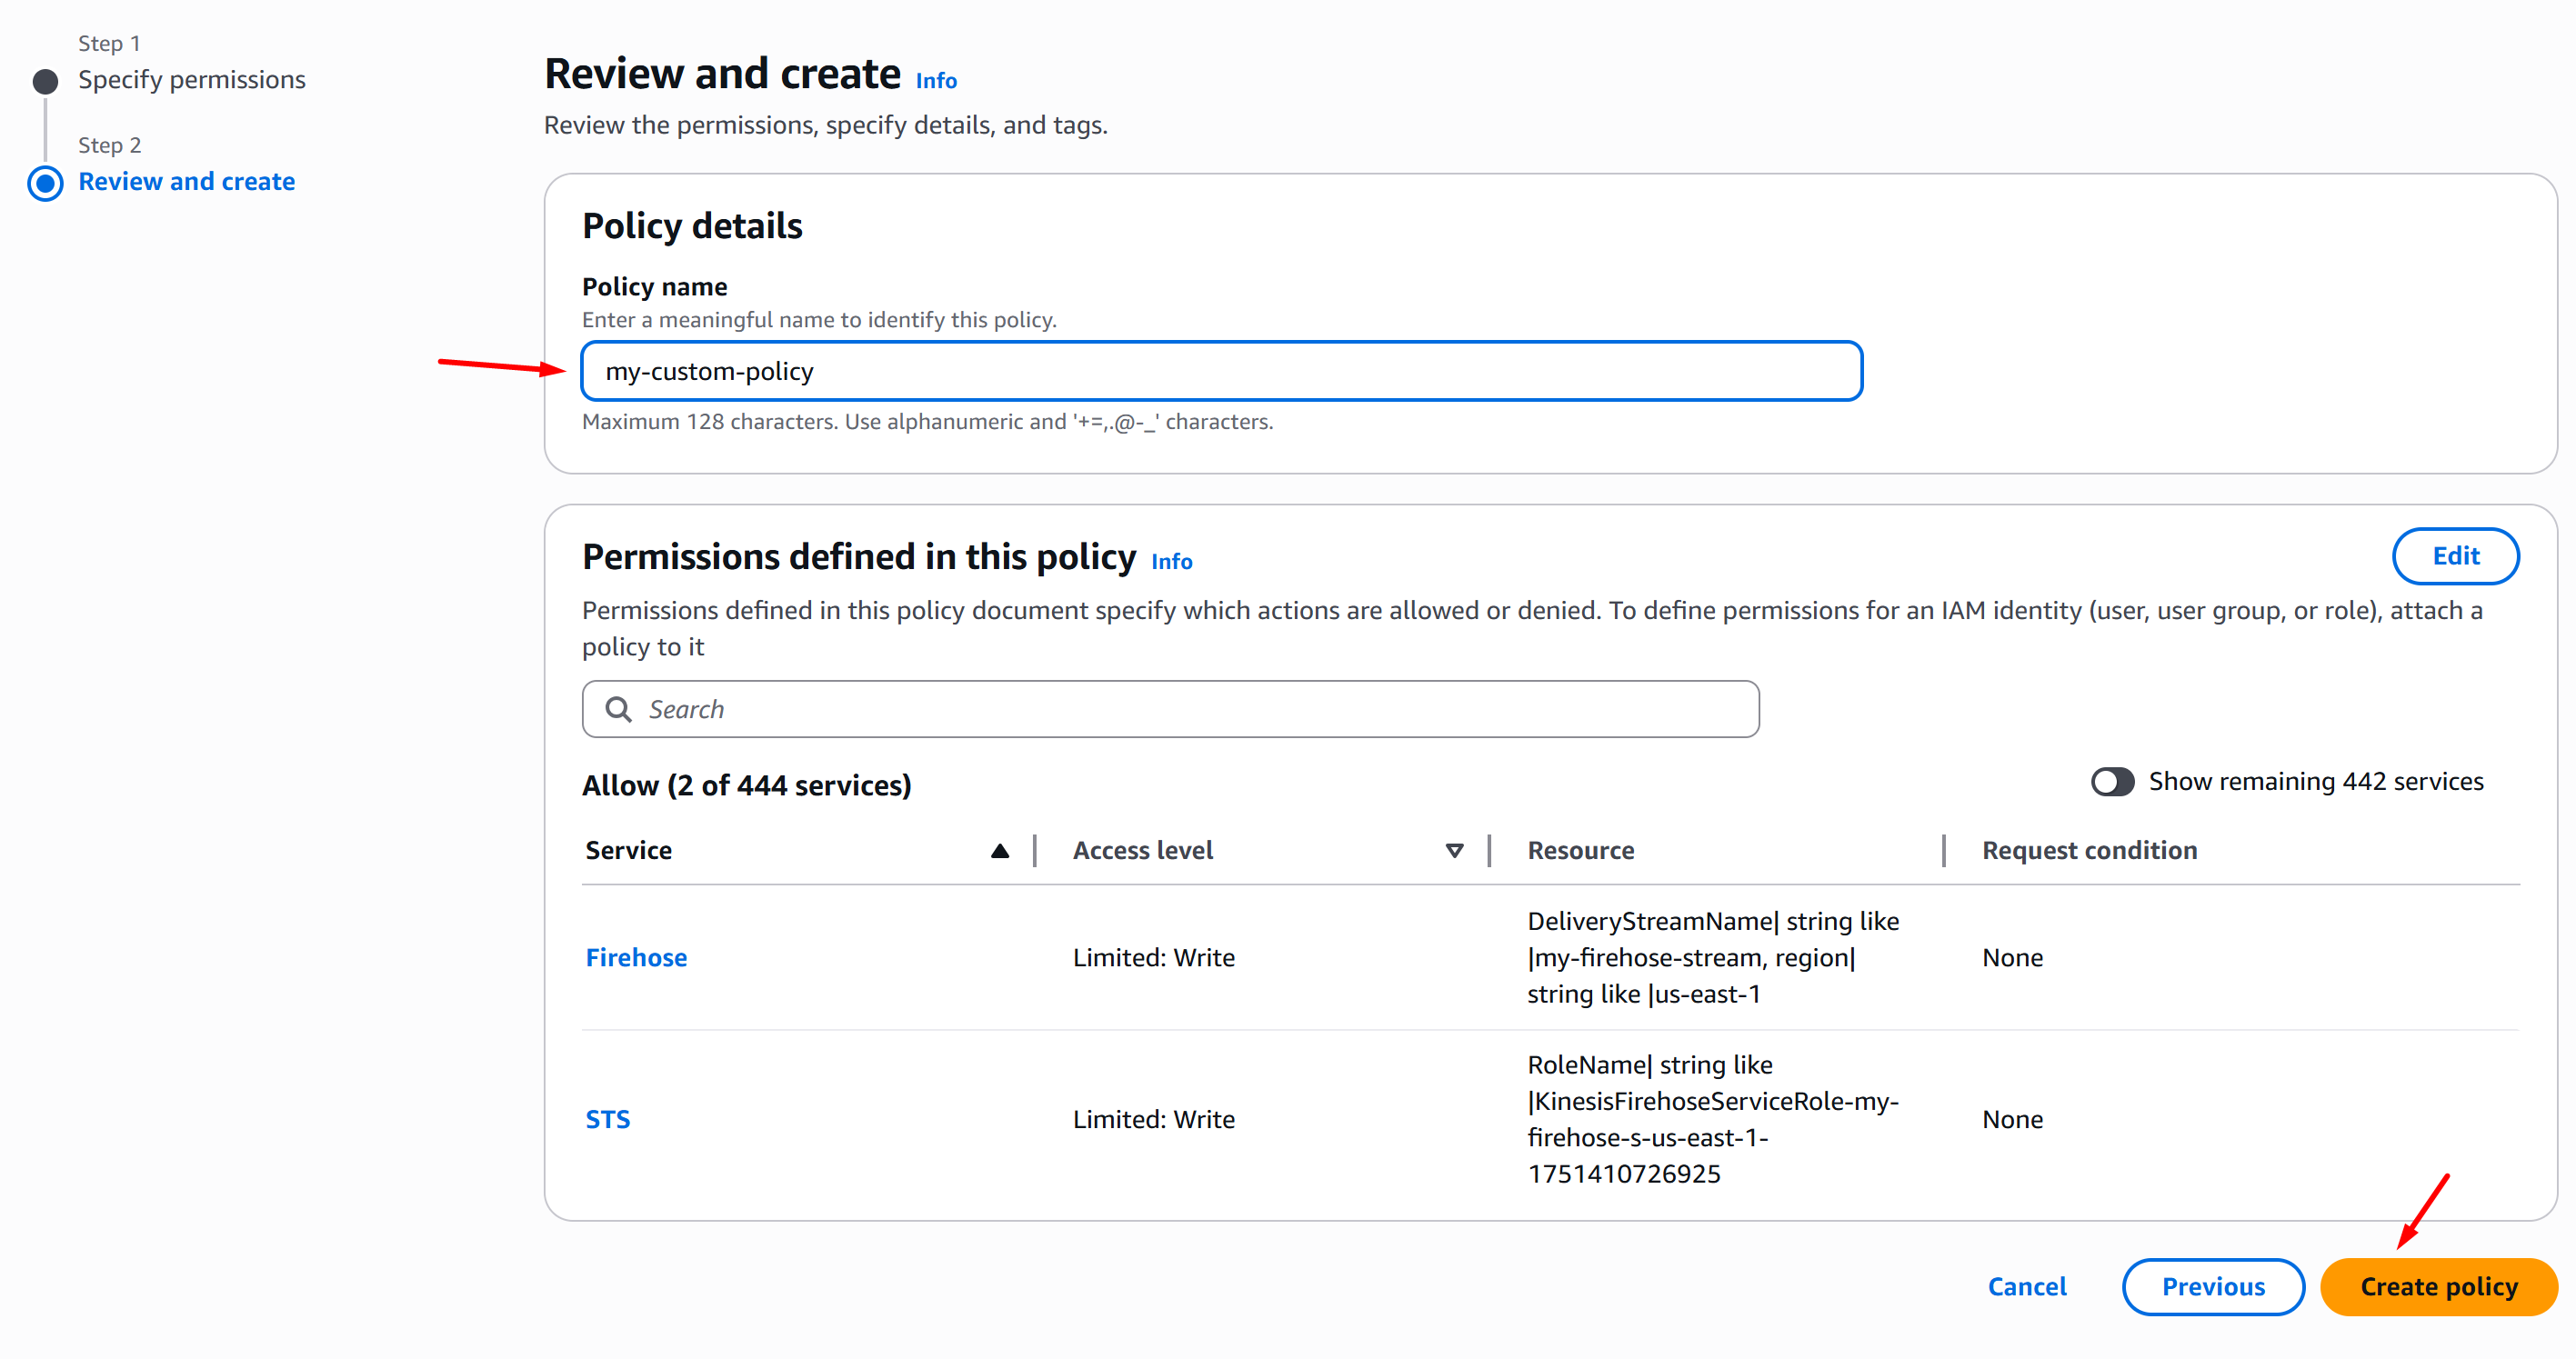
-
Now, go back to the AWS Console Firehose stream create page and click Create Firehose stream. You will now be able to do so:

-
Go to your Amazon SES console and click Configuration Sets > Create set:
-
Fill in the Configuration set name, choose your Sending IP pool and click Create set:
-
Once you’ve successfully created a configuration set, click Event destinations > Add destination:
-
On the Select event types page, click Select all and Next:
-
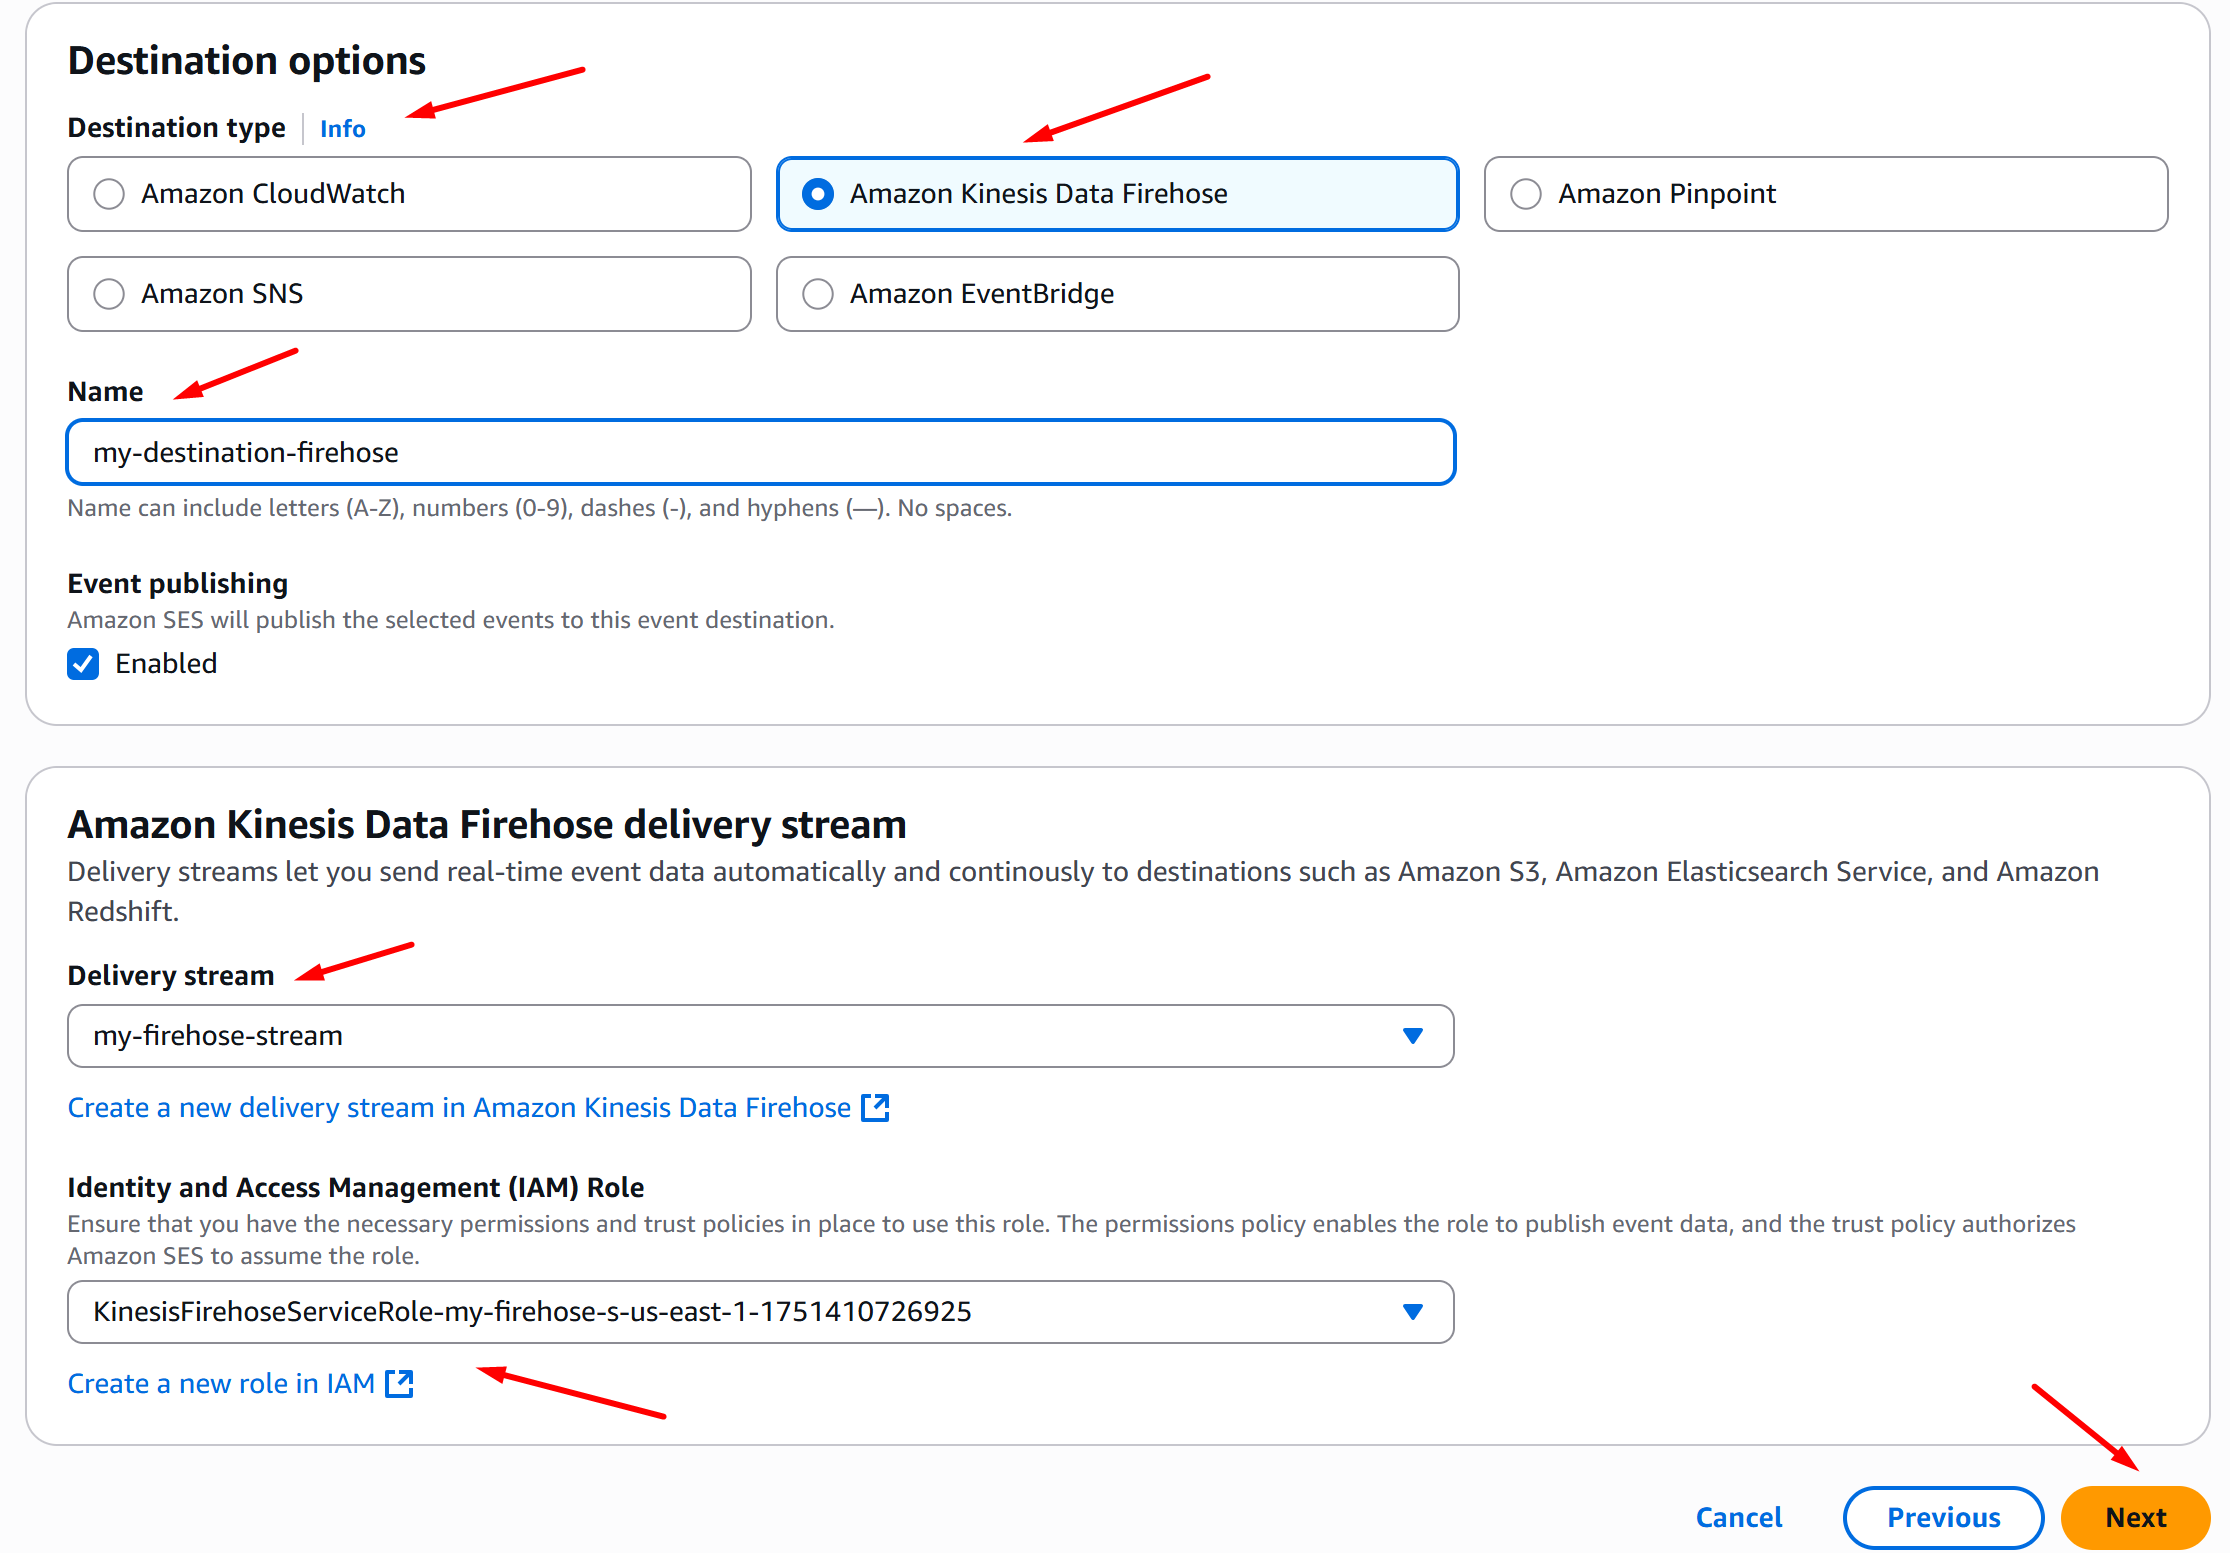
On the Destination options section, select the following:
-
Destination type = Amazon Kinesis Data Firehose
-
Fill in the Name of your destination
-
Delivery stream = Name of your firehose stream
-
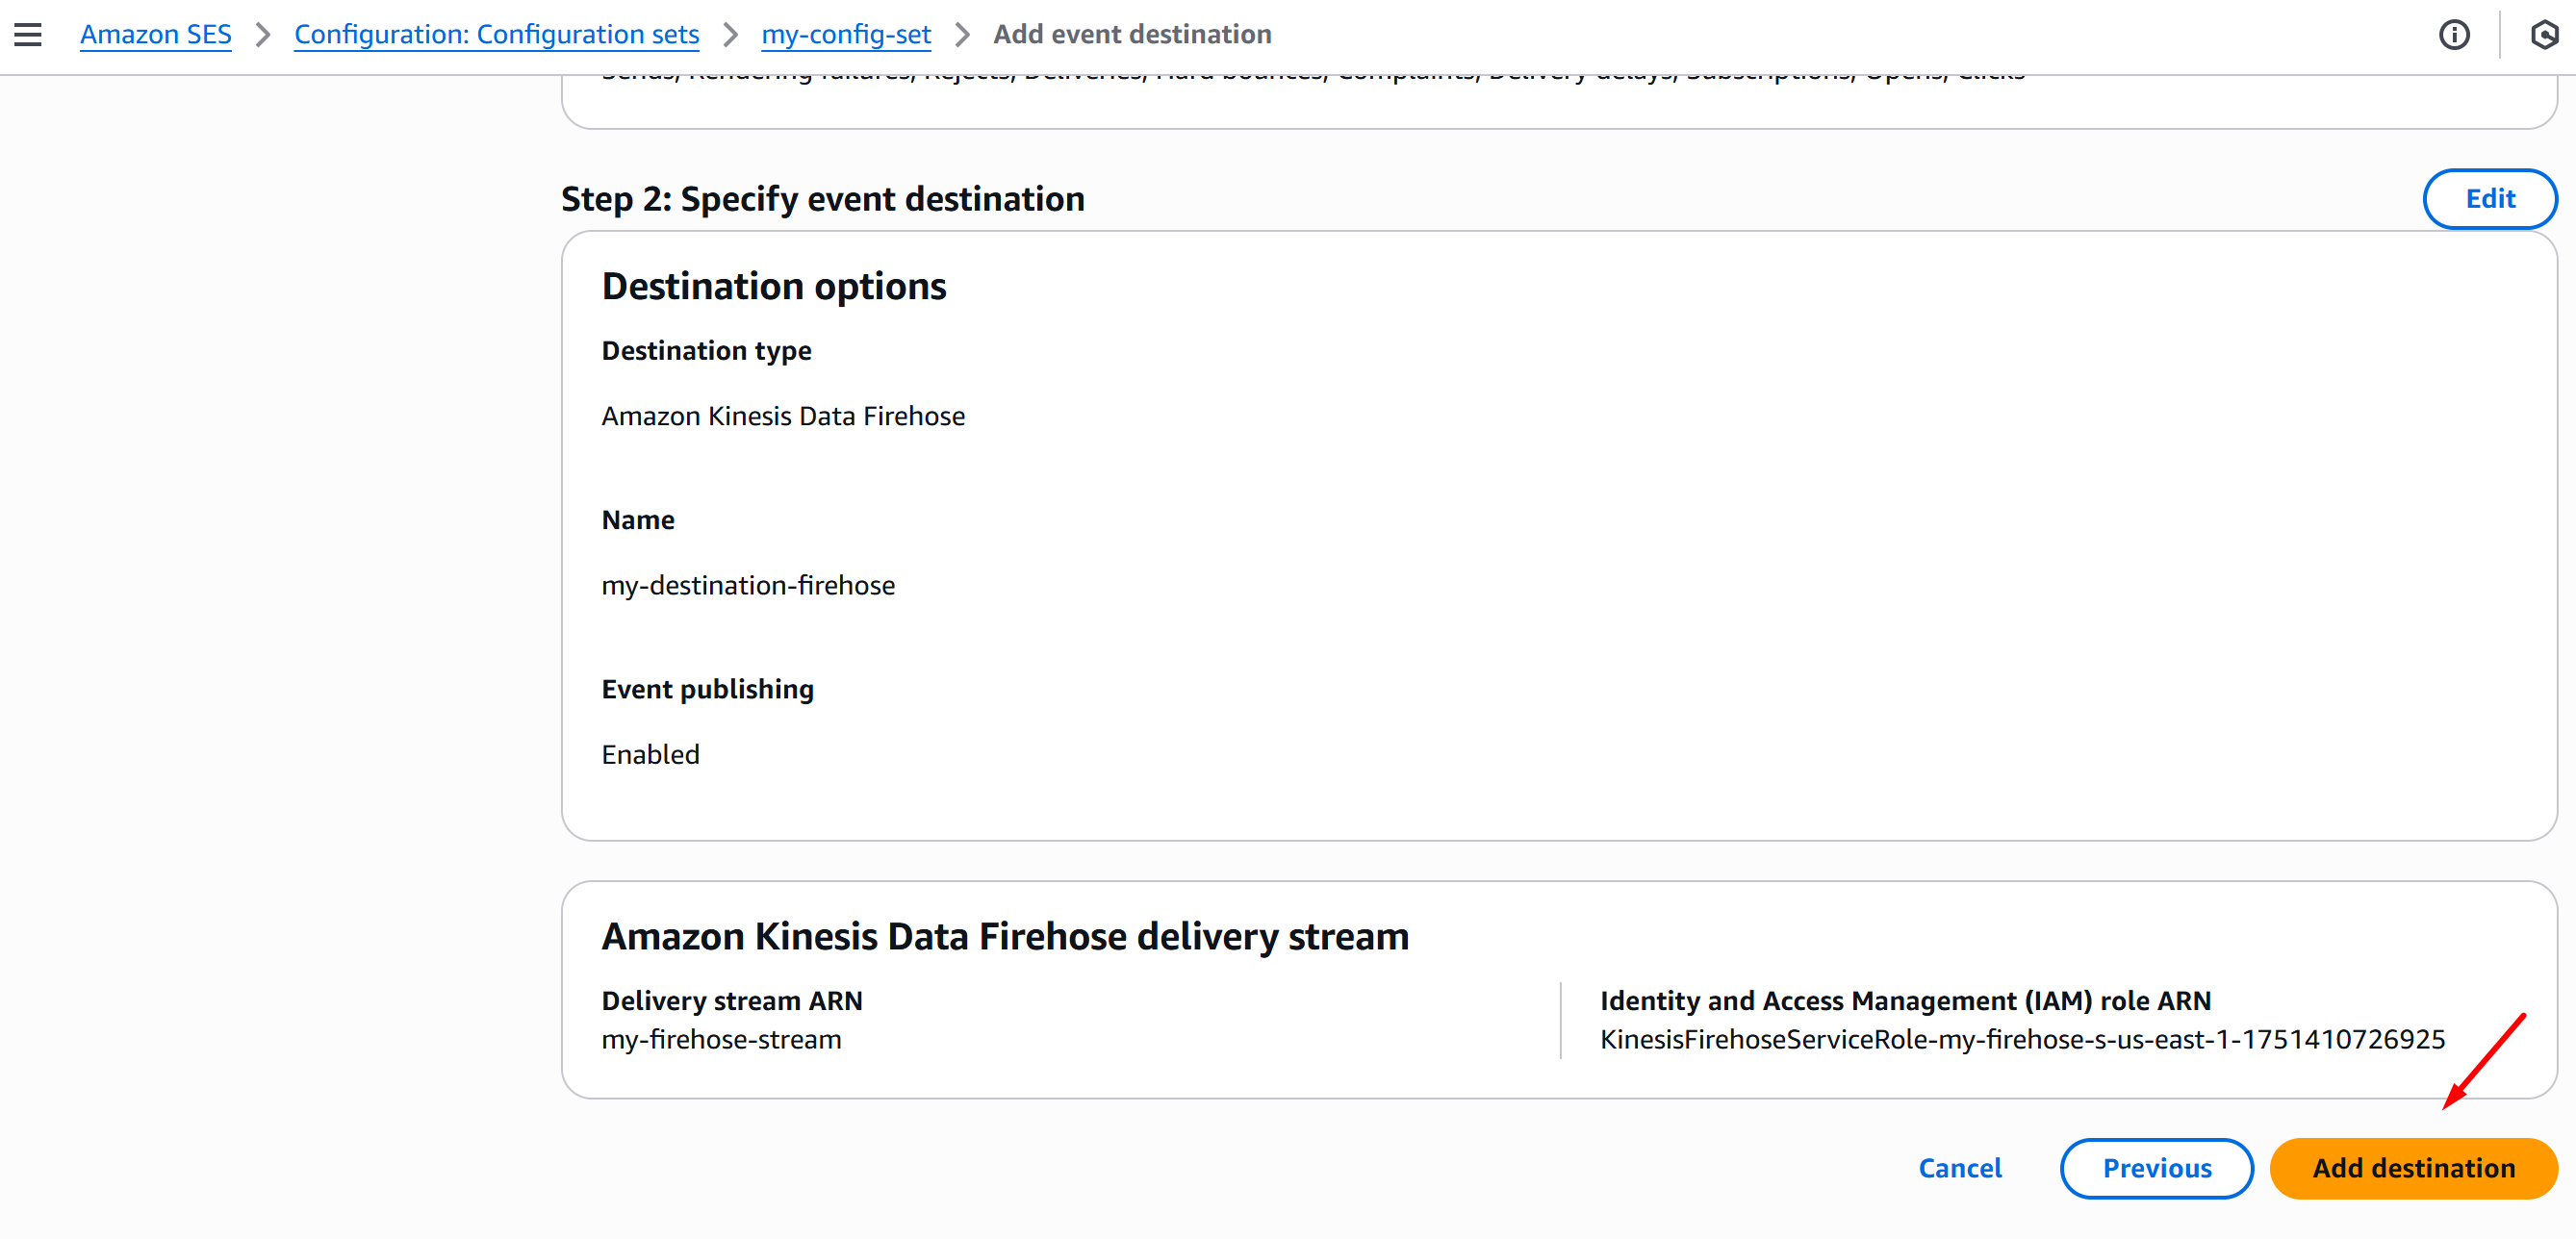
IAM Role = the IAM Role you edited on the previous instructions, in this case
KinesisFirehoseServiceRole-my-firehose-s-us-east-1-1751410726925 -
Click Next:
-
-
Once you’re done reviewing, click Add destination:
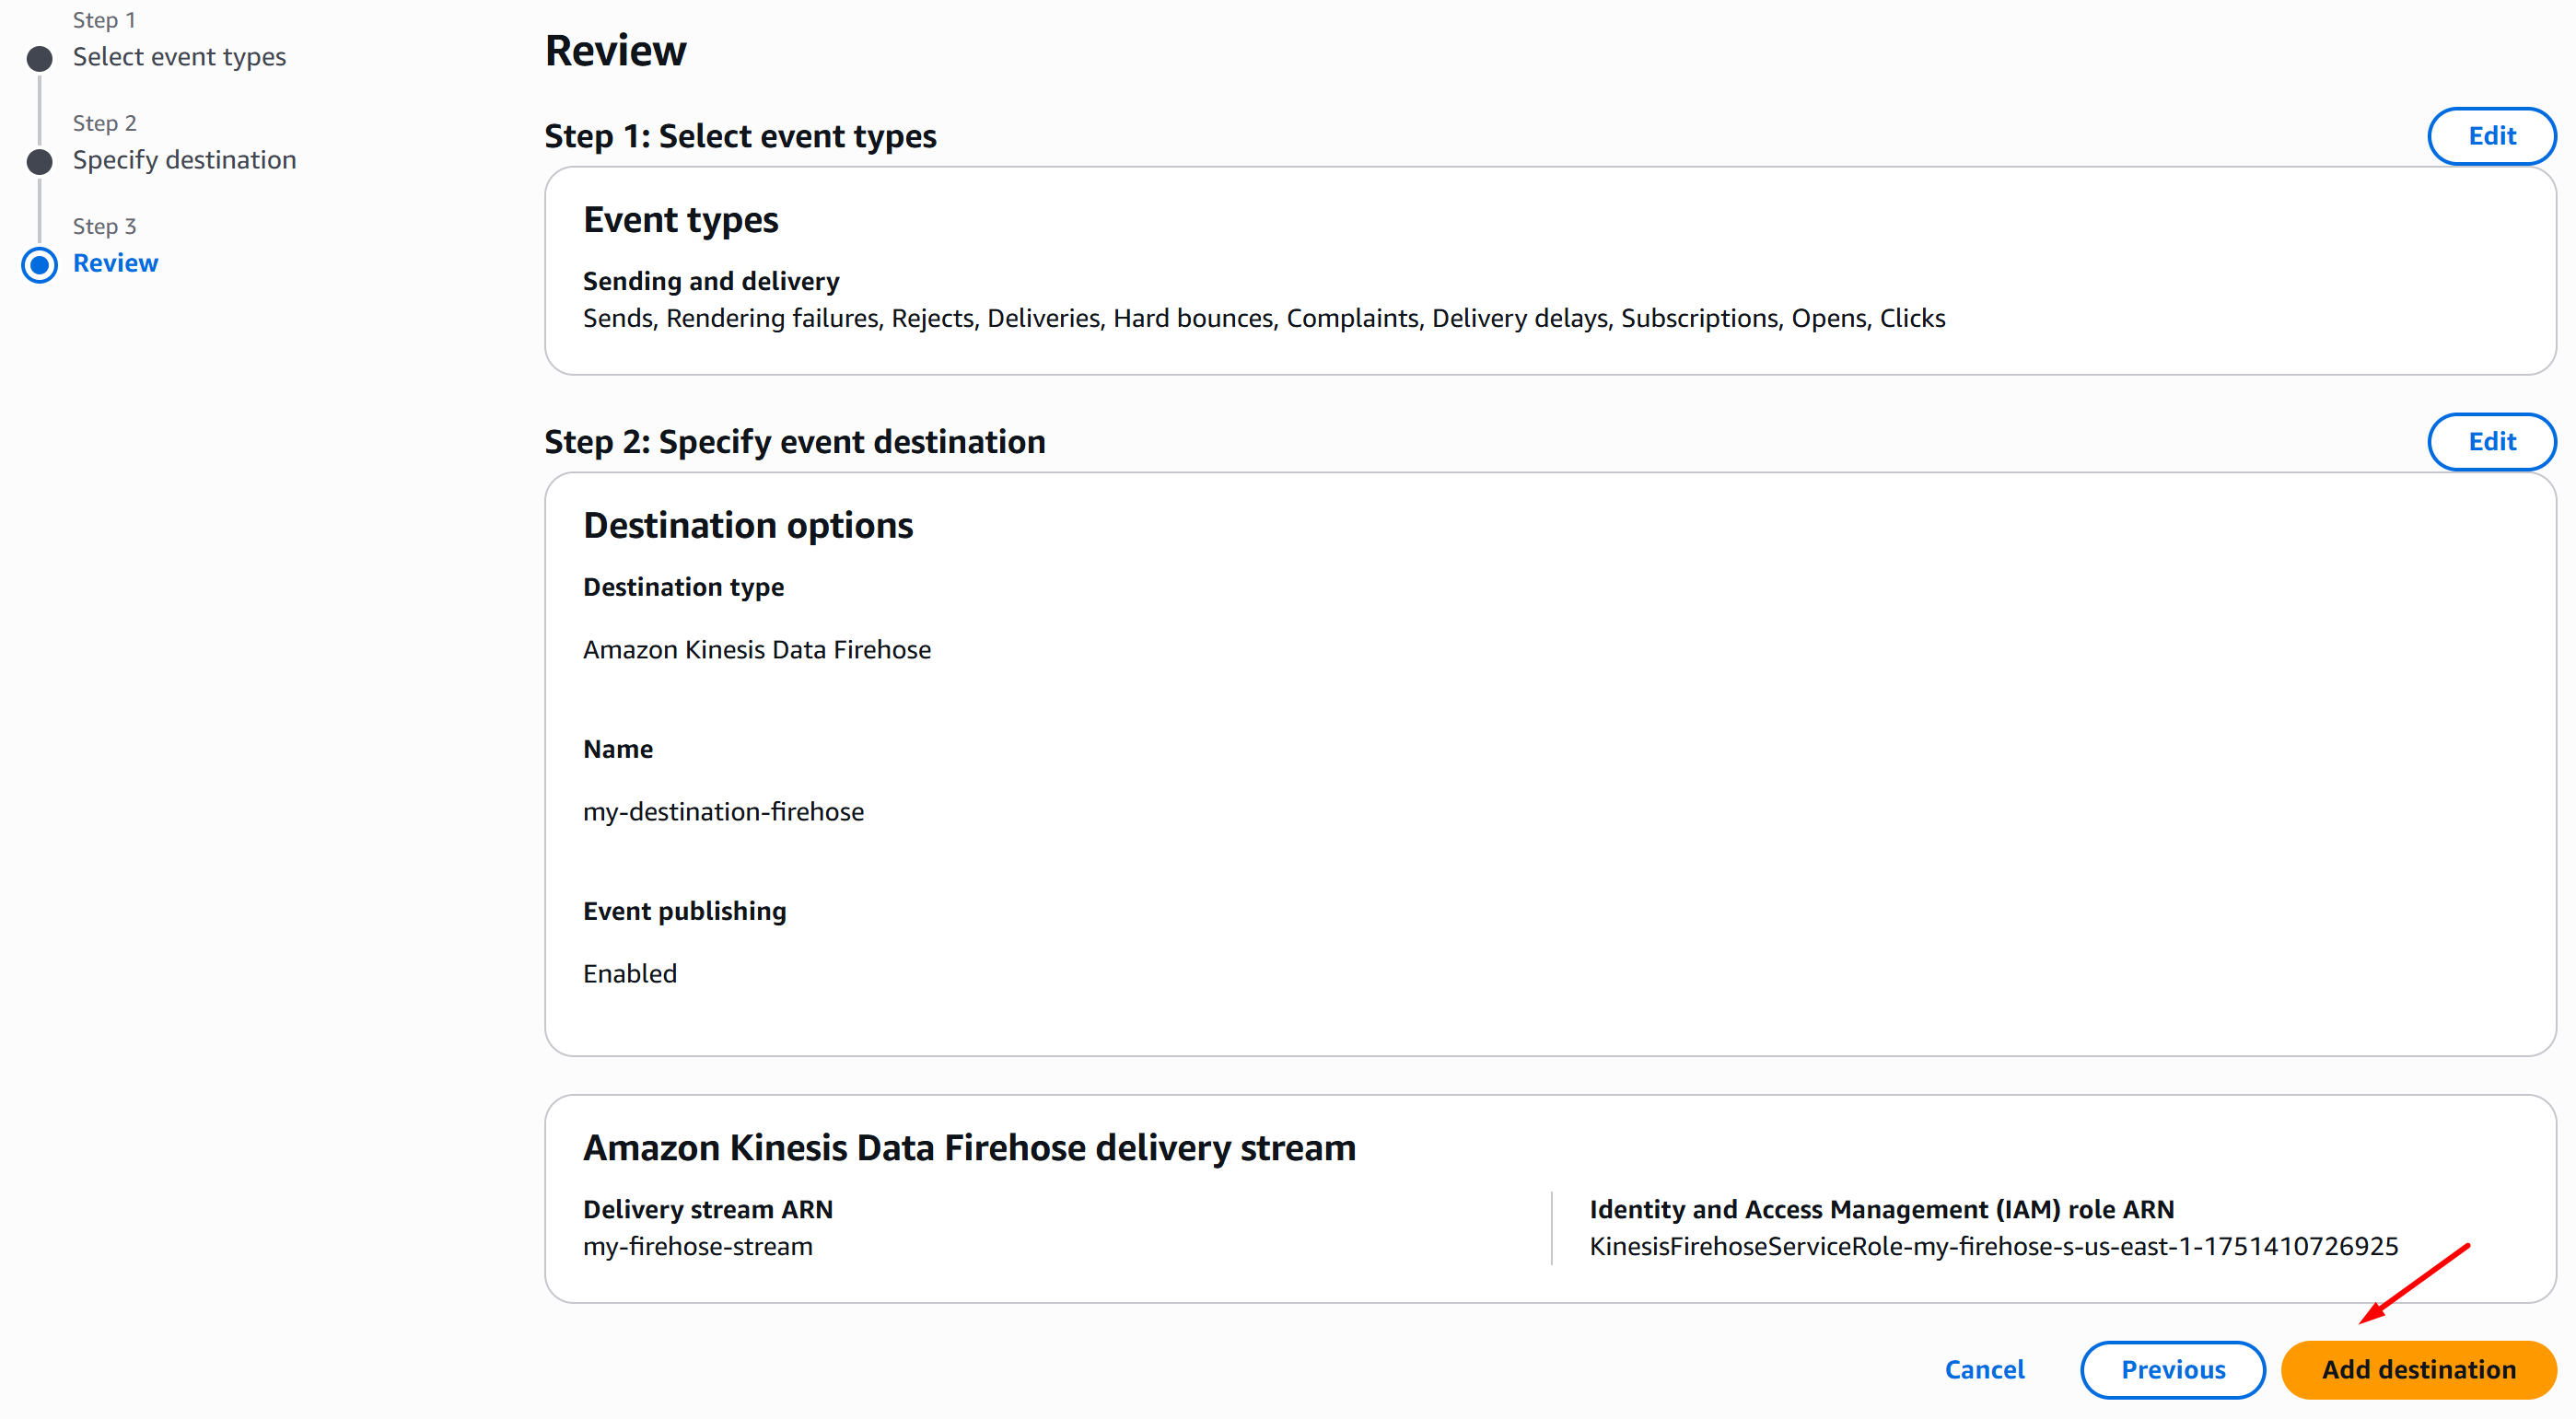
-
You will notice that you’ll get an error: The input you provided is invalid, and this is to be expected, because we need to set a trust relationship policy on the IAM Role:

-
Open a new tab on your browser and go to AWS console IAM > Roles and search for your IAM Role, in this case:
KinesisFirehoseServiceRole-my-firehose-s-us-east-1-1751410726925, then click it:
-
On the Trust relationships tab, click Edit trust policy and replace the policy definition with the one below. Once done, click Update policy:
-
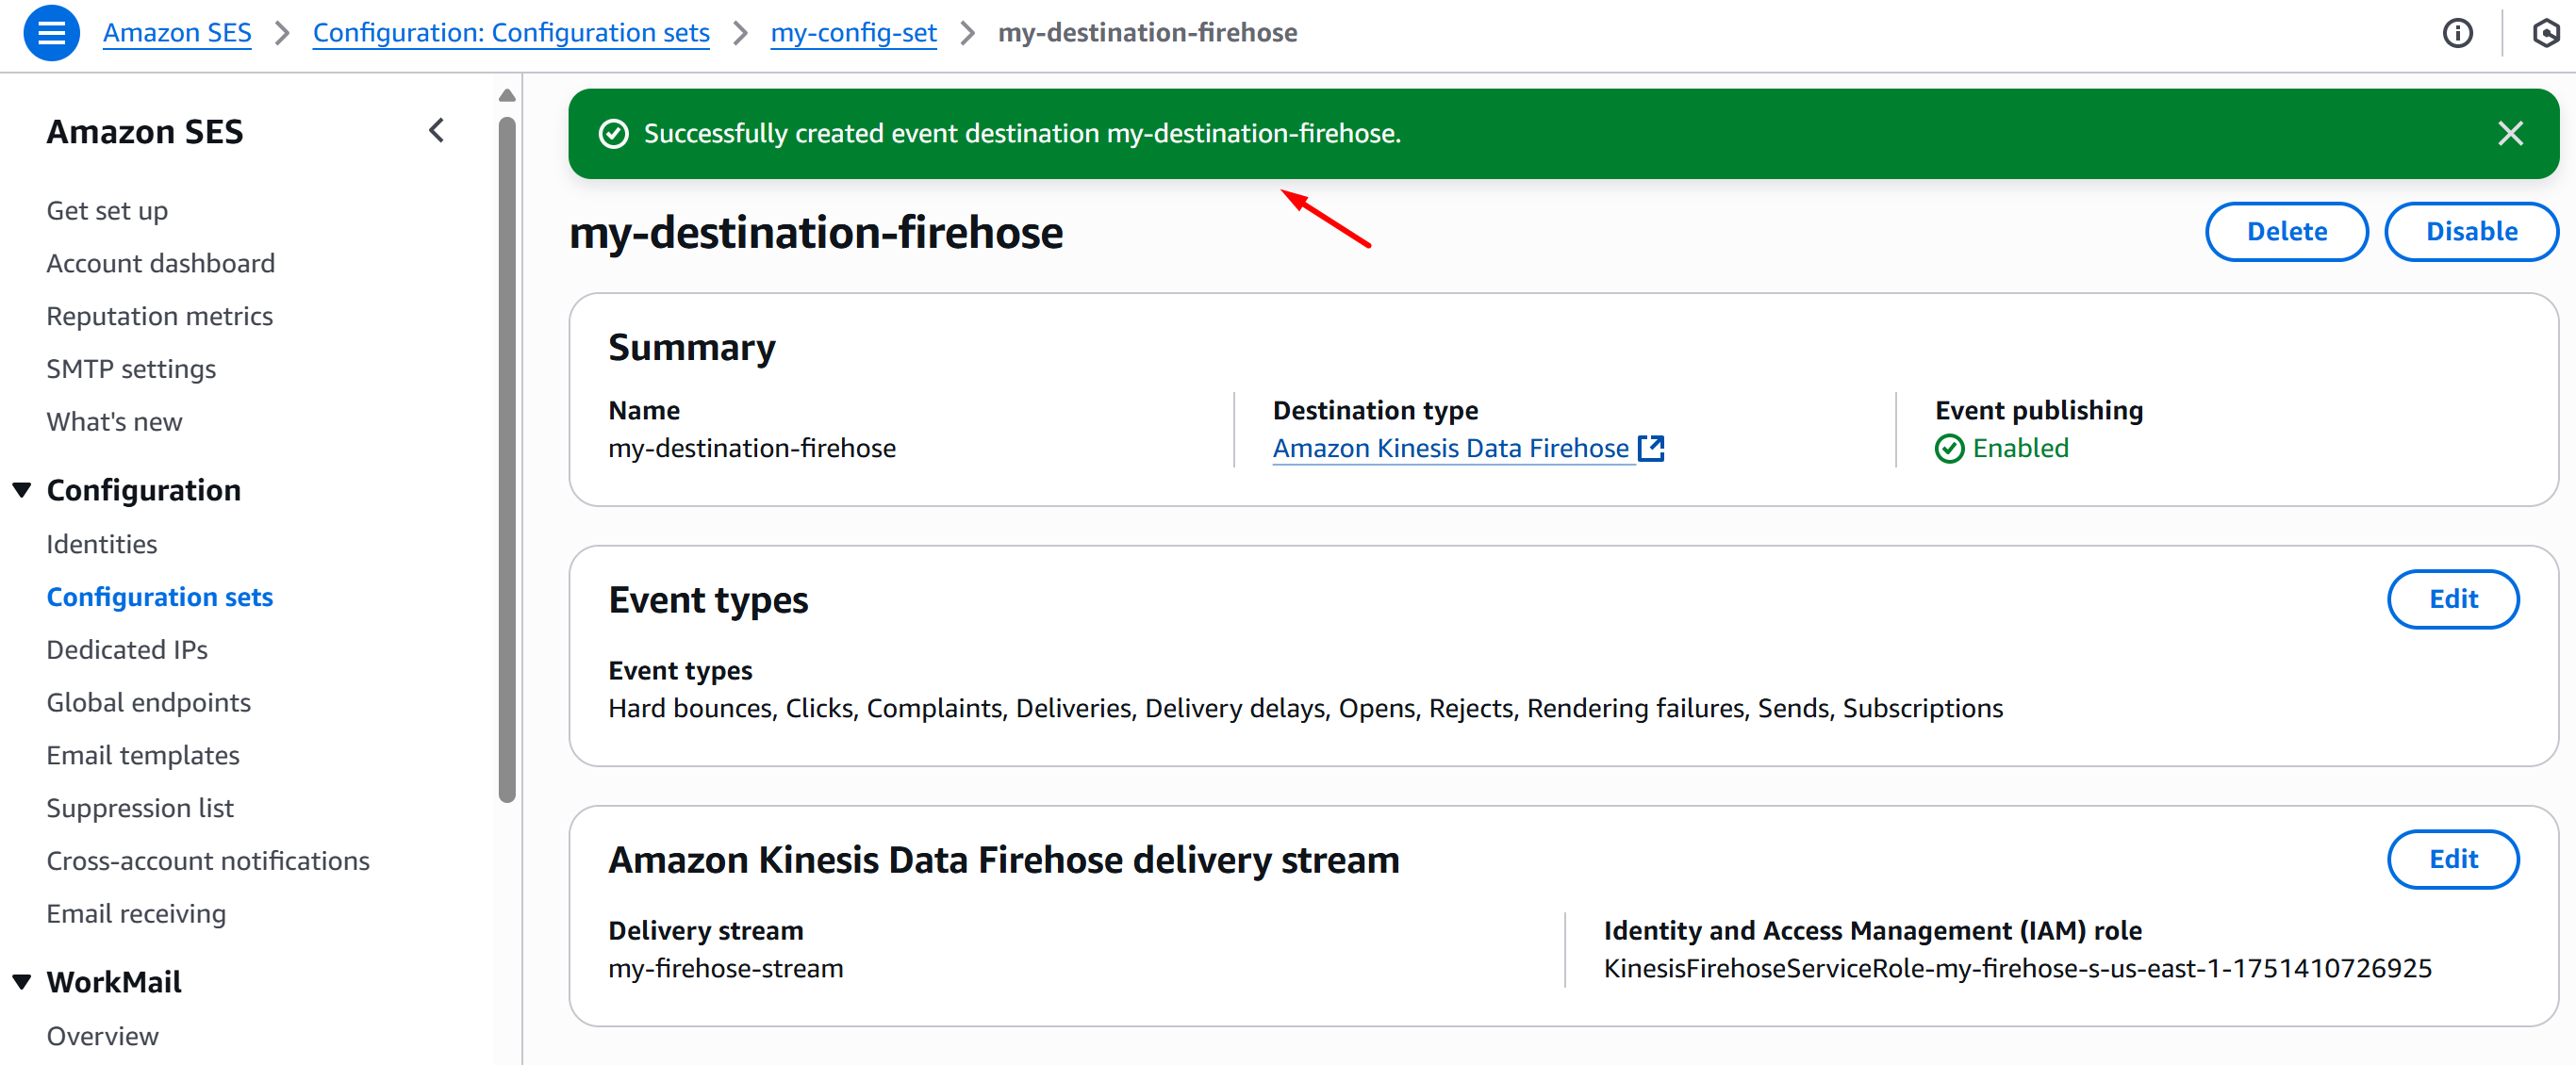
Once the trust policy is updated, head back SES Add event destination and click Add destination. The config should now push through.
AWS SES to Callback Service API data stream configuration
This section covers the configuration of streaming data from Simple Email Service (SES) to RPI Callback Service API.
Requirements
The following resources are required to be provisioned:
Configuration
-
Go to your AWS SES Console and select Configuration sets > Create set:
-
Fill in the Configuration set name, choose your Sending IP pool, and click Create set:
-
Once you’ve successfully created a Configuration Set, select Event Destinations > Add destination:
-
On the Select event types page, click Select all and Next:
-
On the Specify destination page, choose Amazon SNS, fill in the destination Name, select your SNS topic, and click Next:
-
On the Review page, once you’ve validated your config, click Add destination:
-
Now go to AWS Console Lambda > Functions and click Create function:

-
Set the settings below and click Create function:
-
Choose one of the following options to create your function: Use a blueprint
-
Blueprint name: Process messages pushed to an SNS topic (nodejs18.x)
-
Function name: Fill in your function name
-
Execution role: Create a new role with basic Lambda permissions
-
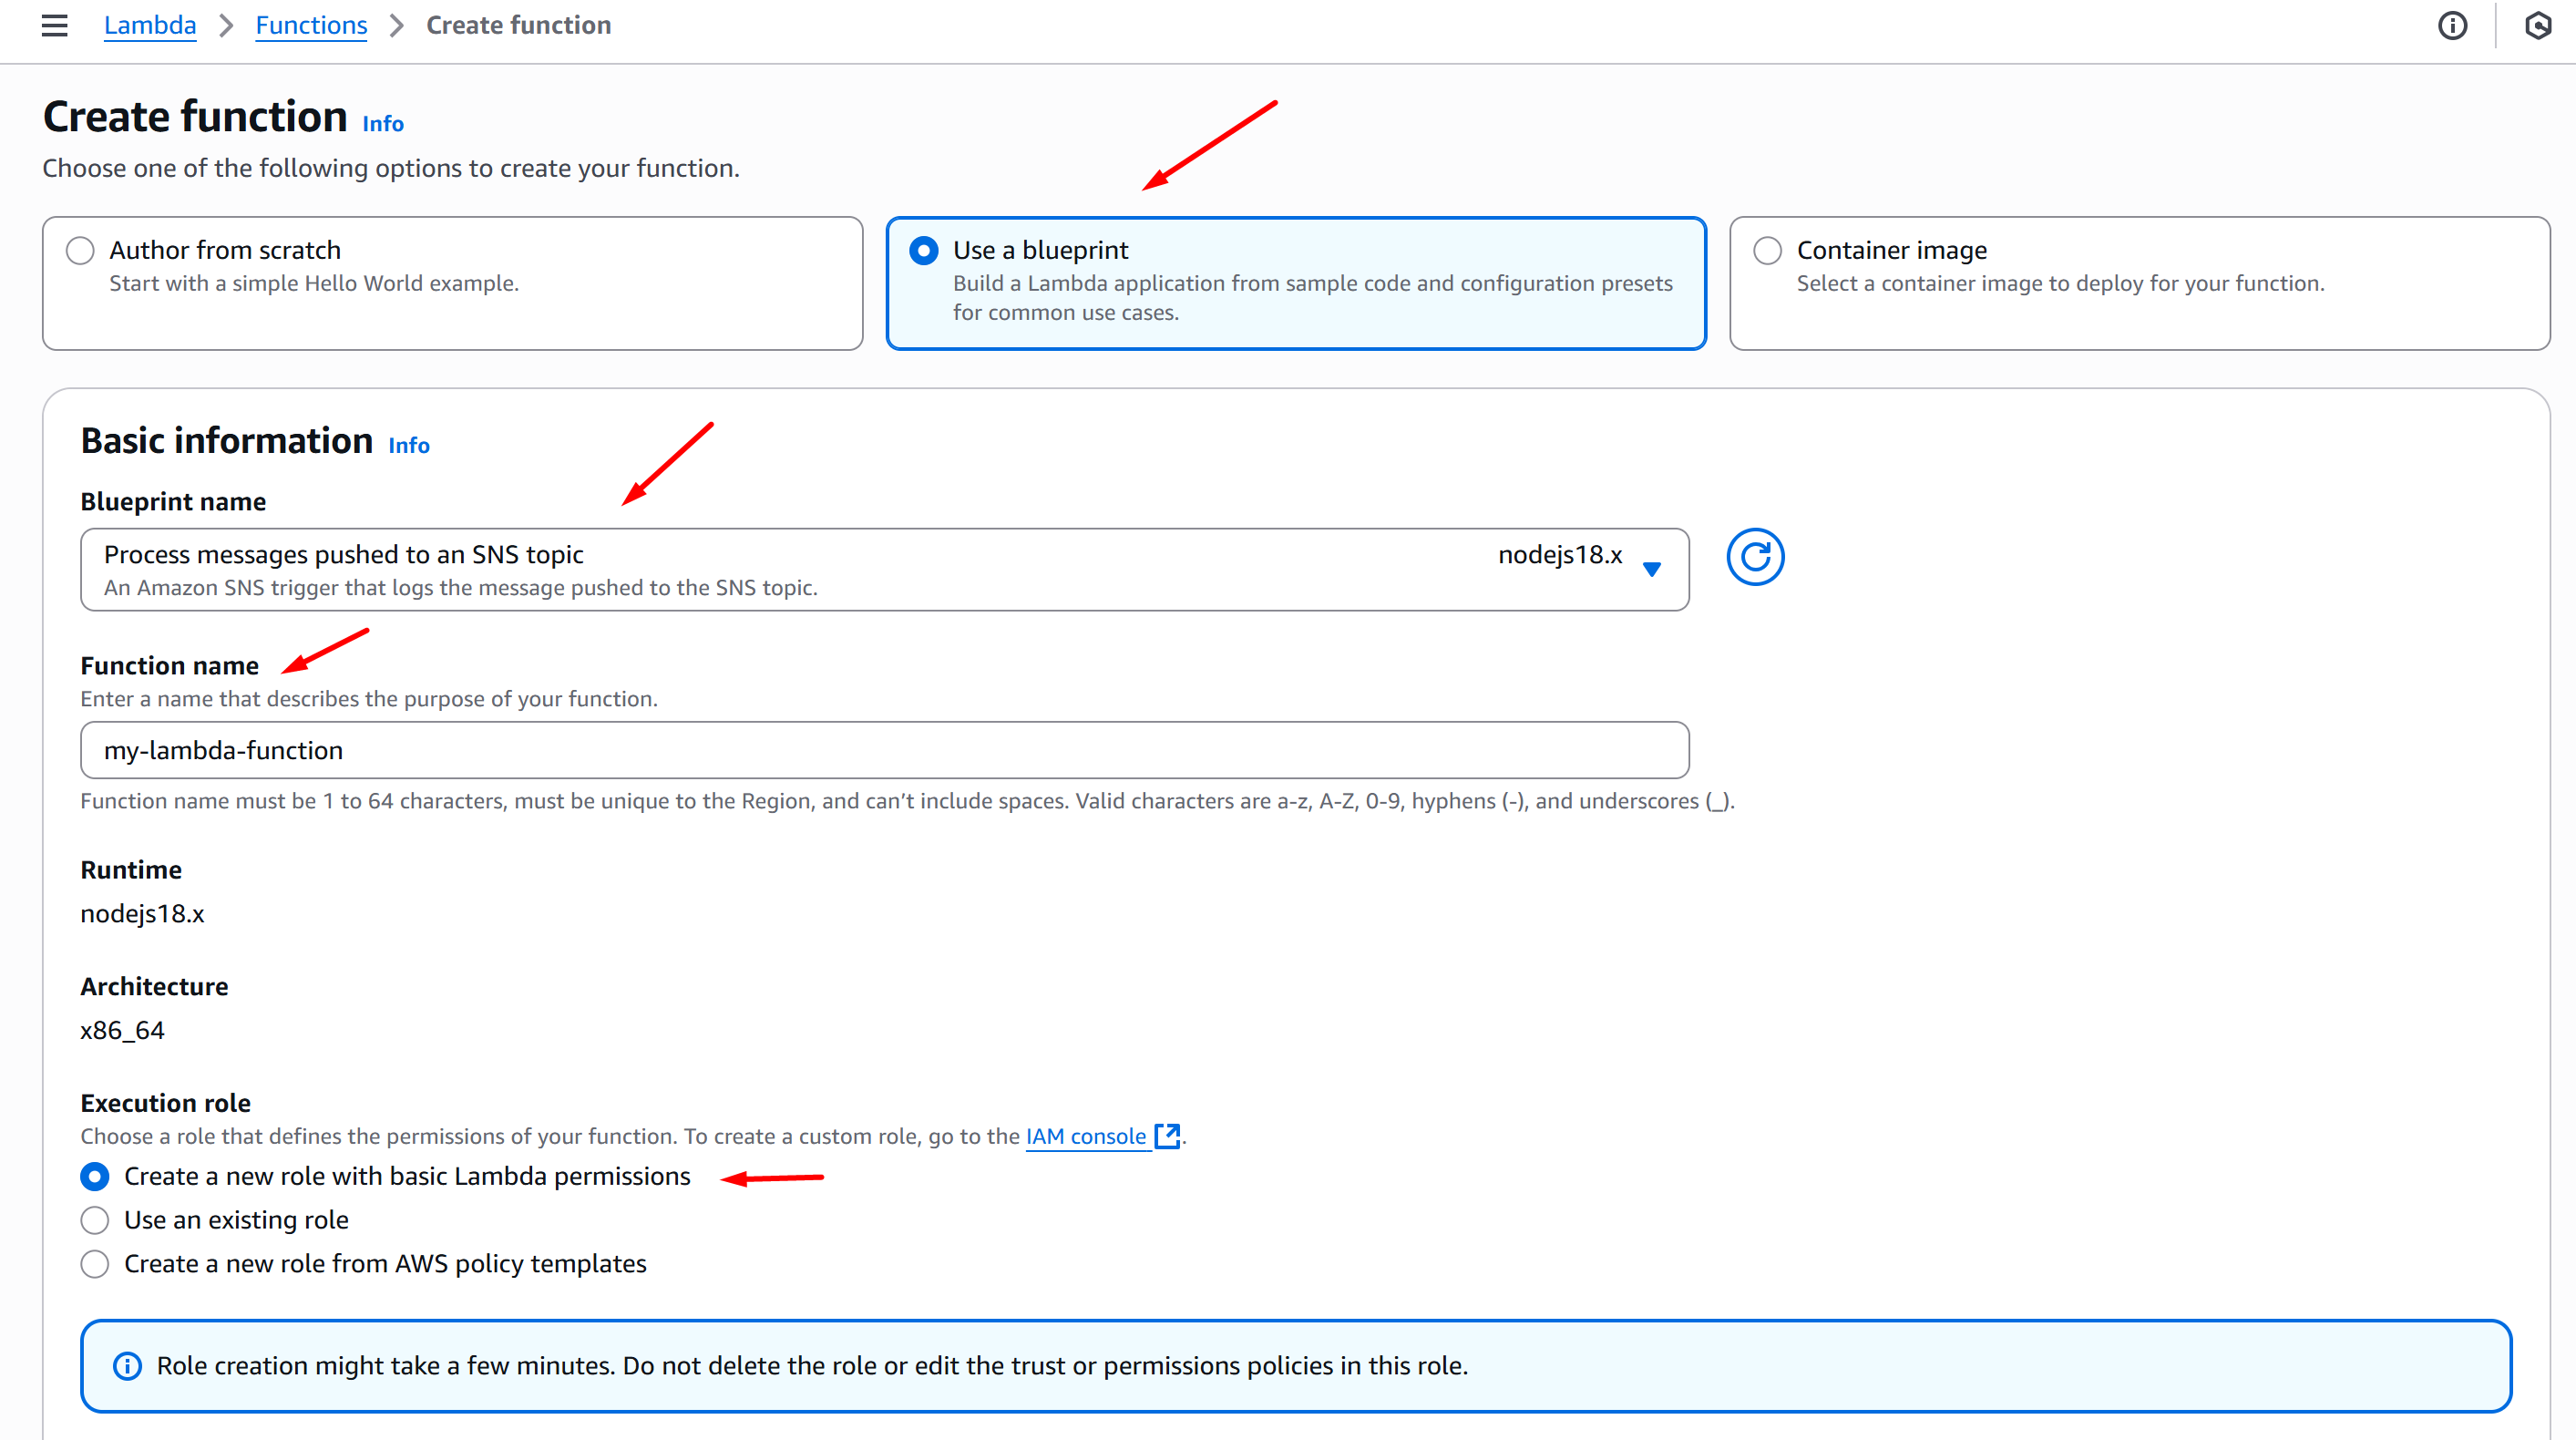
-
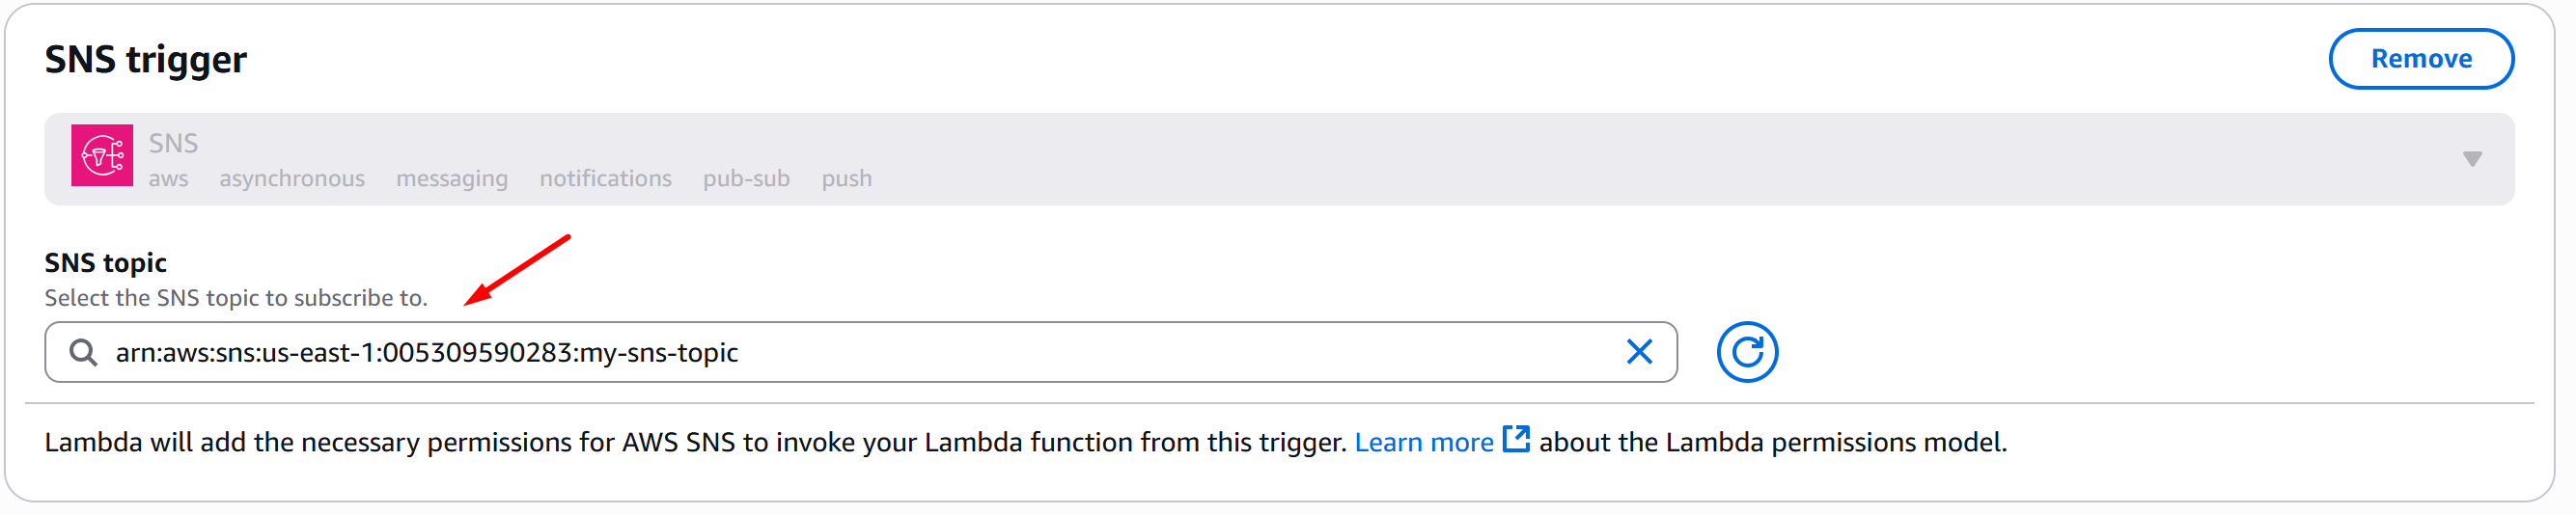
SNS trigger: Choose your SNS topic
-
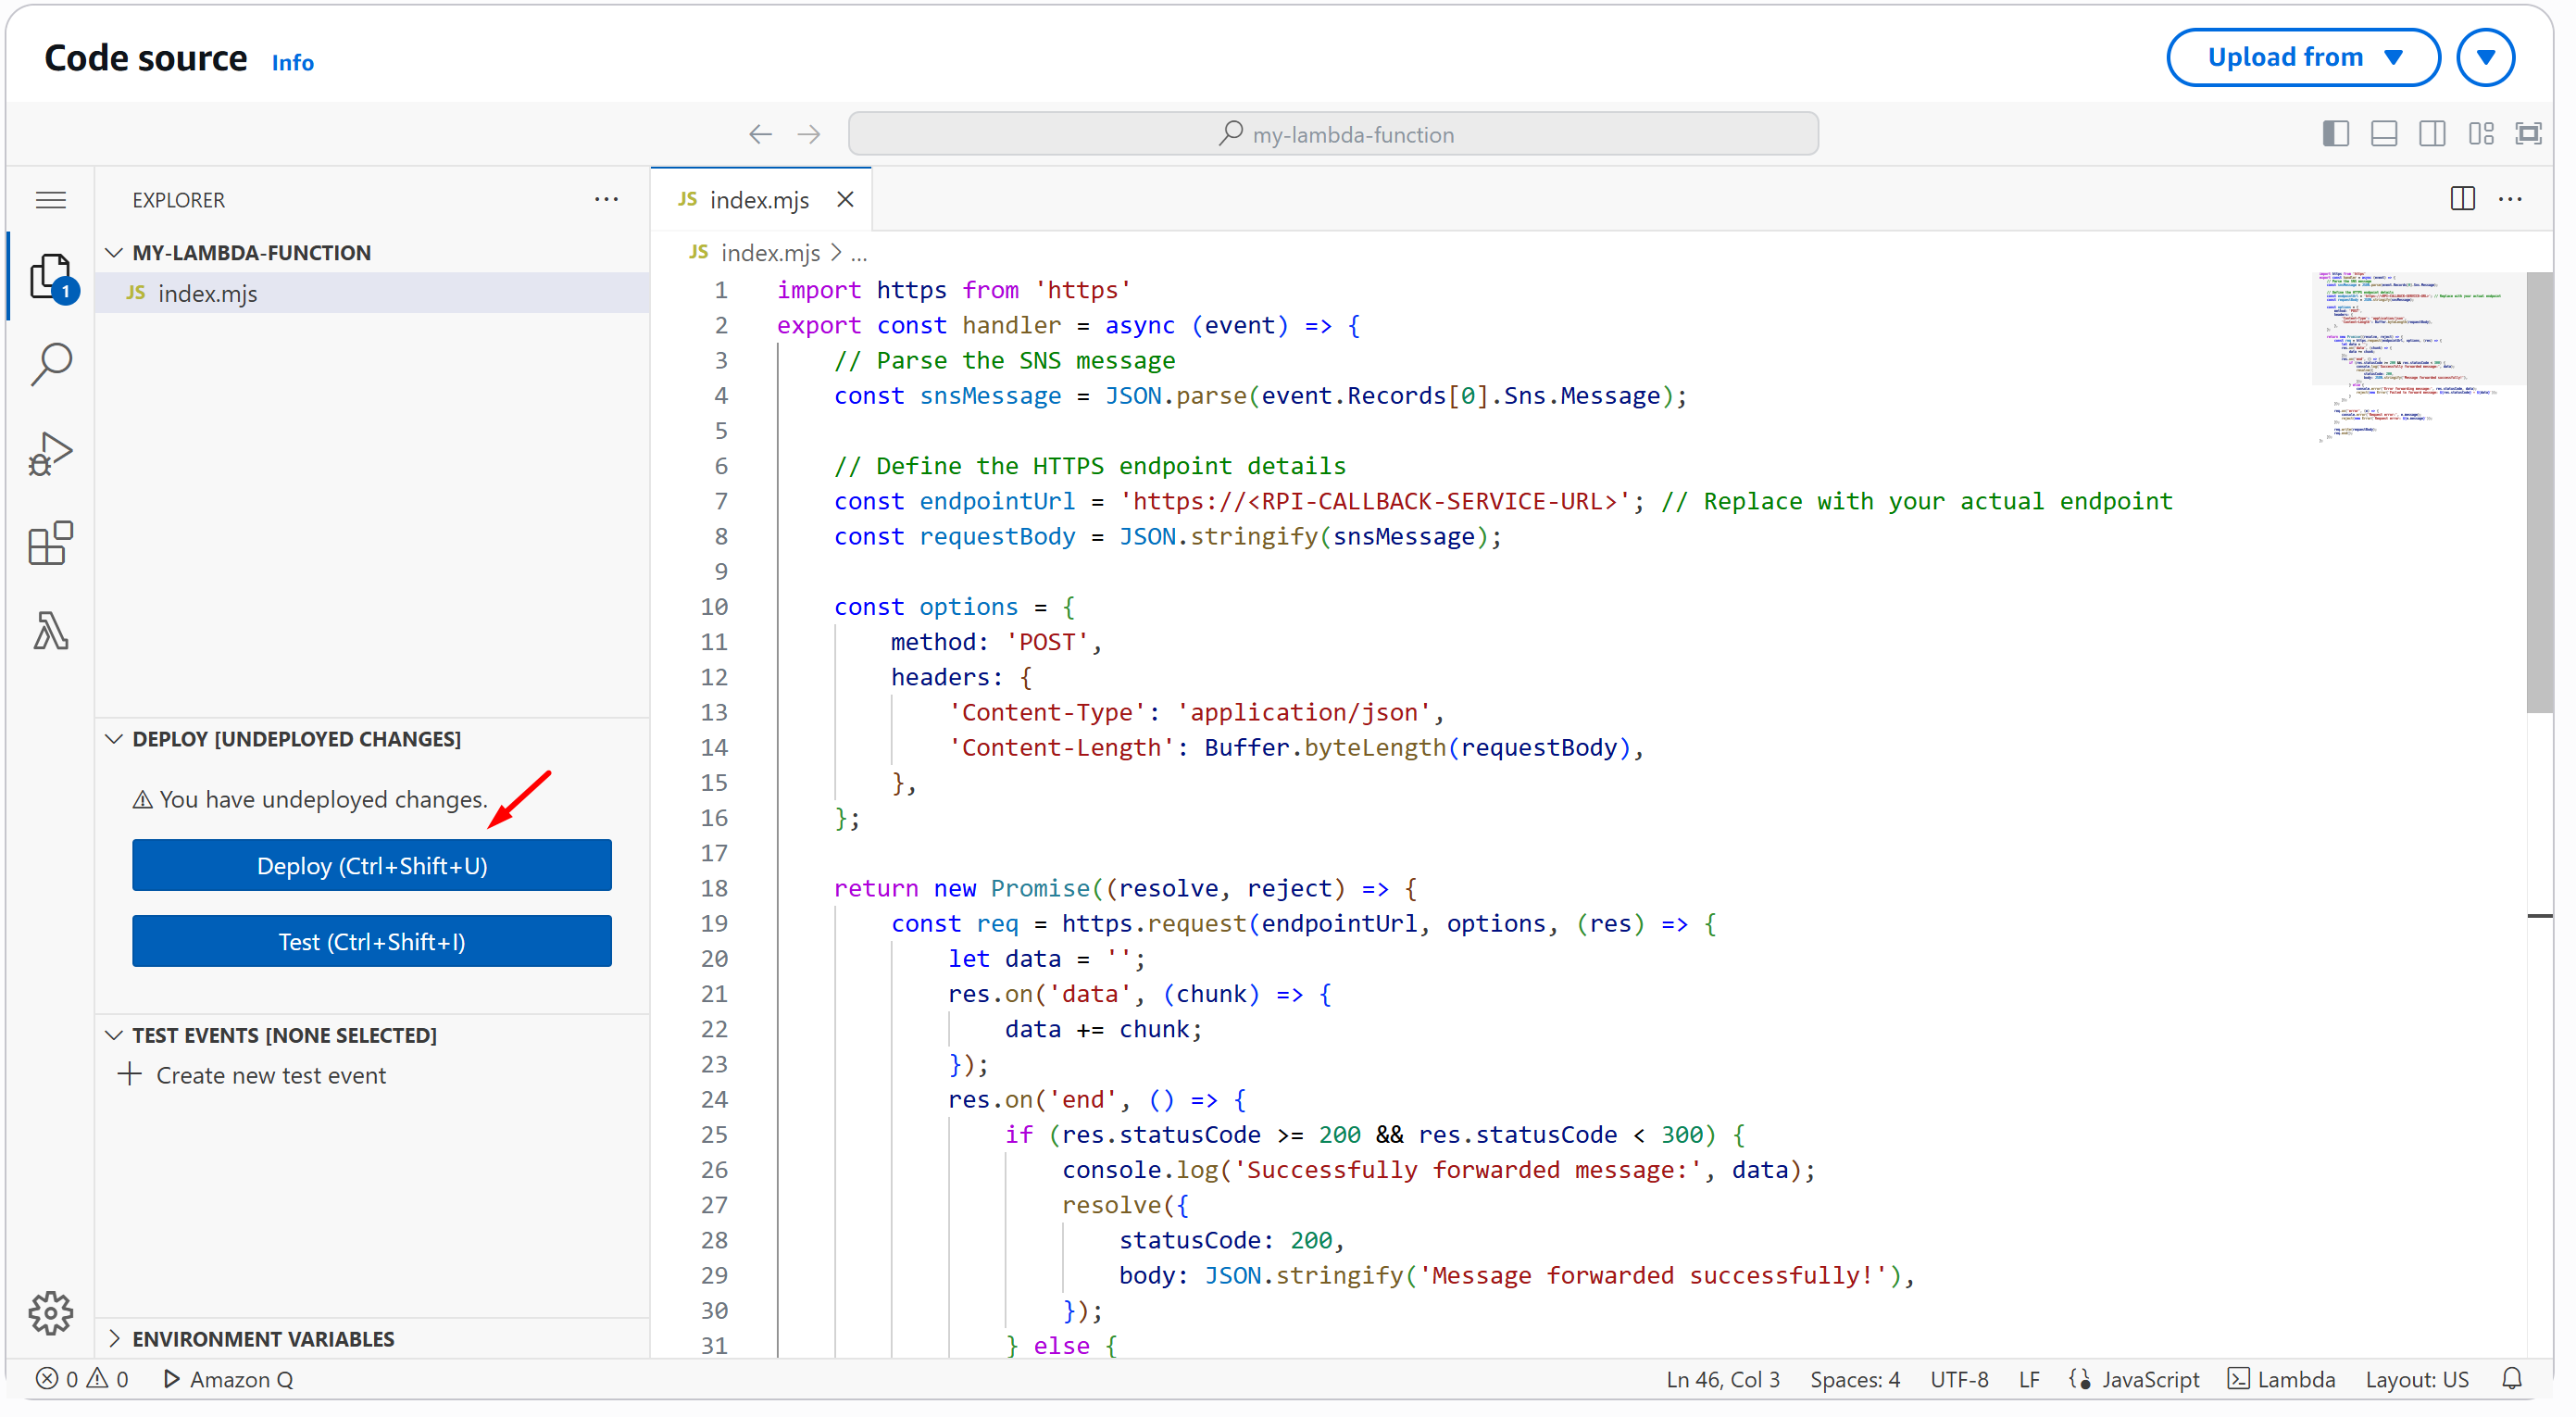
Now, on the Code source, replace with the one below and click Deploy (Ctrl+Shift+U):
-
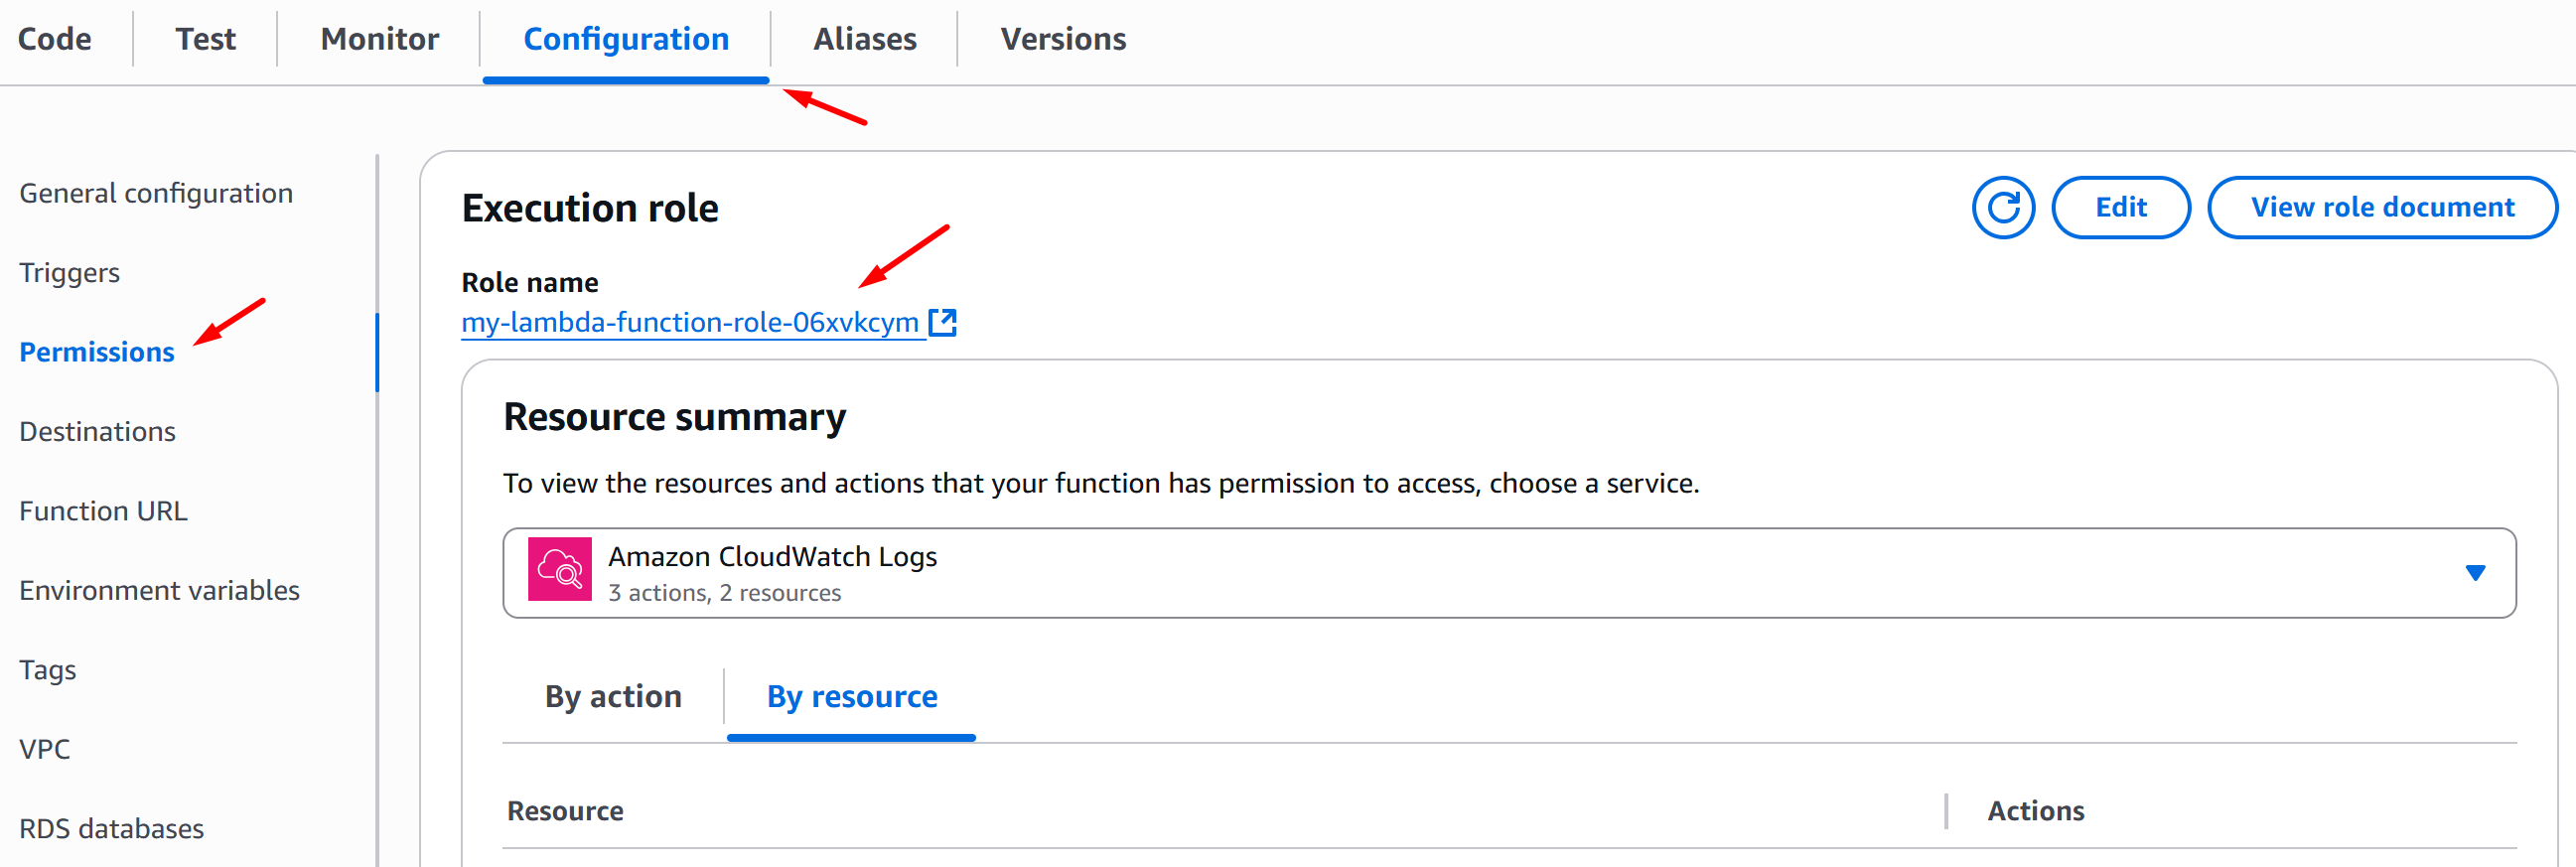
Now, go to Configuration tab > Permissions, click the Role name, and it will open a new browser tab:
-
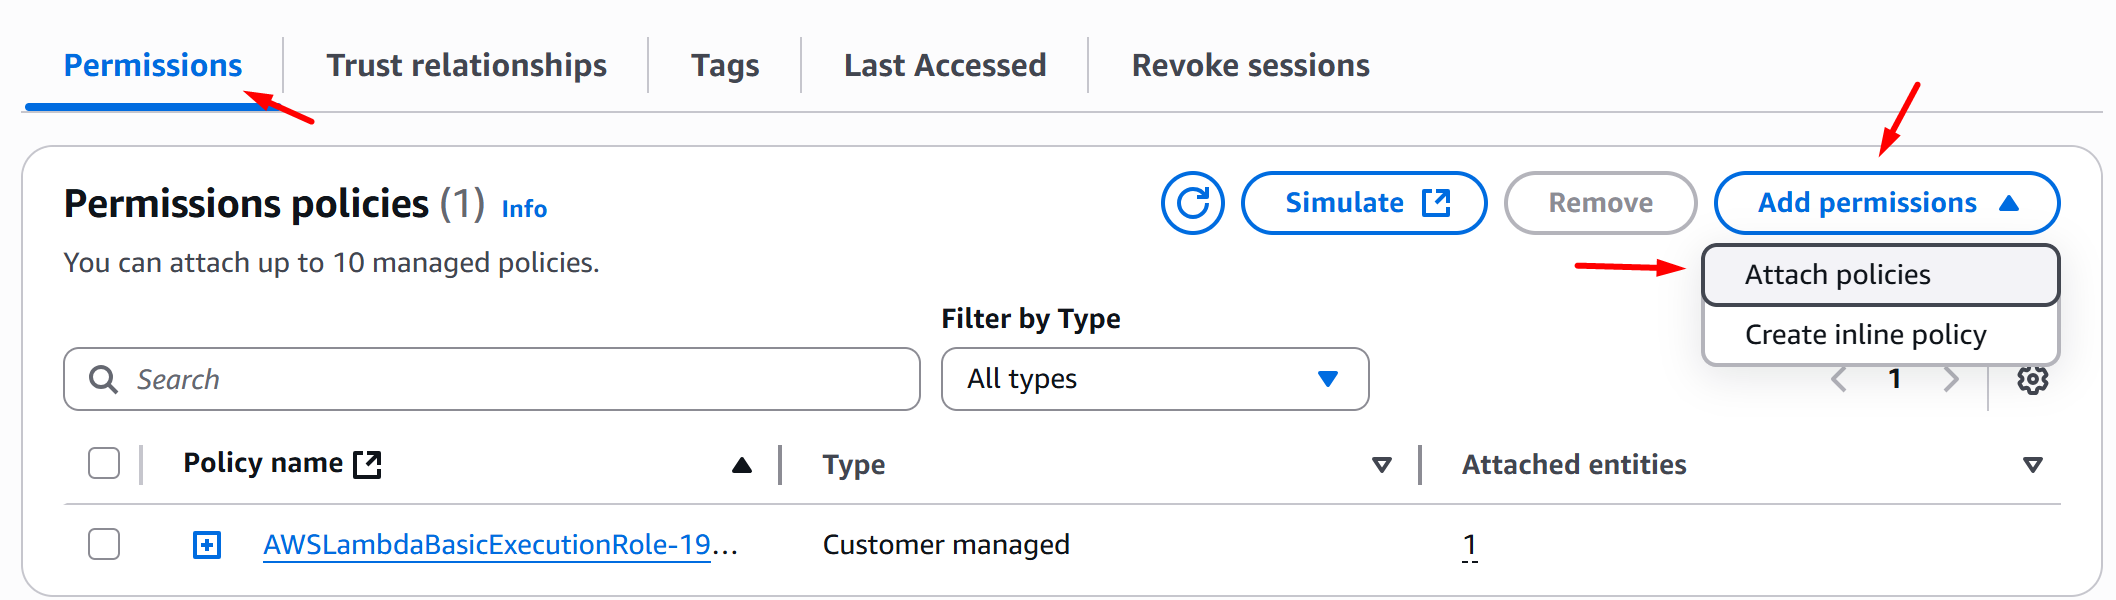
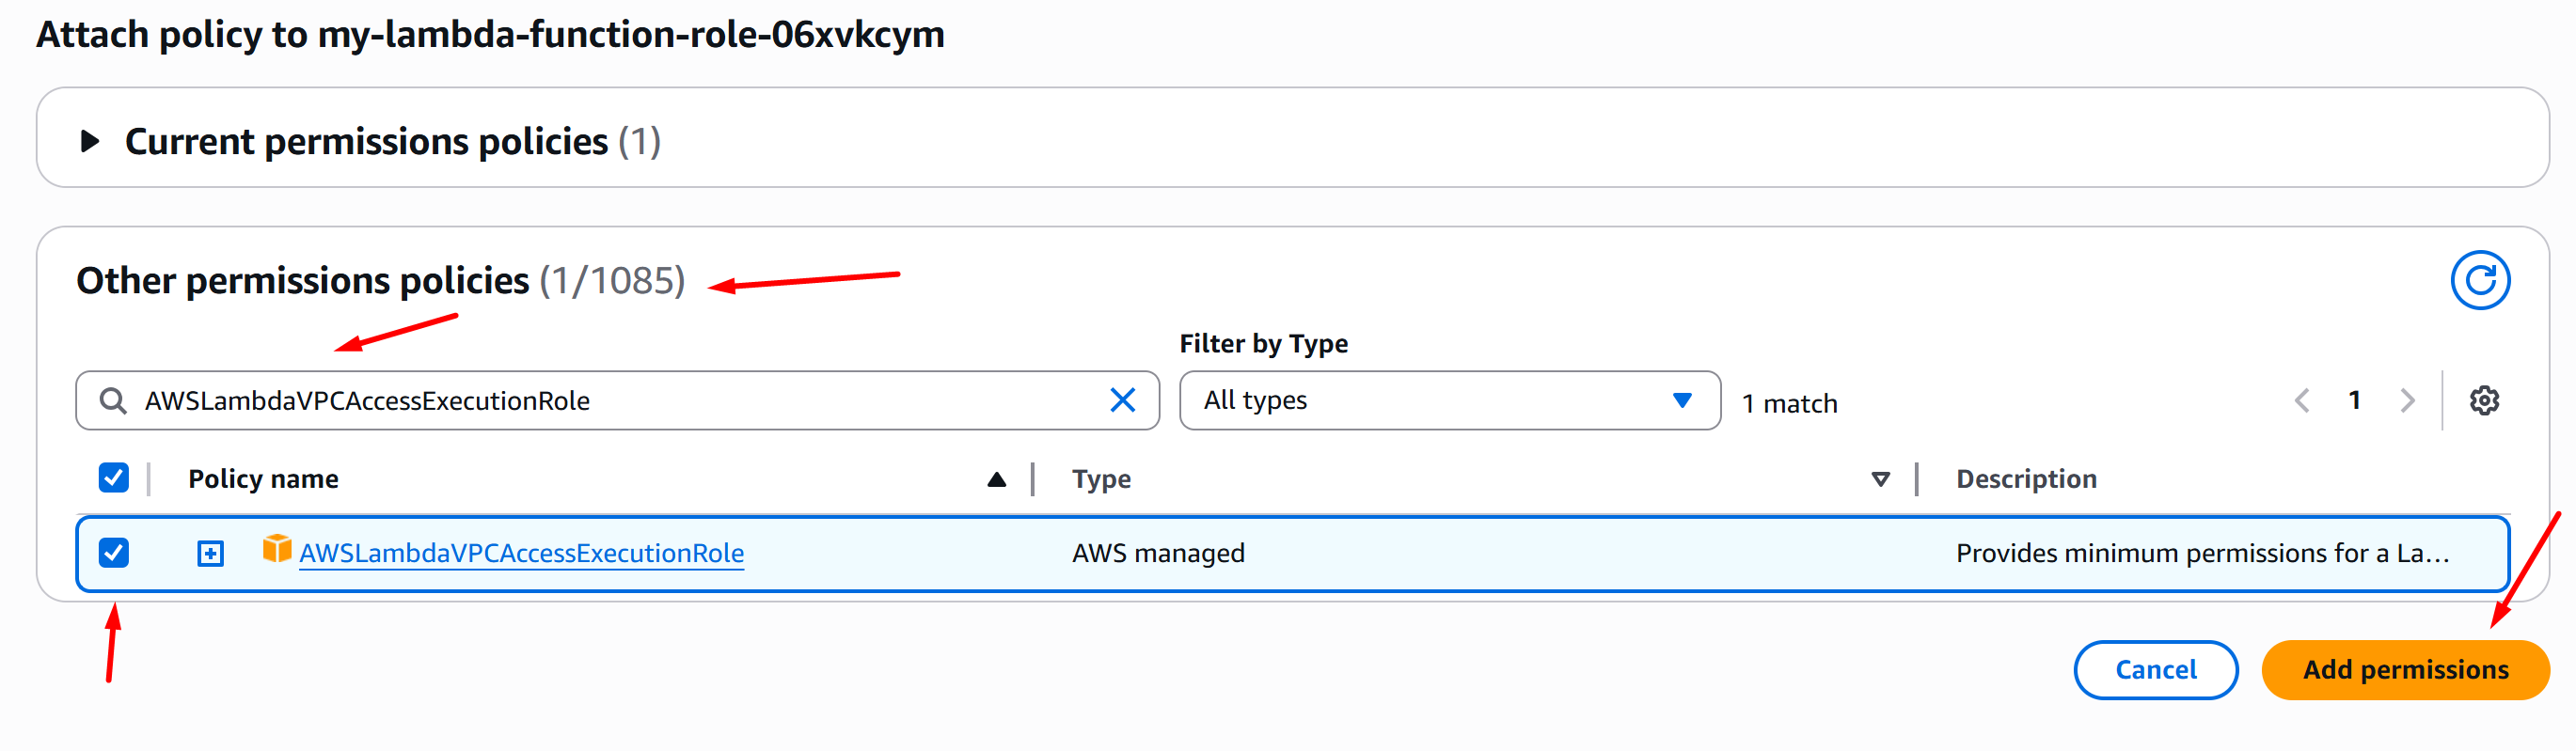
On the Permissions tab, choose Add permissions > Attach policies:
-
On the Other permissions policy section, search for AWSLambdaVPCAccessExecutionRole, tick the check box of the policy and click Add permissions:
-
Now, go back to AWS Console Lambda and click your function. Then go to Configuration tab > VPC and click Edit:

-
On the Edit VPC page, choose your VPC, Subnet, and Security groups, then click Save:
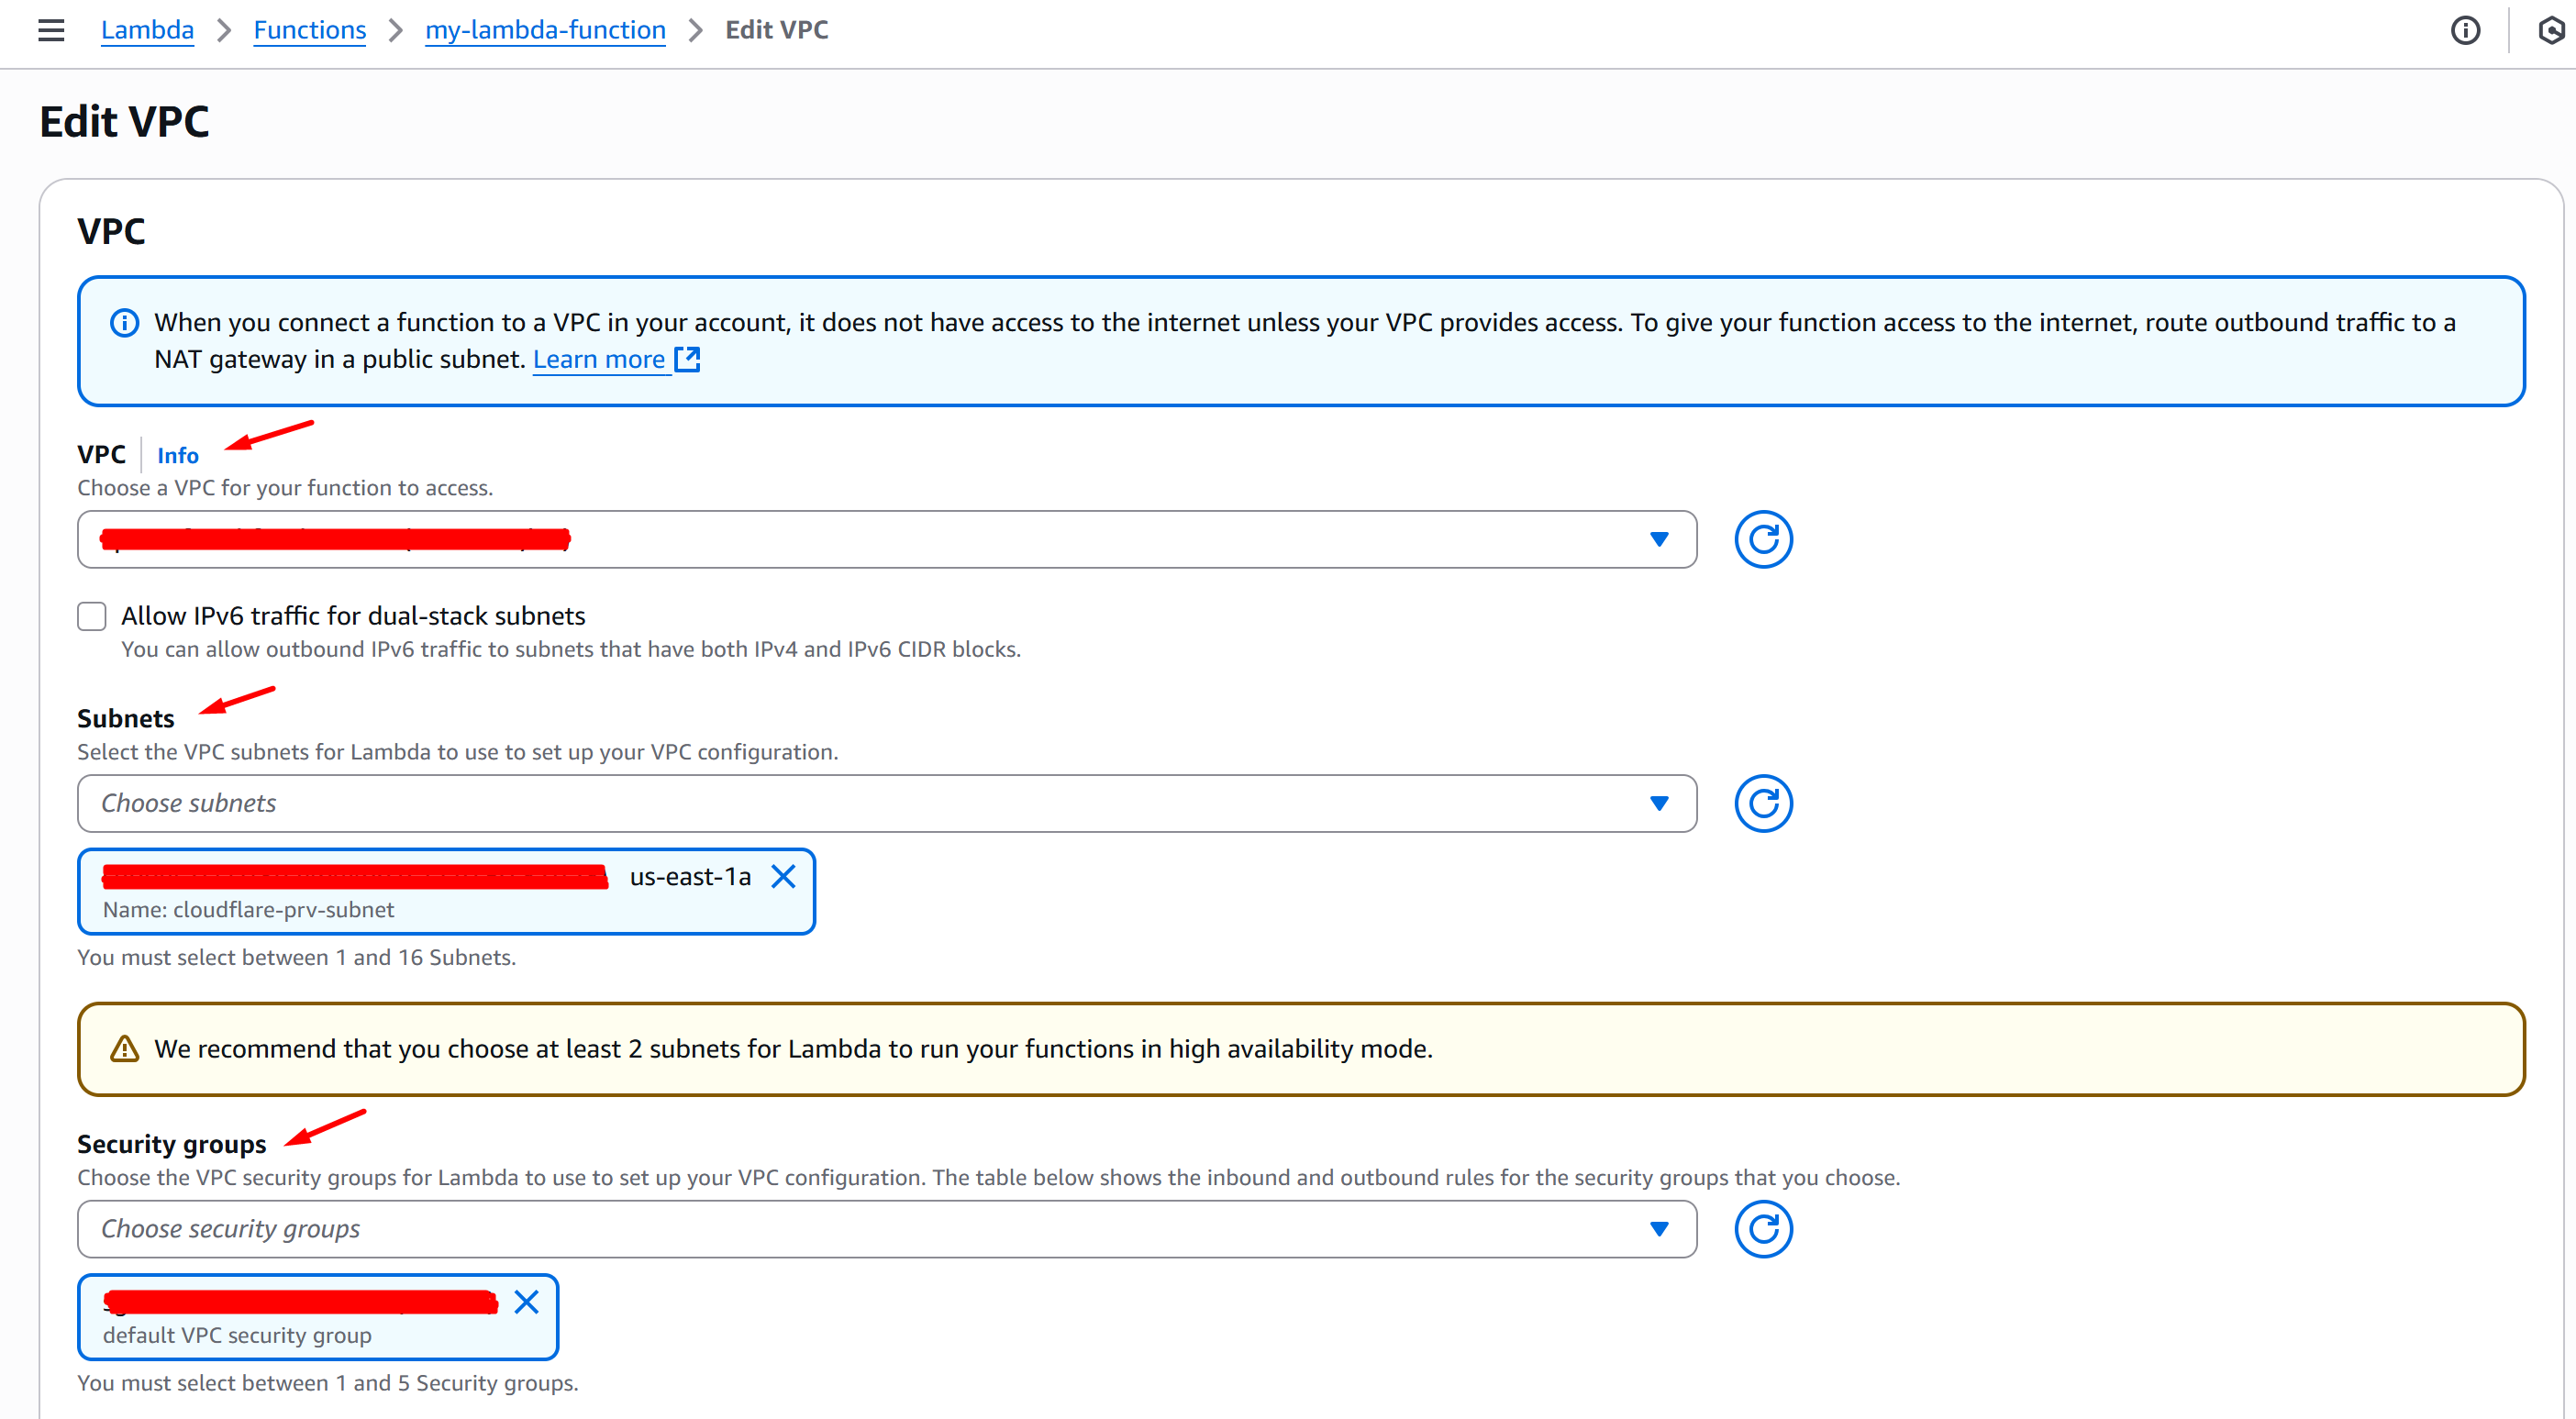
Lambda Function is now integrated on VPC.