

Overview
RPI supports the use of the Keycloak and Okta OpenID connection (OIDC) providers to authenticate users accessing RPI.
OIDC providers Keycloak and Okta have been validated for use with RPI. Separate sections describe how to configure the aforementioned RPI applications for each.
Adjust these values to match your environment's configuration:
OpenIdProviders:
  enabled: true
  name: KeyCloak
The following values.yaml settings are provided to configure OpenID Connect:
|
Setting |
Description |
|---|---|
|
|
Set to |
|
|
Name of the OpenID Connect provider. Supported providers are: |
|
|
Authorization host for OpenID Connect. The user will be taken to this page when logging into RPI using the OpenID authentication. |
|
|
The Client ID configured within the OpenID provider. |
|
|
Audience for the OpenID Connect authentication request. |
|
|
The redirect URL used for retrieving the token, as configured within the OpenID provider. |
|
|
If refresh tokens are disabled, the client will be logged off once the token expires, per the period configured within the OpenID provider. |
|
|
When set to |
|
|
When set to |
|
|
Custom scopes for OpenID Connect. This is the list of custom scopes required to request the OpenID access token. |
|
|
Query parameter name used to pass the id token on logout. The default value is |
|
|
|
Prerequisites
Before generating your overrides, set up your OIDC provider and gather the following values:
|
Value |
Where to find it |
|---|---|
|
Authorization Host |
|
|
Client ID |
The application/client ID from your identity provider's app registration |
|
Audience |
|
|
Redirect URL |
Your RPI Interaction API URL, e.g. |
|
Custom Scopes |
|
Complete your identity provider setup before generating your overrides so you have the required values ready.
Keycloak
The steps below assume the Realm has been created and configured within Keycloak.
Refer to the Keycloak documentation for steps on how to create the required components.
-
audience-
Log into the Keycloak portal, under the Realm configured for RPI.
-
Expand the “Clients” section.
-
For a typical install, the “account” Client ID is the default name for the audience. Set this value at the
audienceconfiguration setting.
-

-
authorizationHost-
As Keycloak is self-installed, the Authorization Host will be formatted as follows:
https://<fqdm>:<port>/auth/realms/<realm_name>. -
Set this value at the
authorizationHostconfiguration setting.
-
-
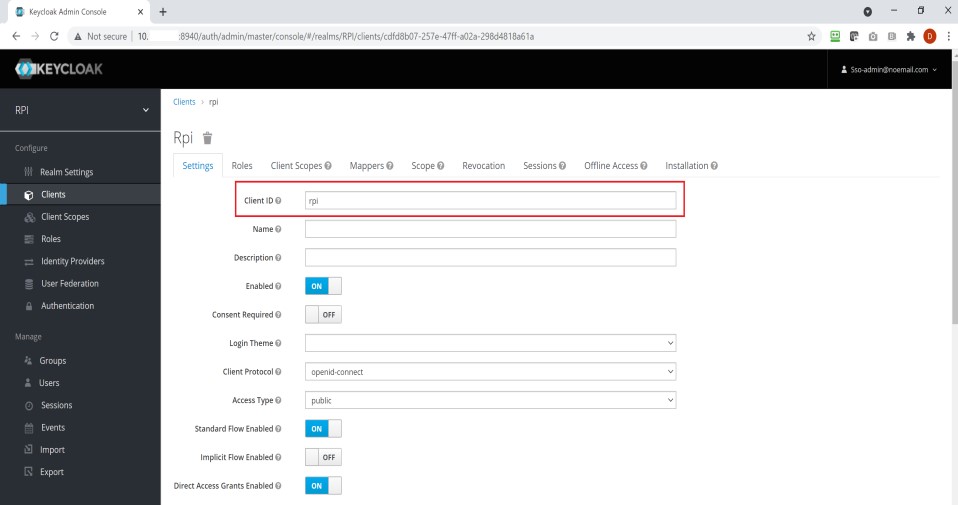
clientID-
Open the list of Keycloak Clients and select the client ID configured for RPI.
-
Copy the value in the “Client ID” text box and set the
clientIDsetting to the same.
-
-
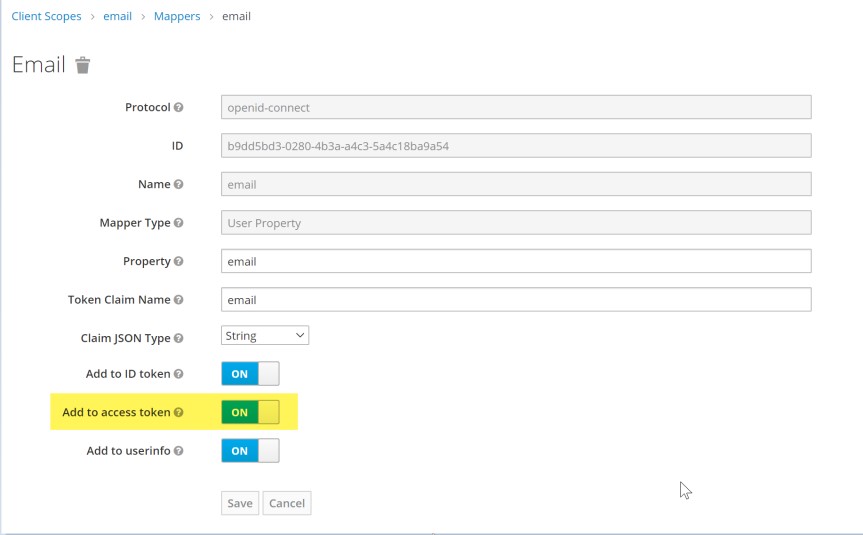
customScopes-
Custom scopes are not required for this provider; however, the email claim must be configured within the client scope. This feature is enabled by default, but can be confirmed by navigating to Client Scopes > Email > Mappers > Email. Ensure the Add to access token option is turned on.
-
-
redirectURL-
Open the client settings for the Keycloak client configured for RPI.
-
Under the Settings tab, scroll down to the Valid Redirect URIs configuration setting and select the +@ icon to add a new redirect URI. This must be a valid and accessible URL with the
https://protocol. -
Use the same URL at the
redirectURLsetting. -
Select the Save button once the URI is updated.
-
Okta
The steps below assume the application has been created within Okta.
Refer to the Okta documentation for steps on how to create the required components.
-
audience-
Log into the Okta portal and expand the “Security” section.
-
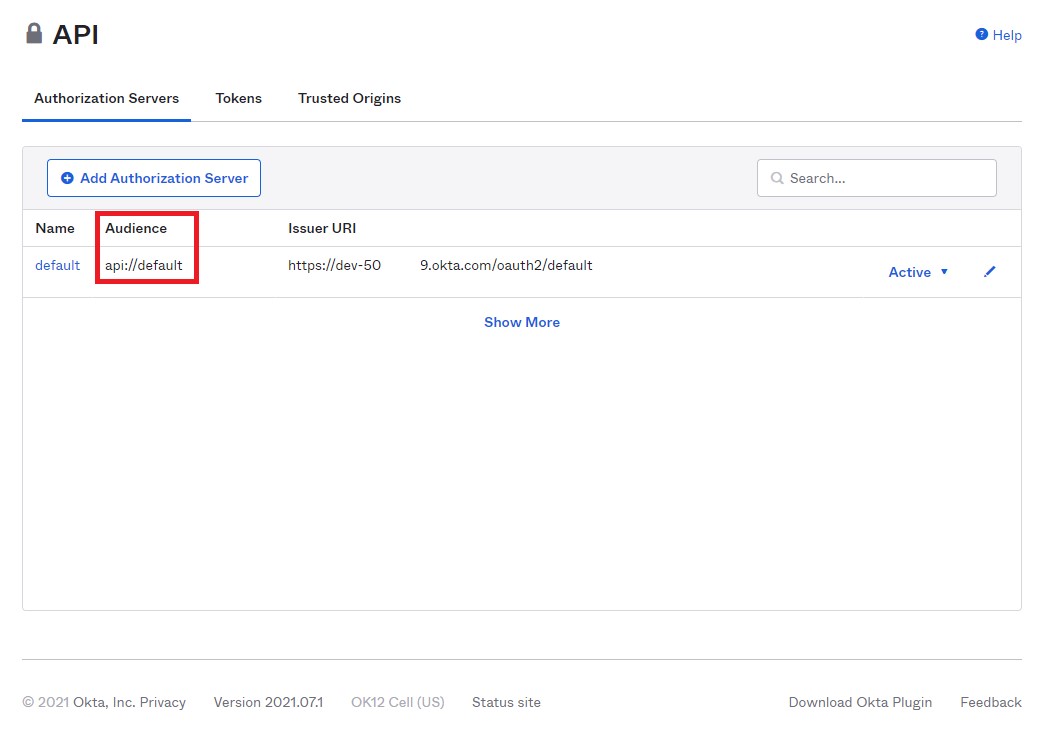
Select the “APIs” link.
-
Under the “Authorization Servers” tab, copy the value in the Audience column and paste the value into the
audienceconfiguration setting.
-
-
authorizationHost-
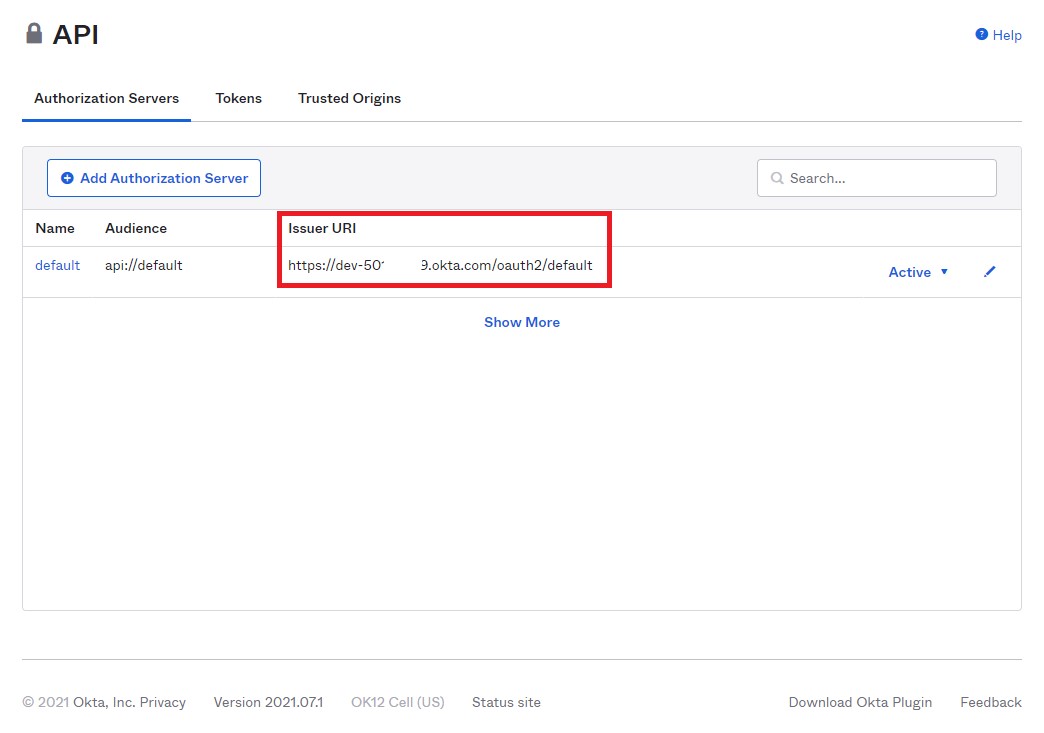
Open the API configuration screen.
-
Copy the value in the “Issuer URI” column of the “Authorization Servers” tab and paste the value into the
authorizationHostsetting.
-
-
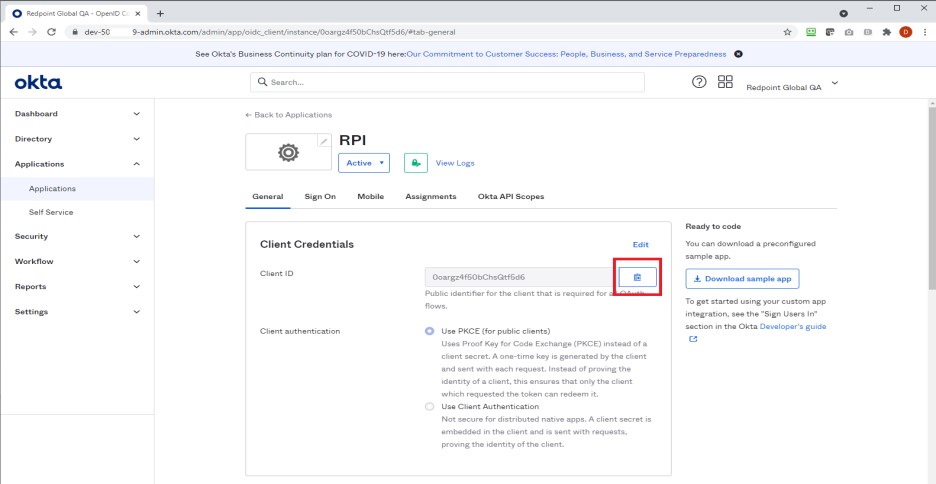
clientID-
Expand the “Applications” section and select the “Applications” link to view the list of configured applications.
-
Proceed by selecting the application created for use in RPI.
-
Under “Client Credentials”, select the copy Client ID button and paste the value into the
clientIDsetting.
-
-
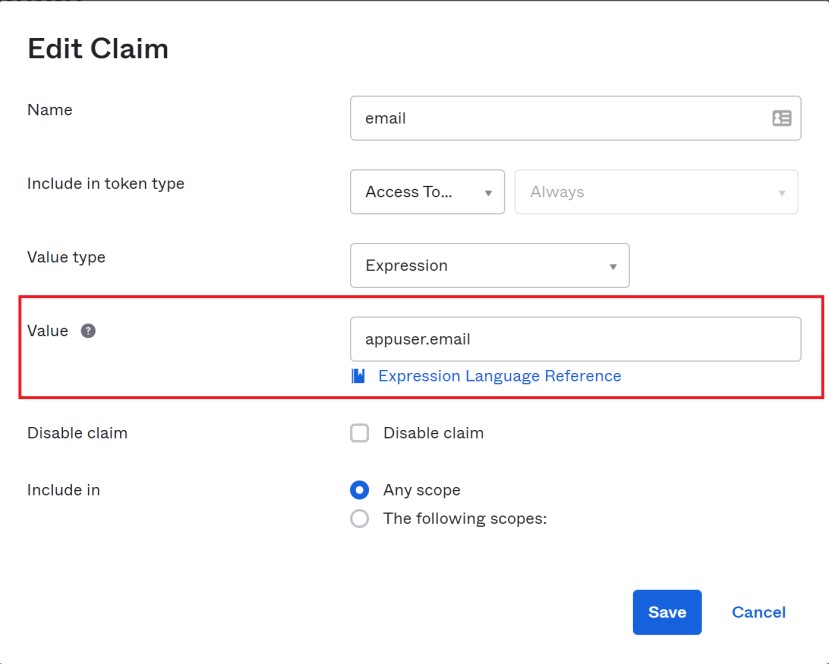
customScopes-
Custom scopes are not required for this provider; however, the email claim must be configured within the Audience, as covered above. To add the email claim, expand the “Security” section and select the “APIs” link. Select the “Name” link of the Audience to open the configuration. Once in the configuration, select the “Claims” tab and select the Add Claim button.
-
Enter “email” for Name and “appuser.email” for Value.
-
Select the Save button.
-
-
redirectURL-
Open the settings for the RPI Okta application.
-
Under General Settings, select the Edit link.
-
Scroll down to the LOGIN section of the settings and enter a URL in the “Sign-in redirect URIs” text box. This must be a valid and accessible URL with the
https://protocol. -
Copy the same URL for the “Sign-out redirect URIs” text box as well.
-
Click the Save button once complete.
-
Paste the value into the
redirectURLsetting.
-

Generate Your Overrides
Once you have the values above, go to the Helm Assistant Generate tab > Step 8: Services > OpenID Connect and enter them. They will be included in your generated overrides.yaml automatically.
For all available OpenIdProviders configuration keys, see the Helm Assistant Reference tab.