

Overview
When creating a selection rule, it’s helpful to review the counts for how many records are included in the selection rule. You can view the counts from within the rule designer using the waterfall counts function. You can also see the count breakdown in the audience designer. This topic will review both methods.
The video below walks you through viewing the counts in the Rule Designer and the Audience Designer.
Using the Waterfall Counts in the Rule Designer
You can view the waterfall counts for any previously made selection rule, but for the purpose of this example, we’ll walk through the process of creating a new selection rule using other selection rules.
To view the waterfall counts:
-
Open the Rule Designer and choose Standard Selection Rule.
-
From the left menu, select Add Selection Rule.
-
Add any saved selection rule.
-
Choose one of the following ways to insert the selection rule:
-
A Linked rule: pulls from the most up-to-date version of the rule.
-
An Embedded rule: makes a copy of the rule as it is now and add it to the new rule.
-
-
Select Finish.
-
Repeat steps 2-5 to add as many selection rules as you need.
-
Save the rule.
-
Select View Waterfall Counts to see the number of record counts for each rule and the drop-off counts.
Running a test in the Audience Designer
In order to view the counts of each audience block, you’ll need to run a test on the audience. For the purpose of this example, we’ll do a high-level walkthrough of creating a simple audience.
To run the test:
-
Open the Audience Designer and choose SQL Audience.
-
Drag a filter block onto the workspace from the Audience blocks menu.
-
Add a selection rule.
-
Repeat steps 2-3 for as many selection rules as you’d like to include.
-
Add blocks for suppressions, splits, and anything else you may need for this audience.
-
Save the audience.
-
From the toolbar, select Tests and choose Start a new test.
-
The test can take a few minutes to complete.
-
There will be a yellow box in the top corner of each block. The box indicates how many records are qualified, and you can read them like a waterfall flow from the beginning to end of the workflow.
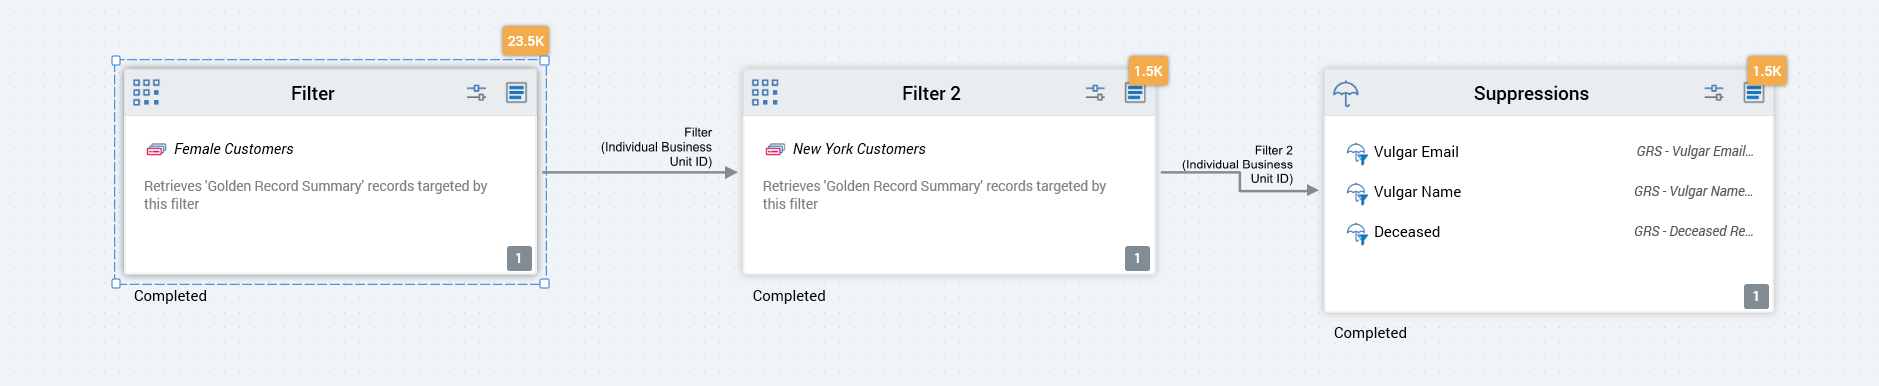
Selecting the box icon with the blue lines underneath the yellow record count box brings up the results pop-up, allowing you to view the exact number of records included in each block. In the suppression block, which has multiple variables, select the umbrella icon in the results pop-up to view the exact number of records each suppression takes away.