

Support for this connector has been deprecated and will be removed in a future release. Refer to the Connector deprecation plan for details.
This section describes how to create and configure an Actian VectorH Data Source Name (DSN). Please follow the steps below. Please note that you may skip steps 1 – 3 if you have already installed the ODBC driver.
-
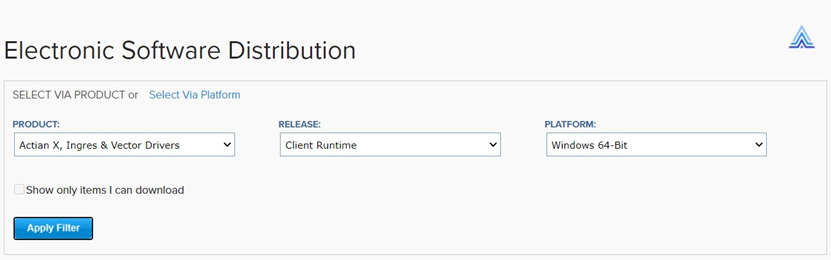
In a web browser, navigate tohttp://esd.actian.com/product/drivers/Client_Runtime to download the driver.
-
In the download page, set Product to ‘Actian Vector and Ingres’, Release to ‘Client Runtime’ and Platform to ‘Windows 64-bit’.
-
Scroll down to locate and click Client Runtime.

-
Click Download to download the driver.
-
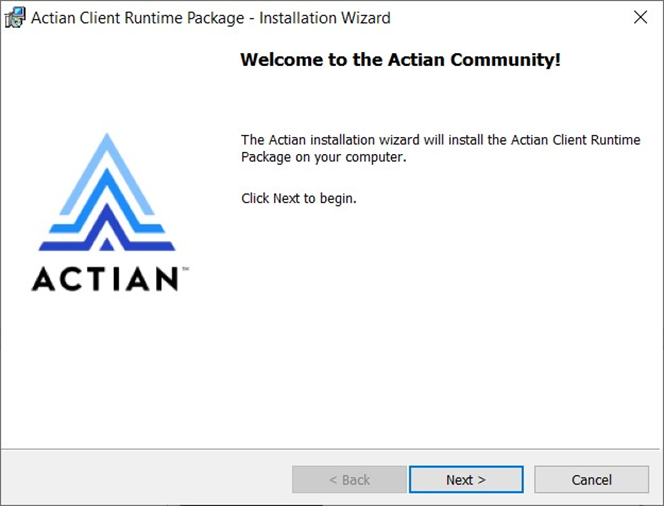
In the download folder, locate clientruntime-vw-6.0.0-129-win-x86_64 file and extract its contents.setup.exe.

-
Within the extracted folder, double click setup.exe.

-
In the Actian Client Runtime Package Window, click Next and follow the required steps to install the driver.
-
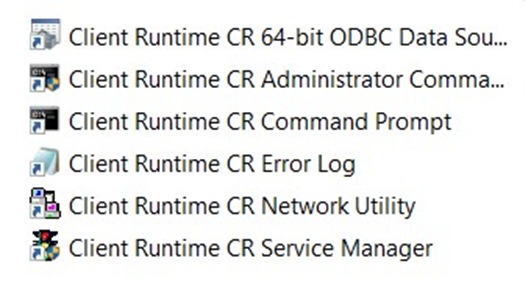
Once you have successfully installed the client runtime, go to ProgramData\Microsoft\Windows\Start Menu\Programs\Actian Client Runtime CR\Client Runtime CR and click the Client Runtime CR Network Utility.
-
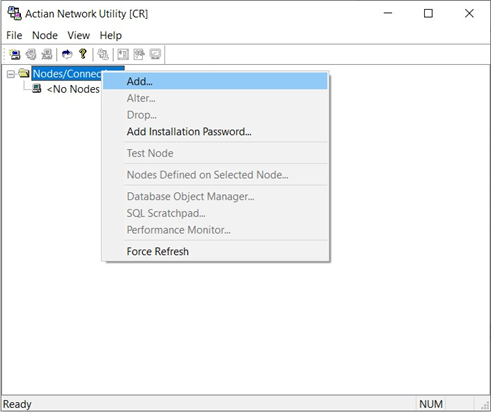
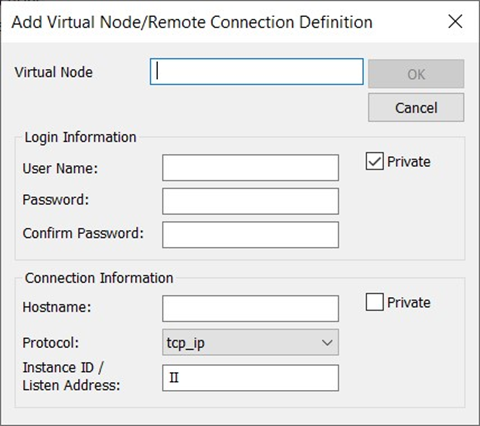
Right-click Nodes/Connections and click Add… to add a new virtual node.
-
Configure the following details:
-
Virtual Node Name: the name of your virtual node.
-
User Name: the database username.
-
Password: the database password.
-
Confirm Password
-
Hostname: the host server (IP address or server name). o If the server is hosted in Amazon, use the EC2 DNS name, i.e.
‘ec2-xx-xxx-xxxxxx.compute-1.amazonaws.com’. -
Protocol: the connection protocol. The default is ‘tcp_ip’.
-
Instance ID/Listen Address: the connection listen address. The value must be set to ‘VH’.
-
-
Make sure that both Private options are not selected and Click OK.
-
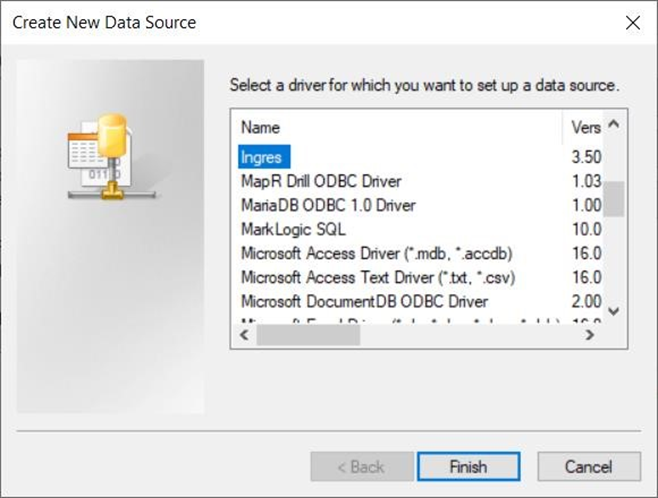
Once you have successfully configured the virtual node, go to Control Panel\All Control Panel Items\Administrative Tools and click ODBC Data Sources (64-bit).
-
In the ODBC Data Source Administrator Window, click the System DSN tab.
-
Click the Add… button to create a new Data Source.
-
Find and select item ‘Ingres’ and click Finish.
-
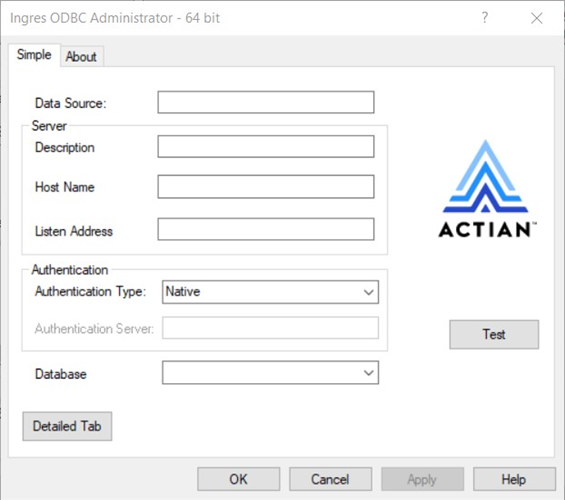
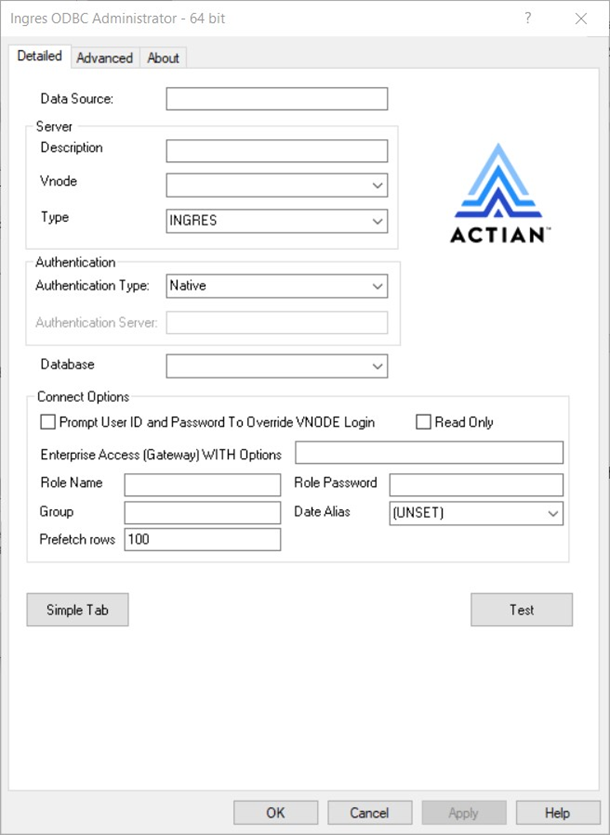
In the Ingres ODBC Administrator – 64 bit Window, click the Detailed Tab.
-
In the Detailed tab, configure the following details:
-
Data Source
-
Vnode: the name of the virtual node created earlier.
-
Type: leave the default value (‘INGRES’).
-
Database: the database name.
-
-
Click the Test button. Once the connection has been made successfully, click the OK button to create the DSN.