

Obtaining a Bigtable instance ID
-
In a web browser, navigate to https://console.cloud.google.com to log into the Google Cloud console.
-
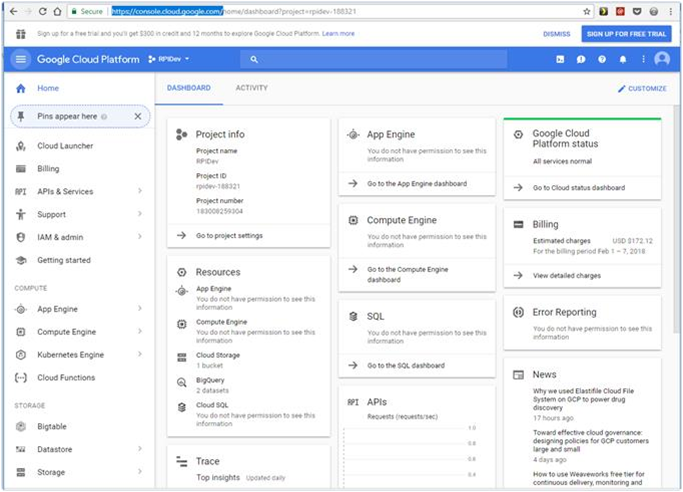
Once you have successfully logged on, you will be redirected to the portal’s main page:
-
In the dashboard navigation menu, click Bigtable.
-
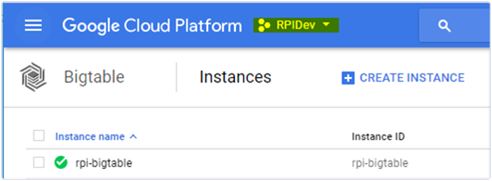
Once the Bigtable interface is displayed, take note of the Bigtable Instance ID, as this will be used to configure Google BigQuery.

Obtaining a Google Cloud project ID
-
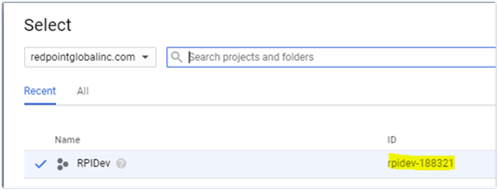
While in the Google Cloud console, click the project selector to the right side of the Google Cloud Platform interface.
-
Once the project selector is displayed, take note of the currently-selected project ID, as this will be used to configure Google BigQuery.
Creating a Google BigQuery Dataset
-
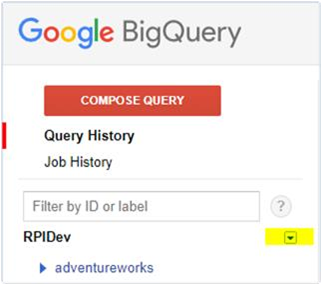
While in the Google Cloud console, click BigQuery. You will be redirected to the Google BigQuery portal.
-
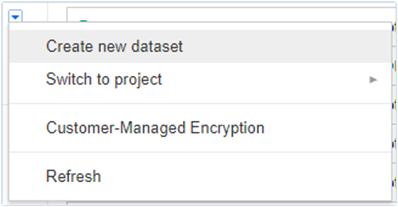
Click the small down arrow icon to the lower right corner.
-
Click Create new dataset.
-
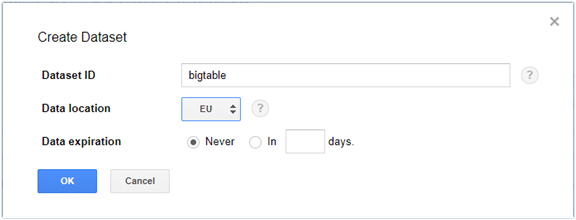
Enter your desired dataset name, and also set your preferred data location. Click OK.
Creating a Google BigQuery Table
-
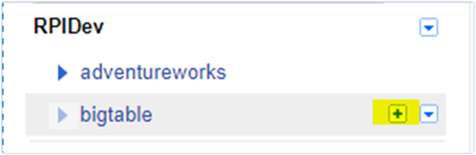
While in the Google BigQuery portal, hover over the target dataset where you want to create a table. Click the (+) icon to the right side of the dataset name to create a new table.
-
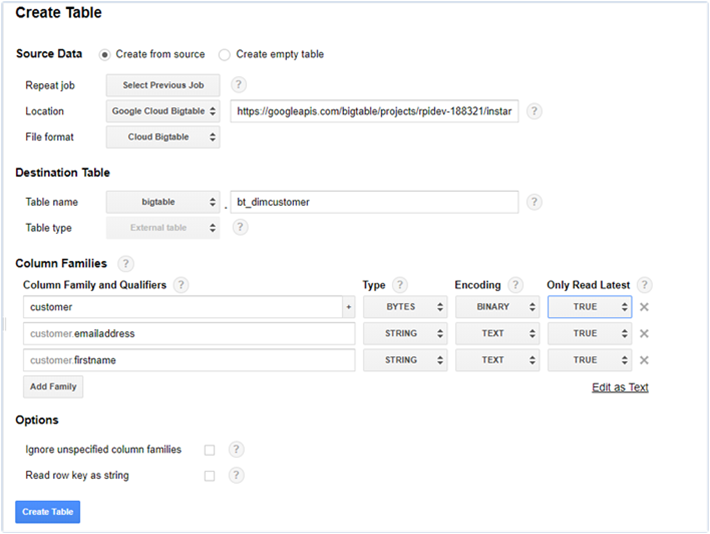
Configure your table as shown below.
-
Select the location “Google Cloud Bigtable”.
-
Specify the Google Cloud Bigtable location source in the following URL format: https://googleapis.com/bigtable/projects/[YOUR-PROJECT-ID]/instances/[YOUR-BIGTABLE-INSTACEID]/tables/YOUR-BIGTABLE-TABLE-NAME
-
Configure your table name under Destination Table.
-
Configure your columns under Column Families.
-
Click Create Table.
Installing Google BigQuery ODBC driver for Bigtable
-
In a web browser, navigate to https://cloud.google.com/bigquery/partners/simbadrivers. Install the Windows 64-bit msi, and follow the instructions provided as the installation progresses.
-
Open the ODBC Data Source Administrator, which can be found in Control Panel > Administrative Tools. Select the System DSN tab and click Add.

-
Find the Simba BigQuery ODBC driver and click Finish.
-
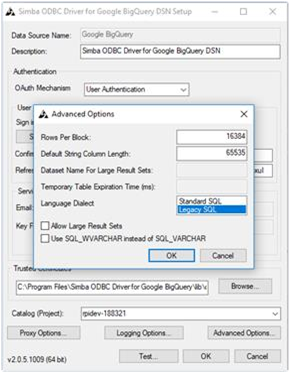
Provide all mandatory connection details for Bigtable.
-
Make sure to set the ODBC language dialect to Legacy SQL. This is to make sure to get the complete schema for tables in the context of Bigtable.
-
Once all set, you may want to test the connection by clicking Test. Otherwise, click OK to save your settings.