Overview
This section shows how to configure Drupal CMS v7.x for Redpoint Interaction to support the Drupal External Content Provider (ECP) plugin.
Service Module Installation
-
In a web browser, log into the Drupal content management system.
-
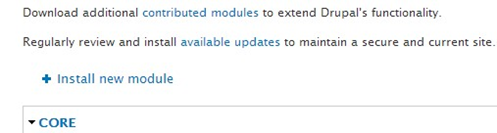
At the toolbar, click Modules.

-
Scroll down and locate the Services module (if currently installed; if not, please continue to the next step).
-
In the Modules page, click Install new module.
-
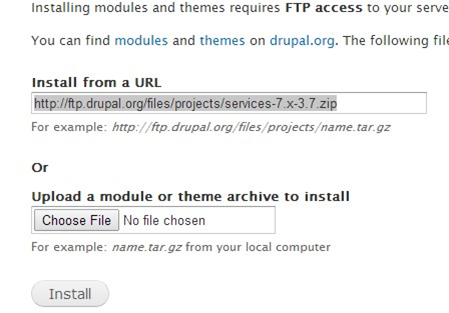
In the Install from URL textbox, enter the following ftp URL: http://ftp.drupal.org/files/projects/services-7.x3.7.zip and click Install.
-
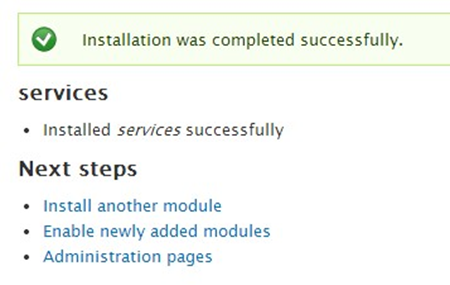
Verify that the installation completes successfully.
-
Click Enable newly added modules to be redirected to the Modules page.
-
Install the following modules by following the same procedure as documented in steps 4 to7:
-
Once you have successfully installed the aforementioned modules, double check the following items to see if their status is enabled:
-
Services
-
OAuth Authentication
-
REST Server
-
Chaos tools
-
OAuth
-
Libraries
-
-
Click Save configuration.
Creating a Service Endpoint
-
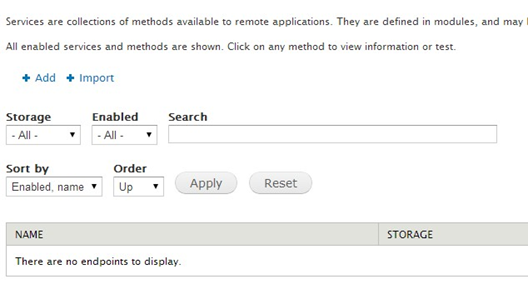
At the toolbar, click Structure> Services.

-
On the Manage Services page, click Add to add a new service endpoint.
-
Click Add to add new service endpoint.
-
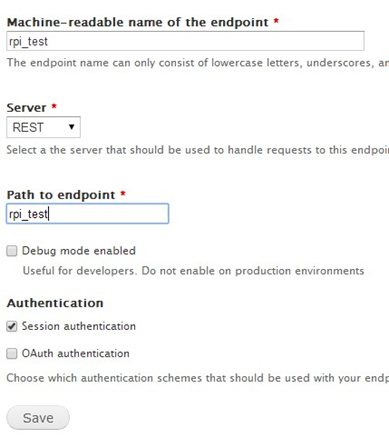
In the Machine-readable name textbox, enter rpi_test.
-
Select Server option REST.
-
Enter rpi_test for the Path. This serves as the Service name in the RPI Drupal ECP plugin.
-
Select Session authentication.
-
Click Save.
-
On the Services page, the newly added Service endpoint named rpi_test will be displayed.

-
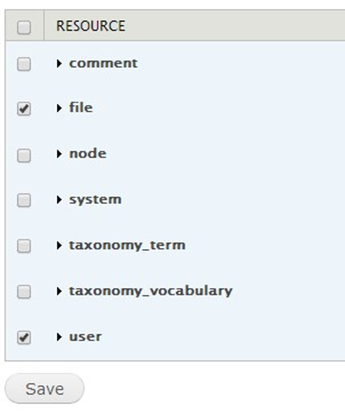
Click Edit Resources.
-
Select the file and user resources.
-
Click Save.
-
On the Services tab, click Server.

-
Under Response formatters, select the json option.
-
Select application/x-www-form-urlencoded and multipart/form-data options for request parsing.
-
Click Save.
Creating Content Type
-
At the toolbar click, Structure.
-
Click Content type.
-
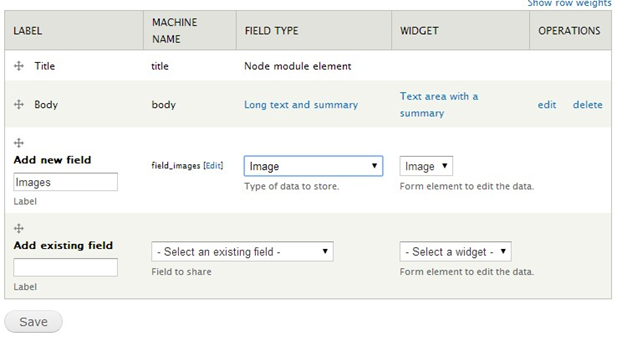
At the list of content types, make sure you are editing the Basic page. Click Manage fields.
-
Enter the name of the field in Add new field textbox (in this example we will be using an Image content type; set its field type to Image).
-
Click Save.
-
At the Images field settings, set the upload destination to Public files.
-
Click Save field settings. The basic page settings for the Image field will be displayed.
Set the File directory to images. Note: this will serve as a root folder once you load the root folders in the Drupal ECP.
-
Click Save settings.
-
Click Add Content.
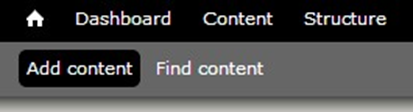
-
Click Basic page. This enables us to create a new file within the Drupal ECP by attaching an image file to the content.
-
Enter the title of the file and choose image file.
-
Click Save.
-
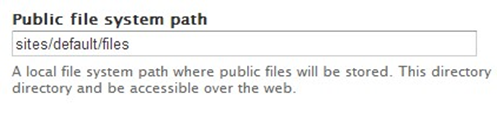
On the toolbar, Click Configuration.

-
Click File system.
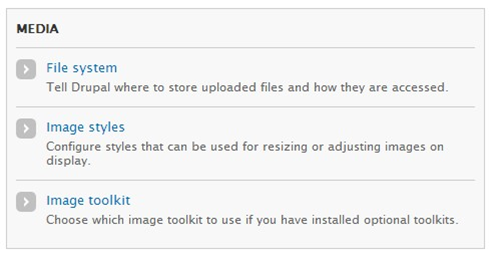
-
Take note of the value of the Public file system path (this serves as the Public folder at the RPI Drupal ECP plugin).