

This section describes how to prepare pre-requisites and configure data connections for the Snowflake data warehouse.
-
In a web browser, navigate to https://docs.snowflake.com/en/user-guide/odbc.html/ to download the ODBC driver.
-
In the download folder, double click ‘snowflake64_odbc-2.23.1.msi’ and follow the installation steps.
-
Once you have successfully installed the driver, go to Control Panel\All Control Panel Items\Administrative Tools and click ODBC Data Sources (64-bit).
-
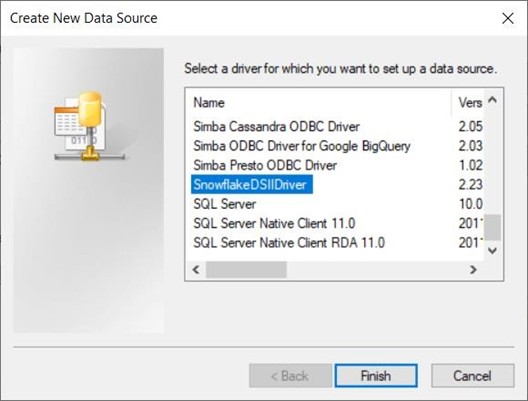
In the ODBC Data Source Administrator Window, click the System DSN tab.
-
Click the Add… button to create a new Data Source.
-
Find and select SnowflakeDSII Driver and click Finish.
-
In the Snowflake Configuration dialog, supply all the required parameters.
-
The Server parameter should be set to
<Snowflake_account>.snowflakecomputing.com(whereSnowflake_accountis a valid Snowflake account name). -
Set the
Tracingparameter to6. -
Finally, set the
NoProxyparameter to*.amazonaws.com.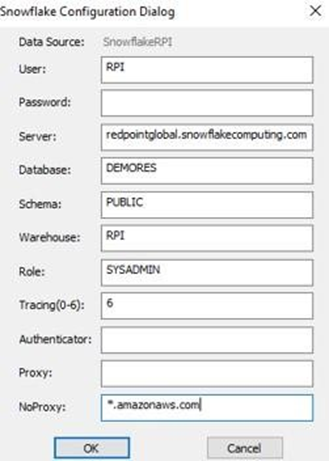
-
-
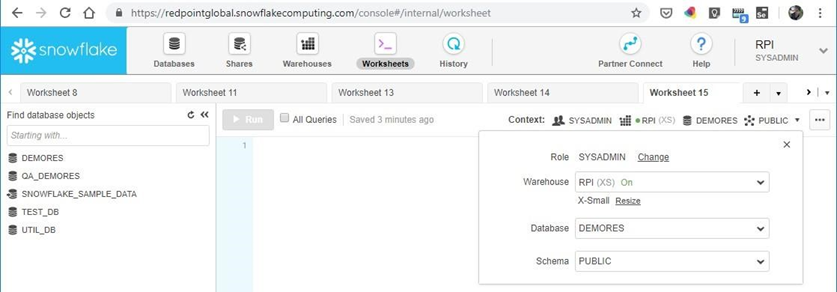
To get details of the required parameters in Step #7, in a web browser, log into your Snowflake account.
-
Once logged in, click ‘WorkSheets’, and click ‘Context’ settings.
-
Make sure that you have access to a Warehouse, Database and Schema. Take note of the settings here as you will use this to configure the Snowflake DSN parameters.
-
Return to step 6. Once all set, click OK.