Support for this connector has been deprecated and will be removed in a future release. Refer to the Connector deprecation plan for details.
This section describes how to create and configure DB2 Data Source Name (DSN). Please follow the steps below. Please note that you may skip steps 1 – 4 if you have already installed the ODBC driver.
-
In a web browser, navigate to http://www01.ibm.com/support/docview.wss?uid=swg21385217 to download the driver.
-
In the download load page, click IBM Data Server Runtime Client.
-
In the download folder, double click v10.5fp5_ntx64_rtcl.exe.
-
In the DB2 Setup Window, click Next and follow the required steps to install the driver
-
Once you have successfully installed the driver, go to Control Panel\All Control Panel Items\Administrative Tools and click Data Sources (ODBC).
-
In the ODBC Data Source Administrator Window, click the System DSN tab.
-
Click the Add… button to create a new Data Source.
-
Find and select IBM DB2 ODBC DRIVER – BD2COPY1 and click Finish.
-
Enter the Data source name. Click Add.

-
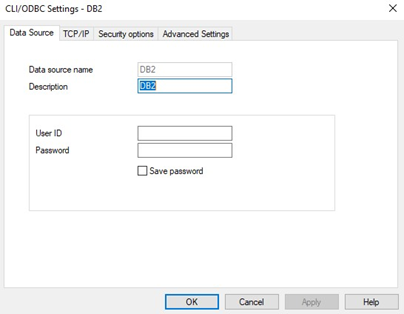
In the Data Source Tab, enter the following details:
-
User ID: the database username.
-
Password: the database password.
-
Save password: this option must be selected.
-
-
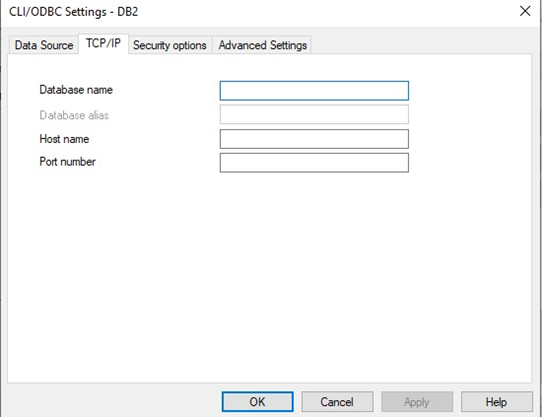
Click the TCP/IP tab. Enter the following details:
-
Database name: the name of the DB2 database.
-
Database alias: the DB2 database’s alias.
-
Host name: the host server (IP address or server name).
-
Port number: the server port number. Only numerical values are supported. The default server port is 50000.
-
-
Click the OK button to create the DSN.
-
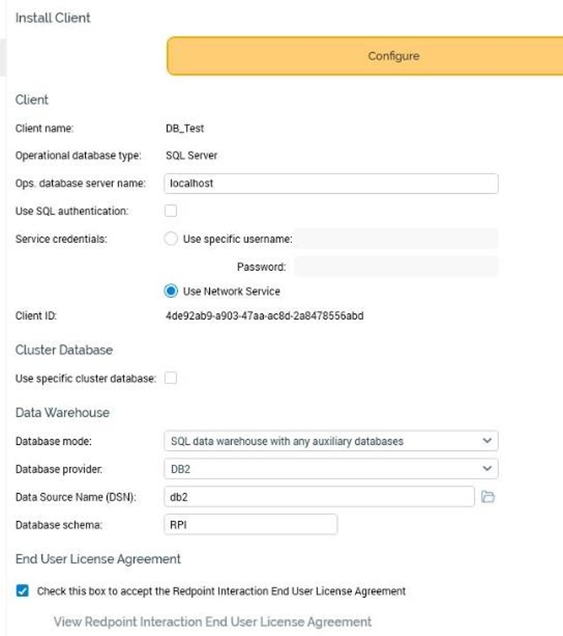
Once completed, launch Server Workbench and login.
-
In the Install Client at Data warehouse pane, select AWS Redshift as the database provider.
-
Enter the Server name. This can be either the DNS (Domain Name System) or an IP address of the server.
-
Enter the Database provider.
-
Enter the Data Source Name.
-
Enter the Database schema.
-
Check the End User License Agreement checkbox and then click Next.