

This section describes how to create and configure a MongoDB (SQL) Data Source Name (DSN). Please follow the steps below. Please note that you may skip steps 1 – 4 if you have already installed the ODBC driver.
-
In a web browser, navigate tohttps://www.progress.com/products/datasources/mongodb https://www.progress.com/odbc/mongodb to download the driver. 2. In the download folder, locate the PROGRESS_DATADIRECT_ODBC_MONGODB_WIN_64.zip file and extract its contents.
-
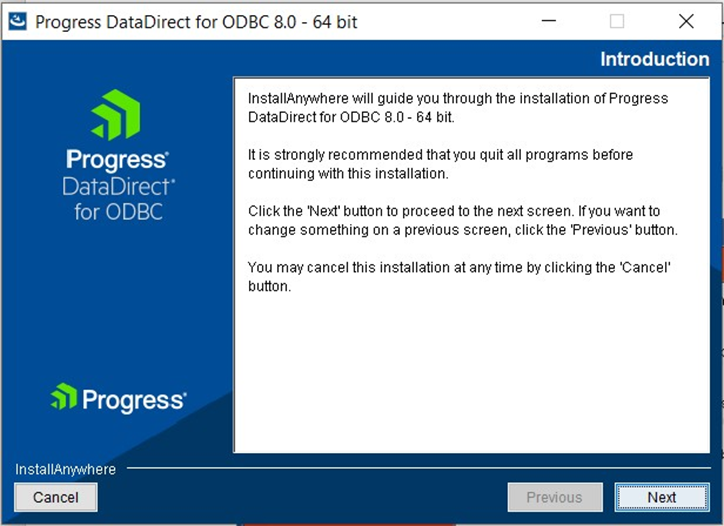
Within the extracted folder, double click the PROGRESS_DATADIRECT_ODBC_8.0_WIN_64_INSTALL.exe file.
-
In the DataDirect for ODBC 8.0 – 64 bit Window, click Next and follow the required steps to install the driver.
-
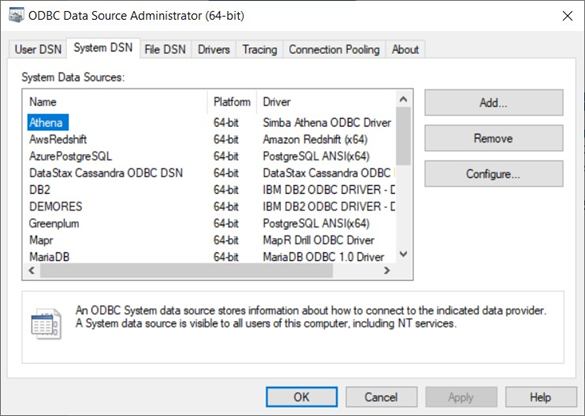
Once you have successfully installed the ODBC driver, go to Control Panel\System and Security\Administrative Tools and click ODBC Data Sources (64-bit).
-
In the ODBC Data Source Administrator Window, click the System DSN tab.
-
Click the Add… button to create a new Data Source.
-
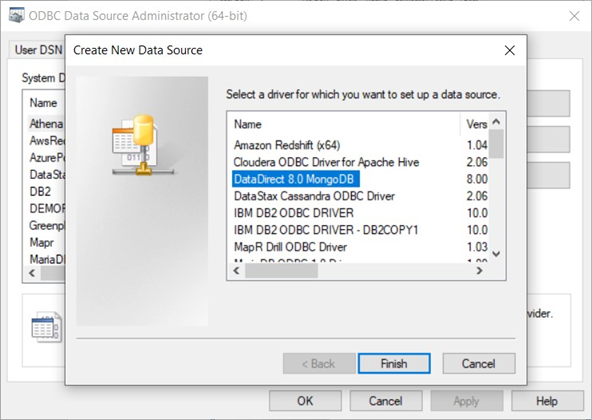
Find and select DataDirect 8.0 MongoDB and click Finish.
-
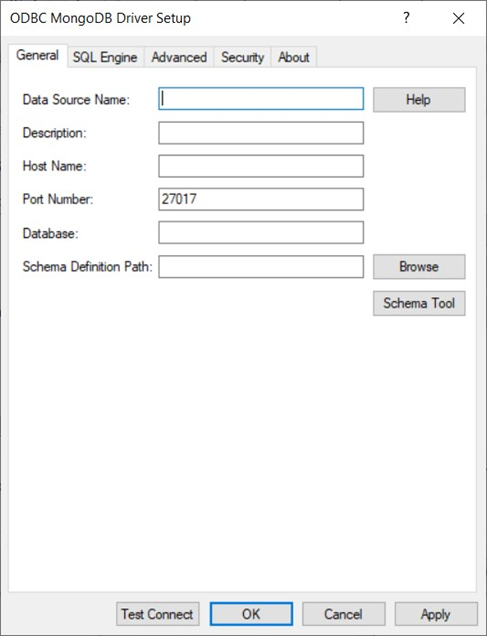
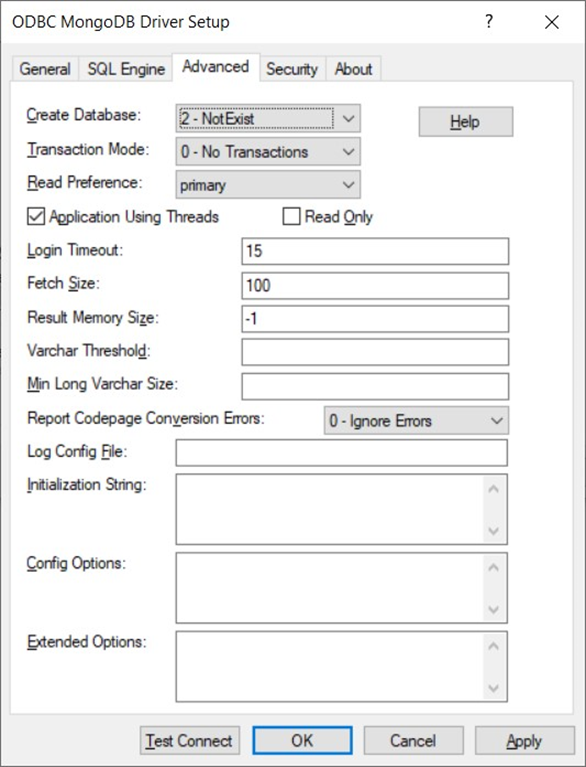
In the ODBC MongoDB Driver Setup Window, configure the following details:
-
Data Source Name
-
Host Name: the MongoDB host server (IP address or a server name).
-
Port Number: the MongoDB server port number. Only numerical values are accepted. The default port number is 27017.
-
Database: the MongoDB database name.
-
Schema Definition Path: specifies the name and location of the configuration file where the relational map of native data is written.
-
-
For more information about the Schema Tool, go to C:\Program Files\Progress\DataDirect\ODBC_80\help\SchemaToolHelp and click schematoolhelp.
-
Click the Advanced tab and make sure the Read Only option is not selected.
-
Click the Test Connect button. Once the connection has been made successfully, click the OK button to create the DSN.