Support for this connector has been deprecated and will be removed in a future release. Refer to the Connector deprecation plan for details.
Overview
This section describes how to create and set up a LinkedIn application for use in RPI. Please follow the steps below:
-
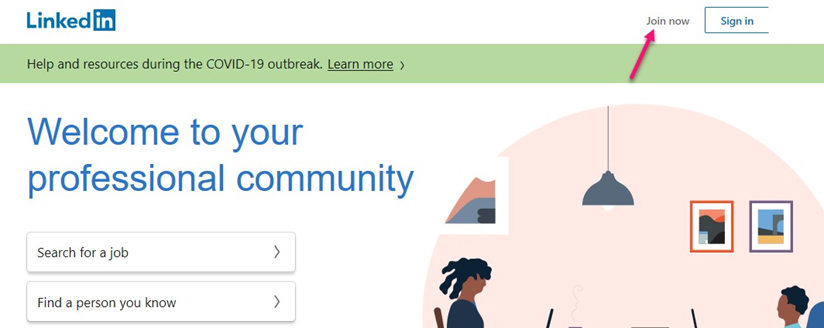
In a browser, go to https://www.linkedin.com/ and click on Join now.
-
Enter the required details and click Agree & Join.

-
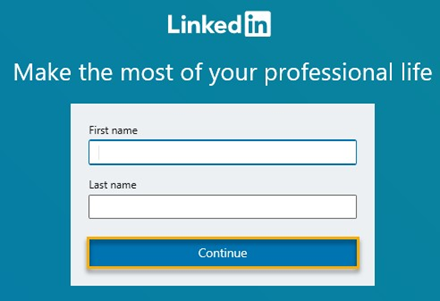
Type your First & Last Name and click Continue.
-
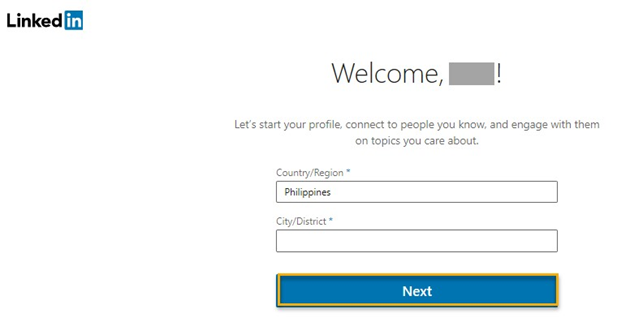
Click the box below select your current Country, City and click Next.
-
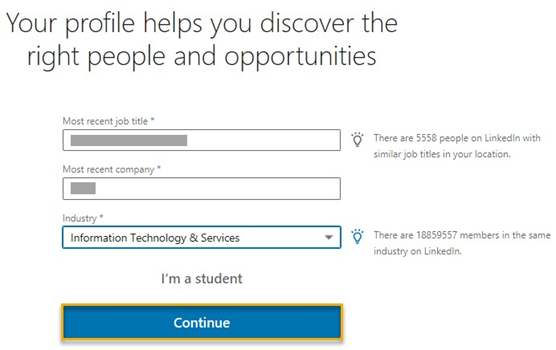
Indicate whether or not you're a student. To do so, fill out the required fields, then click the I'm a student or the Continue box.
-
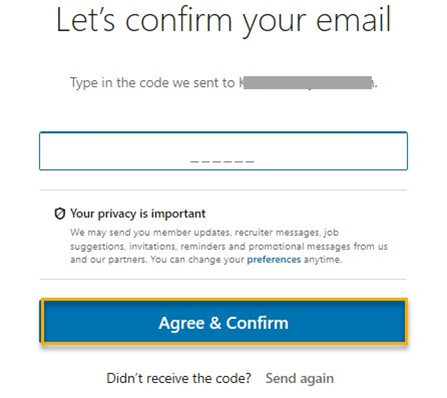
Check your email to verify account. Confirm your email address (you can also copy the code and paste it into the code field on your LinkedIn page).
-
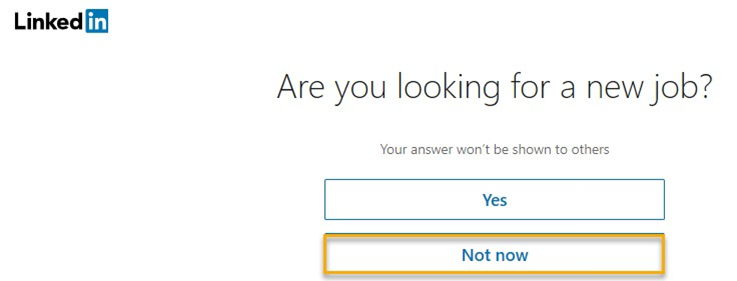
These options control what type of information LinkedIn shows you in your Home page. Click Not now.
-
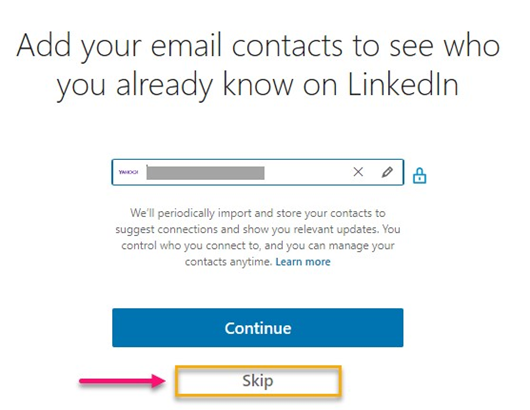
Decide whether or not to import contacts. If choosing to Skip contact import , you may need to click in a popup to confirm your decision.
Creating a New LinkedIn App
-
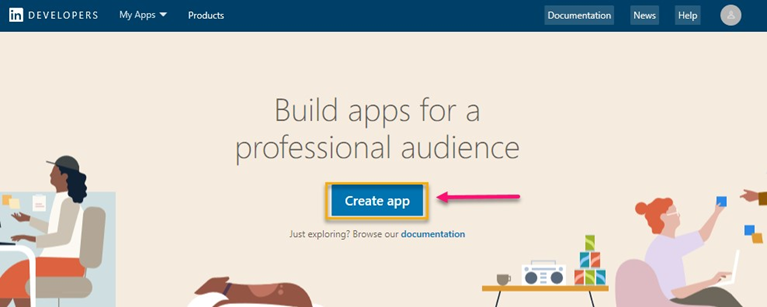
To create a new LinkedIn app, Go to the developer site: https://developer.linkedin.com/ and click Create app.
-
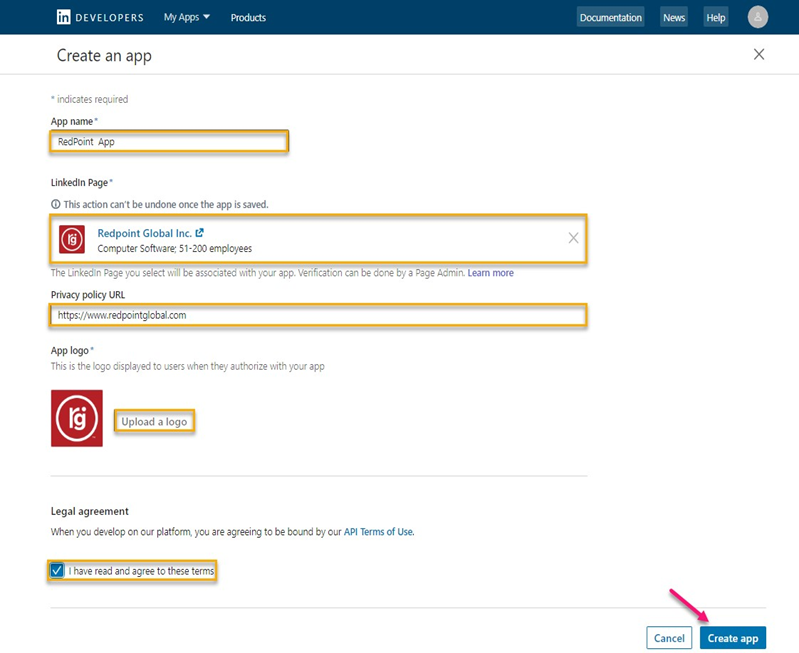
Fill out the required details and check the box to confirm that you have read and agree to the terms.
-
Click Create app.
-
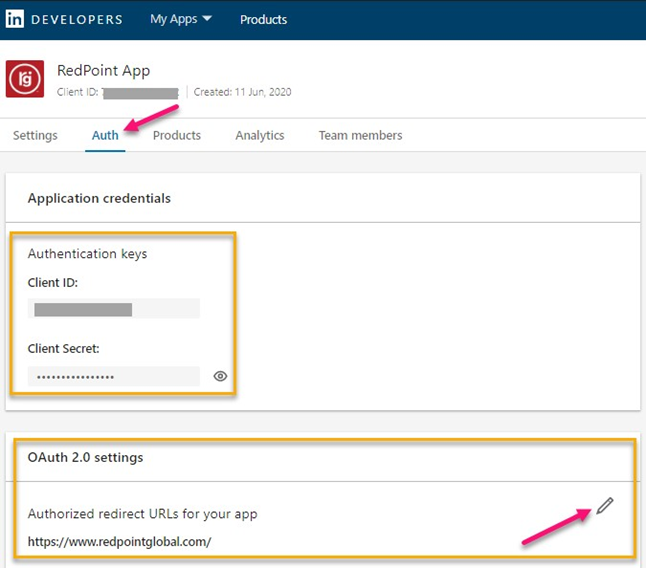
Once the App has been created, go to the Auth tab.
-
Click the pencil button to add Redirect URLs.
-
Copy the Client ID, Client Secret, and Redirect URLs value and store them securely.
-
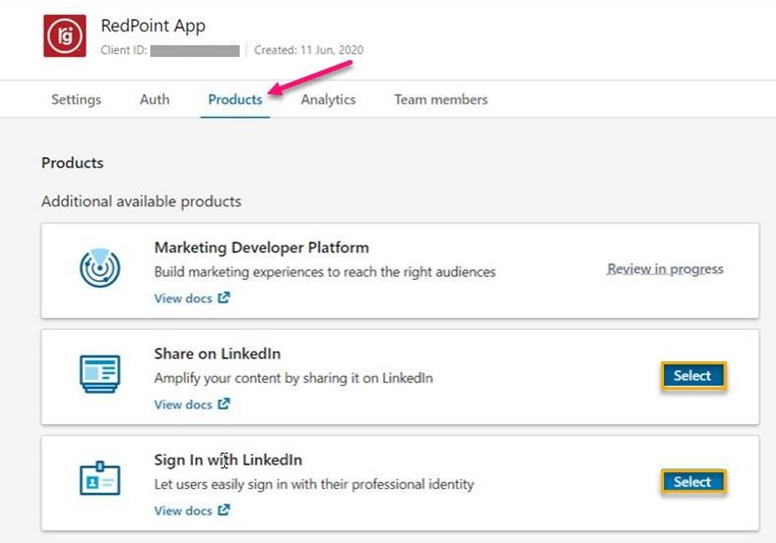
Go to the Product tab and select Share on LinkedIn and Sign In with LinkedIn.