Support for this connector has been deprecated and will be removed in a future release. Refer to the Connector deprecation plan for details.
Create a Mailchimp Account
This section describes how create an account in Mailchimp. Please follow the steps below:
-
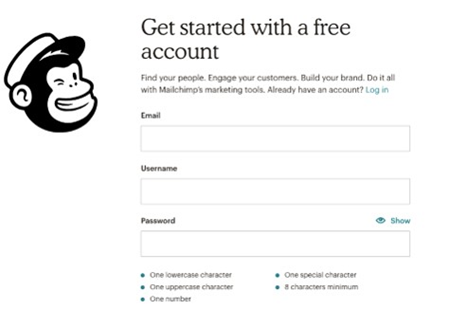
Visit the Mailchimp sign-up page by navigating to https://login.mailchimp.com/signup in a web browser.
-
Provide your email address, username, and password. Click Get Started.
-
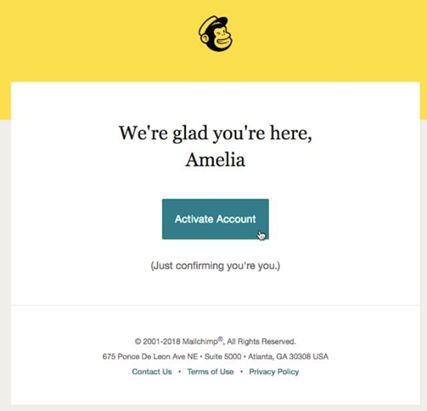
A confirmation message will be displayed. Check your mail inbox for the account activation email to complete your account setup.
-
Open the account activation email and click Activate Account.
-
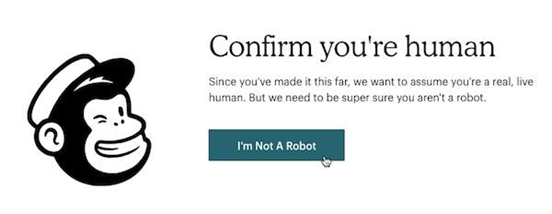
In the Confirmation screen, check the I'm not a robot checkbox, and click Confirm Signup.
Provision a New API Key
This section describes how to create an API user to connect to Mailchimp service. Please follow the steps below:
-
In a web browser, navigate to https://login.mailchimp.com/ to log in.
-
Enter username and password and click the Login button.
-
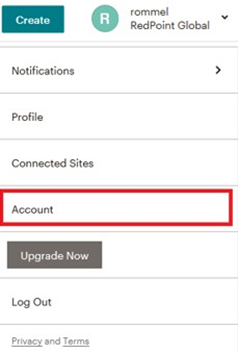
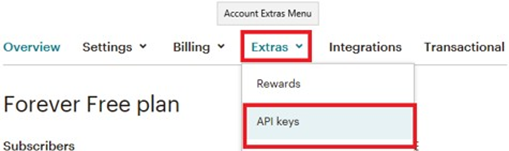
Under account profile, navigate to Account > Extras and select API Keys from the dropdown list.
-
Click the Create a key button to create the new API key.
Configuring the Service URL
This section describes how to setup the service URL in the RPI Mailchimp channel configuration via, if the MailChimp account was provision outside the United States region. Please follow the steps below.
-
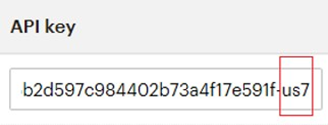
When creating new MailChimp channel, the default service URL is https://us7.api.mailchimp.com/3.0/ as shown below.

-
You must change the first three characters that appear in the host name of the service URL to the last three characters that appear in the API key.

Re-subscribe Contacts
This section describes how to re-subscribe contact(s) via RPI when using Mailchimp. Please follow the steps below:
-
In the MailChimp channel configuration interface, click Choose contacts to re-subscribe to this channel.

-
Add one or more email addresses and click OK.
-
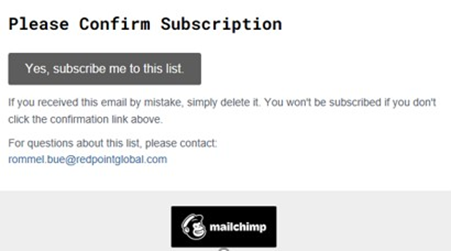
If re-subscription was successful, a confirmation email will be sent to your email inbox.
-
Open the confirmation email, and click the Yes, subscribe me to this list button.