

Launch an Amazon Instance
This section describes how to launch an Amazon EC2 instance in your default Amazon VPC. Please follow the steps below:
-
Sign into the AWS Management Console and open the Amazon EC2 console at https://console.aws.amazon.com/ec2/.
-
Click Launch Instance.

-
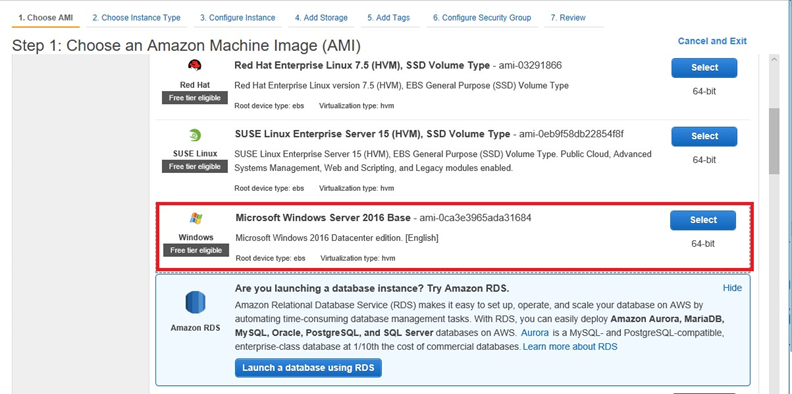
From the list of AMIs, find the Windows Server 2016 Base and choose Select.
-
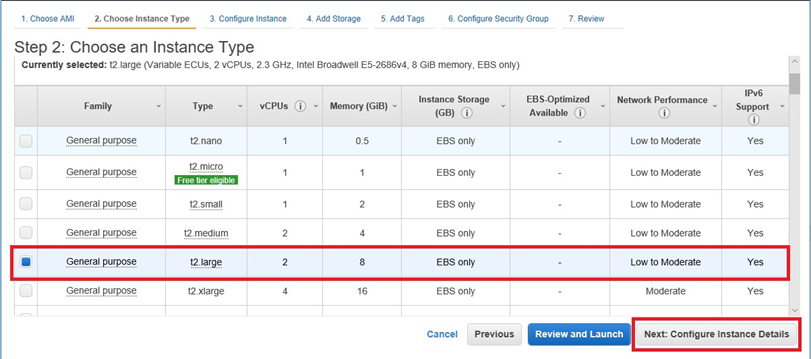
At the top of the list of instance types, choose t2.large. Choose Next: Configure Instance Details.
-
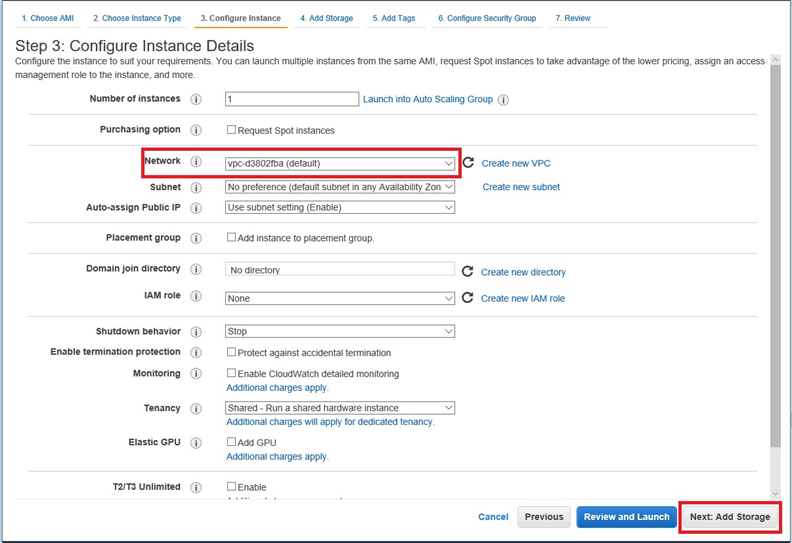
For Network, choose your default VPC then press Next: Add Storage.
-
Skip the Add Storage step by choosing Next: Tag Instance.
-
Skip the Tag Instance step by choosing Next: Configure Security Group.
-
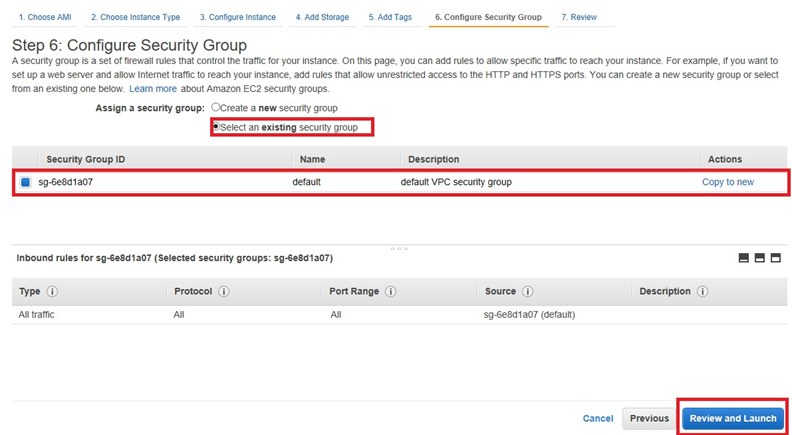
In the list of security groups, choose default. This is the default security group for your VPC.
-
Click Next: Review and Launch.
-
Review the instance and click Launch.
-
To select an existing key pair or create a new key pair, do one of the following:
-
If you do not have an Amazon EC2 key pair, choose Create a new key pair and follow the instructions. You are asked to download a private key file (.pem file); you will need this file later when you log in to your Amazon EC2 instance.
-
If you already have an existing Amazon EC2 key pair, go to Select a key pair and choose your key pair from the list. You must have the private key file (.pem file) available in order to log in to your Amazon EC2 instance.
-
-
When you have configured your key pair, choose Launch Instances.
Create an IAM and User Policy
This section describes how to create an IAM user with a policy that grants access to your Amazon DynamoDB Accelerator (DAX) cluster and to DynamoDB. Please follow the steps below:
-
Open the IAM console at https://console.aws.amazon.com/iam/.
-
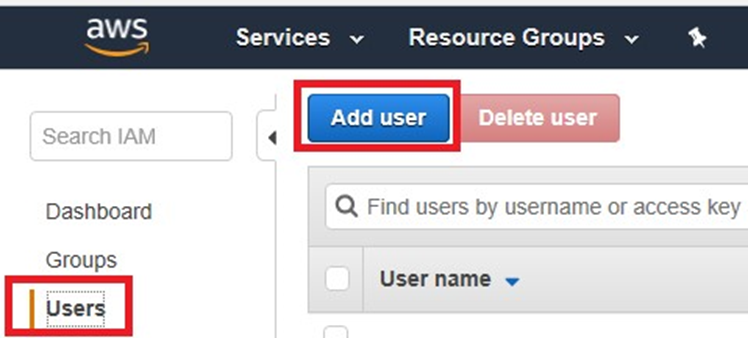
In the navigation pane, choose Users.
-
Click Add User.
-
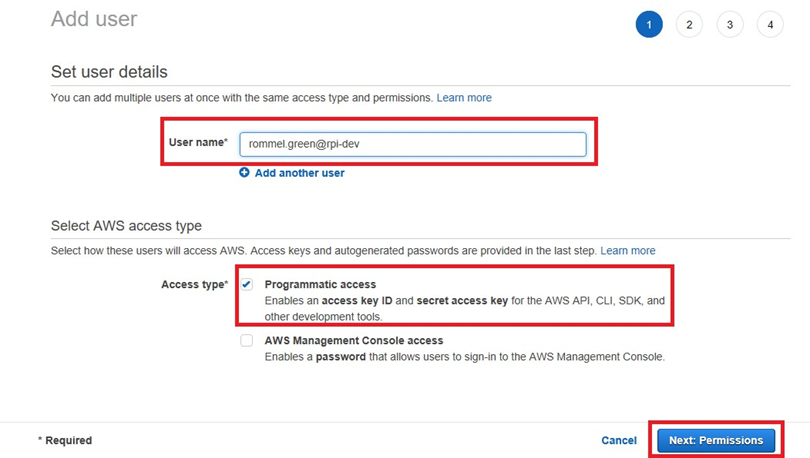
Input the User Name and choose Pragmatic access.
-
Click Next: Permission.
-
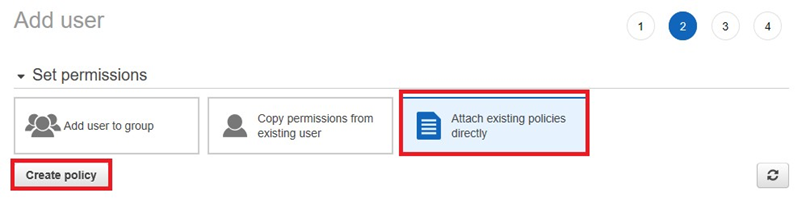
In the Set permissions page, choose Attach existing policies directly, and then choose Create policy.
-
In the Create Policy Page, go to the JSON tab.
-
Copy the text below, then paste it to the JSON field:
JSON{ "Version": "2012-10-17", "Statement": [ { "Action": [ "dax:*" ], "Effect": "Allow", "Resource": [ "*" ] }, { "Action": [ "dynamodb:*" ], "Effect": "Allow", "Resource": [ "*" ] } ] } -
Go to the Visual Editor tab; its contents should look like this:

-
Click Review Policy.
-
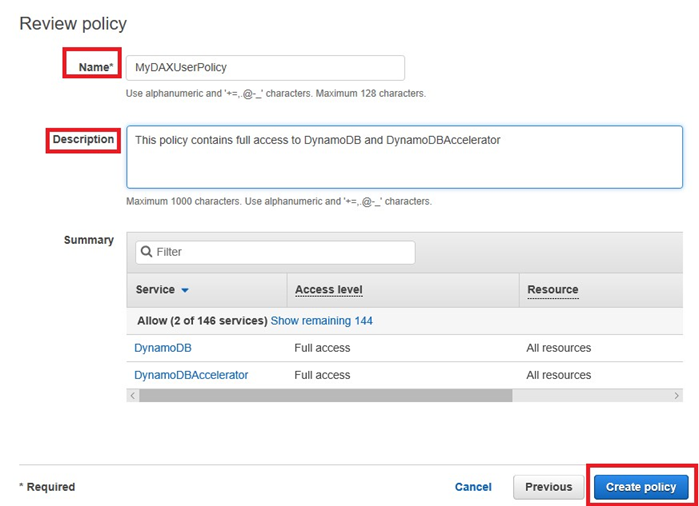
In the Review policy page. Input the Policy name and Description.
-
Click Create Policy to save.
-
Click Next Review.
-
On the Review page, choose Create user.
-
On the Complete page, go to the Secret access key and choose Show. After you do this, copy both the Access key ID and Secret access key. You need both identifiers the Configure Your Amazon EC2 Instance step, below.
Configure Your Amazon EC2 Instance
This section describes how to prepare your Amazon EC2 instance for use. Please follow the steps below:
-
Open the Amazon EC2 console at https://console.aws.amazon.com/ec2/.
-
Use the ssh command to log in to your Amazon EC2 instance, for example:

You will need to specify your private key file (.pem file) and the public DNS name of your instance (see the previous section). The login ID is ec2-user. No password is required.
-
After you log in to your EC2 instance, you need to configure your AWS credential. Type your AWS access key ID and secret key (see above) and set the default Region name to your current Region (in the following example, the default Region name is us-west-2).
